A five-day plan for turning leftover stones into useful, attractive landscapingwithout turning your backyard into an accidental ankle-obstacle course.
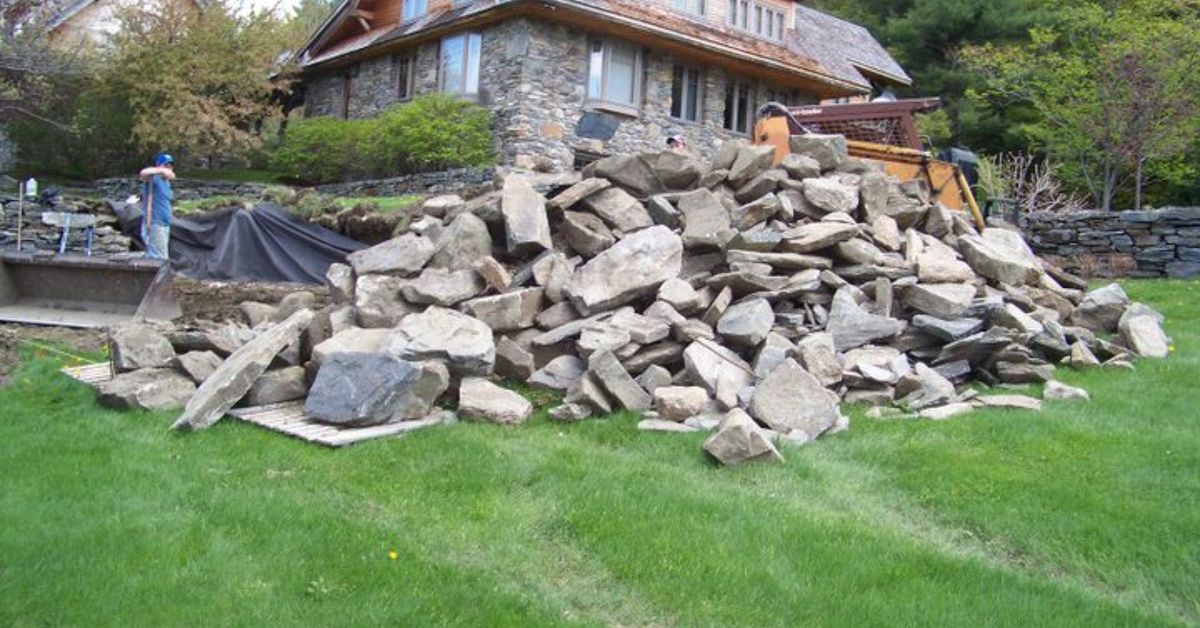
A pile of rocks has a strange talent: it can sit quietly in the yard while making you feel judged. Maybe the stones came from an old flower bed, a construction project, or the previous homeowner’s mysterious “future landscaping plans.” Whatever their origin, they are heavy, stubborn, and far too useful to throw away without a second thought.
The good news is that you can transform an ordinary rock pile in five days. Depending on the stones’ sizes, shapes, and condition, they can become garden edging, a walking path, a dry creek bed, a wildlife-friendly rock garden, or decorative accents. The goal is not to use every rock at any cost. It is to select one practical project, organize the materials, and finish something that looks intentional.
This five-day rock landscaping plan combines design, site preparation, safe lifting, drainage awareness, and realistic project management. You will still get dirty, but at least the dirt will have a schedule.
First, Decide Whether the Rocks Are Worth Reusing
Before choosing a project, inspect what you actually have. Natural fieldstone, river rock, gravel, flagstone, broken concrete, and construction rubble are not interchangeable materials.
Sort the pile by size and shape
- Large boulders: Use as focal points, informal seats, or anchors in a planting bed.
- Flat stones: Save for stepping-stone paths, edging, or small stacked features.
- Fist-sized rocks: Use in dry creek beds, borders, and drainage accents.
- Small gravel: Use for path surfaces, gaps between larger stones, or inorganic mulch where appropriate.
- Broken masonry: Reuse only when it is clean, stable, and free from sharp metal or questionable coatings.
Separate painted, stained, crumbling, or contaminated material. Do not place unknown construction debris in vegetable beds, children’s play areas, ponds, or fire features. If you suspect the pile contains asbestos-containing material, chemical residue, or lead-painted masonry, leave it undisturbed and contact an appropriate local professional.
Clean without creating unnecessary work
Most landscape rocks need only a stiff brush and water. Remove loose soil, roots, weeds, and organic debris so you can see the actual color and condition of each stone. Skip aggressive chemical cleaners unless you know exactly what the stone is and where it will be used.
Cleaning every pebble until it sparkles like jewelry is unnecessary. These are rocks. Their entire brand identity is “lives outdoors.”
Seven Useful Things You Can Make With a Pile of Rocks
1. Create natural garden edging
A single row of similar stones can define a flower bed, separate lawn from mulch, or soften the edge of a walkway. Place the broadest face down and partially bury irregular stones so they do not roll when bumped by a mower or wheelbarrow.
Garden edging is one of the fastest rock-reuse projects because it requires little cutting and allows natural variation. It also makes a collection of mismatched stones look coordinated. Avoid building the edge so high that it becomes a tripping hazard.
2. Build a stepping-stone path
Flat stones can create a path through a perennial garden, from a patio to a shed, or across a muddy side yard. Colorado State University Extension notes that stepping stones provide garden access while helping prevent soil compaction. Measure the route, test a comfortable walking rhythm, and place the stones at consistent intervals.
Each stone should sit firmly on a prepared base. Remove soft soil, add compacted crushed stone or sand when appropriate, and check the surface with a level. A path that rocks back and forth may be technically made of rocks, but it should not perform the verb.
3. Design a dry creek bed
A dry creek bed can disguise a shallow drainage route and add visual movement to a yard. Use larger stones along the edges and smaller material through the center to imitate a natural stream channel. Curves generally look more convincing than a perfectly straight “stone noodle.”
However, decorative rocks do not automatically solve drainage problems. A successful channel needs a safe inlet, a continuous slope, and an outlet that does not send water toward a foundation, septic system, sidewalk, or neighboring property. The U.S. Environmental Protection Agency explains that rain gardens and similar green infrastructure features manage runoff through carefully arranged soil, gravel, and vegetationnot through stone alone.
If the yard regularly floods, contains a steep eroding slope, or receives concentrated water from several properties, consult a drainage or landscape professional before rearranging the problem into a prettier shape.
4. Make a rock garden
A rock garden combines stones with plants adapted to the site’s sun, moisture, soil, and climate. Instead of spreading rocks evenly, group them in different sizes and bury part of each large stone. This makes the arrangement look settled rather than recently delivered.
Leave planting pockets between stones for compatible groundcovers, native wildflowers, ornamental grasses, succulents, or alpine plants. Penn State Extension describes how crevice gardens use narrow spaces between upright rocks to support specialized plants. Your version can be simpler, but the principle remains useful: rocks create structure while carefully selected plants provide life, color, and seasonal change.
Do not assume a sea of rock is harmless to plants. Colorado State University’s Pueblo County Extension warns that rock-covered landscapes can become extremely hot and stress nearby plants. In sunny climates, combine stone with vegetation and avoid surrounding sensitive plants with large expanses of heat-absorbing rock.
5. Form a low raised-bed border
Flat, stable stones can outline a shallow raised planting bed. University of Minnesota Extension recognizes stone walls and pavers as attractive raised-bed materials. For a small decorative bed, stagger joints, use the largest stones at the bottom, and keep the wall low.
A tall wall holding back a significant volume of soil is a structural project. It may require excavation, drainage stone, a compacted base, reinforcement, engineering, or permits. If failure could injure someone or damage property, bring in a qualified contractor instead of trusting a five-minute video and heroic optimism.
6. Add wildlife-friendly features
A few strategically placed rocks can provide basking surfaces, shallow water depressions, or protected spaces near native plants. USDA guidance notes that light-colored rocks can serve as butterfly basking sites. Native vegetation can add shelter and food for pollinators, birds, and other wildlife.
Placement matters. Large, loose rock piles can also shelter rodents or snakes. Utah State University Extension recommends smaller, close-fitting stone when homeowners want to reduce hiding places. Keep wildlife features away from doors, play spaces, heavily traveled paths, and areas where encounters may create problems.
7. Donate, sell, or responsibly dispose of the extras
You do not receive a landscaping medal for forcing 400 unwanted rocks into a yard that needs only 150. Offer usable stone through a neighborhood group, community garden, habitat-restoration organization, or local reuse marketplace. Clearly describe the approximate quantity, rock type, and whether the recipient must load it.
For unusable rubble, contact a local aggregate recycler, construction-waste facility, or municipal disposal program. Do not dump rocks in parks, waterways, roadside ditches, or vacant lots. “Returning them to nature” is still illegal dumping when nature did not request delivery.
The Five-Day Rock-Pile Makeover
Day 1: Inspect, sort, and select one project
Spread the stones enough to identify their sizes and shapes. Wear sturdy gloves, safety glasses, long pants, and protective footwear. Look for nails, broken glass, sharp edges, insects, and unstable stones before reaching into the pile.
Choose one primary project based on the material you havenot the material you wish you had. A pile of rounded river rock suits a creek bed or border. Flat fieldstone suggests a path. A few large, attractive boulders work better as focal points than as reluctant paving material.
Sketch the project and measure the site. Mark boundaries with stakes, string, a garden hose, or landscape-safe marking paint. Set aside approximately 10% of the rock for adjustments and repairs.
Day 2: Prepare the site correctly
Before digging, contact 811 or your state’s online 811 center and wait for the required utility responses. Buried utilities may be shallower than expected, even in ordinary garden areas.
Remove turf, weeds, roots, and loose organic material from the project area. Grade the surface so water moves away from buildings. For paths and edging, excavate only as deeply as the design requires and compact the base in thin layers.
Think carefully before installing landscape fabric. University of Illinois Extension notes that fabric may suppress weeds temporarily but can cause longer-term maintenance problems as soil and organic matter accumulate above it. In some gravel paths it can help separate materials, but it is not a permanent, weed-proof force field.
Day 3: Install the largest stones
Begin with boulders, anchor stones, or the path’s largest stepping stones. Large pieces establish the layout and are difficult to squeeze into place later. Use a hand truck, garden cart, pry bar, or lifting straps rather than trying to impress the nearest squirrel with your lower-back strength.
Lift with your legs, keep loads close to your body, and ask for help with awkward stones. Do not place fingers beneath a suspended rock. Stabilize each large piece before moving to the next one.
In a natural-looking design, partially bury large stones and align their visible surfaces in a consistent direction. Random does not mean careless; successful naturalistic landscaping is organized enough to look as if the rocks arrived centuries ago and have excellent taste.
Day 4: Add smaller material and plants
Fill gaps with medium stones, gravel, or suitable soil. Test the path for rocking stones and correct unstable areas. If you are creating a rock garden, install plants according to their mature size, light needs, and moisture preferences.
U.S. Forest Service guidance highlights the value of native plants for reducing water use, supporting wildlife, and helping control erosion. Choose species native to your region rather than copying a plant list developed for a dramatically different climate.
Rock mulch can provide long-lasting coverage and good drainage for certain drought-adapted plants, according to Utah State University Extension. It does not enrich soil as organic mulch does, however, and the wrong stone can increase heat around plant roots.
Day 5: Test, refine, and clean up
Walk every path, inspect every edge, and gently press or rock each accessible stone. Correct wobbling pieces and remove sharp projections. Run water through a small drainage feature with a hose, using a modest flow, to confirm that it moves in the intended direction.
Step back and look for repetition, balance, and empty space. A few small adjustments often make the difference between “designed landscape” and “rocks awaiting further instructions.” Sweep hard surfaces, remove leftover soil, and relocate unused stones to a stable storage area or prepare them for donation.
Important Mistakes to Avoid
Do not build a fire pit from unidentified rocks
Some natural stones can crack or break when heated, especially when they contain trapped moisture. Do not assume that any attractive rock is suitable for direct fire exposure. Use a manufactured fire-pit insert and materials rated for high temperatures, follow local rules, and consult the product instructions.
The National Fire Protection Association recommends checking local restrictions, placing contained fire pits at least 10 feet from combustible materials, using a level noncombustible surface, and never leaving a fire unattended.
Do not redirect runoff carelessly
Stormwater can carry dirt, fertilizer, oil, pesticides, and other pollutants into waterways, as explained by the EPA’s Soak Up the Rain program. A stone channel should slow and guide water safely, not accelerate it toward a storm drain, foundation, eroding bank, or neighboring yard.
Do not pile rocks against tree trunks
Leave the root flare visible and avoid changing the soil level around established trees. Rocks stacked against bark can trap moisture, conceal damage, interfere with maintenance, and create hot conditions.
Do not ignore future upkeep
Leaves and soil will settle between stones. Weeds will eventually appear. Gravel will migrate, edging may shift after freeze-thaw cycles, and flowing water can move small material. Plan for seasonal raking, hand weeding, occasional leveling, and drainage inspections.
Experience-Based Notes: What the Five Days Actually Feel Like
The first practical lesson of a five-day rock project is that the pile is always larger when you begin moving it. From the kitchen window, it may look like a modest heap. Once the stones are spread into sorting groups, the yard resembles a geological yard sale.
Day 1 often produces the most important design change. A homeowner may begin with visions of a broad flagstone path, only to discover that the pile contains six flat stones and approximately one million round ones. The sensible response is not to purchase an entire second quarry. It is to revise the plan: use the flat pieces as occasional stepping stones and arrange the rounded material as edging or a narrow dry creek.
Photographing the sorted groups helps. From ground level, everything can blur into one dusty collection. A photo taken from a porch, ladder-free elevated position, or second-story window makes proportions easier to judge. Curves that felt graceful may suddenly resemble a dropped garden hose. Correcting them before installation saves hours.
Day 2 tends to feel unproductive because site preparation creates a bare strip of soil instead of a finished feature. Yet this is where the project succeeds or fails. A path placed directly on soft ground may look wonderful until rain and foot traffic make individual stones sink at different angles. Time spent measuring, grading, and compacting is nearly invisiblebut so is a foundation, and nobody argues that foundations are decorative procrastination.
On Day 3, the physical workload becomes real. Moving one large stone feels satisfying. Moving the twentieth makes every rock seem personally unreasonable. Smaller loads, frequent breaks, water, and mechanical aids keep the project moving. The fastest method is often the one that does not require two recovery days and an awkward conversation with a physical therapist.
This stage also reveals why large stones should be placed first. In one common scenario, the centerpiece boulder looks perfect from one side but blocks the path from another. Rotating or shifting it early takes minutes. Discovering the problem after gravel, plants, and edging are installed turns a small correction into a neighborhood event.
Day 4 is usually the morale boost. Smaller stones conceal gaps, plants soften hard edges, and the project begins to belong in the landscape. A useful trick is to stop before every space has been filled. Gardens need breathing room. Completely covering the ground with mixed rocks, ornaments, solar lights, and plants can make the space look less like a peaceful garden and more like a gift shop caught in a landslide.
Water testing is another revealing experience. A dry creek bed may look convincingly river-like while sending hose water sideways into the lawn. Small changes in grade, invisible to the eye, can control the route. Adjusting a few stones and compacting low spots is easier before a real storm arrives with its own opinions.
By Day 5, the temptation is to declare victory as soon as the last stone is placed. Walking the path several times is worth the delay. A stone that shifts slightly under a boot will not become more cooperative later. It should be reset immediately. The same applies to loose edging near a mower, sharp corners beside a walkway, and gravel that rolls onto pavement.
The final lesson is that leftover rocks are not evidence of failure. A small reserve is useful for replacing cracked pieces or correcting future settlement. Store them neatly on stable ground, give away the excess, and record a few notes about the base materials and drainage route. Months later, maintenance becomes much easier when you remember what is underneath the visible surface.
A well-executed five-day project rarely looks extravagant. It looks settled, useful, and appropriate for the yard. That is the quiet magic of landscaping with rocks: the materials are ordinary, but thoughtful placement makes them appear as though they have always belonged there.
Conclusion
A pile of rocks can become a useful landscape feature in five days when you match the project to the material, prepare the site, install the largest pieces first, and leave time for testing. Garden edging, stepping-stone paths, dry creek beds, raised borders, and planted rock gardens are all realistic options for a modest DIY makeover.
Prioritize stability, drainage, buried-utility checks, plant health, and long-term maintenance. Avoid structural walls, improvised fire pits, and major water-management projects unless you have the proper materials and professional guidance. The best result is not the project that consumes every last stone. It is the one that improves the yard without creating a heavier problem.