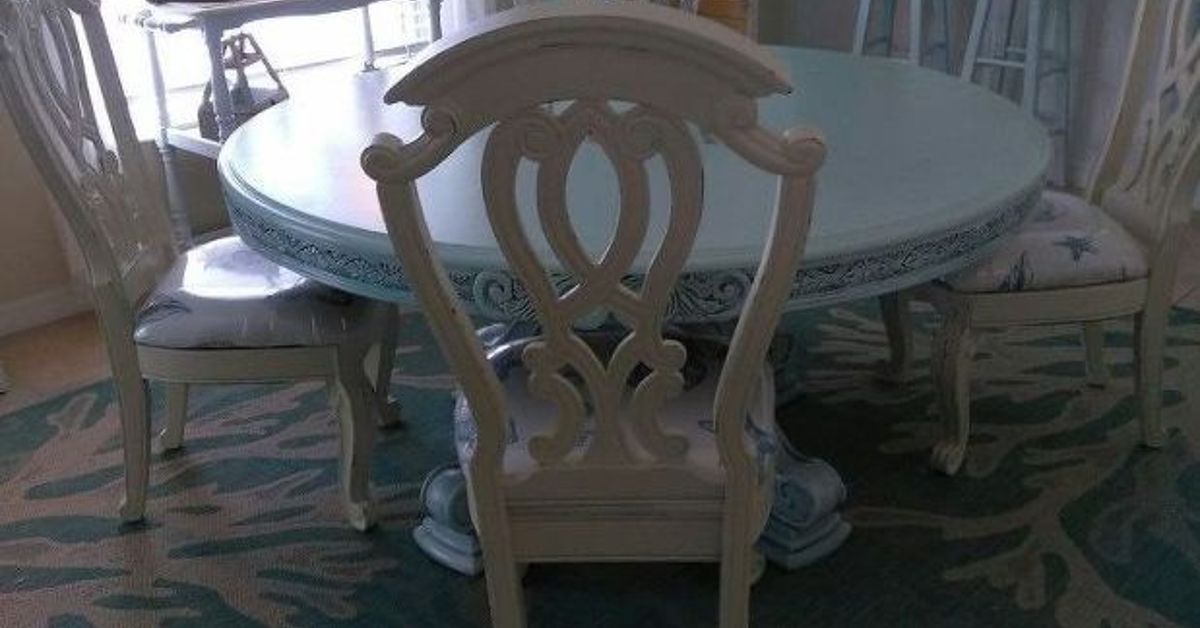
Those tired dining chairs were not technically broken. They were simply wearing fabric that looked as though it had survived twelve holiday dinners, three craying for professional upholstery, we searched the linen closet and found an unexpected solution: an old fabric shower curtain.
Yes, a shower curtain. No, the chairs do not smell like shampoo.
A decorative fabric shower curtain can provide several yards of coordinated material, often for less than the cost of upholstery fabric. Better still, a curtain that is already sitting unused in a closet costs exactly zero dollars. With a staple gun, a few basic tools, and a willingness to negotiate with stubborn corners, we turned worn chair seats into colorful statement pieces.
This guide explains how to recover old chairs with a shower curtain, which materials work best, how to create smooth corners, and what we learned from doing the project ourselves.
Can You Really Use a Shower Curtain as Upholstery Fabric?
You can use certain shower curtains to recover lightly used dining chairs, vanity stools, desk chairs, benches, and other furniture with removable padded seats. The key phrase is certain shower curtains.
A woven fabric shower curtain made from cotton, polyester, or a cotton-polyester blend is usually the best candidate. It should feel substantial enough to pull firmly without stretching out of shape. A medium-weight curtain is easier to staple and fold than a delicate, sheer, or loosely woven material.
A thin plastic or vinyl shower-curtain liner is a poor choice for most indoor chair-recovery projects. Plastic can tear around staples, trap heat, crack over time, and produce a seat that feels less like furniture and more like sitting on a picnic table during a rainstorm.
Check the Fabric Before Cutting
Read the care label and examine the curtain in bright light. Look for worn areas, permanent stains, mold, mildew, brittle sections, and tiny holes near the bottom hem. If the material has been used in a bathroom, wash it according to the manufacturer’s instructions and let it dry completely before beginning.
Do not assume every decorative curtain is water-resistant. Some fabric shower curtains are ordinary textiles designed to hang outside a separate waterproof liner. That is perfectly acceptable for indoor chair upholstery, but spills should still be cleaned promptly.
Why an Old Shower Curtain Was Perfect for Our Chairs
Our curtain had a large botanical print that looked slightly overwhelming in a small bathroom. On four dining-chair seats, however, the oversized leaves became bold individual compositions. The scale of the pattern made each chair look intentionally designed rather than covered with leftover material.
Shower curtains are also generously sized. A standard curtain provides far more surface area than many craft-store remnants. Depending on the curtain dimensions, pattern direction, and chair-seat size, one curtain may cover several removable seats.
The project offered three practical advantages:
- Low material cost: We reused something we already owned.
- Consistent design: Every chair received fabric from the same coordinated print.
- Less waste: The curtain gained a useful second life instead of heading to the trash.
Upcycling does not automatically make every project environmentally perfect, but extending the useful life of existing fabric and furniture can reduce unnecessary replacement. It also gives you permission to experiment. Cutting expensive upholstery material can feel like performing surgery. Cutting an old shower curtain feels more like a confident craft afternoon.
Make Sure the Chairs Are Worth Recovering
New fabric cannot repair a structurally unsafe chair. Before reaching for the staple gun, sit on each chair carefully and check for wobbling, cracked rails, loose joints, broken plywood, protruding hardware, or damaged legs.
Tighten accessible screws and bolts. If a glued wooden joint is loose, repair it properly and allow the adhesive to cure before reinstalling the seat. A chair that shifts, creaks dramatically, or leans like it has strong opinions may need more than a cosmetic makeover.
Removable padded dining-chair seats are among the easiest upholstery projects for beginners because the staples and folded edges remain hidden underneath. Fully upholstered armchairs, antique furniture, seats with springs, and pieces requiring extensive sewing are more complicated. Those projects may deserve professional attention, especially when the furniture is valuable or historically important.
Tools and Materials
Gather everything before taking the chairs apart. Otherwise, you may find yourself holding a half-covered seat while searching the garage for the screwdriver you were certain lived in the kitchen drawer.
- Old woven fabric shower curtain
- Dining chairs with removable padded seats
- Screwdriver or drill with the correct bit
- Heavy-duty manual or electric staple gun
- Staples suitable for the thickness of the seat base
- Staple remover, tack lifter, or flathead screwdriver
- Needle-nose pliers
- Sharp fabric scissors
- Measuring tape
- Fabric marker, chalk, or pencil
- Upholstery foam, if the old padding is damaged
- Polyester batting, if additional softness is needed
- Safety glasses and work gloves
- Optional dust-cover fabric for the seat undersides
Choose Staples Carefully
The staples must be long enough to secure the fabric but not so long that they pass through the seat base. Check the staple-gun instructions and measure the thickness of the plywood or wooden seat. Test one staple in an inconspicuous area before covering the entire chair.
How We Recovered the Chairs With a Shower Curtain
Step 1: Wash and Prepare the Curtain
We laundered the curtain according to its care label, dried it completely, and pressed out the most noticeable wrinkles. A smooth curtain is easier to measure and position. High heat can damage some synthetic fabrics, so the care labelnot creative optimismshould determine the washing and ironing settings.
Next, we spread the curtain across a clean floor and marked every stained, faded, or damaged area with removable tape. This prevented us from accidentally centering a suspicious old mark on the front of a chair.
Step 2: Remove the Chair Seats
We turned each chair upside down on a padded work surface and removed the screws holding the seat to the frame. Each set of screws went into a labeled container. This small organizational step saved us from the traditional DIY finale known as “Why are there two screws left?”
Before removing anything, we photographed the underside of each chair. The pictures recorded the original seat orientation, screw locations, fabric folds, and general construction.
Step 3: Remove the Old Fabric
Using a staple remover and needle-nose pliers, we pulled out the old staples carefully. Eye protection was useful because old staples occasionally launched themselves into new careers as tiny metal projectiles.
We kept one old cover intact to use as a cutting template. If the existing fabric is clean, smooth, and not excessively bulky, some simple projects allow new material to be installed over it. We removed ours because it was stained, uneven, and clearly ready for retirement.
Step 4: Inspect the Foam and Seat Base
With the upholstery removed, we examined the foam, batting, and plywood. Foam that is flattened, crumbling, damp, odorous, or permanently misshapen should be replaced. The wood base should be solid, dry, and free from major cracks.
Two of our seats still had supportive foam, so we kept it. The other chairs received new foam cut to the shape of the seat. We added batting over the foam, leaving enough material to wrap around the edges and staple underneath. Batting softened the corners and created a smoother finished profile.
Step 5: Plan the Pattern Placement
Pattern placement made the biggest visual difference. We laid the curtain right side up, placed each seat on top, and experimented before making any cuts. With a geometric, striped, or directional design, the front edge of every seat should face the same direction.
Large prints do not need to match perfectly, but choosing a focal element for each chair makes the set feel coordinated. We centered a leaf or flower on each seat and avoided placing bold lines directly along curved edges, where distortion would be noticeable.
Step 6: Cut the New Covers
We turned the shower curtain wrong side up and traced around the old upholstery cover. Where no usable template was available, we placed the seat on the fabric and added several inches around every side for wrapping and stapling.
It is better to begin with slightly too much fabric than slightly too little. Excess material can be trimmed later. A cover that falls one inch short cannot be repaired with enthusiasm.
Before cutting all the pieces, we completed one test seat. This confirmed that our margins were generous enough and that the fabric could handle firm tension without becoming distorted.
Step 7: Staple the Straight Sides
We placed the fabric right side down, centered the padded seat on top, and installed the first staple at the center of the back edge. Then we pulled the fabric firmly across the seat and stapled the center of the opposite edge.
We repeated the process on the left and right sides. Starting with four centered anchor staples helped maintain even tension and kept the pattern from shifting.
From there, we worked outward from each center, alternating between opposite sides. The fabric was pulled snugly enough to remove wrinkles but not so aggressively that the pattern stretched or the foam compressed unevenly. We paused frequently to turn the seat over and inspect the top.
Step 8: Fold and Staple the Corners
Corners are where a simple upholstery project begins testing your character. The goal is to distribute excess fabric in small, neat folds rather than creating one bulky lump.
For each corner, we pulled the center point toward the underside and secured it. Then we folded the remaining material into balanced pleats, keeping the visible edge smooth. Rounded seats required several small folds, while squarer seats worked well with one controlled fold on each side.
We avoided stacking too many staples in one spot and made sure no fabric covered the screw holes. When a corner looked bulky, we removed the staples and tried again. Upholstery staples are not marriage vows; they can be reconsidered.
Step 9: Trim and Finish the Underside
Once the fabric was secure, we trimmed away the excess while leaving a safe margin beyond the staple line. For a cleaner appearance, a piece of lightweight dust-cover fabric can be stapled over the raw edges. This step is optional, but it gives the underside a more professional finish.
Step 10: Reattach the Seats
We positioned each recovered seat on its original frame and reinstalled the screws without overtightening them. Before declaring victory, we checked that the seats were centered, stable, and facing the correct direction.
Finally, we tested every chair on a level floor. The transformation was immediate: the same wooden frames suddenly looked playful, modern, and deliberate.
Common Mistakes to Avoid
Using a Plastic Liner
A plastic liner may look easy to wipe clean, but it is usually too fragile and uncomfortable for a permanent upholstered seat. Choose woven fabric instead.
Ignoring Pattern Direction
A sideways flower may look artistic. Four sideways flowers pointing in different directions look like the chairs lost an argument. Mark the front edge of every seat and fabric piece before stapling.
Pulling One Side Completely Before the Others
Finishing an entire edge before securing the opposite edge can shift the pattern and create uneven tension. Begin at the centers and alternate between opposing sides.
Covering Screw Holes
Leave attachment points visible and accessible. Cutting blindly through finished upholstery to locate a missing screw hole is an unnecessarily dramatic final step.
Keeping Damaged Padding
Fresh fabric cannot disguise collapsing foam for long. Replace deteriorated padding while the chair is already apart.
Skipping the Test Seat
Complete one chair before cutting every cover. The first seat reveals how much fabric is needed, how the material responds to tension, and which corner-folding method works best.
How Durable Is Shower-Curtain Upholstery?
A decorative shower curtain is generally thinner than true upholstery-grade fabric, so expectations matter. Our recovered chairs work well for ordinary household dining, occasional desk use, and decorative seating. For restaurant seating, heavily used family-room furniture, or homes where chairs endure daily climbing pets, a tested upholstery-grade textile is a better long-term choice.
Durability also depends on the curtain’s weave, fiber content, existing wear, and how tightly it is installed. A dense polyester or cotton-blend curtain will usually tolerate stapling better than an open weave or delicate decorative material.
To protect the finished chairs:
- Blot spills promptly instead of rubbing them deeper into the fibers.
- Vacuum crumbs with a soft upholstery attachment.
- Test any cleaner on a hidden scrap of curtain fabric first.
- Keep the chairs away from prolonged direct sunlight when possible.
- Inspect loose edges or lifted staples before they become larger problems.
Save several scraps of the curtain. They can be used later to test cleaning products or make a small patch if accidental damage occurs.
What to Do With the Leftover Shower-Curtain Fabric
After covering the chairs, we still had useful material left. Coordinated scraps can become placemats, napkin rings, drawer liners, small pillow covers, basket liners, or framed textile art.
The reinforced top edge of the curtain can be especially useful. Its finished buttonholes may be incorporated into hanging storage, fabric organizers, or reusable gift bags. Small pieces can also be wrapped around jars or planters to repeat the chair pattern elsewhere in the room.
Avoid keeping every oddly shaped scrap merely because it might become “something someday.” Save the clean, useful pieces and release the six-inch triangle that has no clear future.
Our Experience Recovering Old Chairs With a Shower Curtain
We began this project with the dangerous confidence produced by watching several furniture makeovers in a row. The chairs seemed simple, the curtain was free, and the staple gun made a satisfying mechanical sound. What could possibly slow us down?
The first surprise appeared underneath the oldest chair. Its fabric had been attached with enough staples to defend a medieval castle. Removing them took longer than covering the seat. We quickly learned that a proper staple remover was far more effective than attacking every fastener with a kitchen screwdriver.
We also learned to photograph everything. One seat looked perfectly symmetrical until it was time to reinstall it. The screw pattern revealed that the front and back were slightly different. Without the photo, we would have rotated the seat repeatedly while blaming the chair, the screws, and possibly the laws of geometry.
Our first cut was too generous. This was not disastrous, but the extra fabric created thick folds around the corners. On the second chair, we trimmed the cover more thoughtfully while still leaving enough material to grip. That balance made the corners flatter and reduced the number of staples required.
Pattern placement became a surprisingly enjoyable part of the project. The old curtain featured oversized green leaves, gold stems, and small blue flowers. We could have cut four identical sections, but the repeat was too large. Instead, we treated each chair like part of a collection. One seat centered a leaf, another featured a flower, and the remaining two used complementary sections of the design.
The result looked more interesting than exact matching would have. The chairs clearly belonged together, but each one had a slightly different personality. One was calm and leafy. Another was carrying nearly the entire floral arrangement and seemed very pleased about it.
The most difficult part was maintaining even tension. On the first chair, we pulled the right side too tightly before checking the top. The pattern drifted off center, and one edge of the cushion looked compressed. Removing six staples and starting again fixed the problem. After that, we alternated sides and checked the surface every few staples.
We also discovered that corners improve with patience rather than force. Trying to crush all the excess material into one fold produced an obvious bump. Several smaller pleats created a smoother curve. By the fourth chair, the process felt almost automatic.
The entire makeover changed how we viewed the old dining set. Before the project, the chairs looked like temporary furniture we planned to replace eventually. Afterward, the wooden frames seemed warmer, the pattern connected with colors already in the room, and the set felt personal rather than generic.
There were small imperfections. One corner has an extra fold. A flower sits about half an inch farther left than planned. The undersides would not impress a professional upholsterer equipped with a flashlight and unusually strong opinions. None of those details are noticeable during normal use.
Most importantly, the chairs became enjoyable again. Guests asked where we found the fabric, and their expressions changed when we explained that it had once hung beside a bathtub. The project proved that useful materials do not always arrive with the correct label. Sometimes upholstery fabric is hiding in the bathroom, waiting for a staple gun and a second career.
Final Thoughts
Recovering old chairs with an old shower curtain is affordable, approachable, and surprisingly effective. It works best on sturdy chairs with removable seats and with clean, medium-weight woven curtains that can withstand firm stapling.
The professional-looking details are not complicated: inspect the padding, preserve the old cover as a template, plan the pattern before cutting, anchor opposite sides, maintain even tension, and take your time with the corners.
Our chairs did not need replacing. They needed better fabric and a little attention. The project saved money, reused material we already owned, and gave the dining area a design story far more entertaining than “we ordered these online.”
So, before throwing away a decorative shower curtain, look at its pattern one more time. It may be finished with the bathroom, but it could still have several good chairs left in it.