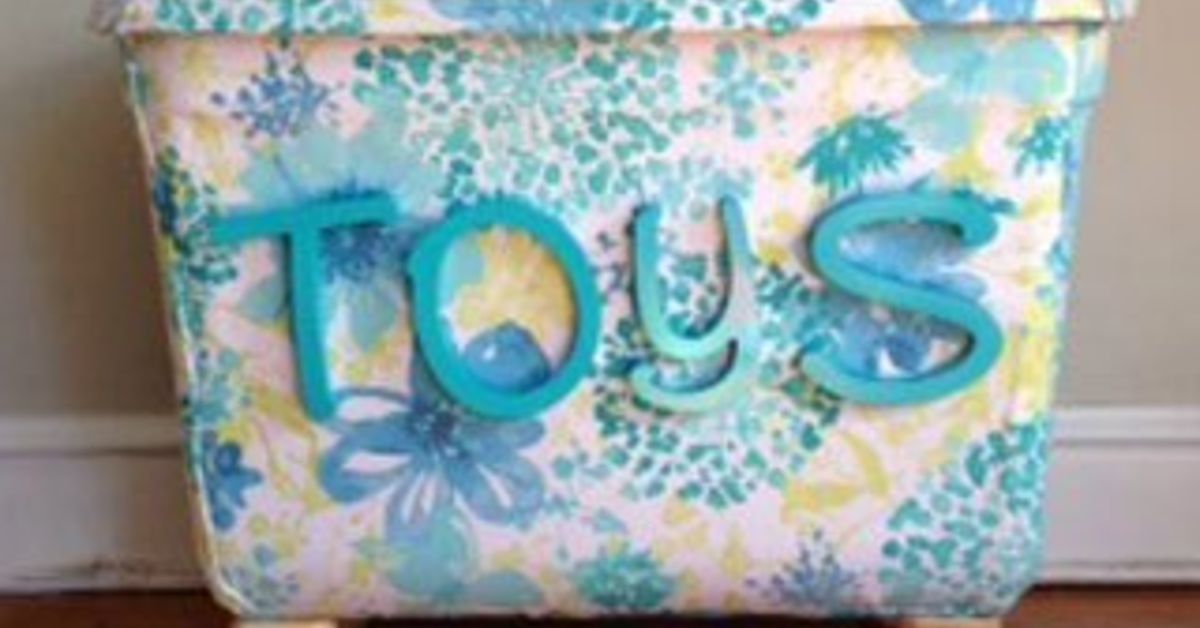
Every home with kids eventually reaches the same thrilling stage of domestic evolution: toys begin appearing in places where toys have no legal right to exist. A plastic dinosaur in the laundry basket. Building blocks under the sofa. A plush rabbit staring from the pantry like it pays rent. That is when an ordinary storage bin starts looking less like a boring container and more like a superhero in rectangular form.
Turning a storage bin into a toy box is one of the easiest, most affordable, and most practical ways to organize a playroom, bedroom, living room, or shared family space. You do not need a custom carpenter, a weekend renovation crew, or a Pinterest board with 400 tabs open. You need a sturdy bin, a smart system, a few safety checks, and a plan that works for real childrennot imaginary children who politely return every puzzle piece to its original box.
This guide explains how to transform a simple storage bin into a functional toy box that keeps clutter under control, encourages kids to clean up, and helps your home look less like a toy store sneezed. We will cover safety, labeling, toy rotation, styling, placement, and real-life tips that make the system last longer than one heroic cleaning session.
Why Turn a Storage Bin Into a Toy Box?
A storage bin is one of the most flexible toy storage ideas because it can fit almost anywhere. Unlike a large wooden toy chest, a bin can slide under a bed, sit inside a cubby shelf, tuck into a closet, roll beneath a bench, or live in the corner of the living room without screaming, “A toddler rules this kingdom.”
Another benefit is cost. Traditional toy boxes, storage benches, and built-in playroom cabinets can be beautiful, but they can also become expensive quickly. A basic plastic, fabric, woven, or wooden storage bin gives families a budget-friendly way to manage toy clutter without committing to permanent furniture.
Storage bins are also easier for children to use. A toy box works best when the cleanup process is simple: open space, put toy in, walk away victorious. When children can see where toys belong, reach the container, and move it without help, they are more likely to participate in cleanup. No system can guarantee a spotless room, but a kid-friendly bin can at least reduce the number of toy cars hiding in your slippers.
Choosing the Right Storage Bin
Not every bin deserves promotion to toy box status. Some are too flimsy, some are too deep, and some have lids that make cleanup feel like filing taxes. Before choosing a storage bin for toys, think about the age of the child, the type of toys, and where the bin will live.
Size Matters More Than You Think
A giant bin may seem efficient, but oversized toy storage often becomes a deep cave where toys disappear forever. Small action figures, puzzle pieces, craft supplies, and building blocks sink to the bottom. Children dump everything out to find one tiny item, and suddenly the floor becomes a colorful archaeological dig.
For most homes, several medium-size bins work better than one enormous toy box. Use one bin for stuffed animals, one for cars, one for blocks, one for dress-up clothes, and one for dolls or figures. Grouping toys by category makes cleanup easier and helps children find what they want without launching a full-room excavation.
Choose Safe Materials
Plastic bins are lightweight, washable, and practical for blocks, cars, bath toys, and outdoor toys. Fabric bins are soft and attractive, making them useful for bedrooms and living rooms. Woven baskets add warmth and style but should be checked for sharp edges, loose fibers, or splinters. Wooden bins can be sturdy and beautiful, but they require extra attention to corners, hinges, and weight.
If younger children will use the toy box, avoid heavy lids, locking mechanisms, sharp corners, and deep containers that invite climbing. A lidless bin is often the safest and simplest option. It also removes one of the biggest barriers to cleanup: having to remove a lid, put the toy away, and replace the lid while holding three stuffed animals and a plastic fire truck.
Look for Handles and Mobility
Handles make a storage bin much more useful as a toy box. Kids can carry small bins to the play area and return them when finished. Parents can quickly move bins from the living room to the bedroom before guests arrive, which is the adult version of a magic trick.
Rolling bins are excellent for under-bed toy storage or shared spaces. If the bin has wheels, make sure it rolls smoothly and does not tip easily. For toddlers, lightweight bins are usually better than heavy rolling trunks.
Safety First: What Every Toy Box Needs
Safety should guide every storage bin to toy box project. Toy storage seems harmless, but poorly designed chests can create pinch points, trapped fingers, climbing hazards, or suffocation risks. The safest toy box is usually open, shallow, stable, and easy to access.
Be Careful With Lids
If your storage bin has a lid, ask one important question: could the lid fall on a child’s hands, head, or neck? Heavy hinged lids should have proper safety hinges or lid supports that keep the lid open in any position. A lid that slams shut is not a feature; it is a tiny finger ambush.
For young children, consider removing the lid entirely. A lidless toy box improves visibility, makes cleanup faster, and reduces risk. If you want a cleaner look in a living room, choose a lightweight removable lid and store it separately during playtime.
Ventilation Is Important
Children are creative. Unfortunately, that creativity sometimes includes climbing into boxes, hiding inside bins, and pretending to be cargo. If a toy box has a lid, it should not latch shut, and it should have ventilation openings or gaps. Never use an airtight container as a toy box for children.
Round the Edges
Check the bin for rough edges, sharp corners, cracked plastic, exposed staples, or splintered wood. Add corner guards or padding if needed. Sand wooden surfaces smooth before painting or sealing. Kids do not walk through rooms so much as ricochet through them, so rounded edges are your friend.
How to Convert a Storage Bin Into a Toy Box
The transformation can be as simple or as creative as you want. Some families only need labels. Others want paint, wheels, dividers, cushions, or a decorative finish that blends with the room. Here is a practical step-by-step approach.
Step 1: Empty and Clean the Bin
Start with a clean container. Wash plastic bins with mild soap and warm water, then dry completely. Vacuum fabric bins and spot-clean stains. Wipe wooden bins with a damp cloth and let them dry before adding paint, decals, or liners.
Step 2: Sort the Toys Before Storing
Do not begin by dumping every toy into the bin. That is not organization; that is hiding evidence. Instead, sort toys into simple groups: keep, donate, repair, recycle, and toss. Broken toys, dried-out markers, mystery parts, and fast-food trinkets do not need a luxury storage suite.
After decluttering, group the remaining toys by type. This helps you decide whether one bin is enough or whether multiple smaller bins will work better.
Step 3: Add Labels
Labels are the secret sauce of toy organization. For readers, use simple words like “Blocks,” “Cars,” “Dolls,” “Animals,” and “Art.” For younger children, use picture labels. You can print icons, take photos of the toys, or use simple drawings.
Labels help children understand where things belong. They also help adults avoid the classic mistake of putting dinosaurs in the train bin, which may not bother you but can deeply offend a four-year-old curator of prehistoric transportation.
Step 4: Add Dividers or Smaller Containers
If the bin is wide or deep, use smaller boxes, zipper pouches, drawer organizers, or fabric baskets inside it. This is especially useful for toy sets with small parts. Building bricks, doll accessories, pretend food, train tracks, and puzzle pieces all benefit from smaller internal zones.
Clear pouches are great for puzzles because children can see the picture and pieces without wrestling with damaged cardboard boxes. Small lidded containers can work for tiny items, but keep them easy to open.
Step 5: Make It Attractive
A toy box that looks good is more likely to stay in a shared living space. Paint a wooden bin in a color that matches the room. Wrap a plain plastic bin with peel-and-stick wallpaper. Add vinyl decals, stencil the child’s name, or attach a chalkboard label.
For a softer look, place fabric bins inside a cube organizer. For a natural style, choose woven baskets. For a modern playroom, use matching clear bins with simple labels. The goal is not perfection. The goal is a system that does not make your living room look like it lost a fight with a birthday party.
Best Toy Categories for a Storage Bin Toy Box
Some toys are perfect for bin storage. Others need shelves, hooks, or special containers. Choosing the right match prevents frustration.
Great Choices for Bin Storage
Stuffed animals, dress-up clothes, foam blocks, large vehicles, pretend play food, balls, toddler toys, baby toys, and soft books work well in open bins. These items are easy to grab and easy to toss back in during cleanup.
Toys That Need Smaller Containers
Building bricks, puzzle pieces, craft supplies, tiny figures, magnetic tiles, train sets, and doll accessories should be stored in smaller containers within the toy box or in labeled bins on shelves. This prevents the dreaded “everything mixed with everything” problem.
Toys Better Stored Elsewhere
Board games, books, fragile collectibles, electronic toys, and art supplies with markers or glue may be better on shelves or in cabinets. Toys with batteries should stay dry and easy to inspect. Messy art supplies should live where an adult can supervise them unless you enjoy discovering glitter in your kitchen in November from a craft project in March.
Where to Place Your New Toy Box
Placement determines whether the system works. A toy box should live near the place where toys are actually used. If children play in the living room, a beautiful bin in the bedroom will not solve the living room mess. It will simply remain in the bedroom, looking innocent.
In a playroom, place bins on low shelves so kids can reach them. In a bedroom, use under-bed bins, closet cubbies, or a storage bench at the foot of the bed. In a living room, choose attractive baskets, storage ottomans, or bins that fit inside media cabinets. In small homes, use vertical space with shelving and keep only current favorite toys accessible.
Toy Rotation: The Secret to Less Mess
Toy rotation is one of the smartest ways to keep a storage bin toy box from overflowing. Instead of keeping every toy available all the time, divide toys into groups. Keep one group accessible and store the rest in a closet, garage shelf, or labeled backup bin.
Every few weeks, swap the toys. Children often become excited about “old” toys when they reappear, and fewer toys out at once means less mess to clean up. Toy rotation also helps parents notice which toys are loved, ignored, broken, or ready to donate.
How to Teach Kids to Use the Toy Box
The best toy storage system is the one children can understand. Keep instructions simple. Instead of saying, “Clean your room,” say, “Put the cars in the car bin and the blocks in the block bin.” Specific directions reduce overwhelm.
Make cleanup part of the routine. Try a five-minute reset before dinner or bedtime. Use a song, timer, or small challenge: “Can you put all the animals in the zoo bin before the timer beeps?” Children love a game, especially one that lets them beat the clock and then announce victory like a tiny sports commentator.
Do not expect perfection. A child who puts most toys in roughly the correct bin is learning responsibility. That is a win. You can refine the system later.
Design Ideas for a Stylish Storage Bin Toy Box
A toy box does not have to ruin your décor. With a few thoughtful choices, it can blend into the room beautifully.
Farmhouse Style
Use a wooden crate or woven basket with a fabric liner. Add a simple white label or metal tag. This works well in living rooms, nurseries, and cozy bedrooms.
Modern Minimalist
Choose matching white, gray, or clear bins with clean labels. Store them in cube shelves for a streamlined look. This style is ideal for families who want visual calm but still own 74 toy animals.
Colorful Playroom
Use bright bins grouped by color or toy type. Add picture labels and low shelves. This makes the room fun, accessible, and easy for children to navigate.
Small-Space Solution
Use stackable bins, under-bed containers, or a storage ottoman. Keep only daily-use toys in the main area and rotate the rest. In small homes, every bin should earn its spot.
Common Mistakes to Avoid
The first mistake is buying storage before decluttering. More bins do not automatically mean more organization. Sometimes they simply create a more organized-looking pile of things nobody uses.
The second mistake is using bins that are too deep. Deep bins hide toys, frustrate kids, and encourage dumping. The third mistake is skipping labels. Without labels, every container becomes a mystery box. The fourth mistake is making the system too complicated. If cleanup requires six steps, three lids, and a sorting philosophy, children will abandon it immediately.
Finally, avoid storing unsafe items in a toy box. Keep small choking hazards away from younger siblings. Store art supplies, batteries, cords, and fragile objects separately.
Real-Life Experiences: What Actually Works
In real homes, the storage bin to toy box method works best when it respects how children actually play. Children rarely take out one toy, play neatly, and return it like a museum employee handling artifacts. They build cities, host tea parties, crash trucks, adopt stuffed animals, and create dramatic storylines involving pirates, astronauts, and one suspiciously powerful rubber duck. The toy box needs to support that kind of joyful chaos.
One helpful experience many parents discover is that open bins beat closed bins for daily toys. A lid may look tidy, but it adds friction. Kids are more likely to toss blocks into an open bin than open a lid, place blocks inside, and close it again. For toys used every day, easy access matters more than a perfect appearance.
Another lesson is that labels should match the child’s thinking, not the adult’s dream system. Adults may want categories like “STEM manipulatives” or “imaginative play accessories.” Children understand “blocks,” “cars,” “food,” and “dress-up.” Simple labels win. Picture labels are even better for preschoolers because they remove the need to read before cleaning up.
Families also learn that one toy box in the living room can save everyone’s sanity. Even if the main toy storage area is in a bedroom or playroom, a small living room bin creates a fast reset zone. At the end of the day, toys from the shared space go into that bin. Later, the bin can be carried back to the child’s room. This prevents the living room from becoming a permanent play exhibit titled “Plastic Things Everywhere.”
Another practical experience is that toy rotation feels strange at first but quickly becomes a favorite strategy. When children have fewer toys available, they often play more deeply. Instead of bouncing between twenty options, they focus on what is in front of them. When rotated toys return, they feel new again. Parents save money, reduce clutter, and avoid the emotional spiral of wondering why a child ignores a toy that once required three stores and a coupon code to obtain.
Storage bins also teach independence. A toddler can carry a soft bin of animals. A preschooler can match picture labels. An older child can sort building bricks, dolls, cards, or craft items. The toy box becomes more than storage; it becomes a small lesson in responsibility. The trick is to keep expectations age-appropriate. A three-year-old may not create a magazine-worthy playroom, but they can put plush toys into a basket. That counts.
Durability matters too. In theory, a delicate woven basket looks charming. In practice, it may be dragged across the floor, climbed into, flipped upside down, and turned into a spaceship. Choose bins that can survive the job. Washable plastic, sturdy canvas, reinforced fabric, and smooth wood are often better choices than fragile decorative containers.
The best experience of all is the quick cleanup. A good storage bin toy box can transform a room in five minutes. Blocks disappear into one container. Stuffed animals return to their soft corral. Cars roll back into their labeled garage. The room becomes walkable again, and no one steps on a tiny plastic brick with the full force of parental regret.
Most importantly, the system should change as children grow. Baby rattles become toddler toys. Toddler toys become puzzles and pretend play. Later, the same bins may hold sports gear, art supplies, books, collectibles, or school projects. A storage bin converted into a toy box is not just a temporary fix. It is a flexible home organization tool that grows with the family.
Conclusion
Turning a storage bin into a toy box is a simple project with a big payoff. It reduces clutter, saves money, improves cleanup routines, and helps children find and care for their toys. The key is choosing the right bin, prioritizing safety, sorting before storing, labeling clearly, and keeping the system easy enough for real life.
A toy box does not need to be fancy to be effective. It needs to be safe, accessible, durable, and placed where play actually happens. Whether you use a plastic bin, fabric cube, woven basket, rolling container, or painted wooden crate, the right setup can bring order to the toy tornado without removing the fun from childhood.
Note: This article is written for general home organization and DIY inspiration. For children’s storage, always check product safety, avoid heavy or locking lids, supervise young children, and adapt every toy box setup to the child’s age and abilities.