Fresh flowers are charming until a lily leans too close to your sleeve and leaves behind a bright yellow-orange souvenir. Pollen stains look innocent at firstjust a little dust, right? Unfortunately, pollen is more like nature’s powdered highlighter. It clings, smears, and somehow lands on the one white shirt you were brave enough to wear.
The good news: pollen stain removal is very possible if you treat the stain correctly from the beginning. The bad news: the first instinct most people haverubbing it with a napkin, wetting it immediately, or tossing it into the washer and hoping for laundry magicis exactly what can make the stain worse.
This guide explains how to remove pollen stains from clothes, upholstery, carpet, and delicate fabrics using practical, fabric-safe methods. You will learn what to do first, what never to do, which stain removers work best, and how to rescue stubborn yellow pollen stains without turning your laundry room into a crime scene investigation.
Why Pollen Stains Are So Stubborn
Pollen is designed to stick. In nature, that is excellent news for flowers, bees, and the whole “plants continuing to exist” situation. On your cotton shirt, not so much. Many pollen grains have a powdery texture, natural pigments, and sticky compounds that help them attach to surfaces. When pollen is rubbed, those pigments can grind deeper into fabric fibers.
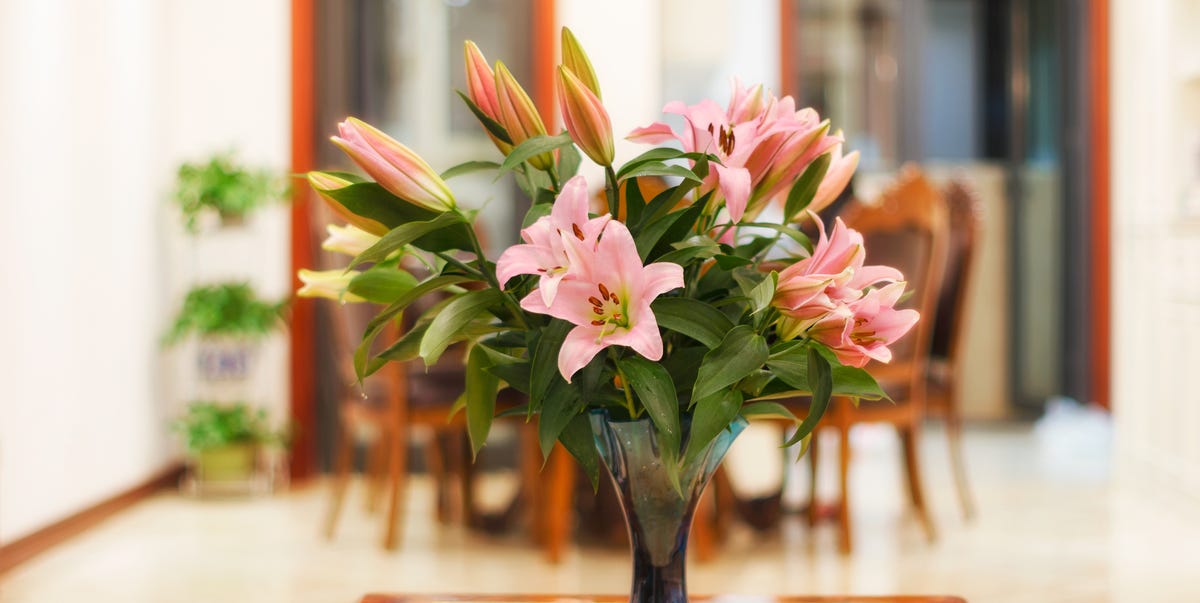
Lily pollen is especially famous for causing dramatic stains. It often appears golden yellow, orange, or rusty brown, and the color can become more noticeable once it spreads. That is why removing loose pollen before adding water is so important. Think of pollen like glitter with a gym membership: once it gets worked into the fibers, it becomes much harder to remove.
The Golden Rule: Do Not Rub the Pollen
If there is one rule to remember, it is this: do not rub pollen. Do not swipe it with your hand. Do not brush it aggressively with a towel. Do not panic-scrub it while whispering, “Please, please, please.” Rubbing spreads the powder and pushes the pigment farther into the fabric.
Instead, keep the stained area as still as possible. If the pollen is sitting loosely on top of the fabric, your first job is to lift it away dry. Once most of the loose pollen is gone, you can move on to rinsing, pre-treating, and washing.
How to Remove Pollen Stains from Clothes
Step 1: Take the Garment Outside and Shake It Gently
Start by taking the stained item outdoors. Hold the fabric with the stained area facing downward, then gently shake it. This helps loose pollen fall away instead of spreading across the garment. Do not slap the fabric or brush the stain with your fingers. The goal is to remove what is loose, not massage the pollen into permanent residence.
Step 2: Use Sticky Tape to Lift the Pollen
After shaking, use sticky tape to lift remaining pollen from the surface. Masking tape, clear tape, or painter’s tape can work. Wrap a piece around your fingers with the sticky side facing out, then lightly press and lift. Repeat with fresh tape until no more pollen transfers.
This step is especially helpful for lily pollen stains because it removes the dry particles before they become muddy or smeared. Be gentle. You are not waxing a surfboard; you are lifting powder from fabric.
Step 3: Rinse from the Back with Cold Water
Once the loose pollen is removed, rinse the stain from the back of the fabric using cold running water. Rinsing from the reverse side helps push pollen out of the fibers instead of driving it deeper. Cold water is usually the safest first choice because it is gentler on fabrics and less likely to set many types of stains.
Avoid hot water at this stage unless the care label and stain treatment specifically call for it. Heat can make some stains harder to remove and may also shrink, fade, or damage certain fabrics.
Step 4: Soak the Garment in Cold Water
Fill a sink or basin with cold water and soak the garment for about 30 minutes. This helps loosen remaining pollen particles and reduces discoloration. If the water becomes tinted, drain it and repeat the soak with fresh cold water.
For washable cotton, polyester, and many everyday fabrics, a cold soak is a safe and useful middle step. For delicate materials, always check the care label first and avoid soaking fabrics that should not be fully submerged.
Step 5: Pre-Treat with Liquid Laundry Detergent or Stain Remover
After rinsing and soaking, apply a small amount of liquid laundry detergent or a laundry stain remover directly to the stained area. Gently work it in with your fingers or a soft cloth. Let it sit for 10 to 15 minutes, or follow the product label directions.
Enzyme-based stain removers can be useful because they help break down organic residues. However, enzymes are not suitable for every fabric, especially some delicate fibers. For silk, wool, vintage clothing, or anything expensive enough to make you nervous, use a gentle detergent and consider professional cleaning.
Step 6: Wash According to the Care Label
Wash the garment as directed on the care label. Use a quality detergent and choose a water temperature that is safe for the fabric. When in doubt, cold or cool water is a safer starting point for many pollen-stained items, especially colored clothing and delicate blends.
Wash the stained item separately or with similar colors. Pollen pigments can transfer, and nobody wants one flower incident to become a full-load laundry tragedy.
Step 7: Air Dry and Inspect Before Using Heat
After washing, do not put the garment in the dryer until you are sure the stain is gone. Dryer heat can set remaining discoloration and make the stain much more difficult to remove. Air dry the item first, then inspect it in bright light.
If you still see a yellow or orange mark, repeat the treatment. Many pollen stains fade after a second round. Patience beats heat every time.
How to Remove Yellow Pollen Stains from White Clothes
White clothing gives pollen stains a spotlight, a microphone, and a standing ovation. The stain looks brighter because there is no color in the fabric to hide it. Start with the same dry-removal method: shake, lift with tape, rinse from the back, soak, and pre-treat.
For sturdy white cotton, an oxygen-based bleach soak may help with lingering yellow discoloration. Follow the product instructions carefully. Oxygen bleach is generally safer for many washable white and colorfast fabrics than chlorine bleach, but it is not right for every material.
Chlorine bleach should only be used when the fabric is bleach-safe, such as many white 100% cotton items. Never use chlorine bleach on wool, silk, leather, mohair, or spandex. If the label says “no bleach,” believe it. Clothing labels are tiny, bossy, and often correct.
How to Remove Lily Pollen Stains
Lily pollen deserves its own section because it behaves like it has a personal grudge against clean laundry. The color is strong, the powder is fine, and the stain spreads easily.
For Fresh Lily Pollen on Clothing
Do not touch the pollen with your fingers. Remove the garment carefully so the stained area does not fold onto another part of the fabric. Shake it outside, then use sticky tape to lift away the pollen. Once the loose pollen is removed, rinse from the back with cold water and pre-treat with liquid detergent.
For Older Lily Pollen Stains
If the stain has already been rubbed in or washed once, you may need more than one treatment. Try soaking the garment in cold water, applying stain remover, washing, and air drying. If the fabric is colorfast and washable, an oxygen bleach soak can help reduce stubborn discoloration.
For delicate or dry-clean-only clothing, do not experiment too aggressively. Lift any dry pollen with tape and take the item to a professional cleaner. Explain that the stain is pollen, preferably lily pollen. The cleaner will appreciate knowing what villain they are fighting.
How to Remove Pollen Stains from Upholstery
Pollen on upholstery requires extra care because you usually cannot rinse a sofa cushion under the faucet. First, let the pollen stay dry. Use tape to lift as much as possible. You can also use a handheld vacuum, but hold the nozzle slightly above the surface rather than dragging it across the stain. Dragging may smear the pollen.
Next, test a small hidden area with a mild cleaning solution. Mix a few drops of gentle dish soap or mild liquid detergent with cool water. Dip a clean white cloth into the solution, wring it well, and blot the stained area. Do not soak the upholstery. Use another cloth dampened with plain water to remove soap residue, then blot dry with a towel.
If the upholstery is silk, velvet, antique, or labeled with cleaning codes you do not understand, stop before things get dramatic. Call a professional upholstery cleaner.
How to Remove Pollen Stains from Carpet
For carpet, dry removal comes first again. Let the pollen sit on the surface if possible. Use tape to lift visible pollen. A vacuum can help, but avoid scrubbing with the vacuum brush attachment because it can spread the stain.
After removing loose pollen, blot the area with a clean white cloth and a mild detergent solution. Work from the outside of the stain toward the center to avoid spreading. Follow with a cloth dampened with plain water, then blot dry. Repeat as needed.
If the stain remains, a carpet-safe oxygen-based cleaner may help, but always test first in a hidden area. Some carpets can fade or discolor, and replacing a rug because of one flower arrangement is not the kind of home makeover anyone asked for.
Best Products for Pollen Stain Removal
You do not need a laboratory to remove pollen stains, but having the right tools helps. Keep these items handy during flower season:
- Masking tape, painter’s tape, or clear tape for lifting dry pollen
- Liquid laundry detergent for pre-treatment
- Laundry stain remover for washable fabrics
- Oxygen-based bleach for colorfast washable items
- Clean white cloths for blotting upholstery and carpet
- A small basin or sink for cold-water soaking
- A soft brush for dried residue, used only after loose pollen is removed
Avoid using random harsh cleaners, especially on delicate fabrics. More powerful does not always mean better. Sometimes it just means you now have a pollen stain and a bleach spot shaped like regret.
Common Pollen Stain Removal Mistakes
Mistake 1: Rubbing the Stain
Rubbing is the fastest way to spread pollen. It turns a small powder mark into a larger stain and pushes pigment into the fibers.
Mistake 2: Adding Water Too Soon
If pollen is still sitting dry on the surface, water can make it smear. Lift dry pollen first with tape, then rinse.
Mistake 3: Using the Dryer Too Early
Dryer heat can set remaining stains. Always air dry first and check the fabric in good light.
Mistake 4: Ignoring the Care Label
The care label tells you whether the garment can handle water, bleach, heat, or machine washing. It is not decorative laundry confetti.
Mistake 5: Treating Delicates Like Towels
Silk, wool, and vintage fabrics require gentler handling. When in doubt, use tape for dry pollen and consult a professional cleaner.
How to Prevent Pollen Stains
The easiest pollen stain is the one that never happens. When bringing lilies or other pollen-heavy flowers indoors, remove the stamens carefully as soon as the flowers open. Wear gloves or use a tissue to avoid staining your fingers. Place arrangements away from curtains, table linens, and upholstered furniture.
If you are carrying flowers in a car, wrap the blooms loosely and keep them away from clothing. If you are arranging flowers for an event, wear an apron or an old shirt. Florists know this trick well: dress for the pollen you may meet, not the clean outfit you wish to keep.
When to Call a Professional Cleaner
Professional cleaning is the safest option for dry-clean-only clothing, expensive garments, wedding attire, silk, wool coats, antique textiles, and valuable upholstery. It is also smart if the stain has already been rubbed, washed, dried with heat, or treated with the wrong product.
Tell the cleaner exactly what caused the stain. “Flower pollen” is useful. “Lily pollen” is even better. The more specific you are, the better chance they have of choosing the right treatment.
Experience Notes: Real-Life Lessons from Pollen Stain Removal
In real homes, pollen stains usually happen at the worst possible moment. Someone buys lilies for the dining table before guests arrive. A child hugs a bouquet while wearing a school uniform. A wedding guest brushes against a floral arrangement and suddenly has a yellow streak on a pale dress. Pollen has excellent timing and terrible manners.
One practical lesson is that speed matters, but calm matters more. Many people see the bright powder and immediately start wiping. That quick wipe is usually what turns a removable dusting into a deeper stain. The better move is to freeze for a second, keep the fabric flat, and remove the pollen dry. A simple piece of tape can do more good in ten seconds than five minutes of scrubbing.
Another experience-based tip: lighting matters. Pollen stains can look gone when the fabric is wet, then reappear after air drying. Before deciding the stain is fixed, check the garment near a window or under bright natural light. Yellow pollen can hide when the fabric is damp. This is why air drying is so useful. It gives you a safe checkpoint before the dryer locks in the stain.
For white cotton shirts, repeated gentle treatment often works better than one aggressive treatment. A cold rinse, detergent pre-treatment, wash, air dry, and repeat cycle can gradually fade the stain. Jumping straight to harsh bleach may damage fibers or create uneven whitening. If bleach is safe for the fabric, use it carefully and only according to instructions.
For colored clothing, always test stain removers first. A stain remover that works beautifully on a white towel might lighten a navy blouse or dull a bright dress. The hidden inside seam is your friend. Test there before applying anything to the visible stain.
For upholstery, restraint is everything. People often over-wet the cushion because they want to “flush out” the stain. Unfortunately, too much water can leave rings, push pollen deeper, or affect the filling beneath the fabric. Blotting with a barely damp cloth is safer than soaking. If the pollen is on a removable cushion cover, check whether the cover can be washed before taking it off. Some covers shrink and become impossible to put back on, which is how a pollen stain becomes a furniture puzzle.
Carpet pollen stains are similar. Lift first, blot second, rinse lightly, and dry thoroughly. Place a clean towel over the damp spot and press gently to absorb moisture. Avoid walking over the area until it is dry, because foot traffic can push residue deeper into the fibers.
The best long-term habit is prevention. If you love lilies, remove the pollen-producing stamens before they shed. Do this over a trash can or paper towel, not over your table runner. If you receive a bouquet, inspect it before placing it near curtains or upholstered chairs. Flowers are beautiful, but they are also tiny decorative stain launchers.
The final lesson: do not give up after one wash. Pollen stains can be stubborn, especially orange lily pollen, but many stains fade with repeated careful treatment. As long as you avoid rubbing, hot water mistakes, and dryer heat, you still have a good chance of saving the fabric.
Conclusion
Pollen stain removal is all about doing the right steps in the right order. First, remove loose pollen while it is dry. Use tape, not rubbing. Then rinse from the back with cold water, soak if the fabric allows, pre-treat with detergent or stain remover, wash according to the care label, and air dry before checking the stain.
For stubborn yellow pollen stains, repeat the process or use oxygen-based bleach on washable, colorfast fabrics. For delicate or dry-clean-only items, professional cleaning is the safest route. With patience and a gentle hand, most pollen stains can be reduced or removedand your favorite shirt does not have to become a gardening-only uniform.