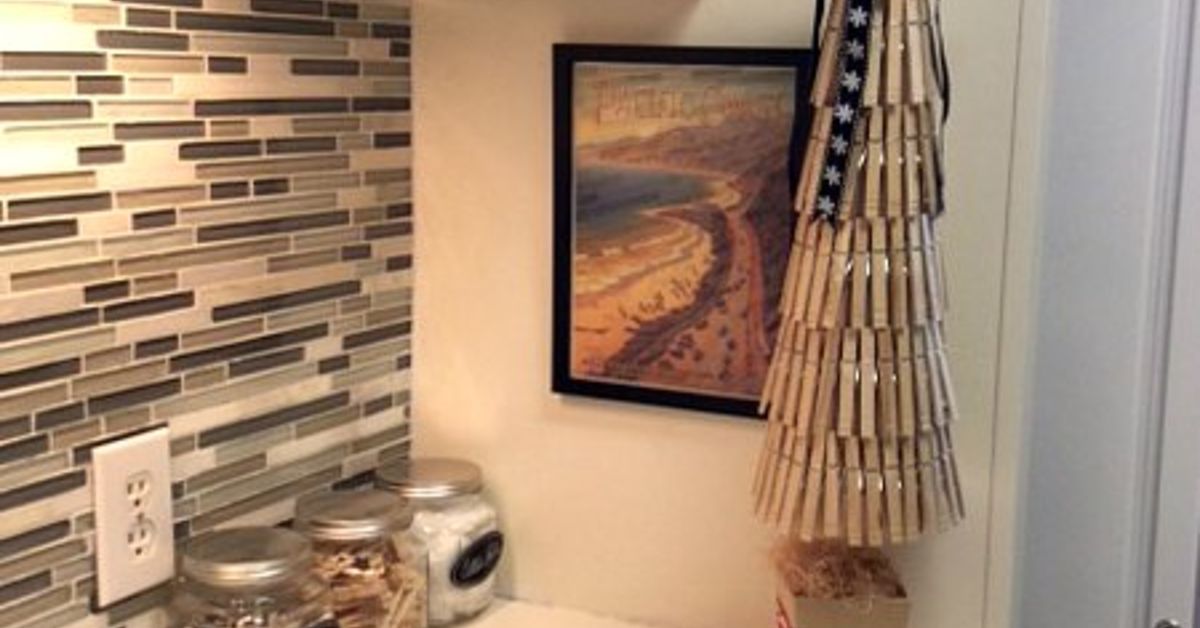
If your holiday decorating style lives somewhere between “cozy handmade charm” and “I would like my table to look festive without spending the GDP of a small nation,” a clothespin Christmas tree might be your new favorite project. It is cheerful, affordable, surprisingly stylish, and just quirky enough to make guests ask, “Wait… is that made of actual clothespins?” Yes. Yes, it is. And that is exactly why it works.
A DIY clothespin Christmas tree turns a humble laundry-room staple into a piece of holiday decor with personality. Depending on how you paint, arrange, and embellish it, the finished look can lean rustic farmhouse, vintage holiday, Scandinavian minimal, or full-on glitter goblin. Best of all, this project is approachable for beginners, easy to customize, and fun to make with kids, friends, or that one family member who starts playing Christmas music before Thanksgiving and feels no shame about it.
In this guide, you will learn how to make a clothespin Christmas tree that looks polished rather than haphazard, plus how to choose materials, avoid common mistakes, and style the finished tree so it looks intentional in your holiday decor. Whether you want a tabletop centerpiece, a mantel accent, or a handmade gift, this clothespin craft has enough flexibility to earn a spot in your annual Christmas rotation.
Why a Clothespin Christmas Tree Works So Well
The beauty of a clothespin Christmas tree is that it combines three things people want from holiday crafts: texture, nostalgia, and low cost. Wooden clothespins already have a natural grain and warm tone that fit beautifully with Christmas decorating. Even before you add paint, stain, glitter, ribbon, or faux snow, they bring that classic handmade feel people love during the holidays.
They are also easy to build with. Unlike fragile glass ornaments or complicated woodworking projects, clothespins are forgiving. You can clip them, glue them, layer them, or take them apart and rebuild them into stars, snowflakes, wreath accents, and trees. That flexibility means your project can be as simple or as extra as your holiday heart desires.
Another reason this DIY Christmas decor idea is so popular is scale. A clothespin tree can be tiny enough for a shelf or large enough to become a dramatic centerpiece. Make one in classic green and brown, and it feels timeless. Make one in white and gold, and suddenly it looks boutique. Make one in red, pink, and disco glitter, and it says, “I celebrate Christmas with flair and possibly cookies for breakfast.”
What You Need to Make a DIY Clothespin Christmas Tree
You do not need a massive craft haul to get started. In fact, one reason this holiday clothespin craft is so appealing is that the supply list is simple and affordable.
Basic Materials
For a classic tabletop tree, gather wooden clothespins, a cone-shaped base or sturdy cardboard cone, hot glue or strong craft glue, acrylic paint or wood stain, foam or sponge brushes, and optional embellishments such as mini beads, ribbon, jute twine, faux snow, glitter, or tiny bells. You may also want a clear sealer if the tree will be handled often or displayed in a covered outdoor area.
Optional Upgrades
If you want a more polished look, add metallic paint, miniature ornaments, battery-operated fairy lights, or a small wooden round for a base. For a farmhouse finish, use matte paint, burlap ribbon, and neutral tones. For a vintage-inspired tree, try muted greens, dusty reds, cream, and a light antique wax effect.
Before You Start
Sort your clothespins first. If some are warped, splintery, or noticeably uneven, set them aside. The prettier pins should go on the most visible parts of the tree. That tiny bit of pickiness pays off later.
How to Make a Clothespin Christmas Tree Step by Step
Step 1: Choose Your Tree Shape
The easiest method is to attach clothespins around a cone form. You can buy a foam or paper mache cone, or make one from heavy cardboard. A cone gives your tree structure and makes layering simple. If you prefer a more open, sculptural style, you can also build the tree around a dowel rod with graduated rings or tiers. For most crafters, though, the cone method is the least fussy and the most beginner-friendly.
Step 2: Prep the Clothespins
You have two options here. The first is to use whole clothespins clipped directly onto the cone edge or glued flat in rows. The second is to remove the springs and separate the clothespins into two wooden halves, then glue the flat sides together or arrange them in overlapping layers. If you want a fuller, more decorative tree with a feathered or petal-like texture, disassembled clothespins usually create the better look.
Lightly sand any rough spots if needed. Then paint or stain the clothespins before assembly. This step matters. Painting first is much easier than trying to reach every nook after the tree is built, and it helps you avoid weird pale wood peeking through like the project forgot to finish getting dressed.
Step 3: Paint, Stain, or Keep It Natural
Acrylic craft paint is the easiest choice for most people because it dries quickly and comes in endless colors. Deep evergreen is the obvious Christmas classic, but not the only option. Cream, sage, black, gold, silver, blush, whitewash, and natural wood all make gorgeous versions. You can even blend shades of green for dimension, using darker tones near the bottom and lighter ones near the top.
If you love a more natural or rustic holiday style, use stain instead of paint. Walnut, oak, and weathered gray tones can make a clothespin tree feel elevated and cozy at the same time. Just be sure everything is fully dry before gluing.
Step 4: Build the Base Layer
Start at the bottom of the cone and work upward in horizontal rows. If you are using whole clothespins, line them up closely so the cone underneath is not too visible. If you are using separated clothespin halves, angle them slightly downward to mimic the way evergreen branches drape. Overlap the pieces just enough to create fullness without making the tree bulky.
This is the stage where patience beats speed. A rushed bottom row can make the whole tree look crooked. Check the spacing often, turn the cone as you work, and step back every now and then to see whether one side is getting more volume than the others.
Step 5: Keep Tapering Toward the Top
As you move upward, shorten the rows naturally by following the cone shape. Keep the same general angle for consistency. The top of the tree should look tidy, not like it got surprised and froze. You can finish the tip with one upright clothespin, a small bead, a bow, a wood star, or a tiny metal ornament topper.
Step 6: Add Details That Make It Look Finished
Once the structure is complete, add embellishments sparingly. A few mini pearls or beads can look like ornaments. Dry brushing white paint on the edges creates a frosted effect. Fine glitter on the tips adds sparkle without turning the whole project into a craft-store explosion. Twine wrapped around the base or a ribbon bow can help ground the design.
If you want to use fairy lights, choose a very lightweight battery-operated strand and weave it gently. Do not overload the tree. A little glow is magical. Too much glow makes it look like your clothespins have entered a holiday talent show.
Best Design Ideas for a Clothespin Christmas Tree
Rustic Farmhouse Tree
Use natural or stained clothespins, a jute bow, wooden beads, and muted greenery. This version looks especially good on a mantel, entry console, or dining table alongside candles and pinecones.
Classic Green Christmas Tree
Paint the clothespins in traditional evergreen shades and add red mini berries or tiny gold dots. This style feels familiar and festive, perfect for anyone who wants handmade decor that still reads “real Christmas tree energy.”
White and Gold Tree
For a more elegant look, paint the tree matte white or creamy ivory and add gold dry brushing, champagne ribbon, or pearl accents. This works beautifully in modern or neutral interiors.
Vintage-Inspired Tree
Try faded greens, soft reds, antique gold, and a dusting of faux snow. Pair it with bottle brush trees, old-fashioned ornaments, or holiday card displays clipped with mini clothespins for a charming nostalgic setup.
Kid-Friendly Color Pop Tree
Go bright. Use cheerful greens, reds, pinks, blues, or glittery metallics. Let kids add pom-poms, stickers, sequins, or mini bows. This version is less “designer holiday vignette” and more “pure Christmas joy,” which is also a valid decorating philosophy.
Common Mistakes to Avoid
Using Too Much Glue
A little adhesive goes a long way. Excess glue can ooze out, create stringy webs, and make your finished tree look messy. Use just enough to secure each piece.
Skipping Dry Time
Paint that feels dry on the surface may still be tacky underneath. If you glue too soon, pieces can slide, smudge, or refuse to behave. Let painted or stained clothespins dry completely before assembly.
Ignoring Balance
If one side has denser layers than another, the tree can look lopsided. Rotate the piece often and check the silhouette from every angle.
Overdecorating
This project already has built-in texture. It does not need every bell, bead, rhinestone, and ribbon in your craft drawer. Pick one main style direction and stick with it.
Forgetting the Display Spot
Think about where your clothespin Christmas tree will live before you decorate it. A dining table centerpiece may need a lower profile. A bookshelf tree can be taller and more detailed. A front porch version may need a protective sealer and a sturdier base.
How to Style Your Finished Tree at Home
A clothespin Christmas tree is surprisingly versatile. Place one on a mantel beside stockings and candles for a warm handcrafted look. Group several in different sizes on a sideboard to create a mini forest. Use one as part of a holiday centerpiece with pine sprigs and oranges. Add family photos clipped nearby for a sentimental display. Or make a pair for your entryway so guests are greeted by something festive before they even get to the cookies.
This DIY Christmas centerpiece also works well in small spaces. If you do not have room for a large tree in every area of your home, a tabletop clothespin tree can deliver the spirit of the season without taking over the room. It is especially handy for apartments, dorm-style corners, office desks, and guest rooms.
Why This Handmade Christmas Decor Feels Special
There is something deeply satisfying about making holiday decor from ordinary materials. Clothespins are not glamorous. No one sees a bag of wooden laundry clips and thinks, “Ah yes, luxury seasonal styling.” And yet, once arranged into a tree, painted with care, and set among your holiday decorations, they become exactly that kind of special object people remember.
That is the real charm of this project. A clothespin Christmas tree is not just decor. It is a conversation starter, a memory maker, and a reminder that some of the best holiday pieces do not come from a store shelf. They come from an afternoon at the table with paint on your fingers, ribbon scraps everywhere, and Christmas music playing just loudly enough to make you believe you could absolutely win a holiday craft contest you invented in your own head.
Conclusion
If you are looking for a holiday project that is affordable, customizable, and genuinely fun to make, a clothespin Christmas tree deserves a place on your list. It is easy enough for beginners, flexible enough for experienced crafters, and stylish enough to display with pride all season long. Whether you keep it rustic, elegant, colorful, or delightfully over-the-top, this DIY clothespin Christmas tree proves that simple materials can create beautiful holiday decor with real personality.
So go ahead: gather the clothespins, clear the table, queue up your favorite Christmas playlist, and make a tree that looks like joy in handmade form. Laundry room supply by day, festive icon by night. That is what we call a holiday glow-up.
Personal Experiences and Holiday Moments Inspired by a Clothespin Christmas Tree
One of the best things about making a clothespin Christmas tree is that it rarely feels like just another craft. It becomes an experience. The first time many people try it, they expect a quick little project and end up with an entire holiday memory. You start out thinking, “I’ll glue a few clothespins to a cone,” and before long the kitchen table looks like Santa’s workshop rented temporary office space in your house.
There is usually a moment when the pile of plain wooden pins still looks unimpressive. It sits there with all the charisma of a hardware aisle. But once the paint goes on, the magic starts. A tray of green clothespins drying on wax paper somehow feels wildly festive. Add a mug of hot chocolate, one string of Christmas songs, and maybe a slightly crooked homemade bow, and suddenly the whole afternoon becomes part of the holiday season itself.
For families, this craft has a sneaky way of pulling people together. Kids love choosing colors and “ornaments,” even if their design instincts occasionally suggest purple glitter and three jingle bells in one square inch. Adults usually take over the glue gun with the seriousness of engineers on an important mission. Grandparents often approve of the fact that it uses simple materials and does not require downloading an app, scanning a code, or learning a confusing template. Everyone gets to participate in a way that feels low-pressure and cheerful.
There is also something satisfying about how personal each tree becomes. No two clothespin trees ever look exactly the same. Some end up sleek and stylish, like they belong in a magazine photo shoot. Others come out a little wonky, a little exuberant, and a lot lovable. Honestly, those are often the best ones. The slightly imperfect tree is usually the one that gets remembered, because someone painted half the pins backward, someone else insisted on adding a tiny star that was definitely too large, and everyone laughed too hard to care.
These trees also carry a kind of nostalgic comfort. They feel old-fashioned in the best possible way, even if you make them in a modern color palette. They remind people that holiday decorating does not have to be expensive to be meaningful. A handmade clothespin Christmas tree can sit on a mantel right beside store-bought decor and still steal the show, simply because it has a story attached to it.
Another experience people often talk about is how reusable the project feels emotionally. Each year, when you pull the tree out of storage, you remember who helped make it, what movie was on in the background, or how the dog tried to run off with a clothespin halfway through assembly. It becomes part of the rhythm of the season. Some people even make a new one every year in a different style, creating a collection that tells the story of changing tastes, changing homes, and changing holiday traditions.
And then there is the quiet satisfaction of setting the finished tree in place. After the last bead is glued on and the final dusting of glitter has settled onto absolutely everything within a five-foot radius, you put the tree on the shelf or table and step back. It is handmade. It is a little silly. It is unexpectedly beautiful. And it feels good, not just because it turned out well, but because you made something warm and festive with your own hands. In a season that can sometimes become too rushed or too polished, that simple feeling is worth a lot.