Some Halloween decorations whisper, “Boo.” Others kick open the tiny front door, rattle the plastic shutters, and announce, “Welcome to the creepiest real estate listing on the block.” A DIY haunted dollhouse sits proudly in the second category. It is small enough for a mantel, shelf, entry table, or party centerpiece, but dramatic enough to make guests stop and say, “Wait, did you make that?”
The best part? You do not need to be a professional miniaturist, prop designer, or person who owns fourteen types of tweezers. You can turn an old dollhouse into a spooky Halloween haunted house with paint, glue, thrifted odds and ends, dollar-store accessories, miniature decorations, and a little creative chaos. Whether you find a faded plastic dollhouse at a yard sale or rescue a wooden one from the attic, this project is one of the most satisfying Halloween DIY decorations because it transforms something sweet into something deliciously eerie.
This guide walks you through the full process: choosing a dollhouse, prepping it, painting it, adding haunted details, lighting it safely, and styling it like a miniature mansion where the ghosts definitely have strong opinions about wallpaper.
Why a Dollhouse Makes the Perfect DIY Haunted House
A dollhouse already has everything a haunted house needs: rooms, windows, doors, stairs, rooflines, and the slightly unsettling feeling that someone tiny might be watching you. Instead of building a Halloween display from scratch, you are starting with a ready-made structure. That saves time, reduces cost, and gives you plenty of creative surfaces to decorate.
A haunted dollhouse also works with many Halloween styles. Paint it matte black and add skeletons for a classic spooky look. Use gray, moss green, burgundy, and antique gold for a gothic mansion. Add pink pumpkins, glitter bats, and tiny ghosts for a cute Halloween dollhouse that is more “friendly phantom” than “sleep with the lights on.”
Because the project is compact, it is great for apartments, dorm rooms, small homes, classrooms, offices, and anyone who wants Halloween decor without turning the living room into a full haunted corn maze. It can be kid-friendly, elegant, creepy, funny, or all of the above.
Supplies You Will Need
You can keep this project inexpensive by shopping your craft stash first. Old ribbon, scrapbook paper, broken jewelry, cardboard, faux moss, and tiny plastic toys can all become haunted house details. The goal is not perfection. In fact, the more weathered and weird your materials look, the better.
Basic Materials
- An old plastic or wooden dollhouse
- Mild soap, water, and a cleaning cloth
- Fine-grit sandpaper or sanding sponge
- Painter’s tape or masking tape
- Plastic primer or bonding primer, especially for plastic dollhouses
- Black, gray, white, brown, purple, green, and orange acrylic paint
- Spray paint suitable for the dollhouse material
- Small paintbrushes and foam brushes
- Hot glue gun or strong craft glue
- Cardboard, craft sticks, chipboard, or balsa wood
- Battery-operated LED tea lights or fairy lights
Spooky Decorative Extras
- Mini skeletons, bats, spiders, pumpkins, cats, ghosts, or ravens
- Faux spiderwebs
- Miniature Halloween signs
- Scrapbook paper for wallpaper or flooring
- Cheesecloth for curtains
- Faux moss, twigs, pebbles, and bark
- Toothpicks or craft sticks for boarded windows
- Black lace, ribbon, beads, and chains
- Mod Podge or another decoupage medium
Do not worry if you do not have every item. A haunted dollhouse is forgiving. Crooked boards? Haunted. Uneven paint? Haunted. A tiny skeleton glued slightly sideways? Clearly, he has been through a lot.
Step 1: Choose the Right Dollhouse
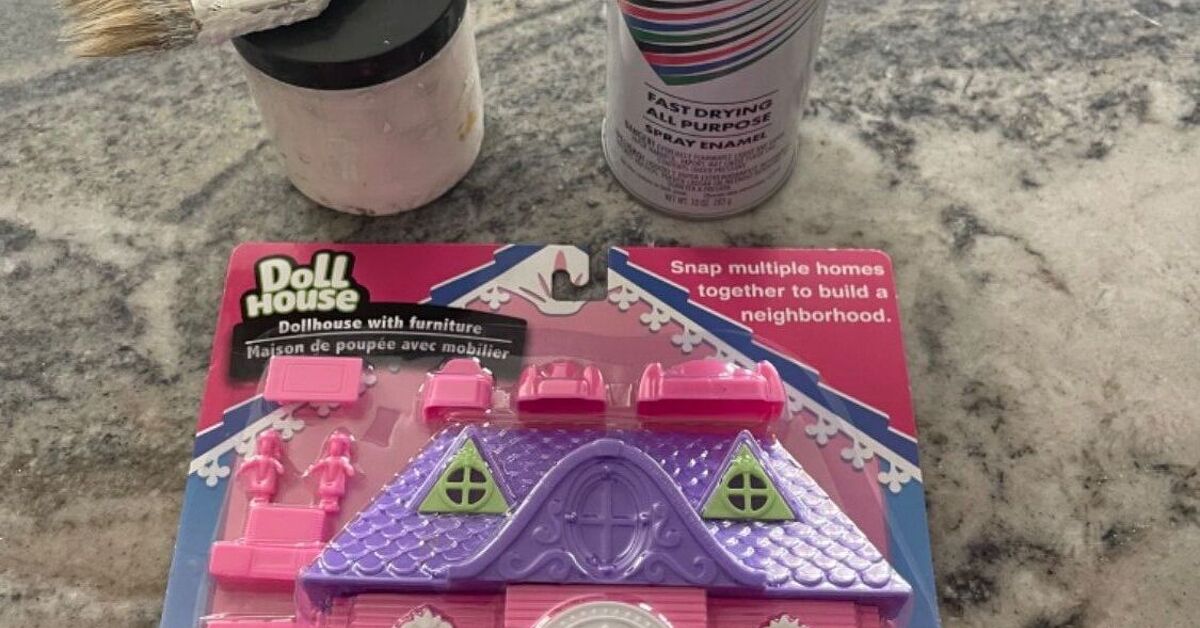
The best dollhouse for this project is one you will not feel guilty transforming. Check thrift stores, garage sales, online marketplaces, neighborhood groups, and your own storage spaces. Plastic toy dollhouses are especially popular because they are lightweight, affordable, and often full of molded details that look amazing once painted dark.
Wooden dollhouses are also excellent, especially if you want a more realistic gothic look. They usually accept paint well and can be sanded, stained, or distressed. Cardboard or MDF dollhouses work too, but they need gentler handling and should be kept indoors away from moisture.
Before you buy, look at the roof shape, window placement, porch, balconies, and interior rooms. Turrets, arches, stairs, shutters, and railings all add personality. A slightly damaged dollhouse can be perfect because missing pieces are easy to turn into “abandoned mansion” features.
Step 2: Clean and Prep the Dollhouse
Even the spookiest mansion deserves a bath before the haunting begins. Wash the dollhouse with mild soap and warm water to remove dust, grease, stickers, and mystery smudges from its previous life. Let it dry completely before painting.
If the surface is glossy plastic, lightly sand it so primer can grip better. You do not need to sand aggressively. A gentle scuffing is enough. Wipe away sanding dust with a clean cloth. If the dollhouse has removable furniture, doors, or accessories, take them off and paint them separately.
For plastic dollhouses, primer is your best friend. A bonding primer or plastic primer helps the paint adhere and reduces peeling later. For wooden dollhouses, primer can help create an even base and cover bright colors. Think of primer as the spell that keeps your haunted makeover from flaking off like cursed wallpaper.
Step 3: Pick a Haunted House Color Scheme
A strong color palette makes the whole project look intentional. The classic approach is matte black with gray dry-brushing, but there are many ways to create a spooky effect.
Classic Haunted Mansion
Use black, charcoal, gray, dusty white, and brown. This look feels abandoned, smoky, and timeless. It works beautifully with skeletons, ravens, boarded windows, and flickering LED lights.
Gothic Glam
Try black, deep purple, burgundy, antique gold, and dark emerald. Add lace curtains, tiny portraits, chandeliers, and ornate trim. This is the haunted house where the ghosts drink tea from tiny cups and judge your posture.
Kid-Friendly Spooky Cute
Use black, orange, lavender, lime green, white, and silver glitter. Add smiling ghosts, mini pumpkins, candy signs, and friendly bats. This style is great for families and classrooms because it feels festive rather than frightening.
Abandoned Witch Cottage
Use weathered brown, moss green, gray, black, and muted orange. Add twigs, faux moss, potion bottles, crooked fences, and a tiny broom by the door.
Step 4: Paint the Base Coat
Once the dollhouse is clean, dry, and primed, apply your base coat. Spray paint is fast and gives smooth coverage, especially on plastic, but always use it outdoors or in a well-ventilated area according to the label directions. If you prefer more control, use acrylic craft paint and a foam brush.
Black is the easiest base color because it instantly unifies mismatched surfaces. Dark gray is another great option if you want to see more architectural details. For a dramatic look, paint the exterior black and the interior walls in dusty purple, faded green, or smoky gray.
Let the first coat dry fully before adding another. Rushing dry time is how fingerprints become permanent residents. Two light coats are usually better than one thick coat, especially on plastic. Thick paint can drip, pool in corners, and hide the little details that make the dollhouse interesting.
Step 5: Add Depth with Dry-Brushing
Dry-brushing is the magic trick that makes a painted toy look like an aged haunted mansion. Dip a brush into gray, white, silver, or brown paint, then wipe most of it off on a paper towel. Lightly drag the nearly dry brush across raised areas such as roof shingles, bricks, shutters, railings, and trim.
This technique highlights texture and creates the look of dust, weathering, and age. Use gray or white on black surfaces for a moonlit effect. Use brown around doors, railings, and roof edges for dirt and decay. Use green in corners and along the base to suggest moss or mildew. Congratulations, you are now professionally aging a tiny house. Very niche. Very powerful.
Step 6: Create Boarded Windows and Broken Details
Nothing says “do not enter” like boarded-up windows, which naturally makes everyone want to look closer. Cut craft sticks, toothpicks, thin cardboard, or balsa wood into small strips. Paint them brown or gray, then dry-brush with black for age. Glue them across windows at uneven angles.
You can also create broken shutters, crooked doors, cracked siding, and damaged roof shingles. Cut small pieces of cardboard into shingle shapes and glue them onto the roof in overlapping rows. Leave a few tilted or missing to make the house look neglected.
For broken glass, cut jagged pieces from clear plastic packaging and glue them carefully inside window frames. Keep sharp edges away from children and pets. If safety is a concern, skip real-looking broken pieces and use black paper silhouettes instead.
Step 7: Decorate the Interior Rooms
The outside gets attention first, but the inside is where your haunted dollhouse becomes irresistible. Each room can tell a tiny story. A kitchen might have potion bottles and a cauldron. A bedroom might have a cheesecloth ghost floating over the bed. A parlor might have crooked portraits, a skeleton guest, and a spider who has clearly taken over the lease.
Use scrapbook paper as wallpaper and flooring. Dark florals, black-and-white stripes, vintage damask, faux wood, and checkered patterns all work well. Attach paper with decoupage medium or double-sided tape. If you want a temporary design, use removable adhesive dots instead of permanent glue.
Small accessories make the scene come alive. Turn beads into potion bottles, cardboard into books, bottle caps into tables, and scraps of lace into curtains. A tiny mirror can be made from silver paper and a cardboard frame. A rug can be cut from felt or patterned fabric. The more little surprises you add, the longer people will stare at the finished piece.
Step 8: Add Exterior Landscaping
A haunted house needs a creepy yard. Place the dollhouse on a wood plaque, tray, foam board, or cardboard base so you can build a full scene around it. Paint the base black, gray, or brown, then add faux moss, pebbles, twigs, mini pumpkins, and little tombstones.
Make a crooked fence from craft sticks or toothpicks. Glue small twigs together for dead trees. Cut tombstones from cardboard or foam and paint them gray, then add funny names with a fine marker. Try “Barry D. Alive,” “Anita Nap,” or “Ima Goner” if your Halloween style includes dad jokes wearing a cape.
A path leading to the front door helps guide the eye. Use small stones, painted cardboard, or textured paper. Add a tiny welcome mat with “Enter If You Dare” written on it. The more the display feels like a miniature world, the more memorable it becomes.
Step 9: Use Lighting for Maximum Spookiness
Lighting is what turns a cute craft into a Halloween centerpiece. Battery-operated LED tea lights, fairy lights, or small puck lights can make windows glow and shadows dance. Orange lights create a jack-o’-lantern feel, purple lights add a haunted party mood, and warm white lights give the house an old mansion glow.
Place lights behind windows, under staircases, or inside rooms. You can tape or glue lights in place, but make sure battery packs remain accessible so you can turn them on and replace batteries. Never use real candles inside or near a dollhouse. Paper, paint, glue, fabric, faux moss, and plastic are not exactly famous for their calm relationship with open flame.
If your lights use button or coin batteries, keep the battery compartment secured and keep the finished decoration away from young children and pets. For a family-friendly display, choose lights with enclosed battery packs and screws that hold the compartment shut.
Step 10: Add Final Haunted Details
Now comes the fun part: the finishing touches. Stretch faux spiderwebs across the roof, porch, and windows. Add mini spiders, bats, ghosts, skeletons, pumpkins, black cats, and ravens. Use black thread to hang bats from ceilings or balconies. Cut silhouettes from black cardstock and place them in windows for an eerie shadow effect.
For extra texture, dab brown and green paint along corners, rooflines, and the foundation. Add a little white paint to railings and edges to make them look dusty. Glue tiny chains around doors, add warning signs, or place a skeleton hand reaching out of a window. The goal is to create layers so the eye keeps discovering new details.
Stop before the house becomes too crowded. A few strong focal points are better than a miniature yard sale hosted by a vampire. Step back, squint, and ask yourself what stands out. If every inch screams, nothing screams.
Temporary vs. Permanent Haunted Dollhouse Makeover
Before you start gluing bats to the roof with wild abandon, decide whether this haunted dollhouse is a permanent Halloween decoration or a temporary makeover for a child’s toy.
Permanent Makeover
If the dollhouse is thrifted, broken, outdated, or no longer used for play, go ahead with primer, spray paint, hot glue, and permanent accessories. This gives you the most dramatic result and turns the dollhouse into a reusable Halloween decoration you can display every year.
Temporary Makeover
If the dollhouse still belongs to a child or you want to return it to normal after Halloween, use removable decorations. Try painter’s tape, removable adhesive dots, paper bats, mini garlands, small pumpkins, and battery lights. Add fabric or paper panels without painting the original surface. This version is less intense but still charming, and it avoids the awkward conversation where someone asks why their dollhouse now looks like Dracula bought it at auction.
Common Mistakes to Avoid
The most common mistake is painting without cleaning or priming, especially on plastic. Paint may peel if the surface is dusty, glossy, or oily. Another mistake is using too much hot glue, which can create visible blobs. Use small dots of glue and hold pieces in place until secure.
Do not overload the house with accessories before the base design is finished. Paint, dry-brushing, roof details, window boards, and lighting should come first. Decorations are the final layer, not the foundation.
Also, do not forget scale. Miniature decorations do not need to be perfect, but extremely large accessories can make the house look cluttered. Choose a few oversized items only if you want a playful, whimsical effect.
Budget-Friendly Ideas for a DIY Haunted Dollhouse
You can make a haunted dollhouse on a surprisingly small budget. Start with a thrifted dollhouse or one you already own. Use cardboard instead of buying miniature wood. Make tombstones from packaging foam. Turn cotton balls into spiderweb clumps. Cut bats from black construction paper. Use old jewelry pieces as gothic wall decor.
Dollar-store Halloween sections are treasure chests for this project. Look for small skeletons, plastic spiders, mini pumpkins, faux webs, LED tea lights, creepy cloth, and tiny signs. Craft stores often carry miniature Halloween accessories, but you do not need to buy everything new. A clever handmade detail often looks better than a store-bought one because it gives the house character.
How to Display Your Haunted Dollhouse
Place your finished haunted dollhouse where people can see the details up close. A mantel, bookshelf, console table, entryway bench, buffet, or windowsill can all work. Add a black cloth, faux cobwebs, pumpkins, taper candles in holders, or a stack of old books around the base to create a larger Halloween vignette.
If you are hosting a Halloween party, use the dollhouse as a centerpiece for a dessert table or drink station. Put it near a bowl of candy, a tray of cookies, or a sign that says “Open House: Spirits Welcome.” For photos, turn on the LEDs and dim nearby lights. The glow through the miniature windows will make the house look wonderfully eerie.
Personal Experience: What This Project Teaches You
The first thing you learn when turning a dollhouse into a DIY haunted house is that Halloween crafting rewards imperfection. In many DIY projects, a crooked line feels like a problem. Here, it becomes atmosphere. A chipped railing looks abandoned. A paint smudge becomes soot. A slightly uneven roof shingle looks like it survived a century of storms, curses, and possibly one very dramatic raccoon.
One of the most enjoyable experiences is watching the dollhouse change personality layer by layer. At first, it may look like a cheerful toy that has no idea what is coming. After the primer, it looks strange. After the black paint, it suddenly becomes mysterious. Once dry-brushing begins, the details pop out, and the house starts looking like a miniature movie set. By the time the windows are boarded and the LED lights are glowing, the transformation feels almost magical.
This project is also a great reminder that creativity does not always require expensive materials. Some of the best details come from scraps. A torn piece of cheesecloth becomes a ghost curtain. A twig becomes a dead tree. A cardboard rectangle becomes a grave marker. A broken necklace becomes a chandelier. When you start seeing ordinary items as miniature haunted decor, your craft drawer turns into a tiny prop department.
If you work on this project with kids, it becomes even more memorable. Children are excellent at spooky storytelling. They may decide which room belongs to the witch, where the skeleton sleeps, why the ghost lives in the attic, and which tiny pumpkin is “the boss pumpkin.” Their ideas can make the dollhouse funnier, stranger, and more original than a perfectly styled version. For younger children, focus on removable decorations and safer materials. Let them place pumpkins, paper bats, stickers, and soft spiderwebs while an adult handles cutting, hot glue, spray paint, and lighting.
For adults, the project can be surprisingly relaxing. Painting tiny trim and arranging miniature scenes requires focus, but not the stressful kind. It is the kind of focus that quiets your brain for a while. You get to make creative decisions quickly: Should the attic have a ghost? Obviously. Should the porch have a skeleton dog? Absolutely. Should the bathroom have a tiny mummy? That is between you and your design conscience.
The biggest lesson is to build in stages and let each layer dry before rushing forward. A haunted dollhouse looks best when it has depth. Start with structure, then paint, then aging, then lighting, then accessories. If you add everything at once, the details can compete. If you build slowly, every choice has a place.
When Halloween ends, storing the dollhouse safely is worth the effort. Remove loose accessories if needed, wrap delicate pieces in tissue, and place the house in a sturdy box. Next year, you can bring it out again and add new details. Maybe the ghosts get a garden. Maybe the witch opens a bakery. Maybe the skeleton finally fixes the porch railing. A DIY haunted dollhouse can grow into an annual tradition, with new rooms, jokes, and spooky surprises each season.
Conclusion
Turning a dollhouse into a DIY haunted house for Halloween is one of those rare crafts that is affordable, creative, reusable, and wonderfully dramatic. You can keep it simple with black paint and LED lights or go all in with wallpaper, boarded windows, miniature furniture, creepy landscaping, and gothic details. The project works for beginners, families, seasoned crafters, and anyone who believes Halloween decor should have a little personality.
Start with a dollhouse, give it a dark base coat, add weathered texture, fill it with spooky miniatures, and let safe battery lighting bring the whole scene to life. The finished piece will look like a tiny haunted mansion with a big Halloween attitude. And if anyone asks whether the house is actually haunted, just smile and say, “Only after 9 p.m.”