Painting walls sounds simple until you are standing in the middle of the room holding a roller, staring at a wall like it personally insulted your ancestors. The good news? You do not need to be a professional painter to get a smooth, clean, “wait, did you hire someone?” finish. You just need the right tools, a smart order of operations, patience, and the courage to stop saying, “I’ll just paint around the furniture.”
This beginner’s guide walks you through how to start painting walls like a pro, from choosing paint and prepping the room to cutting in, rolling, drying, and fixing common beginner mistakes. Whether you are refreshing a bedroom, giving your living room a new personality, or finally covering that “temporary” beige from 2009, this wall painting guide will help you work cleaner, faster, and with fewer emergency trips to the hardware store.
Why Wall Painting Is Mostly Preparation
Here is the secret professional painters know: the actual painting is not the hardest part. The prep is. A beautiful wall finish depends on clean surfaces, patched holes, smooth sanding, protected floors, and the right primer. Skipping prep is like baking a cake in a dirty pan and hoping frosting fixes everything. It will not.
Before opening a paint can, inspect the walls. Look for nail holes, cracks, peeling paint, grease, dust, dents, water stains, and glossy areas. Paint does not hide texture problems; it often highlights them. If a wall has bumps, dust, or old flaking paint, your new color may look uneven even if you bought premium paint.
Tools and Supplies You Need Before You Start
A beginner can paint walls well with basic tools, but quality matters. Cheap brushes shed bristles. Cheap rollers leave fuzz. Cheap painter’s tape can bleed. You do not need a professional truck full of equipment, but you do need reliable supplies.
Essential Wall Painting Tools
- Interior wall paint in your chosen color and finish
- Primer, especially for patched areas, dark colors, stains, or new drywall
- 2-inch or 2.5-inch angled brush for cutting in
- Roller frame and roller covers
- Extension pole for better reach and control
- Paint tray and disposable tray liner
- Painter’s tape
- Drop cloths or plastic sheeting
- Spackle or patching compound
- Putty knife
- Fine-grit sanding sponge or sandpaper
- Microfiber cloths or tack cloth
- Screwdriver for removing switch plates and outlet covers
- Work light or lamp to reveal missed spots
For most smooth interior walls, a 3/8-inch nap roller is a good beginner-friendly choice. For textured walls, you may need a thicker nap so the paint reaches into the surface. Use an extension pole even in small rooms. It helps you roll with your whole arm instead of your wrist, which gives a smoother finish and saves your shoulders from staging a rebellion.
Choose the Right Paint Finish
Paint color gets all the attention, but paint finish is the quiet hero. The finish affects durability, shine, cleanability, and how much wall texture shows. A flat finish hides imperfections but is harder to clean. Eggshell and satin finishes are popular for living rooms, bedrooms, hallways, and family spaces because they offer a soft look with better durability. Semi-gloss is usually better for trim, doors, bathrooms, and high-moisture areas.
Beginner-Friendly Paint Finish Guide
- Flat or matte: Best for low-traffic rooms and imperfect walls.
- Eggshell: Great for bedrooms, dining rooms, and living rooms.
- Satin: Good for hallways, kids’ rooms, kitchens, and areas that need light cleaning.
- Semi-gloss: Best for trim, doors, cabinets, and moisture-prone areas.
- Gloss: Durable and shiny, but it shows flaws and can be tricky for beginners.
If you are unsure, eggshell is a safe choice for many interior walls. It looks polished without turning your wall into a mirror. For bathrooms or busy family zones, satin may be smarter because it handles cleaning better.
Step 1: Plan the Room Before Painting
Start with a plan. Decide whether you are painting only the walls or also the ceiling, trim, doors, and baseboards. The order matters. A common professional sequence is ceiling first, then trim, then walls, then baseboards if needed. If you are only painting walls, you can focus on protecting the ceiling line, trim, flooring, outlets, and furniture.
Measure the room so you buy enough paint. One gallon of paint usually covers about 350 to 400 square feet, depending on wall texture, color change, and paint quality. Dark colors, porous surfaces, and dramatic color changes may require primer and two coats. Buying too little paint is annoying. Buying a little extra is practical. Buying six extra gallons because you “felt ambitious” is how garages become paint museums.
Step 2: Clear and Protect the Space
Move furniture out of the room if possible. If not, shift it to the center and cover it completely. Remove wall art, curtains, curtain rods, switch plates, outlet covers, vents, and small fixtures. Place screws in labeled bags or tape them to the back of the item they belong to. Future you will be grateful.
Cover floors with canvas drop cloths if you have them. Plastic sheeting is useful but slippery, so be careful. Tape down edges where needed. Do not assume you are “too careful” to drip paint. Paint has a talent for finding flooring, socks, pets, and anything expensive.
Step 3: Clean the Walls
Walls collect dust, cooking residue, fingerprints, pet fur, candle soot, and mysterious smudges that no one in the house will confess to making. Clean walls before painting so the paint bonds properly. Start by dusting or vacuuming baseboards and corners. Then wipe walls with a damp microfiber cloth. For greasy areas, especially kitchens, use a mild cleaner and rinse with clean water.
Let the walls dry completely before sanding, priming, or painting. Painting over damp walls can lead to poor adhesion and uneven results. If there is mildew, water damage, or active moisture, solve that issue before painting. Paint is not a repair strategy; it is a finish.
Step 4: Patch Holes and Sand Smooth
Use spackle or patching compound to fill nail holes, small dents, and minor cracks. Apply with a putty knife, slightly overfill the hole, and let it dry according to the product instructions. Once dry, sand the patch until it feels smooth and level with the wall.
Run your hand over the repaired spot. If you can feel a ridge, you will probably see it after painting. Wipe away sanding dust with a tack cloth or damp cloth. Dust left on the surface can create a gritty finish, which is excellent if you are painting a beach-themed wall and terrible for everything else.
Step 5: Use Painter’s Tape the Right Way
Painter’s tape helps beginners protect trim, ceilings, windows, and built-ins. Apply tape in straight sections and press the edge firmly with your finger or a putty knife. This helps prevent bleed-through. Do not stretch the tape as you apply it; stretched tape can lift or curve.
For the cleanest line, remove tape while the paint is still slightly wet or score the edge gently with a utility knife once dry. Pull the tape back at an angle. If you yank it straight out like you are starting a lawn mower, you may peel up fresh paint.
Step 6: Prime When Needed
Primer creates a uniform surface and helps paint adhere. You do not always need to prime an entire room, but you should prime bare drywall, patched areas, stains, repaired spots, glossy surfaces, and walls going from very dark to very light or light to very dark. A tinted primer can be helpful under rich colors like navy, red, charcoal, emerald, or deep brown.
Spot-prime patches at minimum. Without primer, patched areas can absorb paint differently and show up as dull spots called flashing. Flashing is one of those painting problems you notice only after cleanup, which is rude but common.
Step 7: Cut In Before Rolling
Cutting in means painting the edges and corners with a brush before using a roller. Use a 2-inch or 2.5-inch angled brush. Dip only about one-third of the bristles into the paint, tap off excess, and paint a narrow band along the ceiling line, corners, trim, windows, and baseboards.
Work in manageable sections. Do not cut in the entire room and then take a long lunch. For the smoothest blend, roll while the brushed paint is still wet. This is called maintaining a wet edge, and it helps prevent visible lines between brushed and rolled areas.
Step 8: Load the Roller Correctly
Pour paint into the tray. Lightly dampen a new roller cover with water if you are using latex paint, then remove excess moisture. You can also roll painter’s tape over a new roller cover to pull away loose lint. Dip the roller into the paint and roll it over the tray ridges until it is evenly loaded but not dripping.
A roller should sound soft and full, not dry and scratchy. Do not press hard to squeeze more paint out of it. Reload instead. Pressing too hard creates roller marks, uneven texture, and a tired arm. Let the roller do the work. It was literally built for this.
Step 9: Roll the Wall Like a Pro
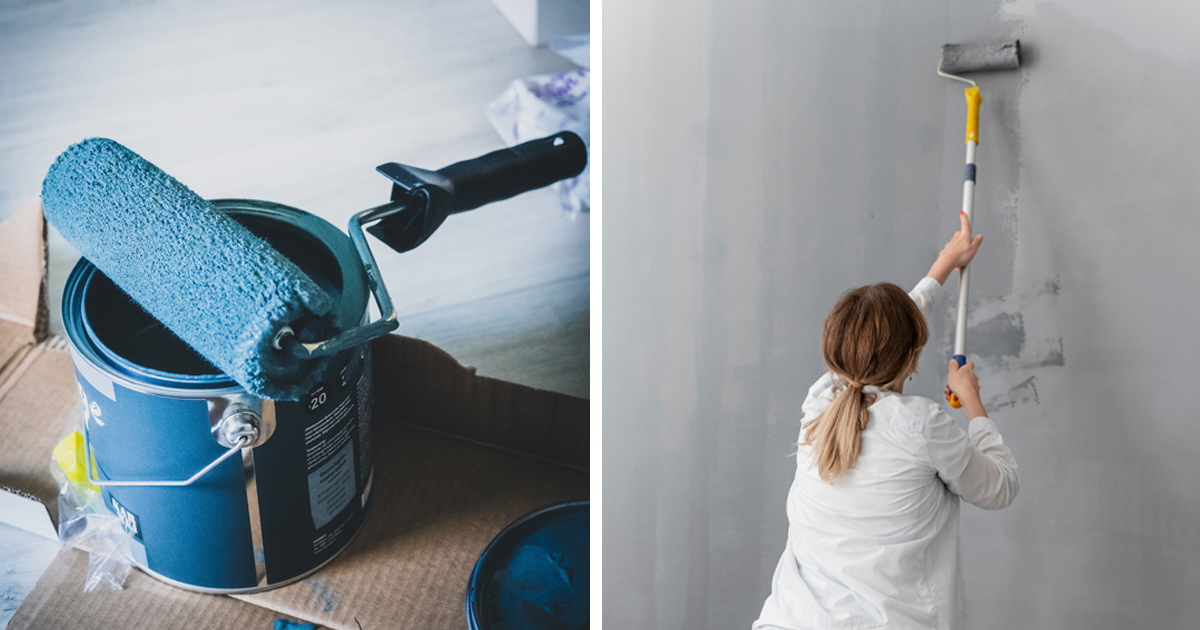
Start a few inches away from the edge and roll paint onto the wall in a “W” or “M” pattern, then fill in the open spaces with overlapping vertical strokes. Work in small sections, roughly three to four feet wide. Move from top to bottom, keeping a wet edge as you go.
Overlap each pass slightly. Avoid random rolling in every direction. That may feel productive, but it can leave uneven texture. After covering a section, lightly roll from ceiling toward floor with gentle pressure to even out the finish. This final smoothing pass helps reduce lap marks and roller lines.
Step 10: Apply a Second Coat
Most walls look better with two coats. The first coat builds coverage; the second coat gives depth, consistency, and durability. Follow the drying time printed on the paint can before recoating. Dry-to-touch is not always the same as ready-to-recoat.
Use the same method for the second coat: cut in, roll in sections, keep a wet edge, and avoid overworking the paint. Once paint starts to set, brushing or rolling over it repeatedly can create drag marks. Sometimes the most professional thing you can do is leave the wall alone.
Common Beginner Painting Mistakes to Avoid
Painting Over Dirty Walls
Dust and grease interfere with adhesion. Clean first, paint second. Your wall is not a napkin.
Skipping Primer on Problem Areas
Patches, stains, raw drywall, and dramatic color changes often need primer. Paint alone may not hide them evenly.
Using the Wrong Roller Nap
A roller that is too thin may not cover textured walls. A roller that is too thick can create heavy texture on smooth walls.
Letting the Edge Dry
Lap marks happen when wet paint overlaps dry paint. Work in sections and keep moving across the wall.
Removing Tape Too Late
If tape stays on too long, it can pull up dried paint. Remove carefully and follow the tape manufacturer’s guidance.
Safety Tips Before You Paint
Open windows when possible and use fans for ventilation. Choose low-VOC or zero-VOC paint if indoor air quality is a concern. Wear old clothes, gloves if desired, and eye protection when sanding overhead or painting ceilings.
Important note: If your home was built before 1978, be cautious with sanding or scraping old paint. Older homes may contain lead-based paint, and disturbing it can create hazardous dust. Consider using a lead test kit or hiring a certified lead-safe professional before doing prep work on old painted surfaces.
How to Clean Up After Painting
Seal leftover paint tightly and label the can with the room name, date, and surface painted. Clean brushes and rollers according to the paint type. For latex paint, warm water and mild soap usually work. Do not pour large amounts of paint down the drain. Follow local disposal rules for leftover paint.
Remove drop cloths after paint is dry enough that dust will not stick to it. Reinstall switch plates and outlet covers once the walls are fully dry. Step back, admire your work, and pretend you were calm the entire time.
Beginner Experience: What Painting Walls Teaches You
The first time you paint a wall, you learn quickly that confidence and preparation are not the same thing. Confidence says, “This will take two hours.” Preparation says, “Where is the painter’s tape, and why is there a mysterious dent behind the bookshelf?” If you are a beginner, give yourself more time than you think you need. Painting is not difficult, but it rewards patience.
One of the best experiences you can have as a new painter is testing your color before committing. Paint a sample on the wall and look at it in the morning, afternoon, and evening. A color that looks warm and cozy in the store may look strangely cold under your home’s lighting. Natural light, bulb temperature, flooring, furniture, and nearby colors all affect how paint appears. The tiny sample card is useful, but it is not magic.
You will also discover that the room gets messier before it gets better. Once furniture is moved, outlet covers are removed, walls are patched, and drop cloths are everywhere, the project may feel dramatic. That is normal. Good prep looks chaotic for a while. The key is to keep everything organized. Put tools in one area, keep lids on paint cans when not pouring, and wipe drips immediately. Wet paint is forgiving. Dry paint has hired a lawyer.
Another practical lesson is that cutting in takes practice. Your first ceiling line may wobble a little. Do not panic. Use painter’s tape if it helps, or practice with a brush in a less visible corner. Hold the brush like a pencil, use steady pressure, and move slowly. A high-quality angled brush makes a huge difference. Many beginners blame themselves for messy lines when the real villain is a bargain-bin brush with the precision of a broom.
Rolling also has a learning curve. At first, beginners often press too hard because they want every drop of paint out of the roller. This creates lines and uneven coverage. A better habit is to reload the roller more often and use gentle pressure. Work in small sections and overlap your passes. Once you find a rhythm, rolling becomes surprisingly satisfying. It is basically home improvement meditation, except your arms get tired and your playlist suddenly matters a lot.
The most rewarding moment comes after the second coat dries. The room feels cleaner, brighter, and more intentional. Even if the color is subtle, freshly painted walls can make old furniture look better and the whole space feel updated. You may notice small flaws, because you know exactly where every patch and brushstroke is. Most guests will not. They will simply see a fresh room and assume you have your life together. Let them.
Finally, painting teaches you not to rush the finish. Let the paint dry properly before pushing furniture back against the walls, hanging art, or scrubbing smudges. Fresh paint can feel dry before it fully cures. Treat the walls gently for the first couple of weeks. Your patience will help the finish stay smooth and durable.
If you approach wall painting as a step-by-step process instead of a one-day miracle, you will get better results. Prep carefully, use the right tools, keep a wet edge, apply two coats, and clean up like someone who respects tomorrow morning. That is how beginners start painting walls like prosnot by being perfect, but by following the habits that make a professional finish possible.
Conclusion
Learning how to start painting walls like a pro is less about secret tricks and more about smart basics. Clean the walls, repair damage, protect the room, choose the right paint finish, prime when needed, cut in carefully, roll with consistent technique, and give each coat enough drying time. Do those things, and your walls will look smoother, cleaner, and far more professional.
For beginners, the biggest win is slowing down during preparation. A rushed paint job often looks rushed. A thoughtful one looks intentional, polished, and surprisingly expensive. With the right supplies and a little patience, you can transform a room without calling a contractor, draining your budget, or turning your floor into abstract art. Your walls are ready. Your roller is ready. Now all that is left is choosing the color you will either love forever or repaint in six months. Either way, you now know how to do it right.