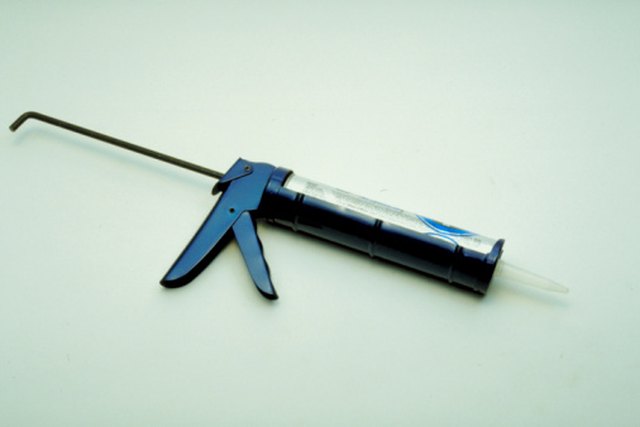
Silicone caulk is one of those tiny home-improvement heroes that quietly protects your countertop from water, crumbs, grease, and the mysterious sticky stuff that appears near the sink even when nobody admits to cooking. But when it gets stained, cracked, moldy, loose, or smeared like a bad frosting job, that same heroic sealant becomes a stubborn little villain.
The good news? You can remove silicone caulking from a countertop without damaging the surface if you use the right tools, take your time, and resist the urge to attack it like you are opening a package with kitchen scissors. Whether your countertop is laminate, quartz, granite, solid surface, tile, or butcher block, the goal is the same: soften the old silicone, cut it carefully, lift it away, clean the residue, and prep the joint for fresh caulk.
This guide walks you through the safest, most practical way to remove silicone caulk from a countertop, including what tools to use, which solvents to test first, how to avoid scratches, and when to stop before your “quick fix” turns into a countertop crime scene.
Why Silicone Caulk Is So Hard to Remove
Silicone caulk is designed to stick. That is its entire personality. It bonds tightly to smooth surfaces, stays flexible after curing, and resists water better than many acrylic or latex caulks. That is why it is commonly used around kitchen sinks, bathroom vanities, backsplashes, and countertop seams.
The problem starts when silicone gets old. Over time, it can shrink, discolor, collect grime, peel at the edges, or trap mildew. Once that happens, applying new caulk over the old bead is rarely a good solution. Fresh silicone usually does not bond well to dirty, glossy, or partially cured old silicone residue. In other words, if you caulk over old caulk, you may get a nice-looking bead for about five minutesand then the betrayal begins.
For a durable repair, old silicone must be removed completely. That includes the thick bead you can see and the thin invisible film left behind after scraping.
Before You Start: Know Your Countertop Surface
Not all countertops tolerate tools and solvents the same way. A razor blade may work beautifully on glass tile or ceramic, but it can scratch softer materials if used carelessly. Acetone may be useful on some surfaces but risky on others. Before you begin, identify your countertop material and choose the gentlest method that will do the job.
Laminate Countertops
Laminate is common, affordable, and surprisingly tough, but it can scratch or dull if you use aggressive blades or harsh chemicals. Use a plastic scraper first. If you need a blade, keep it nearly flat and work slowly.
Quartz Countertops
Quartz is durable, but the resin in engineered stone can be sensitive to strong solvents and prolonged chemical exposure. Avoid soaking the surface with acetone or caulk remover unless the product label says it is safe for quartz. Always spot-test first.
Granite and Marble Countertops
Natural stone can be scratched, etched, or stained, especially if it is unsealed. Marble is more delicate than granite and reacts poorly to acidic cleaners. Use plastic tools whenever possible and avoid vinegar on marble or limestone.
Solid Surface Countertops
Solid surface materials, such as acrylic-based counters, can usually be repaired if lightly scratched, but that does not mean you should go wild with a metal scraper. Start with a plastic caulk removal tool and a mild remover.
Butcher Block or Wood Countertops
Wood is the most sensitive surface in this project. It can absorb solvents, stain, and dent under sharp tools. Use minimal liquid, avoid soaking, and scrape gently with a plastic tool.
Tools and Supplies You Will Need
You do not need a truckload of professional gear to remove silicone caulk from a countertop. Most of the job comes down to patience and the right combination of cutting, scraping, softening, and cleaning.
- Plastic caulk removal tool or plastic putty knife
- Utility knife with a sharp blade
- Single-edge razor blade or scraper, if safe for your surface
- Needle-nose pliers
- Commercial silicone caulk remover
- Isopropyl alcohol, mineral spirits, or denatured alcohol
- Soft cloths or paper towels
- Nylon scrub pad or soft-bristle brush
- Painter’s tape
- Dish soap and warm water
- Gloves and eye protection
- Hair dryer, optional
- Vacuum or small brush for debris cleanup
A quick warning before the fun begins: do not use steel wool, coarse sandpaper, a screwdriver, a chisel, or your favorite steak knife. Your countertop deserves better, and so does the steak knife.
Step-by-Step Guide: How to Remove Silicone Caulking From a Countertop
Step 1: Clear and Clean the Area
Remove everything from the countertop near the caulk line. That includes soap dispensers, countertop appliances, dish racks, toothbrush cups, decorative jars, and the random bottle of cleaner that has been standing there since 2019.
Wash the area with warm water and a few drops of dish soap. This removes surface grease, food residue, and grime so you can see the caulk clearly. Dry the area completely before cutting. Wet silicone is slippery, and slippery silicone plus a sharp blade is not the DIY moment anyone wants.
Step 2: Protect the Countertop and Backsplash
Apply painter’s tape along both sides of the caulk bead if you are worried about scratches or solvent contact. This is especially helpful near painted backsplashes, wood trim, porous stone, or delicate countertop finishes.
The tape will not stop a blade from causing damage if you press too hard, but it can protect nearby surfaces from smears of softened silicone and accidental solvent drips.
Step 3: Score the Edges of the Silicone
Use a sharp utility knife to score along the top and bottom edges of the silicone bead. Hold the blade at a shallow angle and let the sharp edge do the work. Do not dig into the countertop or backsplash.
If the caulk runs between a countertop and a backsplash, score where the silicone meets each surface. If it is around a sink, cut along the edge where the silicone touches the sink rim and again where it touches the countertop.
The goal is to break the bond on both sides so the bead can lift away in strips. Think of it as politely separating the silicone from the countertopnot launching a demolition campaign.
Step 4: Peel Away the Main Bead
Once the caulk has been scored, use your fingers or needle-nose pliers to grab a loose end. Pull slowly and steadily. If luck is on your side, a long strip will peel away like a rubbery noodle. If luck is not on your side, it will come off in tiny annoying pieces. Both outcomes are normal.
When the caulk resists, do not yank hard. Yanking can chip brittle edges, pull paint from a backsplash, or damage a weak seam. Instead, cut a little deeper along the bond line and continue peeling.
Step 5: Use a Plastic Scraper for Stubborn Sections
After the main bead is removed, small chunks usually remain. Use a plastic scraper or caulk removal tool to lift them. Hold the scraper low, almost parallel to the countertop, and push gently under the silicone.
Plastic tools are slower than metal blades, but they are much safer for laminate, quartz, solid surface, and stone. If the silicone is too hard, move to the softening step instead of forcing it.
Step 6: Soften Remaining Silicone
Silicone residue is famous for pretending it is gone while secretly leaving behind a thin film. That film can prevent new caulk from bonding. To soften it, use a commercial silicone caulk remover or a compatible solvent such as isopropyl alcohol, mineral spirits, or denatured alcohol.
Always read the product label and test in an inconspicuous area first. Apply a small amount to the residue, let it sit for the recommended time, and then scrape with a plastic tool. Some removers work in minutes; others need longer contact time. More time is not always better, especially on sensitive materials.
If you prefer a less chemical-heavy approach, gently warming the silicone with a hair dryer can make it more flexible. Use low or medium heat, keep the dryer moving, and avoid overheating stone, laminate, adhesive seams, or painted areas.
Step 7: Carefully Use a Razor Blade Only When Appropriate
A razor blade can be useful on hard, smooth surfaces such as glass tile, ceramic tile, or some sink rims. On countertops, use it only if you are confident the surface can handle it.
Hold the blade at a very shallow angle and glide it under the silicone residue. Never use the corner of the blade like a pick. That is how scratches happen. If you feel resistance, stop and soften the residue again.
For quartz, marble, laminate, and wood, a razor blade should be a last resort. A plastic scraper and patience are usually safer than one heroic scrape followed by regret.
Step 8: Scrub Away the Final Film
Once the visible silicone is gone, clean the joint with a nylon scrub pad, soft brush, or cloth dampened with a safe cleaner. Work along the seam until the surface feels smooth rather than slick.
Silicone residue often feels slightly greasy or rubbery. If your cloth drags over the area or you see shiny patches, keep cleaning. New caulk needs a clean, dry, residue-free surface to bond properly.
Step 9: Wash, Rinse, and Dry Thoroughly
After using any remover or solvent, wash the area with mild dish soap and warm water. Rinse with a clean damp cloth, then dry completely. Solvent residue, soap film, moisture, and dust can all interfere with new caulk.
If the seam is near a sink, give the area extra drying time. Water can hide under the edge of a sink rim or in the gap between a countertop and backsplash. A dry towel followed by air-drying is a smart move.
Step 10: Inspect Before Re-Caulking
Run your finger along the seam. It should feel clean and dry, with no bumps, loose crumbs, or stretchy silicone bits. Look closely from different angles under good light. Silicone residue can be sneaky, especially on light-colored counters.
If you plan to apply new caulk, this inspection matters. New silicone performs best when it bonds directly to the countertop and adjoining surfacenot to old residue, dust, or yesterday’s coffee splash.
Best Ways to Remove Silicone Caulk Residue
Removing the main bead is only half the battle. The residue is where many DIYers get frustrated. Here are the safest options, starting with the gentlest.
Plastic Scraper and Warm Soapy Water
This is the best first step for delicate countertops. It may not remove every trace of cured silicone, but it can clear loose pieces and reduce how much solvent you need.
Isopropyl Alcohol
Isopropyl alcohol can help clean and degrease the area after scraping. It is often useful for final wipe-downs, but it may not fully dissolve thick cured silicone.
Mineral Spirits
Mineral spirits can help loosen silicone residue on many surfaces, but it should be used carefully. Ventilate the room, wear gloves, and test first.
Commercial Silicone Caulk Remover
A silicone caulk remover is made specifically to soften sealant so it can be scraped away more easily. This is helpful when the caulk is old, thick, or stuck in a narrow seam. Follow the dwell time on the label and do not assume that “more product” equals “better results.” Sometimes it just equals “more mess.”
Acetone
Acetone is powerful, but it is not countertop-friendly in every situation. It can damage some finishes, dull surfaces, affect resins, or discolor materials. Use only if the countertop manufacturer or product label confirms it is safe, and test first.
What Not to Do When Removing Silicone Caulk
A few common mistakes can turn a simple caulk removal project into an expensive repair. Avoid these countertop disasters:
- Do not caulk over old silicone. It usually leads to poor adhesion and early peeling.
- Do not use excessive force. If the silicone will not lift, soften it instead of gouging it.
- Do not skip the residue removal. Invisible silicone film can ruin the bond of new caulk.
- Do not mix chemicals. Use one cleaner at a time and rinse thoroughly between products.
- Do not soak porous stone or wood. Too much liquid can stain, swell, or weaken the surface.
- Do not use abrasive pads on glossy finishes. They can dull the surface permanently.
How to Remove Silicone Caulk Around a Sink
Sink edges are one of the most common places to find old silicone caulk. They are also one of the trickiest because the caulk may be tucked under the sink rim.
Start by cutting along the edge of the sink where the caulk meets metal, porcelain, composite, or stone. Then cut along the countertop side. Peel away the bead slowly. If the sink is undermounted, be extra cautious. You do not want to disturb the sink support or damage the seal between the sink and underside of the counter.
For drop-in sinks, old caulk may collect around the rim. Use a plastic scraper and work in short sections. If residue remains, apply a small amount of silicone remover to a cloth rather than flooding the seam. Scrape, wipe, and repeat until the rim is clean.
How to Remove Silicone Caulk Between a Countertop and Backsplash
The joint between a countertop and backsplash needs flexible caulk because the two surfaces can move slightly. That movement is exactly why grout often cracks in this location and why silicone is commonly used.
To remove old caulk from this seam, score both edges carefully. The backsplash side may be tile, stone, painted drywall, stainless steel, or laminate, so adjust your tool pressure accordingly. A plastic caulk remover is especially useful here because it can ride along the corner without digging in.
After peeling away the bead, clean the corner with a soft brush and safe solvent. Let the joint dry fully before re-caulking. A wet or dusty corner is basically an eviction notice for your new caulk.
When Should You Replace Silicone Caulking?
You should remove and replace silicone caulking when it is cracked, peeling, mold-stained, loose, missing in sections, or no longer sealing the gap. You may also need to replace it when installing a new sink, updating a backsplash, refinishing a countertop, or switching from a messy old bead to a cleaner finish.
In kitchens and bathrooms, caulk does more than look neat. It helps prevent water from slipping behind cabinets, under sink rims, or into wall gaps. Ignoring failed caulk can lead to swelling, stains, odors, mildew, and hidden water damage.
Tips for Re-Caulking After Removal
Once the old silicone is gone, you may want to apply a fresh bead. For countertop areas exposed to moisture, choose a kitchen and bath silicone sealant or a high-quality 100% silicone caulk designed for wet locations.
Here are a few tips for a cleaner result:
- Make sure the seam is completely clean and dry.
- Apply painter’s tape on both sides of the joint for crisp lines.
- Cut the caulk tube nozzle small; you can always make the opening bigger.
- Apply a steady, even bead without stopping every inch.
- Tool the bead immediately with a caulk tool or gloved finger.
- Remove painter’s tape while the caulk is still wet.
- Let the caulk cure according to the label before exposing it to water.
The secret to good caulking is not squeezing more product into the gap. It is applying the right amount, smoothing it once, and then walking away before you “fix” it into a lumpy disaster.
Common Problems and Quick Fixes
The Silicone Comes Off in Tiny Pieces
This usually means the caulk is old, brittle, or still bonded tightly in spots. Score both edges again, warm it gently with a hair dryer, or apply a silicone remover and let it soften before scraping.
There Is a Shiny Film Left Behind
That shiny film is likely silicone residue. Wipe with a compatible solvent, scrub gently with a nylon pad, and repeat until the surface no longer feels slick.
The Countertop Looks Dull After Cleaning
Stop using the solvent immediately. Rinse the area with mild soap and water, dry it, and check the countertop manufacturer’s care instructions. Some finishes can be sensitive to strong chemicals.
The New Caulk Will Not Stick
The most common causes are leftover silicone residue, moisture, soap film, grease, or dust. Remove the new caulk, clean the seam again, let it dry fully, and reapply.
Safety Notes for Solvents and Caulk Removers
Even household solvents deserve respect. Work with ventilation, especially in small bathrooms or kitchens without good airflow. Wear gloves, keep products away from flames, and close containers when not in use. If a product label says not to use it on a certain material, believe the label. It is not being dramatic.
Also, never combine cleaning chemicals. Mixing products can create dangerous fumes or damage surfaces. Use one product, clean it off, and then move to another only if needed.
Real-World Experience: What Removing Silicone Caulk From a Countertop Is Actually Like
In theory, removing silicone caulk sounds simple: cut, peel, wipe, done. In real life, it is usually more like: cut, peel one satisfying strip, celebrate too soon, discover residue, scrape, mutter, apply remover, wait, scrape again, question your life choices, then finally admire a clean seam. That is normal. Silicone is not difficult because the steps are complicated. It is difficult because it is stubborn in a quiet, rubbery way.
One practical lesson from countertop projects is that the first five minutes set the tone. If you rush in with a metal blade before cleaning the area, you are more likely to slip, scratch, or grind grit into the surface. A simple wipe-down with dish soap and water makes a bigger difference than most people expect. Grease and crumbs can hide the true edge of the caulk bead, especially around kitchen sinks where cooking oil and soap residue build up.
Another experience-based tip: plastic tools are underrated. Many homeowners reach for a razor blade because it feels more “serious,” but a plastic scraper often removes 80 percent of the material with far less risk. It is slower, yes, but slow is beautiful when the alternative is a permanent scratch across a countertop you see every morning while making coffee.
The hardest areas are usually corners, sink rims, and the tiny gap where a backsplash meets the counter. In these spots, silicone can stretch instead of breaking cleanly. When that happens, the best move is to stop pulling and score the bead again. Pulling harder usually does not help. It just turns one problem into three smaller, stickier problems.
Residue removal is where patience pays off. After the visible caulk is gone, run your finger over the surface. If it feels slick, waxy, or slightly rubbery, silicone is still there. New caulk may look fine at first, but it can peel later if the old film remains. A careful wipe with a tested solvent, followed by soap-and-water cleaning and complete drying, gives the new bead a much better chance of lasting.
It also helps to think like a painter. Good prep work is half the final result. If you plan to re-caulk, tape the edges, cut a small nozzle opening, and apply less caulk than your instincts suggest. Thick beads look messy and take longer to cure. A narrow, even bead usually seals better and looks more professional.
Finally, do not schedule this project right before guests arrive. Silicone removal is not the kind of job that appreciates pressure. Give yourself time to clean, dry, inspect, and re-caulk properly. The reward is a countertop seam that looks fresh, seals tightly, and no longer makes you stare at it with mild resentment while brushing your teeth or washing dishes.
Conclusion
Removing silicone caulking from a countertop is a careful project, not a brute-force battle. Start by cleaning the area, score the caulk with a sharp blade, peel away the main bead, soften stubborn residue, scrape gently, and finish with a thorough wash and dry. The biggest rule is simple: protect the countertop first. A little patience can save you from scratches, stains, and a repair bill that makes old caulk look charming by comparison.
Whether you are refreshing the seam behind a kitchen sink, cleaning up a bathroom vanity, or preparing for a new bead of silicone, complete removal is the key to a neat and lasting result. Old silicone may be stubborn, but with the right tools and a calm approach, it does not stand a chance.
Note: Always spot-test solvents and caulk removers in a hidden area before using them on the visible countertop surface.