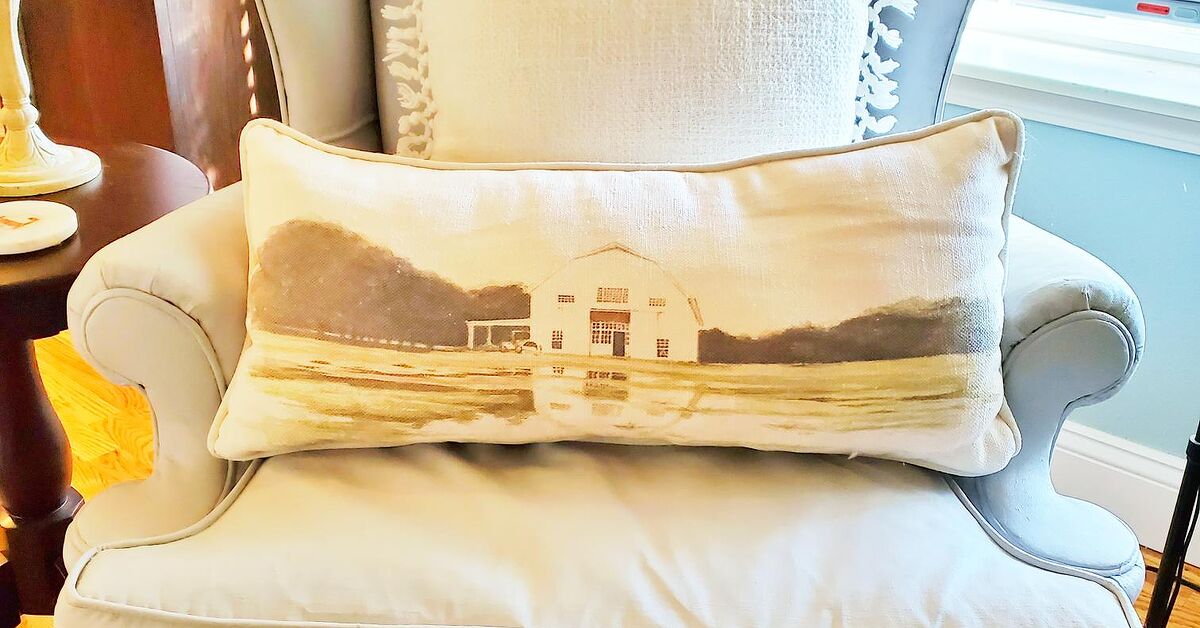
That tired upholstered chair in the corner may look as though it is waiting for a ride to the landfill, but do not schedule the farewell just yet. If its frame is sturdy and its fabric is still intact, chalk paint can give it a dramatic second act without the expense or complexity of full reupholstery.
Painting fabric sounds suspiciously like one of those projects invented after someone stared at leftover paint for too long. Done correctly, however, it can produce an attractive, durable finish that resembles dyed canvas, aged linen, or even soft leather. The secret is not simply brushing regular-strength paint onto the chair and hoping for a miracle. Successful upholstery painting depends on water, thin layers, patient drying, light sanding, and choosing the right chair in the first place.
This guide explains how to paint a fabric chair with chalk paint from preparation through curing, including the mistakes that can turn a charming accent chair into a piece of colorful patio armor.
Can You Really Use Chalk Paint on Upholstery?
Yes, certain chalk-style paints can be used on upholstery, provided the paint manufacturer approves the product for fabric. When diluted with water and worked into damp fibers, chalk paint behaves less like a thick surface coating and more like a highly pigmented fabric stain. It changes the upholstery color while preserving more flexibility than an undiluted coat would.
The finished chair will not feel exactly like untouched fabric. Even an excellent result usually feels more like painted canvas, heavy linen, or softened leather. That texture can be perfectly suitable for an accent chair, dining chair, desk chair, or decorative bench. It may be less desirable on a plush chair used for long movie marathons, naps, and negotiations with the family dog.
Chalk Paint Is Not Chalkboard Paint
Chalk paint is a decorative, water-based paint known for its matte appearance and strong adhesion. Chalkboard paint creates a writable surface for actual chalk. Using chalkboard paint on upholstery would give you a chair suitable for grocery lists, but not necessarily sitting.
Choose the Right Fabric Chair
The chair itself has more influence on the result than the fanciness of your brush. Painting works best when the upholstery is structurally sound, clean, firmly attached, and made from a relatively tight weave.
Good Candidates
- Cotton, linen, canvas, and tightly woven fabric blends
- Firmly upholstered dining chairs and accent chairs
- Lightly textured fabric without a deep pile
- Chairs with faded color but no major tears
- Pieces used occasionally rather than constantly
More Difficult Candidates
- Velvet, velour, chenille, and other fabrics with a pronounced nap
- Loose weaves that expose the cushion beneath
- Very soft, overstuffed cushions that compress deeply
- Stained upholstery with grease, smoke, mildew, or persistent odors
- Cracked faux leather or fabric that is already shedding
Velvet can be painted, but its pile must be brushed, painted, sanded, and groomed carefully. Expect a significant change in texture. For a first attempt, a tightly woven cotton or linen-blend chair is much more forgiving.
Supplies You Will Need
- Chalk paint or chalk-style furniture paint approved for fabric
- Clean spray bottle filled with water
- Small container for mixing diluted paint
- Synthetic-bristle paintbrush or flat upholstery brush
- Vacuum with an upholstery attachment
- Mild upholstery cleaner or gentle soap
- Lint-free cloths
- Painter’s tape
- Drop cloth or plastic sheeting
- Fine-grit sandpaper, approximately 220 to 320 grit
- Small detail brush for piping, buttons, and seams
- Optional chalk-paint wax approved for the chosen paint system
- Gloves and appropriate room ventilation
A dense synthetic brush generally provides better control than a fluffy natural-bristle brush. You are trying to massage diluted color into the fibers, not frost a cake with paint.
How to Paint a Fabric Chair With Chalk Paint: Step by Step
Step 1: Inspect the Chair
Before opening the paint, check the frame, springs, cushion, seams, and fabric. Tighten loose screws and repair unstable joints. Trim loose threads rather than pulling them, which is an excellent way to turn one harmless thread into an unexpected chair deconstruction project.
Press the cushions in several places. If the foam remains collapsed, smells musty, or feels damp, painting is not the appropriate repair. Replace the cushion or consider reupholstery instead.
Step 2: Vacuum and Clean the Upholstery
Vacuum the entire chair, paying particular attention to piping, tufting, buttons, creases, and the area beneath removable cushions. Hair, lint, and crumbs become surprisingly permanent once painted.
Spot-clean marks with a gentle upholstery cleaner compatible with the fabric. Avoid oily cleaners, silicone treatments, and heavy soap residue, all of which can interfere with paint penetration. Allow the chair to dry completely before continuing.
If water causes the original dye to bleed onto a white cloth, use caution. That color may migrate through a pale new finish. A darker paint color or a different chair may be the safer choice.
Step 3: Perform a Hidden Test
Test the complete process on the underside of the chair, behind a cushion, or along a concealed back edge. Apply the diluted paint, let it dry, sand it lightly, and evaluate the color and texture the next day.
This small test reveals how quickly the fabric absorbs water, whether the original dye bleeds, how much paint is required, and whether the final hand is acceptable. Skipping it saves ten minutes and can cost you an entire chair.
Step 4: Protect the Frame and Work Area
Place the chair on a drop cloth in a ventilated room. Remove cushions when possible. Tape wooden legs, decorative nailheads, zippers, labels, and any frame sections that will not be painted.
If you also plan to paint the wooden frame, decide on the order before beginning. Painting the frame first usually makes it easier to tape clean borders around the upholstery after the wood has dried.
Step 5: Dilute the Chalk Paint
Pour a small amount of paint into a separate container. Do not add water directly to the original can because fabric lint, dust, or excess water can contaminate the remaining product.
A practical starting mixture is approximately one part paint to one part water. Thick or absorbent fabric may need more water, while a smooth, tight weave may need less. Some upholstery methods use one part paint to two or even three parts water for the first coat. Follow the instructions for your specific product and use the hidden test to adjust the consistency.
The mixture should resemble light cream rather than frosting. A translucent first coat is normal and preferable to a thick, opaque layer.
Step 6: Lightly Dampen the Fabric
Work on one manageable section at a time. Mist the fabric until it is evenly damp but not soaked. The upholstery should feel cool and slightly moist without releasing water when pressed.
Damp fibers help the diluted chalk paint spread and penetrate more evenly. Oversaturation, however, can carry pigment into the cushion, produce water marks, lengthen drying time, and create conditions that encourage unpleasant odors.
Step 7: Apply the First Thin Coat
Dip the brush into the diluted paint and remove excess against the side of the container. Brush the color into the damp fabric using light strokes in several directions. On woven upholstery, finish each section by brushing with the grain or weave so the surface looks orderly.
Use the brush tip to work paint around seams, buttons, piping, and tufted areas. Do not allow paint to collect in creases. Blot heavy spots immediately with a damp lint-free cloth.
The first coat will probably look uneven, faded, or slightly alarming. This is normal. It is a bonding and staining layer, not the grand finale.
Step 8: Let the Chair Dry Thoroughly
Allow the first coat to dry completely before sanding or repainting. Depending on the fabric, humidity, ventilation, and amount of water used, this may require several hours or overnight.
Do not judge the color while the upholstery is wet. Chalk paint often appears darker during application and becomes lighter and more matte as it dries. A fan can improve air circulation, but avoid blasting one area so aggressively that it dries differently from the rest.
Step 9: Sand the Fabric Gently
Once the chair is fully dry, sand the painted upholstery lightly with 220- to 320-grit sandpaper. Use minimal pressure and move with the fabric’s weave. The objective is to remove raised fibers and tiny paint particles, not erase the coat you just applied.
Vacuum or brush away all sanding dust. This step makes an enormous difference in softness. It is also strangely satisfying, rather like petting a chair while pretending to be productive.
Step 10: Add Additional Thin Coats
Mist the upholstery lightly again and apply a second diluted coat. You can make this mixture slightly stronger if the first coat absorbed evenly. Continue applying light layers until the color is consistent, allowing each coat to dry completely and sanding gently between coats.
Most chairs require two or three coats. A dramatic change from a dark patterned fabric to a pale solid color may require more and may never become perfectly uniform. Choosing a new shade similar in depth to the original upholstery usually produces a softer finish with less paint.
Step 11: Decide Whether to Seal the Fabric
Sealing requirements vary by paint brand and desired texture. Some chalk-paint systems recommend a very thin application of clear wax, while others offer a flexible spray wax or do not require a topcoat on fabric.
Wax can deepen the color, improve wipeability, and create a leather-like hand. Too much can make the chair greasy, stiff, or prone to transferring residue onto clothing. Test the finish in the hidden area before treating the entire chair.
Avoid applying a rigid polyurethane or heavy furniture lacquer to ordinary upholstery unless the manufacturer specifically approves it. A hard finish may crack when the cushion flexes.
Step 12: Allow the Finish to Cure
Dry paint is not necessarily cured paint. Keep the chair out of regular service for at least the period stated on the product label. Depending on the paint and optional finish, gentle use may be possible after a few days, while full curing can take longer.
During this period, avoid wet cleaning, heavy pressure, pets, dark jeans, and enthusiastic children holding markers. The chair has already experienced enough personal growth for one week.
How to Keep Painted Upholstery Softer
The most common complaint about painted fabric is stiffness. Fortunately, most severe stiffness is caused by technique rather than the mere presence of paint.
- Use more thin coats instead of fewer thick coats. Heavy paint sits on top of the fibers and creates a shell.
- Dilute the first coat generously. It should penetrate the weave rather than conceal everything immediately.
- Keep the fabric lightly damp during application. Paint glides across damp fibers more evenly.
- Sand after every fully dried coat. Fine sanding removes rough pigment and raised fibers.
- Stop when coverage is acceptable. One unnecessary coat can be the difference between painted linen and portable drywall.
- Choose a compatible color. Moving from beige to navy is easier than moving from black floral fabric to ivory.
Common Chalk-Painted Chair Problems
The Fabric Feels Hard or Crunchy
The paint was probably too thick, applied to dry fabric, or allowed to build up on the surface. Let it dry fully, sand gently, and brush away the residue. If another coat is necessary, dilute it more heavily.
The Color Looks Streaky
Uneven moisture, inconsistent paint dilution, or incomplete drying can cause streaks. Apply the next thin coat section by section, maintaining a wet edge and stirring the mixture frequently.
Paint Cracks When Someone Sits Down
Cracking generally indicates excessive paint buildup, a rigid sealer, or upholstery that flexes more than the finish can tolerate. Sand loose areas and touch them up with a very thin mixture. Severe cracking may mean the chair was not a good candidate for painting.
The Original Pattern Still Shows
A dark or high-contrast print may remain faintly visible beneath lighter paint. Add another thin coat or embrace the subtle pattern as texture. Continuing until every trace disappears can make the fabric uncomfortably stiff.
The Chair Has Blotchy Dark Areas
The fabric may have absorbed water unevenly, or an old stain may be migrating through the finish. Allow the piece to dry for a full day before deciding what to do. If the blotch remains, test a darker color in a concealed location.
Care and Maintenance
Vacuum painted upholstery gently with a soft brush attachment. Blot spills promptly with a barely damp cloth instead of scrubbing. Avoid soaking the fabric, using steam cleaners, or applying strong solvents unless the paint manufacturer specifically permits them.
High-contact edges may eventually show wear. Save a small amount of the mixed color formula for future touch-ups. Lightly clean and sand the worn area before applying another thin coat.
Use the chair realistically. A painted vintage accent chair can remain attractive for years under moderate use. A chalk-painted recliner shared by three children, two dogs, and a bowl of cheese puffs is participating in a much harsher laboratory trial.
Experience-Based Lessons From Realistic Chair Makeovers
The following observations reflect common outcomes reported across upholstery-painting projects and practical testing. They are useful because the official steps sound simple, while actual chairs have seams, stains, mysterious fibers, and opinions of their own.
The Hidden Test Is More Important Than the Color Swatch
A paint chip shows the color of paint on paper, not how diluted pigment will react with upholstery. Beige fabric can warm a blue paint into teal. Red fibers can make cream appear pink. Synthetic upholstery may resist the first coat and then absorb the second with surprising enthusiasm.
A complete test patch should include drying and sanding. Freshly painted fabric often feels unpleasant, but it can soften considerably after it dries and receives a light sanding. Judging the project ten minutes after the first brushstroke is like reviewing bread while it is still dough.
The First Coat Usually Looks Terrible
Many successful projects pass through an awkward stage in which the chair appears patchy, damp, and generally worse than before. The first coat should not provide perfect coverage. When it does, it is often too thick.
The better approach is to treat the first layer as a translucent stain. Work it into the fibers, remove puddles, and walk away. Once dry, the surface becomes more uniform, and the second coat has something consistent to grip.
Water Control Matters More Than Brush Brand
Expensive brushes are helpful, but moisture control determines whether the paint penetrates evenly. A section that is too dry tends to develop visible brush marks and surface buildup. A section that is soaking wet can produce runs, water rings, and very slow drying.
Working in small sections is easier than misting the entire chair at once. Dampen one arm, paint it, and move to the next area. On large chair backs, divide the upholstery mentally into panels and complete each panel before advancing.
Seams Consume More Paint Than Flat Areas
Piping, tufting, and folds absorb paint rapidly and can remain darker than surrounding fabric. A small detail brush helps push diluted color into these areas without flooding them. After brushing a seam, inspect it from several angles because unpainted slivers have a remarkable ability to remain invisible until the chair is back in the living room.
Darkening the Chair Is Usually Easier
Changing tan upholstery to charcoal, faded blue to navy, or pale gray to forest green generally requires less paint than covering dark fabric with white. Similar-depth transformations preserve texture because fewer coats are needed.
When a pale final color is essential, expect additional coats and accept that the chair may feel more like painted canvas. A medium-tone color is often the best compromise between complete transformation and comfortable texture.
Sanding Is the Step People Regret Skipping
Before sanding, dried chalk paint may feel dusty and rough. A gentle pass with fine-grit paper removes the brittle particles sitting above the weave. After vacuuming, the fabric often feels dramatically better.
More force is not more effective. Aggressive sanding can expose the original color on raised areas and damage delicate fibers. Light pressure, several passes, and frequent hand checks produce a more controlled result.
Paint Cannot Repair Bad Upholstery
Paint is excellent at changing color and disguising mild fading. It cannot restore collapsed foam, remove deep odors, mend torn seams, or stabilize fabric that is disintegrating. Projects are most satisfying when the chair is ugly but fundamentally healthy.
If the cushion smells after cleaning and drying, the odor is probably inside the padding. Painting over it creates a more attractive chair that still smells unfortunate. At that point, replacing the foam or reupholstering is the honest solution.
Patience Produces the Professional Finish
The temptation to add another coat before the previous one dries is strongest when the chair looks uneven. Resist it. Wet layers trap moisture, drag pigment, and make sanding impossible. Overnight drying between heavily diluted coats may feel slow, but it reduces nearly every common problem.
The best projects are usually completed over several days: cleaning on day one, initial painting on day two, additional coats and sanding on day three, and curing afterward. Chalk paint is marketed as fast and easy, but the chair does not know it is in an advertisement.
Final Thoughts
Learning how to paint a fabric chair with chalk paint is less about artistic talent and more about restraint. Select a sound chair, test the fabric, dilute the paint, maintain light moisture, and build the color through thin layers. Let every coat dry completely and sand gently before continuing.
The final upholstery will feel different, but different does not have to mean uncomfortable. A carefully painted chair can resemble aged canvas or supple leather while adding an entirely new color to the room. It also keeps a usable piece of furniture out of the waste stream and gives you the satisfaction of answering, “You painted the fabric?” every time someone compliments it.
Just remember the golden rule: when in doubt, add less paint. You can always apply another thin coat. Removing a thick one from a tufted chair is the kind of character-building experience nobody requested.