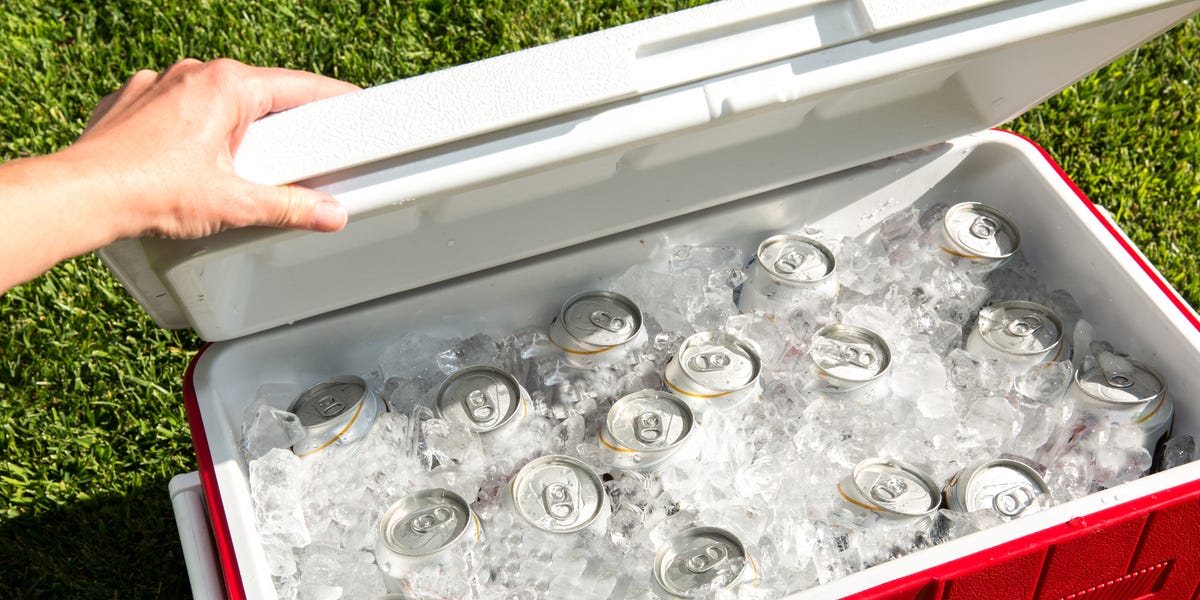
A cooler looks like a simple plastic box, but packing one well is a small exercise in thermal engineering. Toss room-temperature soda, a package of chicken, and three lonely ice cubes inside, and you have not packed a cooleryou have created a lukewarm bacterial waiting room.
Whether you are planning a picnic, camping for a weekend, tailgating before a game, or driving across several states, the goal is the same: keep perishable food at 40°F or below, make the ice last, and prevent raw food from leaking onto anything ready to eat. The following cooler-packing method combines practical outdoor techniques with established U.S. food-safety guidance.
Choose the Right Cooler for the Trip
Before buying ice, match the cooler to the length and style of your outing. A lightweight soft-sided cooler is convenient for lunch, the beach, or a short hike. A hard-sided model generally offers thicker insulation and better cold retention for camping, fishing, road trips, and multi-day events.
Do not automatically choose the largest cooler in the garage. A half-empty 100-quart chest contains a great deal of warm air that your ice must cool. Select a model you can fill tightly with food and cold sources while still being able to lift it safely. Large hard coolers can become impressively heavy once loadedless “portable picnic box,” more “refrigerated furniture.”
Consider Using Two Coolers
If space permits, pack food and beverages separately. The drink cooler will be opened frequently, especially once everyone discovers that opening the lid and staring into it does not produce new beverage choices. Keeping perishable food in another cooler reduces exposure to warm air and helps it remain cold longer.
A separate cooler for raw meat is even better. It minimizes the risk that leaking juices will contaminate salads, fruit, cheese, sandwiches, or other ready-to-eat foods.
Prepare Everything Before Packing
Clean and Inspect the Cooler
Wash the interior with warm water and mild dish soap, rinse it thoroughly, and let it dry. Check the lid, gasket, drain plug, hinges, and zipper for damage. A loose plug or poorly sealed lid allows cold air to escape and can turn the trunk into a shallow indoor lake.
Wash produce under clean running water before packing it, including fruits with rinds or peels. Clean hands, utensils, and work surfaces before preparing food. Outdoor dining does not grant bacteria a vacation day.
Pre-Chill the Cooler
A cooler stored in a hot garage can absorb a surprising amount of cooling energy. Bring it indoors the night before the trip. Several hours before packing, fill it with sacrificial ice, frozen bottles, or cold water. Discard that ice or water immediately before adding fresh cold sources and food.
Pre-chilling is helpful even with a premium cooler. Insulation slows heat transfer; it does not magically remove heat already trapped inside the box.
Chill or Freeze the Contents
Refrigerate drinks and food before loading them. Whenever appropriate, freeze meat, bottled water, juice boxes, sauces, and prepared meals. Frozen food functions as an additional cold source and can thaw gradually during a longer trip.
Never expect cooler ice to chill a large quantity of warm food while also keeping everything else safely cold. A case of room-temperature beverages can consume a considerable portion of your cooler’s cooling capacity before the trip has properly begun.
Select the Best Ice and Cold Sources
The most effective setup usually combines several types of cold sources:
- Block ice melts slowly and provides long-lasting cooling.
- Ice cubes cool quickly and fit around cans, containers, and irregular spaces.
- Frozen gel packs are reusable, tidy, and useful around foods that should remain dry.
- Frozen water bottles act like blocks of ice and become drinking water after thawing.
When freezing bottles, leave expansion space and follow the container manufacturer’s directions. Completely full containers may split as the water freezes.
How Much Ice Should You Use?
For maximum ice retention, many cooler manufacturers recommend approximately two parts ice to one part chilled contents. That ratio may seem excessive, but food safety is not the ideal place to practice extreme ice minimalism.
A day-trip cooler may perform adequately with less ice if everything starts cold and the lid stays closed. Hot weather, direct sun, frequent opening, and multi-day travel require more. Fill remaining gaps with additional ice, frozen bottles, or gel packs. A tightly packed cooler generally stays cold longer than one containing large pockets of air.
How to Pack a Cooler Step by Step
-
Create a cold base. Place block ice, frozen bottles, or large gel packs across the bottom. This helps shield the contents from heat rising through a vehicle floor, boat deck, beach, or warm ground.
-
Add frozen and highly perishable food. Place frozen meals, meat, poultry, seafood, dairy products, and other temperature-sensitive items close to the cold sources.
-
Contain raw food completely. Double-bag raw meat or place it in sturdy, watertight containers. In a shared cooler, raw food belongs at the bottom, below cooked and ready-to-eat items.
-
Add more ice around the food. Pour cubes into open spaces rather than leaving large air gaps. Cold sources should surround the contents, not merely sit nearby like uninterested spectators.
-
Load food in reverse meal order. Pack the final day’s meals at the bottom and the first meal near the top. This prevents extended archaeological digging every time someone wants lunch.
-
Protect delicate items. Keep bread, herbs, berries, eggs, and soft produce near the top in rigid, sealed containers. A hamburger bun that has spent six hours beneath a watermelon rarely emerges with its dignity intact.
-
Finish with a top layer of ice. Cover the food with cubes, gel packs, or an insulated cooler mat. Since warm air enters from the top whenever the lid opens, this final layer provides useful protection.
-
Add a thermometer. Place an appliance or refrigerator thermometer where it can be checked quickly. Keep perishable food at 40°F or colder throughout the trip.
Organize Food for Safety and Convenience
Use Watertight Containers
Melting ice can soak cardboard, dissolve paper labels, and infiltrate poorly closed bags. Repack food into shallow, leakproof containers or heavy-duty zip-top bags. Shallow containers also cool more efficiently and are easier to stack.
Portion ingredients at home. Instead of packing an entire jar of mayonnaise, bring only what the trip requires. Remove bulky outer packaging when doing so does not eliminate essential cooking, allergy, expiration, or food-safety information.
Separate Food by Meal
Group each meal in a labeled bag or container. For example, place the first night’s taco ingredients together and the next morning’s breakfast supplies in another group. This reduces searching time and makes it easier to remove everything needed in one opening.
Keep frequently used snacks near the top. If children will use the cooler, consider giving them a separate snack-and-drink cooler so the main food chest does not experience a lid-opening marathon.
Keep the Cooler Cold During Travel
Transport the cooler in an air-conditioned passenger area when practical, not in a hot trunk. Keep it level, secure it so it cannot slide or tip, and avoid opening it during the drive.
At your destination, place the cooler in deep shade. Remember that shade moves as the sun travels, so the peaceful morning location beside a tree may become a solar oven after lunch. A light-colored towel, sleeping bag, blanket, or reflective cover can provide additional insulation, but do not block any required ventilation.
Open the lid only when necessary and close it immediately. Decide what you want before opening it. Better still, ask whether anyone else needs something so several requests can be handled at once.
Should You Drain Meltwater?
Cold meltwater helps fill air gaps and can slow the melting of remaining ice. Leave it in the cooler if all food is sealed in watertight containers and the water remains cold. Drain some water if it threatens packaging, makes the cooler difficult to handle, or must be removed before adding fresh ice.
Never use meltwater or loose ice from a raw-meat cooler in drinks. If a package leaks, treat the water, ice, and surrounding surfaces as contaminated.
Follow Essential Food-Safety Time Limits
Perishable foods include raw or cooked meat, poultry, seafood, eggs, milk, soft cheese, deli meat, leftovers, cut melon, cut tomatoes, and prepared salads. Keep these foods at 40°F or below.
Once perishable food leaves temperature control, the standard limit is two hours. When the outdoor temperature is above 90°F, that limit drops to one hour. The clock is cumulative: several short periods on a picnic table still count.
Return small serving portions to the cooler promptly instead of placing one large bowl outside for the entire afternoon. If food has remained warm too long, discard it. Smell, taste, and appearance cannot reliably reveal dangerous bacterial growth.
Using Dry Ice in a Cooler
Dry ice can keep frozen food solid, but it requires more care than ordinary ice. Confirm that the cooler manufacturer permits its use. Handle dry ice with insulated gloves and eye protection, and prevent direct contact with skin, food, and the cooler liner.
Dry ice releases carbon dioxide gas as it warms. Never place it in an airtight container, because pressure can build until the container ruptures. Use it only with appropriate ventilation, keep it away from children and pets, and do not transport it in an occupied passenger compartment or other poorly ventilated enclosure. Never add dry ice directly to beverages.
For ordinary picnics and day trips, regular ice, frozen bottles, and gel packs are simpler and safer.
Common Cooler-Packing Mistakes
- Loading warm food, drinks, or a sun-heated cooler.
- Using too little ice or leaving large empty spaces.
- Placing raw meat above fruit, sandwiches, or cooked food.
- Relying on guesswork instead of a cooler thermometer.
- Leaving the cooler in direct sunlight or a parked vehicle.
- Opening the lid repeatedly or leaving it ajar.
- Assuming melted ice automatically means the food is unsafeor assuming cold-looking water proves it is safe.
- Saving food that exceeded safe time or temperature limits.
Cooler-Packing Experiences: Five Lessons From Real-World Outings
The following experience-based scenarios reflect common problems encountered on camping trips, beach days, picnics, and road journeys. They demonstrate why small packing decisions often matter more than the logo printed on the lid.
Experience 1: The Warm-Soda Ice Disaster
Imagine packing a weekend cooler with chilled food, two bags of ice, and a case of soda taken directly from a warm pantry. By the time the vehicle reaches camp, much of the ice has melted. The cooler did not fail; the warm drinks simply demanded an enormous amount of cooling.
The lesson is to refrigerate every beverage in advance. When refrigerator space is limited, chill the most important food first and use a separate drink cooler. Ice should maintain cold contents, not perform an emergency rescue operation on 24 warm cans.
Experience 2: The Search for the Missing Mustard
At a busy picnic, one small condiment can inspire ten minutes of digging. During that search, the lid stays open, cold air escapes, and carefully stacked containers migrate into chaos.
A simple meal map prevents the problem. Put condiments, lunch ingredients, and utensils together near the top. Label bags visibly and tape a contents list beneath the lid. This is particularly helpful during group trips, when the person opening the cooler did not pack it and considers “somewhere near the bottom” a valid storage category.
Experience 3: The Floating Sandwiches
Loose sandwich bags often appear waterproof until several pounds of ice melt around them. Then water reaches the bread, cheese slices drift out of formation, and lunch takes on the texture of a kitchen sponge.
Placing sandwiches in a rigid, sealed container prevents crushing and water damage. The same method protects berries, herbs, deviled eggs, and other delicate food. Containers consume a little more room, but that space is easier to forgive than six soggy sandwiches.
Experience 4: The Cooler That Stayed Colder
Consider two coolers packed with similar food and ice. One sits beside the tent in afternoon sun and opens whenever someone wants a drink. The other remains beneath a canopy and contains only dinner ingredients. By evening, the shaded food cooler predictably has more solid ice.
The difference comes from heat exposure and lid activity, not necessarily equipment quality. Separating drinks from food, planning retrievals, and following the moving shade can noticeably improve performance without buying a new cooler.
Experience 5: The Questionable Last-Day Leftovers
On the final morning of a trip, the cooler may contain cold water but no visible ice. Someone will inevitably argue that the leftover chicken “still feels pretty cool.” Touch is not an accurate thermometer, and enthusiasm is not a recognized food-safety measurement.
If the thermometer shows that perishable food remained at or below 40°F, it may still be safe within its normal storage period. If the temperature history is unknown, the safest decision is to discard it. Planning smaller portions reduces both waste and end-of-trip debates.
Together, these experiences reveal the basic formula for successful cooler packing: start cold, pack tightly, separate risky foods, organize by use, monitor the temperature, and keep the lid closed. Expensive insulation helps, but disciplined packing does most of the daily work.
How to Clean a Cooler After the Trip
Empty the cooler as soon as possible. Discard unsafe leftovers and contaminated ice, then wash the interior, drain, plug, and accessories with warm water and mild detergent. Rinse thoroughly and allow every surface to dry.
Store a hard cooler with the lid slightly open and a soft cooler fully dry and unzipped when its care instructions permit. Air circulation helps prevent mold, mildew, and the mysterious odor that otherwise greets you six months later.
Conclusion
Learning how to pack a cooler is mostly about controlling heat, air, moisture, and access. Pre-chill the cooler, load only cold or frozen contents, use plenty of ice, place raw meat below ready-to-eat food, and organize meals so the lid stays open for seconds rather than minutes.
Keep perishable food at 40°F or colder and follow the two-hour ruleor the one-hour rule when temperatures exceed 90°F. With these habits, your next picnic, camping trip, tailgate, or road adventure should feature cold drinks, fresh food, and considerably fewer conversations beginning with, “Do you think this is still good?”