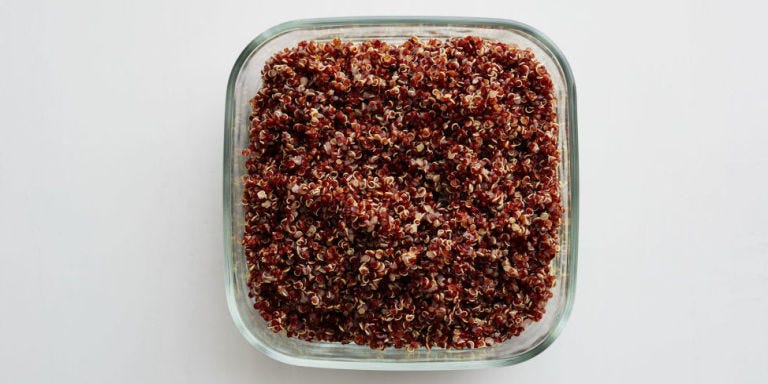
Quinoa has a funny little talent: it looks humble in the bag, cooks faster than many grains, and somehow makes a weeknight dinner feel like you planned aheadeven if your actual plan was “open pantry, hope for the best.” This super-simple quinoa recipe is for anyone who wants fluffy, tender quinoa without babysitting the pot, memorizing complicated ratios, or ending up with a sad, soggy mound that tastes like wet cardboard wearing a health halo.
The good news? Making great quinoa is easy once you understand three basics: rinse it, use the right amount of liquid, and let it rest after cooking. That final resting step is where the magic happens. The steam finishes the texture, the grains loosen up, and suddenly you have a light, nutty, versatile base for bowls, salads, soups, meal prep, breakfast, and quick side dishes.
This guide walks you through the best super-simple quinoa recipe, plus practical tips, flavor ideas, storage advice, troubleshooting, and real-life cooking experience. Whether you are making quinoa for the first time or trying to fix your “why is this mushy?” era, you are in the right kitchen.
What Is Quinoa?
Quinoa is often treated like a grain, but technically it is a seed. In the kitchen, it behaves like a quick-cooking whole grain, which is why you will see it used in salads, pilafs, grain bowls, veggie burgers, breakfast porridges, and healthy dinner sides. It has a mild, nutty flavor and a pleasant little pop when cooked correctly.
One reason quinoa has stayed popular is its nutrition profile. Cooked quinoa provides plant-based protein, fiber, minerals, and naturally gluten-free carbohydrates. It is also considered a complete protein because it contains all nine essential amino acids. That does not mean quinoa has to wear a cape, but it does make it a smart pantry stapleespecially for vegetarian meals, gluten-free cooking, and easy meal prep.
Why This Super-Simple Quinoa Recipe Works
This recipe keeps things beautifully basic. You only need quinoa, water or broth, a pinch of salt, and about 20 minutes. The technique uses a dependable stovetop method: rinse, simmer gently, rest covered, then fluff with a fork.
The secret is not adding more ingredients. The secret is controlling moisture. Too much liquid can make quinoa mushy. Too much heat can cook it unevenly. Skipping the rest can leave it wet and clumpy. When you give quinoa a gentle simmer and a short covered steam, the grains open up without falling apart.
Super-Simple Quinoa Recipe
Ingredients
- 1 cup quinoa, white, red, black, or tri-color
- 1 3/4 cups water or low-sodium vegetable broth
- 1/4 teaspoon fine sea salt or kosher salt
- 1 teaspoon olive oil or butter, optional
Equipment
- Fine-mesh strainer
- Medium saucepan with a tight-fitting lid
- Fork for fluffing
Step-by-Step Instructions
Step 1: Rinse the quinoa
Place the quinoa in a fine-mesh strainer and rinse it under cold running water for about 30 to 60 seconds. Move it around with your fingers or shake the strainer gently so all the tiny seeds get washed. This helps remove saponins, a natural coating that can taste bitter or soapy. Even if the package says “pre-rinsed,” a quick rinse is cheap insurance against funky flavor.
Step 2: Drain well
Shake off as much water as possible. This matters because extra rinse water can throw off the quinoa-to-water ratio. If the quinoa goes into the pot dripping like it just survived a rainstorm, it may cook softer than you want.
Step 3: Combine quinoa, liquid, and salt
Add the rinsed quinoa to a medium saucepan with 1 3/4 cups water or broth and 1/4 teaspoon salt. Broth gives quinoa more savory flavor, while water keeps it neutral for both sweet and savory meals.
Step 4: Bring to a boil
Set the saucepan over medium-high heat and bring the liquid to a boil. Once it bubbles, stir once. Do not stir constantly. Quinoa is not risotto, and it does not need emotional support every 15 seconds.
Step 5: Lower the heat and simmer
Reduce the heat to low, cover the pot, and simmer for 12 to 15 minutes. The quinoa is done when most of the liquid is absorbed, the grains look translucent, and tiny spiral-like tails appear around the seeds.
Step 6: Let it rest
Remove the pot from the heat and let it sit, covered, for 5 to 10 minutes. This step helps the quinoa finish steaming and keeps the texture fluffy instead of wet. Do not skip it unless you enjoy quinoa with the personality of wallpaper paste.
Step 7: Fluff and serve
Remove the lid and fluff the quinoa gently with a fork. Taste and adjust the salt if needed. Serve it warm, cool it for salads, or store it for quick meals throughout the week.
Recipe Yield and Timing
- Prep time: 3 minutes
- Cook time: 12 to 15 minutes
- Rest time: 5 to 10 minutes
- Total time: About 20 to 25 minutes
- Yield: About 3 cups cooked quinoa
- Servings: 4 side-dish servings
Best Quinoa-to-Water Ratio
The most common quinoa ratio is 1 cup quinoa to 2 cups liquid. That works, especially if you like softer quinoa. However, for a fluffier texture, many cooks prefer slightly less liquid: 1 cup quinoa to 1 3/4 cups water or broth. Because rinsed quinoa carries extra moisture into the pot, the slightly reduced liquid helps prevent mushiness.
For firmer quinoa, use 1 1/2 cups liquid per 1 cup quinoa. For softer quinoa, use the full 2 cups. The best ratio depends on your pot, stove, lid fit, and texture preference. Start with 1 3/4 cups, then adjust after your first batch. Cooking is science, but it is also a tiny negotiation with your saucepan.
Should You Toast Quinoa Before Cooking?
Toasting is optional, but it can make quinoa taste nuttier and more fragrant. After rinsing and draining, add the quinoa to a dry saucepan over medium heat. Stir for 2 to 3 minutes until it smells lightly toasted, then add your liquid and salt. Be careful: quinoa is small and can go from nutty to “oops” quickly.
If you are making a super-simple quinoa recipe on a busy night, skip the toasting. If you have a few extra minutes and want deeper flavor, toast away. Your kitchen will smell like you tried harder than you did, which is one of cooking’s greatest little victories.
Water vs. Broth: Which Is Better?
Water is perfect when you want plain quinoa for flexible meal prep. You can use it later in breakfast bowls, salads, wraps, soups, or stir-fries. Broth is better when quinoa will be served as a savory side dish. Vegetable broth, chicken broth, or mushroom broth can make a simple pot taste more complete.
If using broth, choose low-sodium when possible so you can control the salt. You can also add garlic powder, onion powder, bay leaf, lemon zest, or a splash of olive oil for flavor. Keep seasonings simple if you plan to use the quinoa in multiple meals.
How to Know When Quinoa Is Done
Properly cooked quinoa is tender but not mushy. The grains should look slightly translucent, and you should see little white curls around them. Those curls are part of the seed and are a great visual cue that the quinoa has cooked through.
If the quinoa is tender but there is still liquid at the bottom of the pot, remove the lid and cook for another 1 to 2 minutes over low heat. If the liquid is gone but the quinoa tastes crunchy, add 2 tablespoons water, cover, and cook a few more minutes.
Common Quinoa Mistakes and Easy Fixes
Mistake 1: Skipping the rinse
Unrinsed quinoa can taste bitter because of saponins. Fix it by rinsing under cold water before cooking. A fine-mesh strainer is essential because quinoa is tiny and dramatic; it will escape through large holes like it has somewhere important to be.
Mistake 2: Using too much water
If your quinoa turns mushy, reduce the liquid next time. Try 1 3/4 cups liquid per 1 cup quinoa instead of 2 cups.
Mistake 3: Cooking at a hard boil
A strong boil can make quinoa cook unevenly and may cause the pot to foam or overflow. Once it reaches a boil, turn the heat to low and simmer gently.
Mistake 4: Lifting the lid too often
Every peek releases steam. Check near the end of cooking, but avoid opening the pot every minute. Quinoa needs a little privacy.
Mistake 5: Skipping the covered rest
The rest period helps the grains firm up and separate. If your quinoa seems wet right after cooking, give it 5 to 10 minutes covered off the heat before judging it.
Flavor Variations for Simple Quinoa
Lemon Herb Quinoa
After cooking, stir in 1 tablespoon olive oil, 1 tablespoon lemon juice, lemon zest, chopped parsley, and a pinch of black pepper. This version is excellent with grilled chicken, roasted vegetables, salmon, or chickpeas.
Garlic Butter Quinoa
Melt 1 tablespoon butter in the warm pot, then stir in a small grated garlic clove and the cooked quinoa. Add parsley or chives if you have them. This tastes cozy, savory, and suspiciously like you did something fancy.
Southwest Quinoa
Cook quinoa in vegetable broth, then fold in lime juice, cumin, corn, black beans, cilantro, and diced tomatoes. Use it for burrito bowls, tacos, or a quick lunch salad.
Mediterranean Quinoa
Add chopped cucumber, tomatoes, olives, feta, lemon juice, olive oil, and oregano. This turns basic quinoa into a bright, meal-prep-friendly salad.
Breakfast Quinoa
Cook quinoa in water with a tiny pinch of salt. Warm it later with milk, cinnamon, fruit, nuts, and maple syrup. It is like oatmeal’s well-traveled cousin.
What to Serve With Quinoa
Quinoa works with almost anything because its flavor is mild and nutty. Serve it under roasted vegetables, saucy beans, grilled shrimp, baked tofu, chicken, turkey meatballs, or sautéed greens. It can replace rice in many bowls and side dishes, and it adds texture to soups and salads.
For a balanced meal, pair quinoa with protein, vegetables, and a flavorful sauce. A simple bowl might include quinoa, roasted sweet potatoes, kale, chickpeas, avocado, and tahini dressing. Another easy dinner could be quinoa, salmon, steamed broccoli, and lemon-garlic yogurt sauce.
How to Store Cooked Quinoa
Let cooked quinoa cool before storing it. Transfer it to an airtight container and refrigerate for up to 4 days. For meal prep, spread the cooked quinoa on a baking sheet for faster cooling, then pack it into containers once it is no longer steaming.
You can also freeze quinoa. Place cooled quinoa in freezer-safe bags or containers, flatten it into thin portions, and freeze for up to 2 months. Reheat from frozen in the microwave with a splash of water, or thaw overnight in the refrigerator.
How to Reheat Quinoa Without Drying It Out
To reheat quinoa in the microwave, place it in a bowl with 1 to 2 teaspoons water. Cover loosely and microwave until warm, then fluff with a fork. On the stovetop, warm it in a small saucepan over low heat with a splash of water or broth.
If the quinoa is going into a salad, you do not need to reheat it. Cold quinoa has a pleasantly firm texture and absorbs dressings well. In fact, leftover quinoa often makes better salads than freshly cooked quinoa because it has time to settle and separate.
Is Quinoa Healthy?
Quinoa can be a nutritious part of a balanced diet. It provides complex carbohydrates, plant-based protein, fiber, and minerals such as magnesium and iron. Because it is naturally gluten-free, it is useful for people who avoid gluten, though anyone with celiac disease should still check packaging for certified gluten-free labeling to reduce cross-contact risk.
Like any food, quinoa is best enjoyed as part of a varied plate. It is not magic, it will not fold your laundry, and it will not answer emails. But it is a practical, nutrient-dense ingredient that can make quick meals easier and more satisfying.
of Real-Life Experience: What I Learned Making Super-Simple Quinoa Again and Again
The first thing I learned about quinoa is that most disappointing batches are not caused by the quinoa itself. They are caused by impatience. I used to treat quinoa like rice, dump in water, crank the heat, and hope for fluffy results. Sometimes it worked. Sometimes it came out sticky, soggy, and oddly bitter, like it was quietly judging my life choices. The turning point was learning to rinse it well and reduce the water just a little.
For everyday cooking, 1 cup quinoa with 1 3/4 cups liquid has become the most reliable ratio in my kitchen. It gives the grains enough moisture to soften but not so much that they collapse into mush. I also noticed that different pans behave differently. A wide saucepan evaporates liquid faster, while a smaller pot with a tight lid holds steam better. Once you understand that, quinoa becomes less mysterious. You stop blaming the recipe and start adjusting like a calm, capable dinner wizard.
Another experience that changed my quinoa game was using broth instead of water. Plain quinoa is useful, but broth makes it taste like a side dish instead of a blank worksheet. Vegetable broth is my favorite for meal prep because it works with almost everything. If I know I am making Mediterranean bowls, I add lemon zest after cooking. If I am making burrito bowls, I add cumin and lime. If I have no plan at all, I leave it plain and let tomorrow’s lunch decide its personality.
The resting step also deserves applause. When quinoa finishes simmering, it can look a little wet on top, and the temptation is to keep cooking it. But leaving it covered off the heat for 5 to 10 minutes usually fixes the texture. The steam redistributes, the grains separate, and the pot goes from “maybe ruined” to “actually, we are fine here.” Fluffing with a fork instead of stirring with a spoon helps too. A spoon can mash the grains together, while a fork lifts and separates them gently.
I have also learned that cooked quinoa is one of the most forgiving meal-prep ingredients. A container in the fridge can become breakfast with cinnamon and berries, lunch with chickpeas and cucumber, or dinner with roasted vegetables and a fried egg. It can bulk up soup, rescue leftover chicken, or turn random vegetables into something that looks intentional. That is the true beauty of super-simple quinoa: it does not demand attention, but it quietly makes meals easier.
The biggest tip from experience is to taste and season after cooking. Quinoa absorbs flavor, but it still needs help. A pinch of salt, a splash of acid, a drizzle of olive oil, or a spoonful of sauce can wake it up instantly. Think of quinoa as a friendly base, not the whole performance. Give it good partners, and it will show up beautifully every time.
Conclusion
Learning how to make super-simple quinoa is one of those small kitchen skills that pays off all week. Rinse it to remove bitterness, cook it gently with the right liquid ratio, let it rest, and fluff it with a fork. That is it. No complicated technique, no fancy equipment, no culinary degree required.
Once you master the basic recipe, quinoa becomes a flexible foundation for healthy bowls, quick salads, easy side dishes, breakfast bowls, and freezer-friendly meal prep. Use water when you want versatility, broth when you want savory flavor, and herbs, citrus, spices, or sauces when you want the quinoa to match your meal. Simple, fluffy quinoa is not just a recipeit is a quiet little weeknight victory.
Note: This article is written in standard American English for web publishing and is based on real cooking and nutrition guidance, rewritten naturally without source-link clutter inside the article body.