Building a Minecraft subway system is one of those projects that starts with a humble minecart and somehow ends with you acting like the mayor, civil engineer, electrician, interior designer, and slightly stressed public transit director of your blocky empire. A good subway does more than move you from Point A to Point B. It connects bases, farms, villages, mines, trading halls, storage rooms, arenas, castles, and that suspiciously overbuilt sheep barn you keep telling everyone is “temporary.”
The best part? You do not need mods to create a useful underground transit network. With rails, powered rails, redstone, tunnels, platforms, signs, lighting, and a little patience, you can build a fast, organized, and good-looking Minecraft subway system in Survival or Creative mode. This guide walks you through planning routes, digging tunnels, building stations, powering rails, creating stops, adding signs, testing speed, and polishing the whole thing until it feels less like a cave with tracks and more like a real metro line.
What Is a Minecraft Subway System?
A Minecraft subway system is an underground rail network that uses minecarts to move players between important locations. Unlike a simple rail line, a subway usually has multiple stations, clearly marked routes, dedicated tunnels, safe platforms, and some kind of launch-and-stop system. Think of it as your world’s transportation backbone, except the passengers may include armored players, villagers, cats, and occasionally one chicken who absolutely refuses to leave the cart.
In vanilla Minecraft, the core ingredients are simple: regular rails guide the minecart, powered rails add speed when activated, detector rails can trigger redstone signals, and activator rails can create special minecart interactions. You can keep things basic with a two-station line, or you can design a full city network with colored routes, transfer hubs, automatic cart returns, themed platforms, and maps on the wall.
Materials You Need
Before you start tunneling like an overcaffeinated mole, gather the right supplies. The exact amount depends on how long your subway will be, but the following items are useful for almost every build.
Basic Rail Materials
- Regular rails
- Powered rails
- Minecarts
- Redstone torches, levers, buttons, or redstone blocks
- Detector rails for automation
- Building blocks for tunnel walls and station platforms
- Lighting blocks such as lanterns, torches, glowstone, sea lanterns, or redstone lamps
- Signs, item frames, banners, or maps for navigation
- Pickaxes, shovels, food, armor, and spare tools for Survival mode
A minecart is crafted from iron ingots, and regular rails also require iron and sticks. Powered rails are more expensive because they use gold and redstone, so plan ahead if you are building in Survival. If your gold supply is tiny, do not panic. You can still build the subway in phases: first dig the tunnels, then lay basic rails, then add powered rails as your resources improve.
Step 1: Plan Your Subway Before You Dig
The biggest mistake beginners make is digging first and planning later. That is how you end up with a station under your cow farm, a tunnel through a lava lake, and a “temporary” staircase that becomes permanent because nobody wants to fix it.
Start by listing the places you want to connect. Useful subway destinations include your main base, storage hall, villager trading hall, iron farm, mob farm, XP farm, mine entrance, Nether portal room, ocean base, castle, city district, and community shopping area on multiplayer servers.
Next, decide whether your subway will be a simple line, a loop, or a hub-and-spoke network. A simple line is easiest: Station A connects to Station B, then maybe Station C. A loop is great for cities because players can keep traveling in one direction and eventually return to the start. A hub-and-spoke layout works well when your main base is the center and several separate lines branch outward.
Use Coordinates Like a Professional
Write down the coordinates of each station. In Java Edition, press F3 to view coordinates. In Bedrock Edition, enable coordinates in world settings. You do not need to be painfully exact at first, but knowing your target X, Y, and Z values saves a lot of pickaxe durability and emotional damage.
A good subway height is usually below ground but above the deepest cave chaos. Many players build tunnels around Y-level 40 to 60 for city subways, or lower if they want a mining-themed rail network. If your world has large caves, underground rivers, or ancient cities nearby, scout carefully before committing to a route.
Step 2: Choose a Tunnel Size
A subway tunnel should be wide enough to ride safely, decorate comfortably, and repair easily. For a single-track subway, a 3-block-wide by 3-block-high tunnel is a practical minimum. The track goes in the center, lighting can sit on the walls or ceiling, and you still have space to walk beside the rail if something breaks.
For a two-way subway, use at least a 5-block-wide tunnel. Place one track going out and another coming back, with a divider or walkway in the middle. This layout feels more realistic and prevents awkward minecart traffic jams. If you are building on a multiplayer server, two-way tracks are worth the extra digging.
Recommended Tunnel Layouts
- Starter tunnel: 3 wide, 3 high, one track.
- Two-way tunnel: 5 wide, 3 high, two tracks.
- Decorated metro tunnel: 7 wide, 4 high, two tracks, wall details, and lighting.
- Grand city subway: 9 wide or larger, with maintenance walkways and colored line markers.
If you want the subway to feel modern, use smooth stone, polished deepslate, quartz, concrete, iron bars, glass panes, and sea lanterns. If you want a rugged survival look, use stone bricks, cracked stone bricks, deepslate tiles, chains, lanterns, and support beams.
Step 3: Dig the Route Safely
Now comes the satisfying part: digging a suspiciously long hole through the world. In Survival mode, bring extra pickaxes, torches, food, blocks, a water bucket, and armor. You may run into caves, lava, gravel, water, mobs, abandoned mineshafts, or that one creeper who has been waiting six chunks away just to ruin your infrastructure project.
Dig in a straight line when possible. Straight subway routes are faster, easier to sign, and simpler to power. Curves are fine, but too many turns make the ride feel slow and messy. When you reach a cave, decide whether to bridge across it, wall it off, or turn it into a dramatic glass-window tunnel. The glass option is extra stylish if the cave has glow berries, lava, or an underground lake.
Safety Tips for Survival Builders
- Light tunnels as you dig to prevent hostile mobs from spawning.
- Keep rails away from open lava unless protected by blocks or glass.
- Use slabs, walls, fences, or glass panes to stop mobs from wandering onto tracks.
- Mark unfinished tunnels clearly so players do not ride into a dead end.
- Carry spare blocks to patch water and lava leaks quickly.
Step 4: Lay Regular Rails First
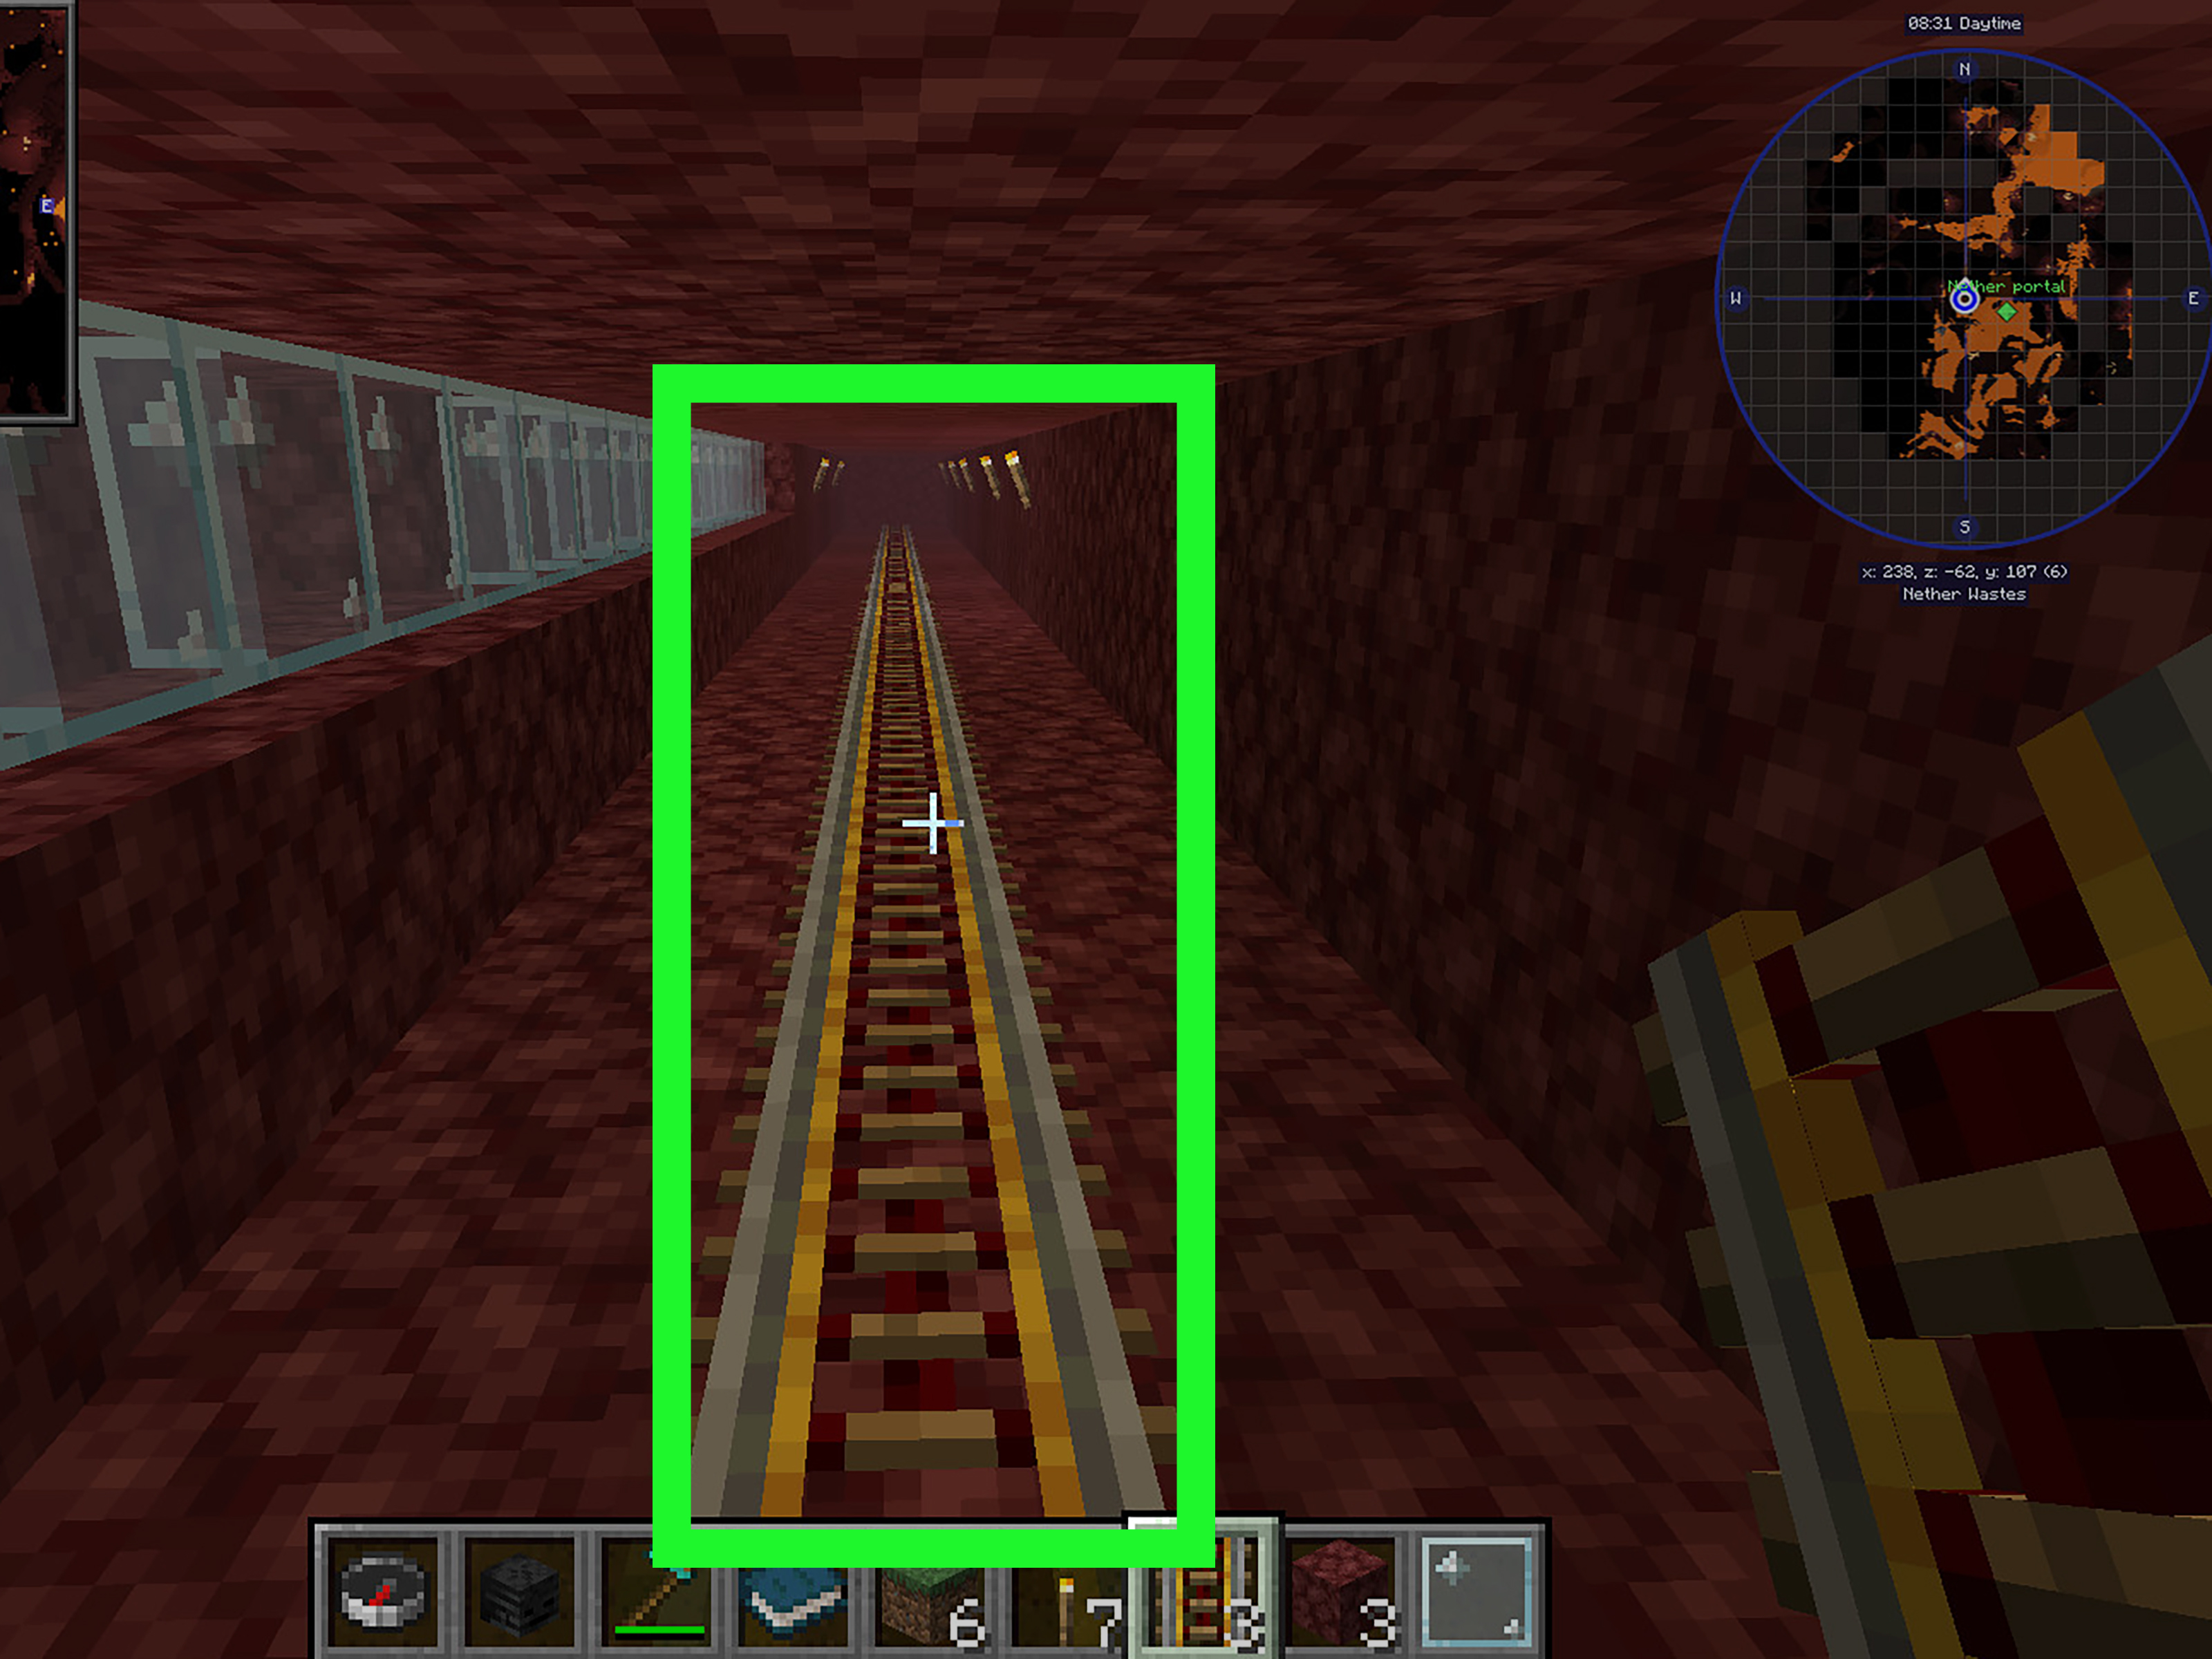
Once the tunnel is ready, lay regular rails along the route. Start with a basic track from one station to the next. Do not place every powered rail yet. First, confirm that the route connects properly and that curves, slopes, and station entrances behave the way you want.
Rails automatically connect to nearby rails, including rails that are one block higher or lower. This makes slopes easy to create, but it also means rails can sometimes bend in a direction you did not intend. If a rail curves the wrong way, remove nearby rails and place them again in the correct order. Minecraft rails are helpful, but they occasionally behave like they have strong opinions.
Step 5: Add Powered Rails for Speed
Powered rails are the engine of your Minecraft subway system. When powered by redstone, they boost minecarts forward. When unpowered, they can slow or stop a cart, which makes them useful for stations and brakes.
For flat passenger lines, a common rule of thumb is to place one powered rail every 25 to 38 blocks once the cart is moving. If you want a smoother and faster ride, place them closer together. For uphill sections, use powered rails much more often, sometimes every few blocks, because minecarts lose speed while climbing.
You can power powered rails with redstone torches, levers, buttons, redstone blocks, or hidden redstone wiring. Redstone torches are cheap and simple. Place one beside or beneath the block holding the powered rail, and the rail lights up. For clean subway tunnels, hide redstone torches under the track bed or behind wall panels.
Powered Rail Placement Strategy
- Use two or three powered rails at launch points for a strong start.
- Place powered rails regularly on long flat tunnels.
- Use frequent powered rails on slopes.
- Leave station brake rails unpowered until the player presses a button.
- Test every line with a real minecart before decorating everything.
Step 6: Build a Simple Subway Station
A good station needs three things: a place to stop, a way to launch, and clear information. Start by digging a room around the track. A starter station can be 7 blocks wide, 9 blocks long, and 4 blocks tall. Put the track in the center, build platforms on both sides, and add stairs or ladders leading to the surface.
At the end of the platform, place a solid block as a bumper. Put an unpowered powered rail directly before the bumper. When a minecart rolls in, it stops on or near that powered rail. Add a button on the wall connected to the powered rail. When the player sits in the minecart and presses the button, the rail powers on and launches the cart away from the station.
Simple Station Parts
- Platform: The area where players enter and exit carts.
- Stopper block: A solid block at the end of the line to prevent runaway carts.
- Launch rail: A powered rail that starts the cart when activated.
- Button: A simple control for departures.
- Signs: Labels showing station name and destination.
This simple station design is reliable, affordable, and beginner-friendly. It does not require complicated redstone, and it works well for most survival subway systems.
Step 7: Create Multiple Lines and Transfers
Once you have more than two stations, your subway becomes a network. That means you need to think about transfers. A transfer station is a larger station where players can switch from one line to another. For example, your Blue Line might connect the main base to the ocean monument, while your Red Line connects the base to the desert village and raid farm.
Use colored blocks to identify lines. Blue concrete for the Blue Line, red concrete for the Red Line, green concrete for the farm line, yellow concrete for the shopping district line, and so on. Color coding makes navigation much easier, especially for guests who do not know your world.
Smart Transfer Station Ideas
- Build separate platforms for each direction.
- Place large signs above platforms showing destinations.
- Use colored wool, concrete, or banners for each route.
- Add a wall map showing all stations.
- Use item frames with icons, such as emeralds for trading halls or wheat for farms.
Real transit systems rely heavily on wayfinding, and your Minecraft subway should too. Clear names, consistent colors, readable signs, and visible exits make the whole network feel professional. Also, they reduce the number of times your friends ask, “Which line goes to the slime farm?” while standing directly under the sign that says Slime Farm.
Step 8: Add Detector Rails and Automation
Detector rails produce a redstone signal when a minecart passes over them. This makes them useful for automatic lights, arrival bells, doors, cart dispensers, and switching systems. You do not need detector rails for a basic subway, but they add a lot of life to advanced stations.
For example, you can place a detector rail before a station entrance and connect it to redstone lamps. When a cart arrives, the platform lights up. You can also connect detector rails to note blocks for a station chime, or to pistons that briefly open platform gates. Keep automation simple at first; redstone has a magical way of turning a small idea into a basement full of repeaters and regret.
Useful Automation Features
- Arrival lamps that turn on when a cart enters the station.
- Note block chimes for incoming trains.
- Automatic cart return systems.
- Powered rail boosters triggered by detector rails.
- Line-selection junctions controlled by levers or buttons.
Step 9: Make the Subway Look Good
Function matters, but style keeps players using the system. A subway tunnel can be more than a gray tube. Add wall patterns, ceiling lights, support pillars, colored route stripes, glass viewing sections, maintenance doors, emergency exits, and station names built into the walls.
For a modern metro look, use white concrete, gray concrete, smooth quartz, polished blackstone, sea lanterns, tinted glass, iron trapdoors, and clean line-color bands. For an old underground railway look, use stone bricks, deepslate, cracked bricks, chains, lanterns, dark oak beams, and copper details. For a fantasy subway, try amethyst, prismarine, warped wood, glowstone, and hanging signs.
Station Decoration Ideas
- Ticket booths made from trapdoors, glass panes, and buttons.
- Benches made from stairs and signs.
- Route maps made with item frames and colored blocks.
- Platform edge markings using yellow concrete or glazed terracotta.
- Advertising boards for shops, farms, or server events.
- Ceiling clocks, banners, and “Next Train” display boards.
Step 10: Test, Fix, and Expand
Never assume a subway works just because the rails are connected. Ride every route in both directions. Test with one player, then with multiple players if you are on a server. Check whether carts stop correctly, whether launch buttons are easy to reach, whether powered rails are frequent enough, and whether signs make sense.
If a minecart slows down too much, add more powered rails. If it overshoots a station, improve the brake section. If mobs block the track, add fences, glass, slabs, or better lighting. If players get lost, add more signs and color markers. A subway system is not finished when the last rail is placed. It is finished when people can use it without needing a ten-minute safety briefing and a prayer.
Common Mistakes to Avoid
Using Too Few Powered Rails
If the cart crawls along like it is carrying a stack of anvils, you need more powered rails. Long flat tunnels and uphill sections require regular boosts.
Forgetting Return Routes
A one-way subway is funny exactly once. Build return tracks, loops, or turnaround stations so players can get back without walking through the tunnel in shame.
Poor Lighting
Dark tunnels invite mobs. Mobs on rails create traffic jams. Traffic jams create angry players. Light your subway generously.
Messy Station Labels
If every sign says “Base” but you have six bases, nobody knows where they are going. Use clear names like Main Base, Desert Village, Ice Farm, End Portal, and Ocean Monument.
Building Too Big Too Soon
Start with one useful line. Expand after it works. A giant unfinished subway is impressive, but a small working subway is actually helpful.
Experience Notes: What Building a Minecraft Subway System Teaches You
After building a few Minecraft subway systems, you start to realize that the rail part is only half the project. The real challenge is designing something that players actually want to use. A tunnel can be technically perfect and still feel confusing if the station names are vague, the platforms look identical, or the exit dumps you behind a hill with no clue where you are. The most successful subway systems feel obvious. You step onto the platform, see the color of the line, read the destination, press the button, and go.
One useful experience is to build your first line between two places you visit constantly. Do not start with a decorative line to a mountain you admire from a distance. Connect your main base to your storage room, trading hall, or XP farm. When the route solves a real problem, you will use it often, notice flaws quickly, and improve it naturally. Maybe the cart slows down before the hill. Maybe the station needs a second platform. Maybe the entrance should be closer to your enchanting room. These small fixes make the system better.
Another lesson is that maintenance access matters. When you hide every redstone torch behind polished blocks, the tunnel looks beautiful, but repairs become annoying. Leave hidden service corridors, trapdoors, or removable panels near important redstone. Label your line controls. Future you will be grateful, especially after forgetting which lever controls the westbound track and accidentally sending yourself to the cactus farm.
Testing with other players is also eye-opening. You may understand your own subway perfectly because you built it block by block. Visitors do not have that advantage. They need signs, colors, arrows, maps, and platform labels. If three friends choose the wrong train in a row, the problem is not your friends. Well, not entirely. The system needs clearer wayfinding.
In Survival mode, the best strategy is phased construction. Dig the tunnel first, make it safe, add basic rails, then upgrade with powered rails and decoration. This prevents burnout. A fully decorated 1,000-block metro line sounds amazing until you spend two evenings placing ceiling slabs and begin questioning every decision that brought you here. Build in useful sections and celebrate each completed station.
Finally, a Minecraft subway system makes your world feel connected. Distant builds stop feeling isolated. Farms become part of a larger city. Friends can travel without asking for coordinates. Even a simple minecart ride through a lit tunnel gives your world a sense of progress and permanence. It is not just transportation. It is storytelling on rails, with occasional chickens.
Conclusion
Learning how to make a Minecraft subway system is about more than placing rails underground. It is about planning useful routes, building safe tunnels, powering minecarts correctly, designing readable stations, and creating a network that makes your world easier and more fun to explore. Start with a simple two-station line, test it carefully, then expand into loops, transfers, colored routes, automatic arrivals, and decorated metro hubs.
Whether you are building a tiny survival subway from your base to your mine or a full city transit system with multiple lines, the same principles apply: keep it clear, keep it powered, keep it safe, and make it look good enough that riding it feels like part of the adventure. Your pickaxe may suffer, your redstone may occasionally judge you, but the result is worth it every time you glide smoothly into a station instead of walking 700 blocks through rain again.