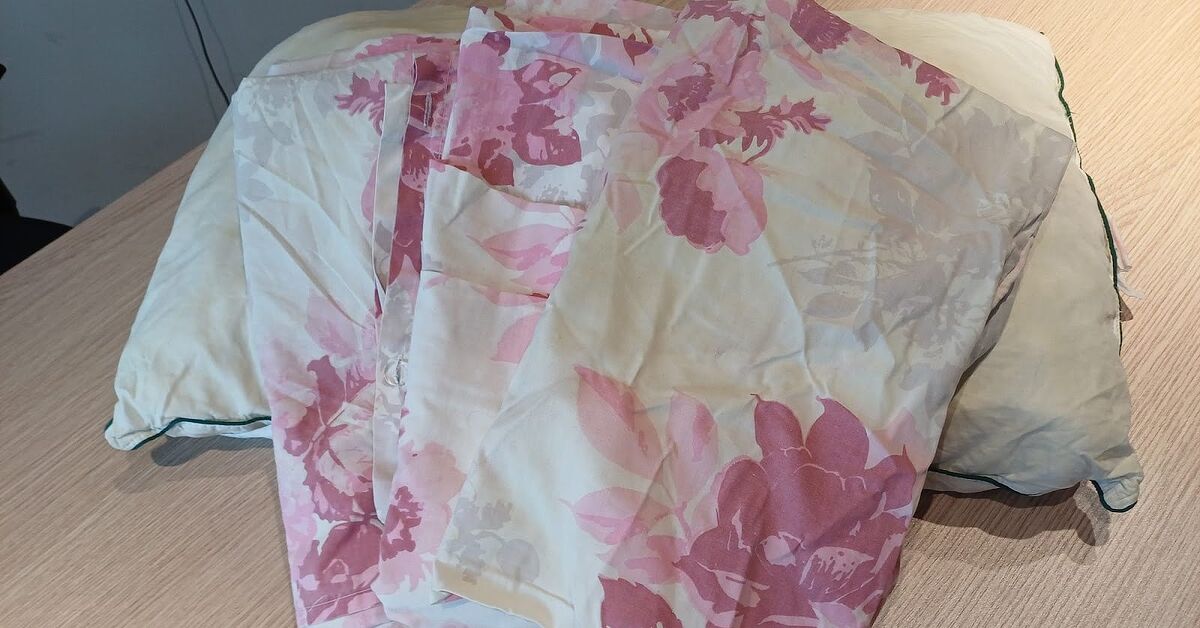
A decorative bow can make a bed, sofa, guest-room chair, nursery corner, or holiday display look instantly more polished. But here is the fun twist: you do not need wired ribbon, expensive fabric, or a professional decorator who arrives wearing linen pants and carrying a steamer. You can make a beautiful, oversized decorative bow from items already sitting in your home: a pillow and sheets.
This project is budget-friendly, renter-friendly, beginner-friendly, and, most importantly, mistake-friendly. If one loop looks like it gave up on life, simply fluff it, tug it, and shape it again. A pillow gives the bow body and volume, while sheets create the wrapped fabric, loops, tails, and center band. Together, they become a soft sculptural accent that looks intentional, cozy, and surprisingly stylish.
Whether you are decorating for a baby shower, styling a guest bed, refreshing a reading nook, staging a bedroom for photos, or just trying to make yesterday’s laundry look like a design choice, this guide will show you exactly how to make a decorative bow from a pillow and sheets with simple steps, smart fabric tips, and real-life styling ideas.
Why Use a Pillow and Sheets to Make a Decorative Bow?
The secret to a great oversized bow is structure. Ribbon can look pretty, but it often collapses when scaled up. A pillow solves that problem by acting as a soft inner form. It gives the bow its puff, curve, and “designer display” volume without requiring wire, foam, or sewing.
Sheets are ideal because they are large, flexible, washable, and easy to fold. A flat sheet can create long, graceful bow tails. A fitted sheet can work too, though the elastic corners require a little more folding and tucking. Pillowcases are perfect for the center band or smaller accent bows.
This project also supports a practical home habit: repurposing textiles. Old but clean sheets, mismatched pillowcases, and spare bedding sets can become seasonal décor instead of hiding forever in the linen closet like fabric ghosts. Cotton sheets create a crisp, casual bow. Linen sheets offer relaxed texture. Satin or silk-like sheets create a more glamorous finish. Flannel gives a cozy winter look. Microfiber works well for smooth, budget-friendly bows.
What You Need
Basic Supplies
- One standard pillow, throw pillow, or small cushion
- One flat sheet or large sheet panel
- One pillowcase, ribbon strip, or folded sheet strip for the center band
- Safety pins, fabric clips, or small binder clips
- Optional: fabric glue, hem tape, or removable adhesive strips
- Optional: iron or handheld steamer
- Optional: measuring tape
Best Pillow Size
A standard bed pillow creates a large bow suitable for a bed, sofa, wall display, or holiday mantel. A square throw pillow makes a fuller, rounder bow. A lumbar pillow creates a long, elegant bow with dramatic tails. For a small decorative accent, use a travel pillow or folded pillow insert.
Best Sheet Size
A twin flat sheet is enough for a medium decorative bow. A full, queen, or king flat sheet gives you longer tails and more dramatic loops. If you want a grand bow for the foot of a bed or a party backdrop, use a queen or king sheet. If you want a compact bow for a chair, crib rail, or gift-table display, use a pillowcase or folded twin sheet.
Choose the Right Sheet for the Look You Want
The sheet fabric changes the personality of the bow. Yes, your bow has a personality now. This is crafting; things escalate quickly.
For a Crisp and Classic Bow
Use cotton or cotton-blend sheets. They fold cleanly, hold soft creases, and look fresh in bedrooms, guest rooms, and farmhouse-style spaces. White cotton sheets create a wedding-like bow, while striped or gingham sheets feel cheerful and casual.
For a Relaxed, Designer-Inspired Bow
Use linen or linen-blend sheets. The natural wrinkles are part of the charm. A linen bow works beautifully in coastal, cottage, rustic, organic modern, and neutral interiors.
For a Fancy or Romantic Bow
Use satin, sateen, or silk-like sheets. These fabrics drape beautifully and catch light, making them ideal for bridal showers, Valentine’s Day décor, anniversary displays, or a dramatic bedroom refresh.
For a Cozy Seasonal Bow
Use flannel sheets. Plaid flannel makes an excellent fall or Christmas bow. Solid cream, red, forest green, or navy flannel can make a room feel warm without requiring twelve scented candles and a knitted throw named “Aspen.”
Step-by-Step: How to Make a Decorative Bow From a Pillow and Sheets
Step 1: Wash, Dry, and Smooth the Fabric
Start with clean sheets and a clean pillow cover. Since this project may sit on a bed, sofa, nursery chair, or dining bench, fresh fabric matters. Wash the sheets according to the care label. Cotton can usually handle warmer water, while silk, satin, and delicate fabrics often need cooler water or gentler care.
Once dry, shake out the sheet and smooth it flat. For a crisp bow, iron the fabric. For a relaxed bow, use your hands to smooth major wrinkles and leave the natural texture. A steamer is helpful if the sheet has deep fold lines from sitting in the closet since 2018.
Step 2: Place the Pillow in the Center
Lay the sheet on a clean floor, large table, or bed. Put the pillow in the center. The pillow will become the hidden body of your bow. Position it horizontally if you want a wide bow. Position it vertically if you want a taller, plumper bow.
If the pillow is too soft, fluff it first. If it is too thick, gently compress it with your hands. The goal is a pillow that gives shape but does not look like a pillow wearing a sheet costume. Subtlety is the difference between “decorative bow” and “laundry bundle with ambition.”
Step 3: Fold the Sheet Into a Wide Band
Fold the long edges of the sheet toward the center until you create a wide fabric band. The band should be wide enough to cover the pillow and extend beyond both sides. For a standard pillow, aim for a band about 16 to 24 inches wide. For a throw pillow, 12 to 18 inches may be enough.
Keep the folded edges facing downward or inward so the visible side looks neat. If the sheet has a pattern, decide whether you want the pattern centered, diagonal, or mixed. Stripes can look especially charming when aligned across the bow loops.
Step 4: Wrap the Pillow
Bring one side of the folded sheet over the pillow, then bring the opposite side over it. The fabric should overlap in the middle or slightly behind the pillow. Tuck excess fabric under the pillow or secure it with fabric clips or safety pins.
Do not pull the sheet too tight. A decorative bow needs softness. If the fabric is stretched like a drum, the bow will look stiff. If it is too loose, it may slump. Aim for a snug but pillowy wrap.
Step 5: Create the Bow Loops
Now shape the left and right sides of the wrapped pillow into loops. Think of each side as a giant “bunny ear.” Hold the center of the pillow and gently push fabric outward on both sides. The pillow should create rounded volume, while the sheet forms the visible loop surface.
Pinch the middle tightly with your hands. This center pinch is what transforms a wrapped pillow into a bow. If the bow looks flat, pull more fabric toward the sides. If one loop is larger than the other, tug the smaller side outward until they balance.
Step 6: Secure the Center
Take a pillowcase, narrow strip of sheet, scarf, ribbon, or leftover fabric band and wrap it around the pinched center. Pull it firmly, but not so tightly that the pillow bulges oddly. Tie the band at the back, or secure it with safety pins, fabric clips, hem tape, or a dab of fabric glue.
If this is a temporary decoration, safety pins or clips are best. If you want the bow to last through a season, fabric glue or hem tape can help hold the center band. Just remember that some adhesives are temporary and some are permanent, so check the product label before committing. Fabric glue is wonderful, but it has no sense of humor when used on heirloom sheets.
Step 7: Add the Tails
The tails are the long pieces that hang down from the bow. You can create tails from the same sheet by leaving extra fabric loose at the bottom, or you can add a second folded sheet strip behind the center band.
For a classic bow, cut or fold the tails into two long rectangles. For a polished look, fold the raw edges inward. For a gift-wrap style, cut the ends into a V shape. For a romantic look, let the tails drape naturally. For a farmhouse style, leave slightly frayed edges if the sheet is already worn and you do not mind a rustic finish.
Step 8: Fluff, Shape, and Style
Once the bow is secured, fluff the loops. Pull the top edges outward, round the corners, and smooth wrinkles with your hands. Stand back and check the shape. The best decorative bows are rarely perfect on the first try. They need a little tugging, adjusting, and possibly one dramatic sigh.
If the bow will sit on a bed, place it at the foot of the bed, against stacked pillows, or centered on a folded blanket. If it will decorate a sofa, place it on the back cushion or across one arm. If it will hang on a wall, attach the back to a removable hook or command-style strip. For a nursery or party backdrop, secure it carefully and keep pins or small clips out of reach of children.
Decorative Bow Styling Ideas
Bedroom Bow
Place a large white or cream bow across the foot of a bed for a soft hotel-inspired look. Pair it with neutral bedding, a textured throw, and two matching pillows. This works especially well in guest rooms because it says, “Welcome,” without requiring a chalkboard sign that literally says welcome.
Baby Shower or Nursery Bow
Use pastel sheets, a small pillow, and a satin center band. A bow can decorate a gift table, rocking chair, crib rail for photos only, or wall backdrop. Always remove decorative fabric from sleep areas before a baby uses the space.
Holiday Bow
Use plaid flannel, red cotton, green sheets, or metallic-look fabric. Add faux greenery, bells, or ornaments around the center band. A large bow can dress a mantel, staircase landing, bench, or wrapped oversized gift box.
Wedding or Bridal Shower Bow
Use white, ivory, blush, champagne, or soft blue sheets. Add lace, pearls, faux flowers, or a velvet center tie. A pillow-and-sheet bow makes a pretty chair-back accent, dessert table feature, or photo-area decoration.
Dorm Room or Apartment Bow
Use a spare twin sheet and pillow to create a removable headboard-style accent. Place it against the wall behind the bed or on top of a storage bench. It is affordable, washable, and easy to change when your style changes from “minimalist beige” to “dopamine decor explosion.”
Common Mistakes and How to Fix Them
The Bow Looks Lumpy
The pillow may be uneven or the sheet may be bunched inside the center wrap. Remove the center band, smooth the fabric, fluff the pillow, and wrap again. Use fewer layers if the sheet is thick.
The Loops Collapse
The pillow may be too soft or too small. Try using a firmer insert, folding a towel behind the pillow, or adding a second pillow for extra body. For very floppy sheets, use fabric clips inside the folds to hold the loop shape.
The Center Band Slips
Wrap the center band twice, then secure it at the back. A safety pin, fabric clip, or small strip of hem tape can keep it in place. If the bow is for display only, a hidden rubber band under the fabric band also works.
The Tails Look Messy
Fold the edges inward and press them with an iron. If you want a no-sew finish, use hem tape. For a casual look, embrace the drape and make both tails intentionally relaxed.
Care and Storage Tips
If the bow is temporary, disassemble it after use and return the pillow and sheets to normal bedding duty. If you plan to keep the bow assembled, store it in a breathable cotton bag or large storage bin. Avoid crushing it under heavy items, unless your goal is “sad pancake bow.”
For washable fabrics, remove pins or clips before laundering. Follow the care label on the sheet and pillowcase. Delicate fabrics may need cold water, hand-washing, or air-drying. If you used permanent fabric glue, check whether the adhesive is washable before cleaning the bow.
Helpful Design Tips for a Better-Looking Bow
- Use a pillow with good loft for fuller loops.
- Choose a sheet color that contrasts with the background.
- Steam or iron cotton sheets for a cleaner finish.
- Use a patterned pillowcase as the center band for visual interest.
- Keep the tails long for elegance and short for a playful look.
- Layer two sheets for a two-tone bow.
- Add greenery, dried flowers, or ornaments only after the bow is fully shaped.
Creative Variations
The No-Sew Gift Bow
Wrap a pillow with a bright sheet and place it on top of a large storage box, ottoman, or wrapped gift. Add long sheet tails that drape down the sides. This makes a great birthday, Christmas, or baby shower display.
The Headboard Bow
Use a king pillow and king sheet to create a giant bow behind sleeping pillows. Choose a neutral fabric for a chic look or a bold print for a playful bedroom statement.
The Chair-Back Bow
Use a small throw pillow and pillowcase to create a compact bow for dining chairs, party chairs, or vanity seating. Secure the bow with a fabric tie around the chair back.
The Seasonal Bench Bow
Place a large flannel bow on an entry bench during fall or winter. Add a basket, boots, pine branches, or pumpkins nearby for an easy seasonal vignette.
Experience Notes: What Actually Helps When Making a Pillow-and-Sheet Bow
The first time you make a decorative bow from a pillow and sheets, the biggest surprise is how much shaping matters. The materials are simple, but the final look depends on small adjustments. A bow that looks strange on the floor can look beautiful once it is placed on a bed and fluffed from the front. That is why it helps to style the bow in its final location before judging it too harshly. Craft projects, like people before coffee, deserve a fair chance.
One useful experience is to start with a sheet you do not feel precious about. A spare cotton sheet is perfect for practice because it folds easily and forgives repeated tucking. If you begin with satin or silky fabric, the bow may slide around while you work. It can still look gorgeous, but it is better as a second attempt after you understand the basic shape. Cotton is the training wheels. Satin is the sports car.
Another helpful lesson is that the pillow should not be overstuffed. A very firm pillow can make the bow look bulky in the center, while a very flat pillow makes the loops droop. The best pillow is medium-firm with enough loft to create rounded sides. If your pillow is too flat, fold a small towel and tuck it inside the sheet behind the pillow. If it is too puffy, compress it gently and use a wider center band to control the shape.
Color choice also makes a big difference. A white bow on white bedding can look elegant, but only if there is texture. Use linen, waffle weave, embroidery, or a contrasting center band to keep the bow from disappearing. For photos, soft contrast usually works better: ivory on beige, blush on white, navy on gray, sage on cream, or plaid on a solid background.
When making bows for events, assemble one test bow at least a day ahead. This helps you figure out whether the sheet wrinkles, whether the center band slips, and whether the bow holds its shape. For party decorating, pre-fold the sheets and label each set with a sticky note. On the day of the event, you can wrap, pinch, tie, and fluff without turning the room into a linen tornado.
For home styling, the most successful pillow-and-sheet bows are the ones that look intentional. Repeat the sheet color somewhere else in the room, such as in a throw blanket, lampshade, rug, flowers, or artwork. That single design trick makes the bow feel like décor rather than a pillow that got promoted.
Finally, do not chase perfect symmetry. Real fabric moves. Soft bows look best when they have a little personality: one tail slightly longer, one loop casually fuller, one fold catching the light. The goal is not a factory-made bow. The goal is a warm, creative accent that makes a room feel cared for. And if anyone asks where you bought it, you can proudly say, “Actually, it used to be laundry.”
Conclusion
Learning how to make a decorative bow from a pillow and sheets is a simple way to turn everyday bedding into charming home décor. With one pillow for volume, one sheet for shape, and a center band to pull everything together, you can create a bow that works for bedrooms, parties, holidays, nurseries, guest rooms, and seasonal displays.
The best part is flexibility. You can make the bow crisp or relaxed, fancy or rustic, oversized or compact. You can use cotton, linen, flannel, satin, or spare pillowcases. You can secure it temporarily with clips or make it more permanent with fabric glue or hem tape. No sewing machine is required, no professional skills are needed, and no one has to know the bow started life as a sheet set hiding in your closet.
With a little folding, pinching, wrapping, and fluffing, a pillow and sheets can become a statement piece that feels creative, cozy, and personal. It is proof that stylish decorating does not always require buying something new. Sometimes, the best design idea is already folded on the linen shelf, waiting for its big bow moment.