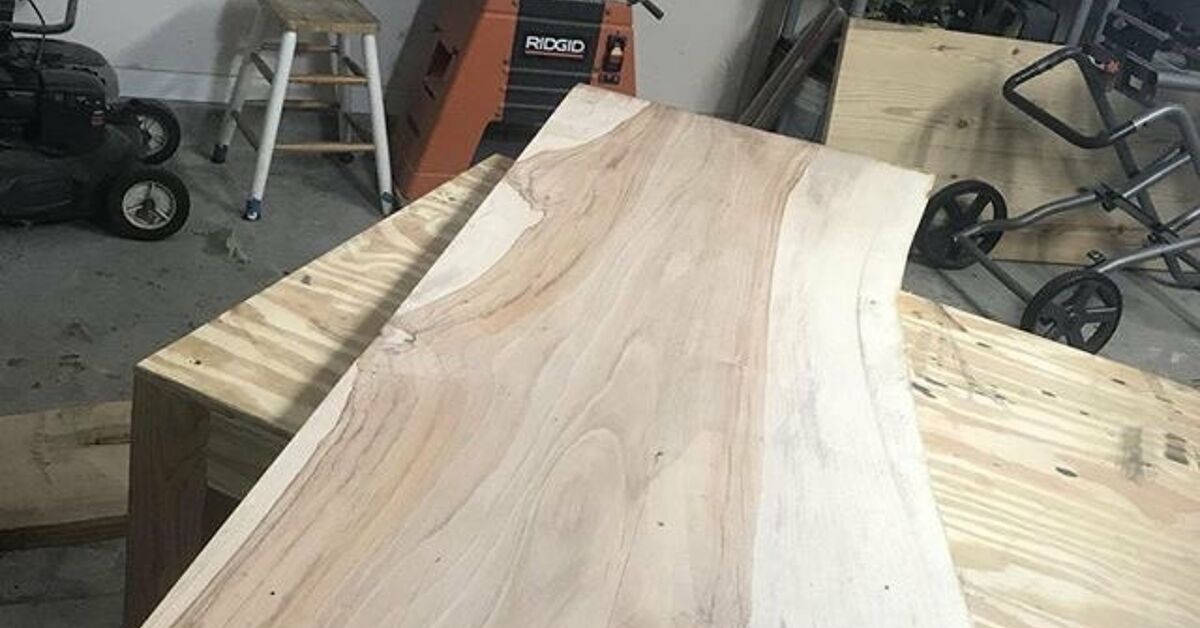
A live edge desk is the furniture version of saying, “Yes, I work from home, but I also have taste.” It brings the natural shape of the tree into your workspace, keeps the grain visible, and gives your office a warm, handcrafted look that no flat-pack desk can fake. Add a drawer, and suddenly your beautiful slab is not just a dramatic piece of wood sitting on legsit becomes a practical workstation with a secret little home for pens, notebooks, chargers, and that one mystery cable nobody dares throw away.
This guide walks you through how to make a beautiful DIY live edge desk with a drawer, from choosing the right slab to installing smooth drawer slides and applying a finish that makes the wood grain look like it just got professional lighting. The project is approachable for a careful DIYer, but it does require patience, accurate measuring, and respect for woodworking tools. If you are new to power tools, work with an experienced adult, wear proper protection, and read every tool and finish label before starting. A great desk is nice; keeping all ten fingers is better.
What Makes a Live Edge Desk Special?
A live edge desk keeps at least one natural edge of the wood slab intact. Instead of cutting every side into a perfect rectangle, you preserve the tree’s organic outline. That edge may curve, dip, wave, or show knots and checks. These features are not flaws; they are the personality. Think of them as the desk’s autobiography, written in grain lines.
Live edge furniture works especially well for home offices because it softens all the technology sitting on top of it. Laptops, monitors, keyboards, and docking stations can make a workspace feel like a small airport control tower. A live edge wood slab adds warmth, texture, and a bit of nature to the scene. The drawer adds function without ruining the clean design.
Project Overview
For this DIY live edge desk, the basic plan is simple: prepare a wood slab, flatten and sand it, build or attach a drawer box under the top, install drawer slides, mount legs or a base, and finish the surface. The finished desk can be customized to your room, but a common size is 48 to 60 inches wide, 24 to 30 inches deep, and about 29 to 30 inches high.
A drawer depth of 14 to 18 inches usually works well for a writing desk. A shallow drawer, around 2 1/2 to 4 inches tall inside, is enough for office supplies without hitting your knees. For a minimalist look, use a slim drawer with a matching wood front. For a modern look, pair the slab with black metal legs. For a warmer traditional style, use wooden legs or a trestle base.
Materials You Will Need
Wood and Hardware
- One kiln-dried live edge slab, ideally 1 1/2 to 2 inches thick
- 3/4-inch plywood or hardwood boards for the drawer box
- 1/4-inch plywood for the drawer bottom
- One drawer front, either matching hardwood or a clean painted panel
- One pair of ball-bearing drawer slides or undermount drawer slides
- Desk legs, hairpin legs, metal trapezoid legs, or a wooden base
- Figure-eight fasteners, Z-clips, threaded inserts, or elongated screw holes for attaching the top
- Wood glue
- Screws sized for your hardware
- Wood filler, epoxy, or CA glue for cracks and voids if needed
- Clear topcoat such as polyurethane, hardwax oil, or water-based finish
Tools
- Tape measure and pencil
- Straightedge or chalk line
- Clamps
- Random orbital sander
- Sandpaper from 80 to 220 grit
- Circular saw, track saw, or table saw
- Drill and driver bits
- Router and flattening sled, planer, or access to a woodworking shop
- Chisel, scraper, or drawknife for bark removal
- Square
- Drawer slide jig or spacer blocks
- Safety glasses, hearing protection, dust mask or respirator, and gloves when appropriate
Step 1: Choose the Right Live Edge Slab
The slab is the star of the show, so do not rush this part. Look for a slab that is dry, stable, and wide enough for a desk. Walnut, maple, oak, ash, cherry, and elm are popular choices. Walnut gives a rich, dramatic look. Maple feels lighter and more modern. Oak brings strength and visible grain. Cherry warms up beautifully over time.
Ask the seller whether the slab has been kiln-dried and what the moisture content is. Furniture-grade lumber should generally be dry enough for indoor use. A slab that is too wet may twist, cup, or crack after you build the desk. In plain English: the desk may decide to become a potato chip. Not ideal.
Check the slab for severe warping, deep cracks, soft spots, insects, or loose bark. Small checks and knots can be filled and turned into design features. Major structural cracks near the center may require bow ties, epoxy, or a different slab. For your first DIY live edge desk, choose a slab with character but not chaos.
Step 2: Plan the Desk Layout
Before cutting anything, decide which edge faces the user. Many builders place the live edge on the front because it is more visible and tactile. However, if the front edge is too uneven for comfortable typing, you can put the live edge at the back and keep the straight edge toward your chair. Beauty is great, but your forearms should not feel like they are wrestling a tree root.
Mark the final length and depth. If one end has a crack or rough chainsaw mark, trim it off. Keep the most attractive grain centered where it will be seen. Also mark where the drawer will go. A centered drawer is classic, but an off-center drawer can look stylish and leave more knee room on one side.
Step 3: Remove Loose Bark and Clean the Edge
Many live edge slabs still have bark attached. It may look rustic, but loose bark often breaks off later. Use a chisel, scraper, or drawknife to remove bark that is not firmly attached. Work carefully so you preserve the natural shape underneath. Do not aggressively carve the edge into something too clean; the point is to keep the tree’s natural line.
After removing bark, use a nylon brush, sanding mop, or hand sanding block to smooth the edge. The goal is a comfortable surface that still looks organic. If you want to keep some bark, stabilize it with a suitable adhesive or finish, but understand that bark is fragile and may not hold up well on a daily-use desk.
Step 4: Flatten the Slab
Flattening is where a rough slab becomes a usable desktop. If the slab is only slightly uneven, a planer or professional shop service may handle it. For wider slabs, a router sled is a common DIY solution. The router rides on rails and removes high spots until the surface is level.
Take shallow passes. Rushing this step can cause tear-out, burning, or a surface that looks like it lost an argument with a lawn mower. After one face is flat, flip the slab and flatten the other side. The finished top should be even, stable, and thick enough to feel substantial.
If you do not own a router sled or planer, ask a local lumberyard, cabinet shop, or maker space whether they offer slab flattening. Paying for this step can save hours of frustration and several new words your family may not want to hear.
Step 5: Fill Cracks, Knots, and Voids
Small cracks and knots are part of the charm of a live edge desk. Large gaps, however, can catch dust, snag paper, or weaken the surface. Clear or tinted epoxy is commonly used to fill voids. Black epoxy looks modern and dramatic, especially with walnut. Clear epoxy keeps the look more natural. Wood filler works for smaller defects, though it may not disappear completely under a clear finish.
Tape the underside of any crack before pouring epoxy so it does not leak out. Mix according to the manufacturer’s instructions, pour slowly, and allow full curing time. Work in a well-ventilated area and wear the recommended protective gear. Once cured, scrape or sand the epoxy flush with the wood.
Step 6: Sand the Desktop Properly
Sanding is not glamorous, but it is the difference between “custom furniture” and “large splinter delivery platform.” Start with 80 grit if the surface has router marks or rough patches. Move through 120, 150, 180, and finish with 220 grit for most clear finishes. Do not jump from 80 straight to 220; the scratches will remain, and the finish will politely highlight every one of them.
Use a random orbital sander on the flat surfaces and hand sand the live edge. Keep the sander moving to avoid swirl marks. Vacuum the dust between grits. A low light held across the surface can reveal scratches you might miss from above. Finish by wiping the slab with a clean cloth or tack cloth recommended for your finish type.
Step 7: Build the Drawer Box
The drawer should be simple, square, and strong. For a desk drawer, 1/2-inch or 3/4-inch material works well. Plywood is stable and practical; hardwood looks premium but requires more attention to seasonal movement. A basic drawer box has two sides, a front, a back, and a 1/4-inch plywood bottom captured in a groove or attached underneath.
Measure the drawer opening based on your slide type. Side-mount ball-bearing slides often require 1/2 inch of clearance on each side. Undermount slides have their own sizing rules, so follow the specific hardware instructions. This is not a place for “close enough.” Drawer slides are tiny metal judges, and they are strict.
Cut all parts square. Dry fit the box before adding glue. Check the diagonals; if both diagonal measurements match, the drawer is square. Glue and clamp the box, then secure it with screws, brad nails, pocket screws, or joinery appropriate to your tools and skill level. Install the drawer bottom last or slide it into grooves before final assembly.
Step 8: Create the Drawer Housing Under the Desk
A live edge desk usually does not have a full cabinet under it, so the drawer needs a support structure. You can build a small drawer cradle from plywood or hardwood rails. This cradle attaches to the underside of the slab and gives the drawer slides something straight and stable to mount to.
Build two side supports and a back rail, leaving the front open for the drawer. Keep the structure shallow so it does not dominate the design. Paint it black for a shadow effect, or use matching wood for a more integrated look. Make sure the drawer housing is set back far enough that the drawer front sits where you want itflush, inset, or slightly proud.
Because a solid wood slab expands and contracts across its width, avoid trapping the top with rigid cross-grain attachments. Use elongated holes, figure-eight fasteners, or other movement-friendly methods where appropriate. Wood movement is not a myth invented by fussy woodworkers. It is physics wearing sawdust.
Step 9: Install the Drawer Slides
Install the slides with care. Use a drawer slide jig, spacer blocks, or a perfectly square scrap board to keep both slides level and parallel. Attach the cabinet-side members to the drawer housing first. Then attach the drawer-side members to the drawer box. Start with screws in adjustable slots so you can fine-tune the fit before locking everything down.
Test the drawer before adding the false front. It should open smoothly, close evenly, and not scrape. If it binds, check whether the box is square, the slides are parallel, or one side is mounted slightly higher than the other. Small adjustments usually solve the problem. Dramatic emotional speeches to the drawer rarely help, although many of us have tried.
Step 10: Add the Drawer Front
The drawer front is what everyone sees, so take your time. You can cut it from the same species as the slab, use a contrasting wood, or make a minimalist painted front. For a hidden drawer look, use a piece that follows the grain direction of the desktop or blends into the shadow under the slab.
Position the front with even reveals around the opening. Double-sided tape can hold it temporarily while you open the drawer and drive screws from inside the box. Add a pull, knob, finger groove, or push-to-open hardware. A slim black pull looks modern. A carved finger pull keeps the design clean. A brass knob adds warmth and a touch of “fancy but not trying too hard.”
Step 11: Attach the Legs or Base
Now the desk begins to look like furniture instead of a very ambitious shelf. Hairpin legs are easy and stylish, but they may feel springy on a heavy slab. Trapezoid metal legs provide a sturdier modern look. Wooden legs or a trestle base add warmth and can be built to match the drawer housing.
Place the legs far enough from the front edge to allow comfortable seating, but not so far inward that the desk becomes unstable. Pre-drill holes to prevent splitting. If using threaded inserts, install them carefully and squarely. For solid wood tops, allow for seasonal movement instead of driving every screw as if you are anchoring a bridge.
Set the desk upright and check for wobble. Adjustable levelers are useful, especially if your floor has the personality of an old pirate ship. Make adjustments before finishing if possible.
Step 12: Apply the Finish
The finish protects the desk from coffee cups, keyboard wear, hand oils, and everyday life. For a natural feel, hardwax oil is popular because it enhances the grain while keeping the surface touchable. For more durability, polyurethane or water-based topcoat can be a smart choice. Water-based finishes dry clearer and tend to keep lighter woods from turning too amber. Oil-based finishes usually deepen the color and add warmth.
Apply thin coats according to the product instructions. Sand lightly between coats with fine abrasive when recommended, and remove all dust before recoating. A desk surface should usually receive multiple coats because it will see daily use. Do not rush curing time. A finish may feel dry before it is ready for heavy objects, monitor stands, or the ceremonial first cup of coffee.
Step 13: Add Smart Desk Details
A beautiful DIY live edge desk with a drawer becomes even better when it solves real workspace problems. Add a cable grommet near the back or route cords through a hidden channel. Mount a small power strip under the desk. Add felt pads inside the drawer to reduce noise. Use dividers for pens, sticky notes, and chargers.
If the live edge is at the front, test comfort with your keyboard and mouse before calling the project done. You may want to soften high spots with hand sanding. If the desk will hold multiple monitors, make sure the slab and legs can handle the weight. Heavy wood is strong, but hardware matters.
Common Mistakes to Avoid
Using a Wet Slab
A wet slab may look fine at first, then move after it enters your home. Choose dry lumber and let it acclimate in the room before building if possible.
Skipping the Flattening Step
A wavy slab can make writing, typing, and drawer installation difficult. Flat does not mean boring; it means usable.
Ignoring Wood Movement
Solid wood expands and contracts. Attach the drawer housing and legs in a way that allows movement, especially across the width of the slab.
Installing Drawer Slides by Eye
Your eyes are wonderful, but drawer slides prefer measuring tools. Use a square, spacers, and careful layout.
Applying Finish Too Thick
Thick finish can run, bubble, or cure poorly. Several thin coats usually beat one heroic puddle.
Design Ideas for a More Beautiful Live Edge Desk
For a modern office, pair a walnut slab with black metal legs and a slim black drawer pull. For a Scandinavian-inspired room, use maple or ash with light wood legs and a clear water-based finish. For an industrial look, combine a thick oak slab with steel legs and a dark drawer front. For a cozy creative studio, use cherry with rounded wooden legs and a small brass knob.
You can also add bow tie keys across cracks for a handcrafted detail. These can be functional, decorative, or both. Contrasting woods like walnut bow ties in maple, or maple bow ties in walnut, create a beautiful accent. Just avoid adding too many details. A live edge slab already has plenty to say; do not make it shout over itself.
Experience Notes: What You Learn While Building a DIY Live Edge Desk With a Drawer
The first thing you learn while building a live edge desk is that wood has opinions. You may arrive with a sketch, a tape measure, and a confident plan. The slab may respond with a knot exactly where you wanted a screw, a curve where you wanted a straight drawer front, or a crack that looks small until you shine a light through it and discover it has ambitions. That is not a reason to give up. It is the heart of the project. Unlike manufactured boards, a live edge slab asks you to design with the material, not just on top of it.
One of the best practical lessons is to slow down during layout. Place your laptop, keyboard, notebook, and lamp on the unfinished slab before cutting or drilling. Sit in a chair and pretend to work. This simple test can reveal whether the live edge feels comfortable, whether the drawer will hit your knees, and whether the legs are in the way. Many DIY mistakes happen because builders design for the camera instead of the human body. The desk should look amazing, yes, but it also has to survive Monday morning emails.
Another experience-based tip is to build the drawer housing like a separate mini project. It is tempting to slap two rails under the slab and call it a day, but the drawer will only work as well as its support structure. The sides need to be parallel. The opening needs to be square. The slides need a consistent mounting surface. When the drawer glides smoothly, the whole desk feels more professional. When it sticks, rattles, or droops, even the prettiest slab starts looking suspicious.
Finishing also teaches patience. After sanding for what feels like half a calendar year, you may want to rush the topcoat. Resist. Test your finish on an offcut or the underside of the slab first. Some finishes darken the wood dramatically. Others keep it pale and natural. A test patch prevents surprises, such as discovering your “light natural maple” now looks like it spent spring break in a tanning bed.
You also learn that small details matter more than expensive details. A cleanly aligned drawer front, softened edges, hidden cable management, and a smooth final coat make the desk feel intentional. A costly slab cannot rescue sloppy hardware placement. On the other hand, a modest slab can look incredible when the proportions are right and the finish is carefully applied.
Finally, building a DIY live edge desk with a drawer gives you a different relationship with your workspace. It is no longer just a place to answer emails, study, write, draw, or edit spreadsheets that multiply when nobody is watching. It becomes something you made. Every knot, curve, and grain line reminds you that the desk did not come from a warehouse box with twelve extra screws and one tiny wrench. It came from your planning, sanding, measuring, adjusting, and problem-solving. That is the real beauty of the project: the finished desk is useful, but the experience makes it personal.
Conclusion
Learning how to make a beautiful DIY live edge desk with a drawer is a rewarding woodworking project because it combines natural design with everyday function. The slab provides character, the drawer adds convenience, and the finish protects your hard work for years of use. Success comes from choosing dry wood, flattening carefully, respecting wood movement, building a square drawer, and applying the finish with patience.
This is not the fastest desk you can make, and that is exactly why it feels special. A live edge desk is not trying to be perfect in the factory-made sense. It is trying to be useful, beautiful, and unmistakably yours. Build it well, and your workspace gets more than a desk. It gets a conversation piece, a productivity station, and possibly the only piece of furniture in the room with better curves than your office chair.
Note: Always follow the safety instructions for your tools, hardware, adhesives, and finishes. Work in a ventilated space, control dust, and get experienced help when using unfamiliar woodworking equipment.