If you have ever stared at a tiny master link clip and thought, “Amazing, my entire drivetrain is trusting that little moon-shaped piece of metal,” welcome to the club. Installing a chain master link clip is not difficult, but it does reward patience, good lighting, and a healthy respect for small parts that enjoy launching themselves into another dimension.
This guide walks you through how to install a chain master link clip in 5 steps, with clear instructions, safety notes, and practical tips that make the job smoother. It is written for clip-style roller chain master links commonly used on motorcycles, dirt bikes, ATVs, go-karts, and similar machines. If your chain uses a rivet-style master link, stop here and follow the chain manufacturer’s riveting procedure instead.
By the end, you will know how to install the clip correctly, how to avoid binding the link, and how to double-check your work so your chain does not turn your next ride into a long walk with character-building opportunities.
Why Proper Master Link Clip Installation Matters
A chain master link clip has one job: keep the outer side plate secured on the master link pins. When it is installed correctly, the chain runs smoothly and stays together as intended. When it is installed incorrectly, you can end up with a loose clip, a binding link, damaged seals, or in the worst case, a chain failure.
The biggest mistake people make is treating clip installation like a five-second afterthought. In reality, the clip is the final lock in a small system: link body, seals or O-rings if applicable, side plate, grooves on the pins, and then the clip itself. Miss one detail and the whole setup gets sketchy fast.
Before You Start: Tools and Parts You’ll Need
Before you begin, make sure you have the correct master link for your exact chain model and size. Not “close enough.” Not “same brand, probably fine.” Not “the one that was rolling around in my toolbox since the Obama administration.” The correct one.
Basic Tools
- Correct clip-style master link kit
- Needle-nose pliers or dedicated master link clip pliers
- A small chain press tool or suitable side-plate press tool if needed
- Clean shop rag
- Chain-safe grease or the grease packet included with the link
- Safety glasses
What to Check First
- The chain is the correct size and type for the machine
- The master link matches the exact chain model
- If the chain is sealed, all required O-rings or X-rings are present
- The side plate is not bent, damaged, or reused from another link
- You are working on a clean, stable section of chain
One more important note: some clip-style master links are a loose fit, while others are press-fit clip links. A press-fit style means the outer plate must be pressed on carefully before the clip can fully seat. If you try to muscle the clip on too early, you are basically asking a small spring clip to do the work of a proper tool, which is rude and ineffective.
How to Install a Chain Master Link Clip: 5 Steps
Step 1: Confirm Compatibility and Position the Chain
Start by verifying that the master link matches your chain’s exact size and series. This is the foundation of the whole job. A master link from a different chain line may look similar but still fit incorrectly, especially on sealed chains.
Once you know you have the right parts, bring the two chain ends together. A common trick is to position the chain on the rear sprocket while you work. That gives the chain some support and makes it easier to keep everything aligned instead of juggling loose chain ends like a circus act with grease.
Clean the area around the chain ends with a rag. Dirt, grit, and old chain sludge are not invited to this assembly. If the chain is new, inspect the master link components and lay them out in order: link body, seals, outer side plate, and clip.
Pro tip: Before you install anything, compare the master link components to a neighboring chain link. It helps you visualize how far the side plate should sit once the job is finished.
Step 2: Grease the Link and Insert It from the Back Side
If you are working with a sealed chain, lightly coat the master link pins and the O-rings or X-rings with the grease supplied by the manufacturer. This is not decorative grease. It helps protect the seals during installation and supports proper assembly.
Place one greased seal on each pin, if your chain uses them. Then insert the master link from the back side of the chain outward, so the clip will end up on the visible outer side of the chain. On most setups, that means the plate and clip face outward where you can inspect them later.
Once the link body is through the chain ends, install the remaining seals on the outer side if required. Take a second to make sure the seals are sitting flat and not twisted. A pinched O-ring is like a sock folded inside your shoe: technically possible, immediately annoying, and bound to cause problems.
Step 3: Install and Press the Outer Side Plate Carefully
Now place the outer side plate over the two master link pins. On some non-sealed chains, the plate may slide on by hand. On many sealed or press-fit clip links, you will need a chain press tool or another controlled method to seat it.
The key here is simple: press the side plate on evenly and slowly. Do not crush it into place. Do not over-tighten it. Do not assume “tighter is safer.” Too much pressure can bind the link, damage the seals, and create a stiff spot in the chain.
Your goal is to press the outer plate far enough that the grooves on the master link pins are exposed enough for the clip to snap into place. A smart way to judge the correct position is to compare the finished width to a neighboring link. If the master link looks dramatically tighter than the links next to it, stop and reassess before going further.
After pressing the plate, flex the link by hand. It should move like the surrounding links. If it feels stiff, sticky, or weirdly tight, the plate may be over-pressed or the seals may not be seated correctly.
Step 4: Install the Master Link Clip in the Correct Direction
This is the step everyone remembers, but not always correctly.
Slide the clip into the grooves on the master link pins. You can usually start one side of the clip in the first groove, then use master link pliers or careful pressure to push the other side into place until it snaps fully home.
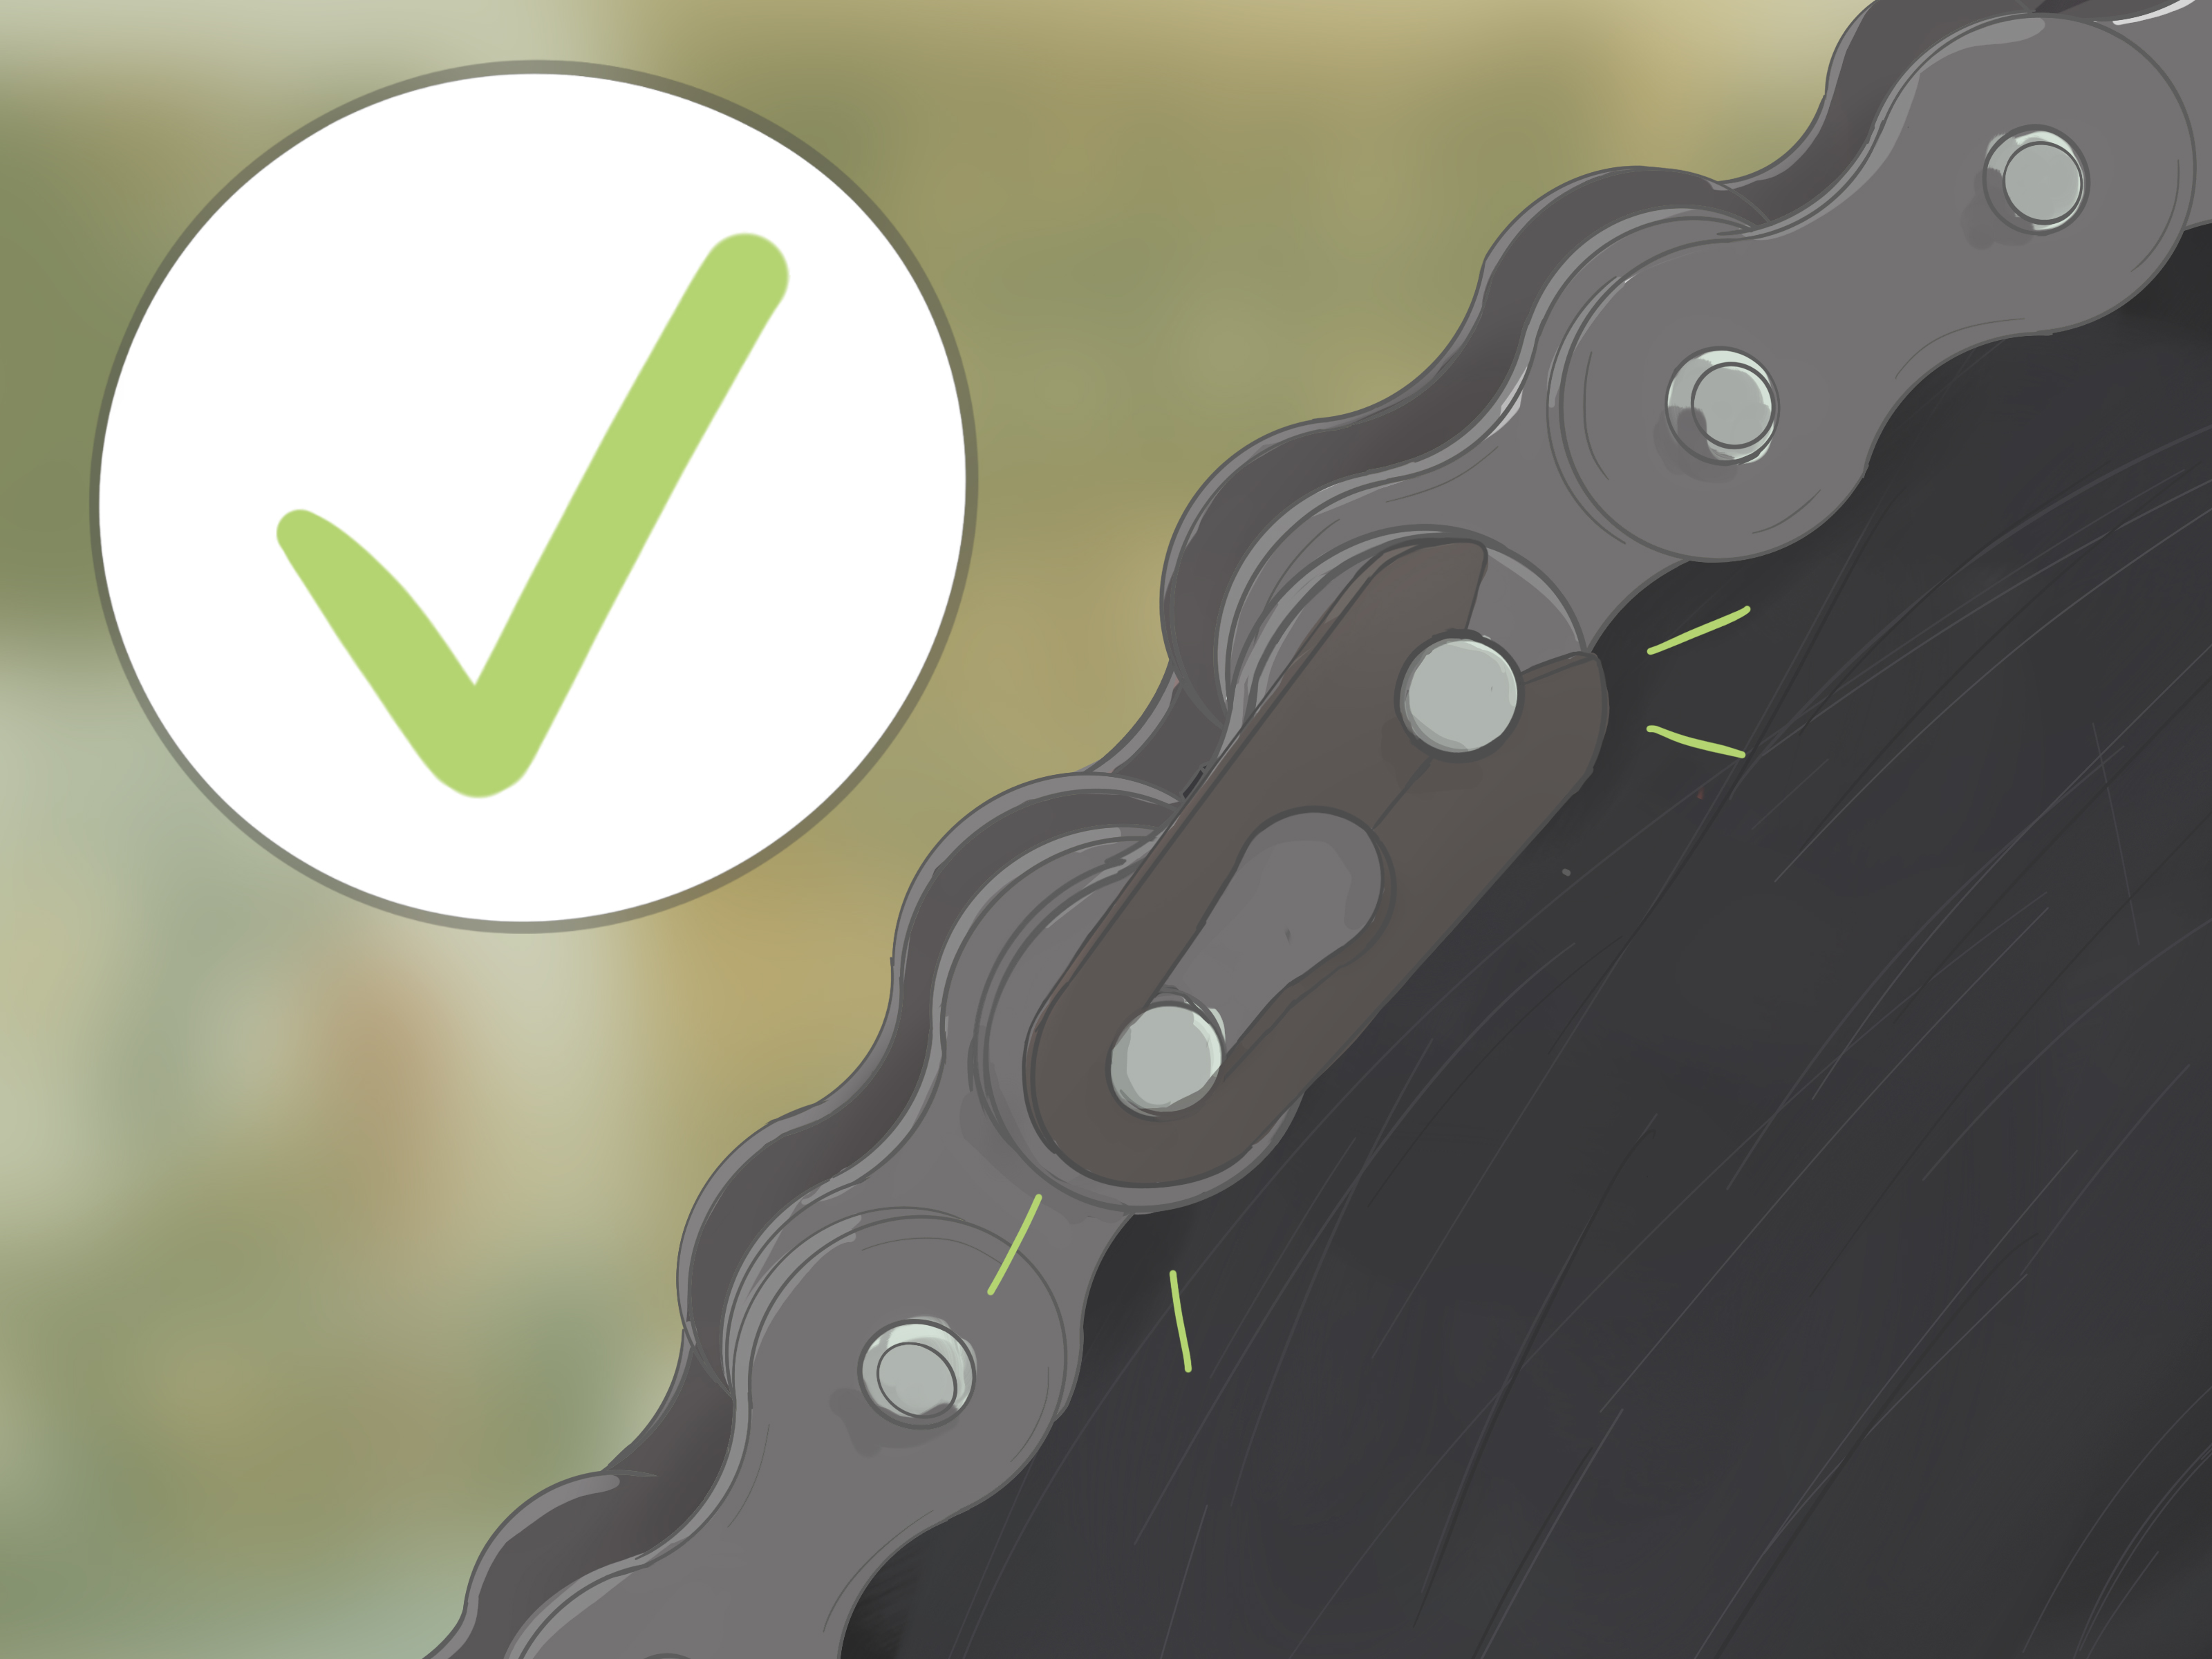
The most important orientation rule is this: the closed end of the clip should face the direction of chain travel. The open end trails behind. That way, if the chain passes debris or brushes against something, the clip is less likely to catch and peel off.
If that sounds abstract, use this memory trick: the rounded, closed end should hit the wind first. The open end should not be leading the parade.
Once the clip is installed, inspect both grooves carefully. The clip should sit fully in the grooves on both pins. If one side is only partly engaged, the job is not finished. Give it another careful look under good light. Tiny parts love to pretend they are seated when they are merely being optimistic.
Step 5: Inspect, Lubricate, Rotate, and Recheck
With the clip installed, do not just admire your work and walk away. This is the inspection stage, and it matters.
- Check that the clip is fully seated in both grooves
- Make sure the closed end faces the direction of travel
- Confirm the outer plate is not over-pressed
- Flex the master link to verify it moves freely
- Wipe away excess grease and apply appropriate chain lubricant if needed
Next, slowly rotate the wheel by hand and watch the master link move through the chain path. Look for tight spots, wobble, rubbing, or anything that seems off. Then check overall chain slack and alignment according to your machine’s service specification.
If the link tracks smoothly, the clip stays seated, and the chain tension is correct, you are done. Congratulations: the tiny metal crescent has accepted your application.
Common Mistakes to Avoid
Using the Wrong Master Link
This is the biggest one. Master links are not universally interchangeable just because the number on the box looks familiar. Match the link to the exact chain model, not just the chain size.
Installing the Clip Backward
If the open end faces the direction of travel, it is easier for the clip to snag and come off. Always orient the clip so the closed end leads.
Over-Pressing the Side Plate
Pressing the side plate too far can pinch the link and damage the seals. The link should move freely when finished. Tight does not equal right.
Skipping Grease on Sealed Chains
Those little seals are not decoration. On O-ring and X-ring chains, use the supplied grease or appropriate assembly grease on the pins and seals during installation.
Reusing Damaged Parts
If the clip is bent, distorted, or launched across the garage and stepped on, replace it. If the side plate or link is damaged, replace the whole connecting link kit. This is not the moment to become creatively frugal.
Using a Clip on a Rivet-Type Link
A clip is for clip-style master links. A rivet link must be riveted. Mixing the two is a bad idea dressed up as a shortcut.
Do You Need Special Tools?
Not always, but they help. Some non-sealed chains with loose-fit clip links can be assembled with basic hand tools. Many sealed chains and press-fit clip links are much easier to assemble correctly with a small chain press tool and master link pliers.
If you work on chains more than once in a blue moon, a dedicated tool is a smart purchase. It reduces the chance of mangling the clip, pressing the plate unevenly, or inventing new swear words in front of the toolbox.
When You Should Not Use a Clip-Style Master Link
Clip-style links are popular because they are simple and serviceable, but they are not automatically the best choice for every machine. Some modern street applications and some chain manufacturers favor rivet-style links, especially where power, sustained speed, or manufacturer recommendation points that direction.
If your service manual or chain manufacturer specifies a rivet master link, follow that guidance. The easiest installation method is not always the right one.
Quick FAQ
Which way should the master link clip face?
The closed end should face the direction of chain travel, and the open end should trail behind.
Can I install a master link clip without a special tool?
Sometimes, yes, especially on non-sealed loose-fit clip links. But a press tool or master link pliers makes installation cleaner and safer on many chains.
Should the master link be stiff after installation?
No. It should articulate like the surrounding links. If it feels tight or sticky, the side plate may be over-pressed or the seals may be misaligned.
Can I reuse an old master link clip?
It is best not to. Reuse is a poor gamble on a critical chain component.
Do all chains use clip master links?
No. Some use rivet-style links, and some chain lines strongly prefer them. Always follow the chain manufacturer’s instructions.
Real-World Experiences: What This Job Usually Teaches People
One of the funny things about installing a chain master link clip is that the job looks almost insultingly easy from a distance. Two pins, one plate, one clip, done. Then you actually do it, and suddenly you understand why experienced mechanics keep calm, use proper tools, and squint at the clip like it just insulted their family.
A very common first experience goes like this: the chain is on, the master link is in place, the outer plate is started, and everything feels wonderfully under control for about nine seconds. Then the installer realizes the plate does not want to slide on far enough by hand. At that moment, many people make the classic mistake of trying to force the clip on anyway. The clip bends, one pin is half engaged, the other is mocking everyone involved, and the garage atmosphere changes dramatically. The lesson is simple: if the side plate is a press fit, treat it like one.
Another frequent experience is the “orientation panic.” You install the clip, step back proudly, and then your brain whispers, “Wait… is the open end supposed to lead?” That moment has happened to a lot of people. The easiest way to avoid it is to decide the direction before the clip goes on. Think about where that section of chain moves when the machine goes forward. The closed end should lead. Once you use that rule a few times, it sticks.
People also tend to remember the first time they over-press a side plate. It usually happens because they are being extra careful and accidentally become extra enthusiastic. The link ends up tighter than the neighboring links, and instead of moving smoothly, it feels stiff and awkward. That is when many riders learn that chain work is less about force and more about control. Gentle, even pressure wins. Hulk mode loses.
Sealed chains add another layer of experience because the little O-rings or X-rings are excellent at trying to escape, tilt, or hide under grease exactly when your hands are slippery. Most experienced installers eventually develop a ritual: lay out every component in order, grease lightly, assemble slowly, and check seal placement twice before pressing the side plate. It is not glamorous, but it saves a lot of frustration.
Then there is the inspection habit. Riders who have done this job a few times almost always say the same thing: the installation itself matters, but the recheck matters just as much. Rotate the wheel. Watch the link pass over the sprockets. Look at the clip again. Tug your confidence back down to earth for ten seconds and verify everything. That quick recheck is often the difference between “job done” and “I should not have assumed that was seated.”
In real garages, the people who get the best results are rarely the fastest. They are the ones who keep the work clean, use the right link, orient the clip correctly, and refuse to rush the last 2 percent of the job. A chain master link clip may be small, but it rewards respect. And once you install one correctly a few times, the whole process stops feeling mysterious and starts feeling satisfyingly mechanical, which is a fancy way of saying: you and the tiny clip finally make peace.
Conclusion
If you want to know how to install a chain master link clip the right way, the process comes down to five essentials: use the correct link, grease the parts if the chain is sealed, press the side plate carefully, orient the clip with the closed end facing chain travel, and inspect the finished link like it owes you money.
It is a small job, but it is not a careless one. Take your time, use the right tools, and double-check your work. Do that, and your chain will be far more likely to run smoothly instead of turning into the mechanical version of a jump scare.