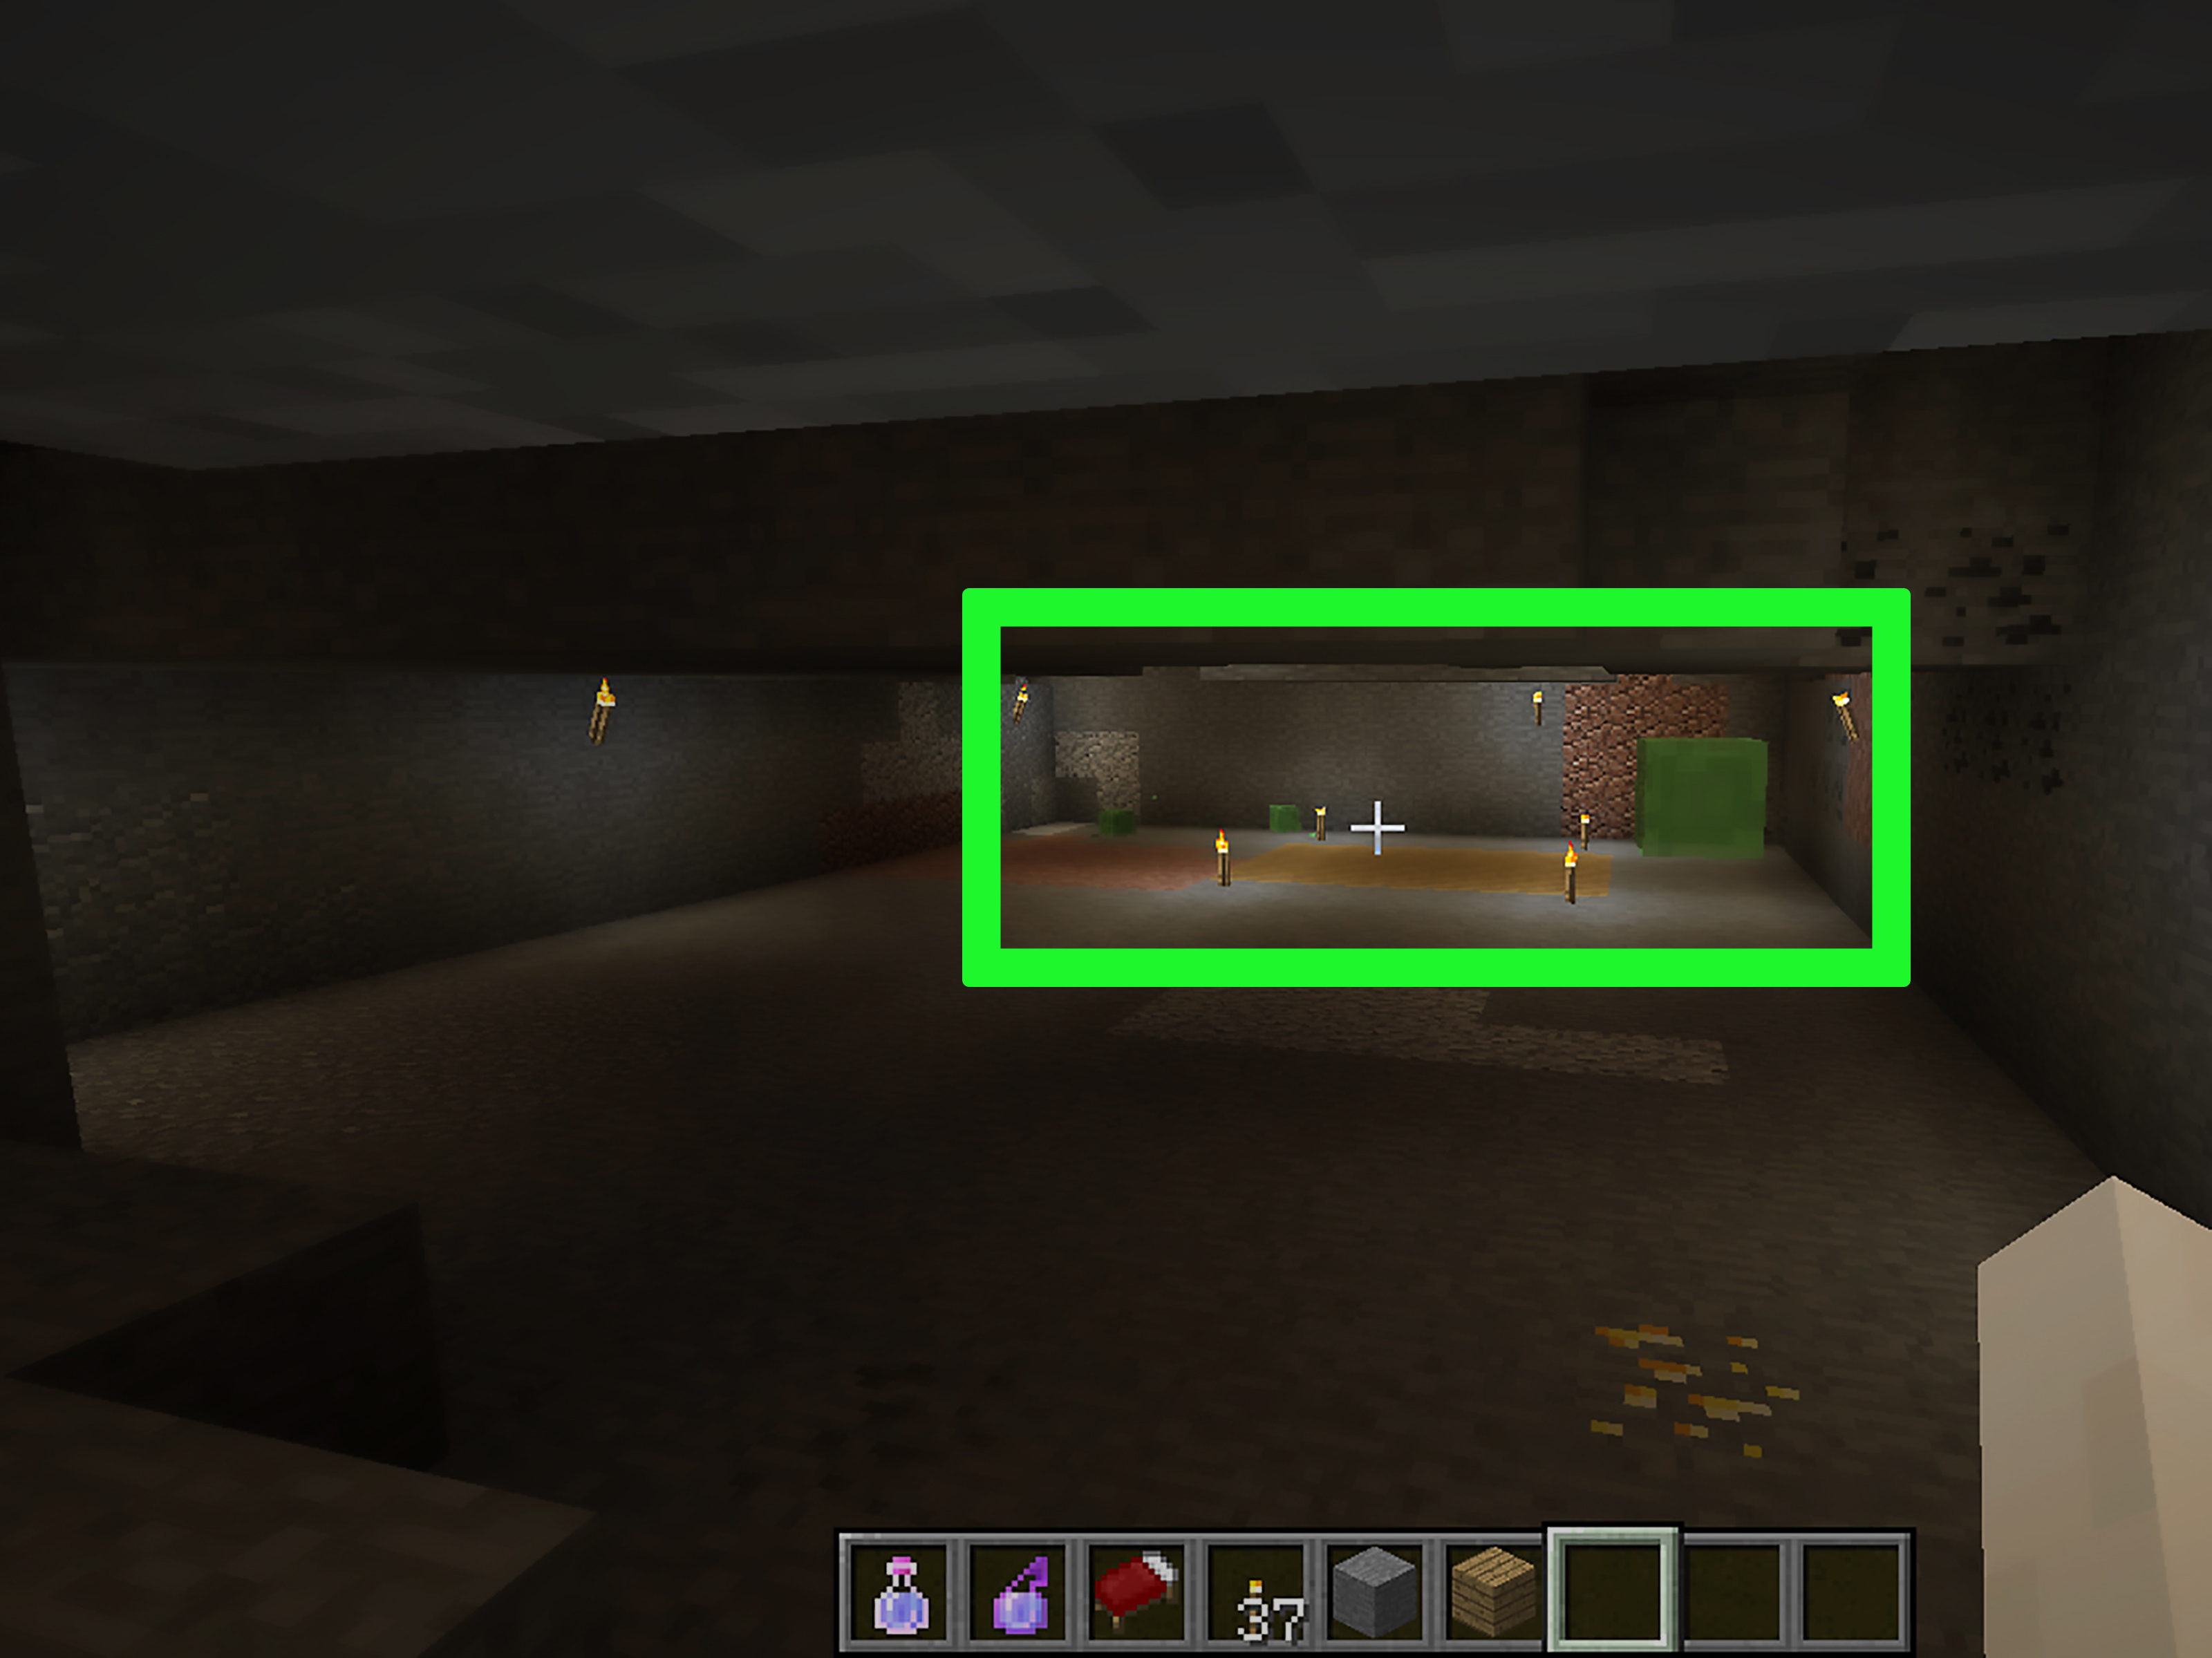
Slimes are some of the strangest little troublemakers in Minecraft. They bounce, split, wobble, squeak, and somehow manage to be both adorable and mildly annoying at the same time. But if you want slimeballs for sticky pistons, leads, slime blocks, magma cream, or redstone contraptions that look like they were designed by a caffeinated engineer, you need to know where these green cubes actually spawn.
The good news: finding slimes is not magic. The bad news: it can feel like magic when you are wandering through a cave for twenty minutes and the only thing that finds you is a skeleton with Olympic-level aim. Slimes follow specific spawning rules, and once you understand those rules, you can hunt them much more efficiently.
This guide explains how to find slimes in Minecraft in 15 steps, including swamp hunting, slime chunks, Y-levels, moon phases, light levels, player distance, farming tips, and common mistakes. Grab a sword, some torches, a stack of blocks, and maybe a snack. The slime hunt begins.
What Are Slimes in Minecraft?
Slimes are hostile, cube-shaped mobs that spawn in the Overworld. They come in three natural sizes: large, medium, and small. Large slimes split into medium slimes when defeated, and medium slimes split into small slimes. Only the smallest slimes drop slimeballs, usually between zero and two per small slime unless Looting improves your luck.
Slimeballs are more useful than they look. One slimeball can turn a regular piston into a sticky piston. Nine slimeballs make a slime block. Slimeballs are also used for leads, magma cream, and several redstone projects. In other words, if you enjoy building secret doors, flying machines, mob movers, or bouncy nonsense, slimes are your squishy little supply chain.
How to Find Slimes in Minecraft: 15 Steps
Step 1: Know the Two Main Slime Locations
Slimes naturally spawn in two main places: swamp biomes and slime chunks. Swamps are easier for beginners because you can hunt above ground. Slime chunks are better for long-term slimeball farming because they work underground and are not tied to moon phases. If you only need a few slimeballs, go swamp hunting. If you need barrels of slimeballs for redstone experiments, find a slime chunk.
Step 2: Search Swamp and Mangrove Swamp Biomes
Swamps and mangrove swamps are the simplest places to start. Slimes can spawn in these biomes at night when the right height and light conditions are met. Look for shallow water, muddy ground, vines, lily pads, mangrove trees, frogs, and that unmistakable “this place smells like wet socks” atmosphere. Swamps are not always close to spawn, so bring a boat, food, a bed, and coordinates if you are traveling far.
Step 3: Hunt at the Correct Height in Swamps
In swamp biomes, slimes spawn between Y=51 and Y=69. That usually places them near the surface, which is convenient because you do not need to dig a giant underground ballroom just to meet a cube. If you are standing too high on a hill or too low in a ravine, slime spawns may not happen. Use your coordinates display to check your Y-level before blaming the game, the moon, or your unlucky pickaxe.
Step 4: Wait for Night, Preferably a Full Moon
Swamp slimes are connected to moon phase. They spawn most often during a full moon and do not spawn during a new moon. If you wait in a swamp all night and see nothing except spiders auditioning for a horror movie, check the moon. A fuller moon means better odds. A new moon means you should sleep, mine, organize chests, or finally admit that your “temporary base” has been temporary for 87 Minecraft days.
Step 5: Keep the Area Dark Enough for Swamp Slimes
Swamp slimes need low light, generally light level 7 or less. This is different from many modern hostile mob spawning rules, so do not assume slimes behave exactly like zombies or skeletons. If you flood the swamp with torches, lanterns, and glowstone like you are opening a shopping mall, you may reduce slime spawns. Use just enough lighting to stay safe around your waiting area, but leave the actual slime-spawning ground dim.
Step 6: Clear Flat Space in the Swamp
Slimes need room to spawn. Large slimes require more open space than small mobs, so cluttered ground, leaves, water, fences, and uneven blocks can reduce the chances. Clear a flat area in the swamp between Y=51 and Y=69. Remove extra trees, fill small holes, and create wide patches of solid ground. Think of it as preparing a dance floor for gelatinous squares. A weird job, yes, but Minecraft makes all of us do weird jobs eventually.
Step 7: Stand the Right Distance Away
Like many hostile mobs, slimes will not spawn right on top of you. A good practical rule is to wait at least 24 blocks away from the spawning area while staying close enough that mobs do not instantly despawn. For swamp hunting, build a small platform or safe hut overlooking the cleared area. This gives slimes room to appear while keeping creepers from turning your research project into modern art.
Step 8: Listen for Slime Sounds
Slimes make distinctive squishy hopping sounds. If you are underground, those sounds are your treasure map. Turn up hostile mob sounds and listen carefully. A repeated wet bouncing noise may mean a slime is nearby in a cave, mineshaft, or slime chunk. Headphones help. So does not sprinting blindly into darkness, although many players prefer the “panic first, learn later” method.
Step 9: Dig Below Y=40 to Search for Slime Chunks
The second major way to find slimes is by locating a slime chunk. Slime chunks are special 16-by-16 block areas where slimes can spawn underground below Y=40, regardless of light level. About one in ten chunks is a slime chunk. That means you may need to explore several chunks before finding one, but once you do, you have a reliable slime source.
Step 10: Use Chunk Borders in Java Edition
If you play Java Edition, press F3 + G to display chunk borders. This helps you see where one chunk ends and another begins. Since slime chunks are chunk-based, borders make the search much cleaner. When you hear or see slimes below Y=40, mark the exact chunk. Do not just say, “It was somewhere near the cobblestone, I think.” Future you will not be impressed.
Step 11: Use Your Seed With a Slime Chunk Finder
If you are comfortable using external tools, a slime chunk finder can save a lot of time. In Java Edition, slime chunks depend on the world seed. In Bedrock Edition, slime chunk behavior is different and chunk locations are commonly treated as consistent across worlds. Either way, entering your seed into a reliable chunk finder can point you toward slime chunks without digging half the planet into Swiss cheese.
Step 12: Create a Test Room Underground
To confirm a slime chunk manually, dig a large room below Y=40 inside a suspected chunk. Make the floor flat and clear enough for large slimes to spawn. A 16-by-16 room with at least three blocks of vertical space is a good starting point. Light the area well so other hostile mobs are less likely to spawn. Slimes in slime chunks do not care about light, so torches can actually help by reducing competition from zombies, skeletons, and creepers.
Step 13: Spawn-Proof Nearby Caves
If no slimes appear, nearby caves may be stealing the mob cap. Minecraft only allows so many hostile mobs to exist in loaded areas. If caves around your slime chunk are packed with mobs, slimes may struggle to spawn. Explore nearby caves and light up floors, ledges, and tunnels. This step is not glamorous, but it works. Think of it as evicting the skeleton neighborhood association so your slime business can open.
Step 14: Build a Basic Slime Farm
Once you confirm a slime chunk, turn it into a simple slime farm. Build spawning platforms below Y=40 with enough vertical space for large slimes. Add lighting to prevent other mobs. Use iron golems to lure slimes toward the edges, then guide them into a killing area with magma blocks, campfires, water streams, or other farm designs. Place hoppers or hopper minecarts beneath the killing area to collect slimeballs automatically.
Step 15: Use Looting and Keep Farming Efficiently
If you are hunting slimes by hand, use a sword with Looting to increase slimeball drops from small slimes. If you are farming automatically, improve efficiency by spawn-proofing the surrounding area, standing at the correct distance, and keeping collection systems clear. A good slime farm may not look fancy, but when it starts filling chests with slimeballs, it becomes one of the most satisfying utility farms in the game.
Swamp Slimes vs. Slime Chunks: Which Method Is Better?
Both methods work, but they serve different players. Swamp slime hunting is best when you are early in the game, need a few slimeballs, and do not want to dig a massive underground space. It is simple: find a swamp, wait for the right moon, stay at the right Y-level, and keep the area dark and open.
Slime chunks are better for long-term slimeball production. They require more setup, but they can be turned into farms that run while you work nearby. Slime chunks also ignore light level, which means you can torch the platforms and reduce unwanted mob spawns. If you are building redstone doors, flying machines, item sorters, or piston contraptions, a slime chunk farm is worth the investment.
Common Reasons Slimes Are Not Spawning
You Are in the Wrong Biome or Wrong Chunk
Not every underground area is a slime chunk, and not every wet-looking biome counts as a swamp. Check your biome and chunk carefully. If you are underground below Y=40 and never see slimes after a long test, you may simply be in a normal chunk.
You Are Too Close
If you stand directly inside your spawning platform, slimes may not spawn. Move away from the area and wait. A platform or AFK spot about 24 to 32 blocks away from the spawning space is often useful for testing.
The Area Is Too Small
Large slimes need enough open space. A cramped two-block-high tunnel is not enough. Clear a proper room and remove obstructions, including blocks, liquids, and awkward decorations that make spawning impossible.
The Mob Cap Is Full
Nearby caves filled with hostile mobs can reduce slime spawns. Light up caves, ravines, and dark surfaces around your farm. This is especially important for underground slime farms, where hidden caves are basically mob hotels with terrible customer service.
The Moon Is Wrong for Swamp Hunting
If you are hunting in a swamp during a new moon, you are wasting time. Wait for a fuller moon, especially a full moon, and try again.
Best Uses for Slimeballs
Once you finally collect slimeballs, you have several excellent crafting options. The most famous is the sticky piston, made by combining a piston with a slimeball. Sticky pistons are essential for hidden doors, redstone elevators, block movers, and dramatic “secret base entrance” moments.
You can also craft slime blocks with nine slimeballs. Slime blocks bounce entities, stick to many blocks, and are used in flying machines and advanced redstone builds. A slime block may look like a giant cube of lime gelatin, but in the hands of a redstone builder, it becomes engineering equipment.
Slimeballs can also make leads, which help move animals, villagers in boats, or mobs you have questionable plans for. They combine with blaze powder to create magma cream, an ingredient used for Fire Resistance potions. That makes slimeballs useful not only for redstone but also for Nether survival.
Extra Experience: What Slime Hunting Feels Like in Real Gameplay
Finding slimes in Minecraft can be weirdly memorable because it sits somewhere between science and superstition. The first time many players look for slimes, they do everything almost right. They dig below Y=40, make a room, add torches, wait patiently, and nothing happens. Then they walk three chunks over, hear a squelchy bounce in the darkness, and suddenly a giant green cube lands on their face like a hostile trampoline.
One of the best practical experiences is swamp hunting early in a survival world. You may not have diamonds, Elytra, or a fancy redstone storage system yet. You only have iron armor, a half-broken sword, and the courage of someone who forgot to bring a bed. Then the moon rises, the swamp gets quiet, and suddenly slimes start appearing between the trees. Large slimes are easy to spot because they bounce above the grass, but the real reward comes after splitting them down into tiny slimes and collecting those first precious slimeballs.
The funny thing about slime hunting is that it teaches patience. Minecraft often rewards direct action: mine the block, kill the mob, craft the item. Slimes are different. You need the right place, the right height, the right distance, and sometimes the right moon. It is less like fishing with a rod and more like convincing a very shy cube to attend a party.
Underground slime chunk hunting feels different. It is more technical, and sometimes more frustrating. You dig out a beautiful test chamber, light it perfectly, clear the edges, and stare at an empty room. Then, after lighting nearby caves and moving your AFK spot, one slime finally appears. That moment is surprisingly satisfying because it confirms the chunk. You are no longer guessing. You have found a renewable slime source, and your future sticky piston empire is officially open for business.
Building a slime farm adds another layer of satisfaction. At first, the farm may be simple: one platform, one iron golem, one magma-block killing floor, and a hopper line into a chest. It may look ugly. It may be made from whatever blocks you had in your inventory. But when slimeballs begin collecting automatically, the farm feels like a machine that solved a problem you used to chase manually. That is one of Minecraft’s best feelings: turning a resource hunt into infrastructure.
There are also small lessons you only learn by doing. Slimes need space. Nearby caves matter. Standing too close ruins your test. Lighting is your friend in slime chunks but not always in swamps. A full moon can make swamp hunting feel generous, while a new moon can make the biome feel broken. And yes, small slimes may do no real damage, but they will still chase you with the confidence of a boss mob. Respect the tiny jelly cubes.
In the end, slime hunting is worth it because slimeballs unlock creativity. A few slimeballs can make leads for animal transport. A stack can support sticky piston doors. A chest full can fuel flying machines, elevators, launchers, and ridiculous bounce pads. Slimes may be goofy, but they are also one of the keys to advanced Minecraft building. Once you know how to find them, the game opens up in wonderfully sticky ways.
Conclusion
Finding slimes in Minecraft becomes much easier when you stop wandering randomly and start using the game’s rules. For quick slimeballs, search swamp and mangrove swamp biomes at night between Y=51 and Y=69, preferably during a full moon. For a long-term supply, dig below Y=40 and locate a slime chunk. Clear space, control mob spawns, stand the right distance away, and use Looting or an automated farm to improve your results.
Slimes may look silly, but they are essential for some of the most useful and creative items in Minecraft. Whether you are building a secret door, moving mobs with leads, brewing Fire Resistance potions, or designing a redstone contraption that makes your friends question your sleep schedule, slimeballs are worth the hunt.
Note: This guide focuses on normal survival-friendly slime-finding methods for current Minecraft Java and Bedrock gameplay. Always recheck mechanics after major updates, especially if you play snapshots, previews, or modded versions.