Baseboards are the quiet overachievers of home design. They protect the bottom of your walls, create a polished transition to the floor, and collect an impressive assortment of dust, pet hair, shoe marks, crumbs, grease, and mysterious household fuzz. Unfortunately, because they sit below normal eye level, most of us do not notice them until they look as though they have been auditioning for a haunted-house renovation.
The good news is that learning how to clean baseboards is not complicated. The most effective routine is to remove loose dust first, wash with a lightly dampened cloth and a gentle cleaner, treat stubborn spots separately, dry the trim, and clean the floor last. This order prevents dry dust from turning into gray sludge and keeps freshly cleaned floors from receiving a second shower of debris.
This guide explains the best way to clean painted, stained, unfinished, wood, vinyl, and MDF baseboards. It also covers scuff marks, greasy kitchen trim, pet hair, hard-to-reach grooves, and methods for cleaning baseboards without bending down.
Why Baseboards Get Dirty So Quickly
Baseboards occupy a difficult neighborhood. Dust falls from furniture, walls, window treatments, and air vents before settling on their narrow upper edges. Walking, sweeping, and vacuuming can stir particles back into the air, where they eventually land on the trim again.
Different rooms create different kinds of messes:
- Kitchens: Airborne grease, food splashes, crumbs, and sticky residue.
- Entryways: Mud, shoe marks, rainwater, pollen, and outdoor dirt.
- Bathrooms: Hair, dust, moisture, cosmetic residue, and occasional mildew.
- Bedrooms: Fabric fibers, hair, skin flakes, and dust from bedding.
- Pet areas: Fur, dander, paw marks, spilled water, and food debris.
- Playrooms: Fingerprints, crayons, toys, and unexplained sticky substances known only to children.
Cleaning every baseboard with the same product is therefore not always effective. A dusty bedroom may need only a vacuum and microfiber cloth, while kitchen trim may require a grease-cutting cleaner.
What You Need to Clean Baseboards
You do not need a specialized cabinet full of cleaning products. In most homes, the following supplies are enough:
- Vacuum with a soft brush or crevice attachment
- Dry microfiber cloth or microfiber duster
- Two or three clean microfiber cloths
- Bucket or bowl
- Warm water
- Mild dish soap
- Soft sponge
- Old soft-bristled toothbrush or clean paintbrush
- Cotton swabs for narrow corners
- Dry towel
- Surface-appropriate degreaser or wood cleaner, when needed
- Melamine sponge for carefully tested scuff removal
Mild dish soap is a popular starting point because it can loosen ordinary dirt and light grease without the harshness of many heavy-duty products. Whatever cleaner you choose, test it on an inconspicuous section first, especially if the paint is old, flat, matte, chalky, cracked, or already peeling.
How to Clean Baseboards Step by Step
1. Clear the Area
Move lightweight furniture, baskets, curtains, toys, pet bowls, and other objects away from the walls. You do not necessarily need to drag a grand piano into the hallway, but exposing as much trim as possible will give you a more consistent result.
Clean shelves, windowsills, blinds, furniture, and other higher surfaces before starting on the baseboards. Dust naturally falls downward, and gravity has never once agreed to take a day off.
2. Remove Loose Dust and Hair
Use a vacuum with a soft brush attachment to travel along the top edge, front surface, grooves, corners, and gap beside the floor. A dry microfiber cloth or duster also works well. For ornate molding, loosen debris with a clean paintbrush while holding the vacuum nozzle nearby.
Do not skip dry dusting. Applying water directly to a dusty baseboard creates muddy streaks that require more wiping and may settle into decorative grooves.
3. Mix a Gentle Cleaning Solution
Add several drops of mild dish soap to a bucket or bowl of warm water. The solution should be lightly soapy rather than foamy enough to host a bubble party.
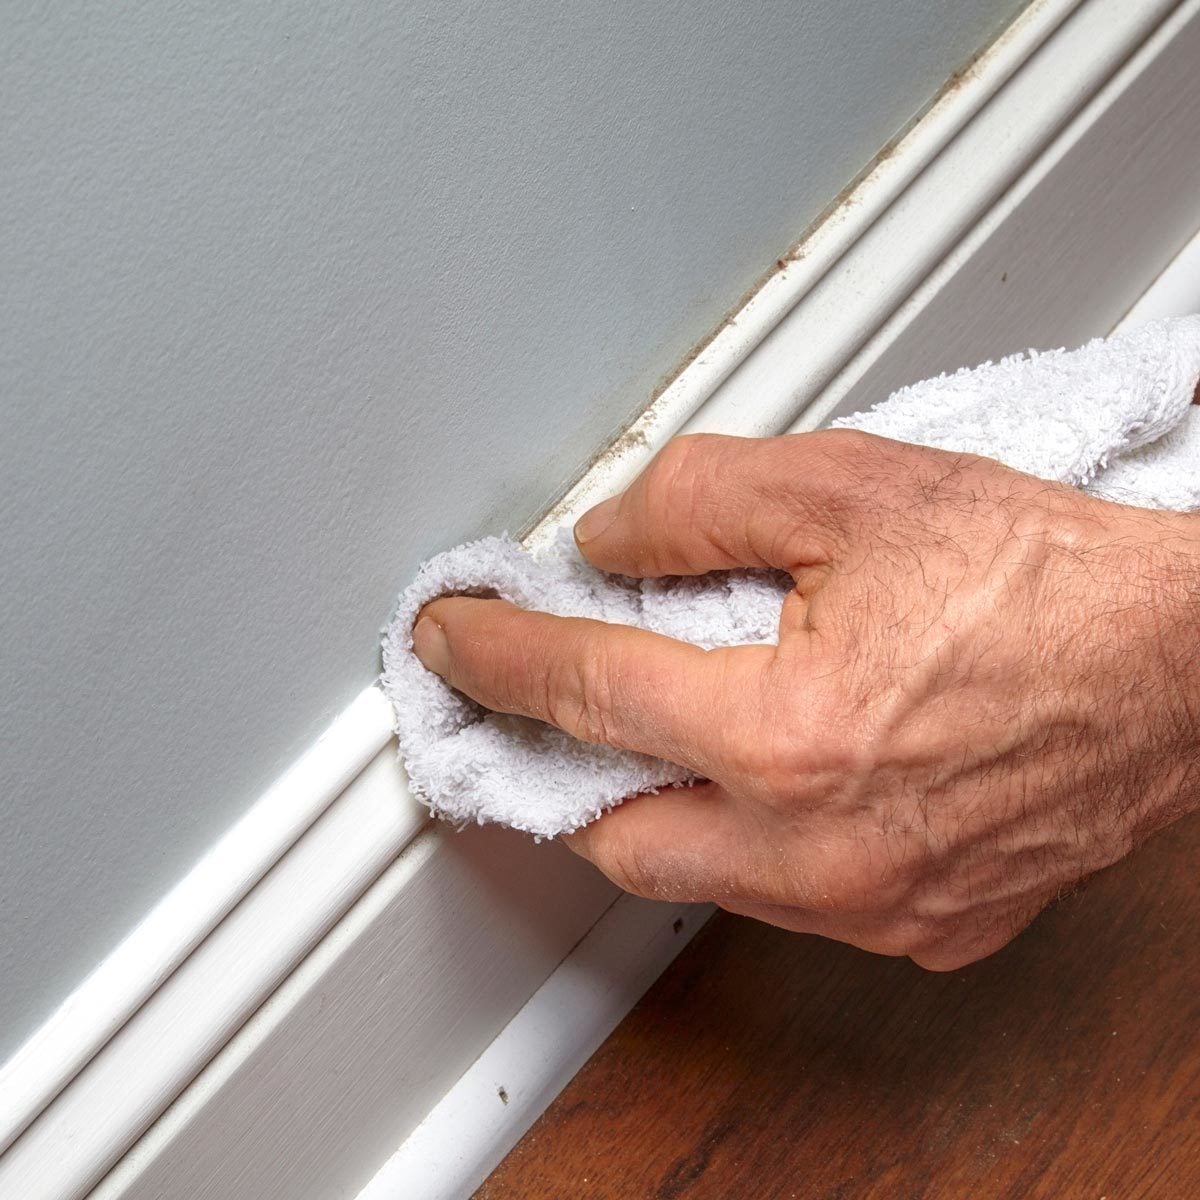
Dip a microfiber cloth into the water and wring it thoroughly. The cloth should be damp, not dripping. Excess water can seep into gaps, damage MDF, affect unfinished wood, soften failing paint, or collect along hardwood flooring.
4. Wash in Small Sections
Begin at one corner and work around the room in sections of approximately three to four feet. Wipe the narrow top ledge first, then the face of the baseboard, decorative details, and lower edge.
Rinse or replace the cloth as it becomes dirty. Continuing with gray cleaning water does not clean the remaining trim; it simply relocates the dirt and gives it a new address.
5. Clean Corners and Grooves
Use a dampened toothbrush, cotton swab, or small detailing brush to clean inside carved profiles, seams, inside corners, and the thin line where the baseboard meets the floor. Apply light pressure to avoid scratching the finish.
6. Rinse and Dry
Wipe the trim with a second cloth lightly dampened with plain water to remove soap residue. Follow immediately with a dry microfiber cloth or towel.
Drying is particularly important for natural wood, MDF, damaged trim, and rooms with hardwood or laminate flooring. It also prevents water spots and leaves painted baseboards looking smoother.
7. Clean the Floor Last
Finish by vacuuming, sweeping, or mopping the floor. This picks up dust, crumbs, and droplets that fell while you worked.
How to Clean Painted Baseboards
Most painted baseboards can be cleaned with warm water, mild dish soap, and a soft microfiber cloth. Satin, semi-gloss, and gloss finishes usually tolerate gentle washing better than flat or matte paint.
- Vacuum or dry-dust the trim.
- Test the cleaning solution in a hidden corner.
- Wipe with a well-wrung microfiber cloth.
- Use gentle circular motions on visible grime.
- Rinse with a clean damp cloth.
- Dry immediately.
If paint transfers to the cloth, becomes shiny in one spot, softens, or starts flaking, stop. The finish may be delicate or deteriorating. Clean the remaining area with less moisture and pressure, or plan to repair and repaint it.
How to Clean Wood Baseboards
Stained, sealed, and unfinished wood require more caution than painted trim. First remove loose dirt with a vacuum or dry microfiber cloth. For sealed wood, use a barely damp cloth with a small amount of mild soap or a cleaner specifically labeled for the finish.
Never soak wood baseboards. Water can enter joints, raise the grain, dull the finish, or cause swelling. Unfinished or antique wood is especially sensitive and may be safer to clean primarily with dry methods unless the manufacturer or a restoration professional recommends otherwise. Professional cleaning and home-care guidance consistently emphasizes matching the cleaner to the trim finish and limiting moisture around wood.
How to Clean MDF, Vinyl, and Tile Baseboards
MDF Baseboards
Medium-density fiberboard is commonly painted, but its interior can swell if water enters through chips, seams, nail holes, or damaged edges. Use a well-wrung cloth, work quickly, and dry each section immediately.
Vinyl or Rubber Baseboards
Vinyl and rubber trim are common in utility rooms, offices, basements, and commercial-style spaces. They generally tolerate gentle soap and water, but manufacturer instructions should take priority. A nonabrasive sponge can help remove stuck-on dirt.
Tile Baseboards
Clean tile with a cleaner appropriate for the tile material. Use a small brush on grout lines, taking care not to spread dirty grout water onto nearby walls or flooring.
How to Remove Scuff Marks from Baseboards
Start with the gentlest method and escalate only when necessary:
- Rub the mark with a damp microfiber cloth.
- Add one drop of dish soap and wipe again.
- Try a paste made from baking soda and water on durable painted trim.
- Use a lightly dampened melamine sponge only after spot testing.
Melamine sponges are effective because they are mildly abrasive. That same quality can dull glossy paint or remove color, so use very little pressure. Internet cleaning tests and professional recommendations agree that stubborn-mark treatments should be tested before being used across visible trim.
Some black marks are not dirt at all. If the paint has chipped and exposed darker material underneath, no amount of scrubbing will restore the color. The area needs touch-up paint.
How to Clean Greasy Kitchen Baseboards
Kitchen baseboards often collect an invisible film of cooking oil that traps dust. Plain water may slide over this residue without removing it.
- Dry-dust or vacuum the baseboards.
- Apply warm water with a small amount of grease-cutting dish soap.
- Let the damp solution sit on a sticky section for a minute without allowing it to dry.
- Wipe gently with a microfiber cloth.
- Use a surface-safe degreaser for stubborn buildup, following its label.
- Rinse and dry the trim.
Change the water frequently. Once the solution becomes cloudy or oily, it is no longer an enthusiastic member of the cleaning team.
How to Clean Baseboards Without Bending Down
Cleaning trim should not require spending an afternoon crawling around like a detective searching for clues. Helpful upright methods include:
- A vacuum extension wand with a soft brush attachment
- An extendable microfiber duster
- A flat microfiber mop with a washable pad
- A clean microfiber cloth secured around a broom head
- A dedicated long-handled baseboard cleaning tool
Use the long-handled tool for broad surfaces, then address corners or detailed molding only where necessary. Professional cleaners commonly recommend extension tools and microfiber mop heads to reduce kneeling while controlling dust and moisture.
How Often Should You Clean Baseboards?
The ideal schedule depends on traffic, pets, flooring, allergies, cooking habits, and how quickly dust collects. A practical routine is:
- Weekly: Quick dusting in kitchens, entryways, bathrooms, and pet areas.
- Monthly: Dusting throughout the home and spot cleaning visible marks.
- Every three to six months: Thorough washing behind furniture and in low-traffic rooms.
- Immediately: Wipe up spills, mud, pet food, and grease before they dry.
Homes with shedding pets, active children, carpet, frequent visitors, or allergy concerns may need more regular attention. Keeping up with light dusting is considerably easier than attacking six months of compressed fluff with the determination of an archaeologist.
Common Baseboard Cleaning Mistakes
Washing Before Dusting
Dry debris mixes with water and creates streaks. Vacuum or dust first.
Using Too Much Water
Saturated cloths can damage wood, MDF, paint, laminate, and nearby flooring. Wring the cloth until it is only damp.
Scrubbing Aggressively
Hard brushes and abrasive pads can alter the sheen or remove paint. Use gentle pressure and allow the cleaner time to loosen grime.
Skipping the Spot Test
Paint formula, age, sheen, and previous repairs affect how trim responds. Test every unfamiliar cleaner.
Spraying Cleaner Directly on the Wall
Overspray can run into seams or land on flooring. Apply cleaner to the cloth unless the product label directs otherwise.
Mixing Cleaning Products
Do not combine bleach with ammonia, vinegar, or other cleaners. Follow label directions and ventilate the room when using strong products. The CDC specifically warns never to mix household bleach with other cleaners or disinfectants because dangerous fumes may result.
Using One Dirty Cloth for the Whole House
A loaded cloth spreads grime. Keep several cloths nearby and switch when one becomes visibly dirty.
How to Keep Baseboards Clean Longer
- Vacuum the top edge whenever you vacuum the room.
- Wipe fresh spills and shoe marks immediately.
- Clean walls, blinds, vents, and furniture so less dust falls onto the trim.
- Move pet bowls slightly away from the wall or place them on a washable mat.
- Use door mats to reduce tracked-in soil.
- Repair cracks and failed caulk that trap grime.
- Touch up chipped paint after the trim is clean and fully dry.
A dryer sheet can pick up light dust and may leave an antistatic residue that temporarily reduces cling. However, it is best used on already-clean trim rather than as a substitute for washing greasy or stained baseboards. Some sheets also contain fragrance or conditioning agents, so test first and avoid using them on unfinished wood.
Experience-Based Lessons from Real-World Baseboard Cleaning
The following observations reflect recurring experiences shared by professional cleaners and homeowners rather than a laboratory-perfect demonstration. Real houses contain old paint, pets, awkward furniture, forgotten corners, mystery stains, and at least one baseboard hidden behind something nobody wants to move.
The Room Often Looks Cleaner Before the Job Is Finished
One of the most noticeable experiences is how quickly a room changes after only the upper edge of the trim is dusted. Gray buildup creates a shadow line around the room. Removing it makes the wall-to-floor transition look sharper, even before any washing begins. This is why a vacuum-only pass can be surprisingly satisfying in bedrooms and other low-traffic spaces.
It also demonstrates that every cleaning session does not need to be a deep clean. A five-minute dusting can prevent a future forty-minute scrubbing session.
Kitchen Dirt Behaves Differently
In living rooms, a dry microfiber cloth may capture most of the mess. In kitchens, that same cloth can glide over the trim while leaving behind a slightly yellow or sticky film. This is usually a sign that cooking residue has bonded with dust.
The practical lesson is to stop rubbing harder and change the chemistry. Warm water with grease-cutting dish soap generally works better than extra pressure. On heavy buildup, allowing the solution a brief contact time is more effective than frantic scrubbing. The trim should remain damp for only a short period and should be dried afterward.
Pet Areas Need Small, Frequent Cleanups
Baseboards near pet beds and feeding stations can look clean in the morning and collect a fresh fur scarf by evening. Waiting for a seasonal deep clean makes the work unpleasant. Keeping a vacuum attachment or washable microfiber duster nearby turns maintenance into a quick habit.
Spilled water should be dried promptly, especially beside MDF trim or hardwood flooring. A washable mat beneath bowls can prevent repeated water marks and food splashes.
Old Paint Requires Restraint
Older baseboards sometimes remain dull after washing. The natural reaction is to scrub harder, but that may expose primer or bare material. If a cloth begins collecting paint color, the problem is no longer dirt. It is a failing finish.
At that point, the best experience-based decision is to stop cleaning, allow the area to dry, lightly prepare the damaged section, and apply compatible touch-up paint. Knowing when not to scrub is part of knowing how to clean baseboards properly.
Working Room by Room Beats Cleaning the Entire House at Once
Baseboards stretch much farther than expected. A whole-house project can lose its charm around the third bedroom. Dividing the work into rooms keeps the cleaning water fresh and makes progress visible.
A practical sequence is to complete one room from start to finish: clear the perimeter, dust, wash, detail the corners, dry the trim, and clean the floor. The room then feels finished rather than leaving the entire home in a half-cleaned state.
The Best Tool Is the One You Will Actually Use
Some people prefer kneeling with a microfiber cloth because it offers precise control. Others need an extension mop because bending is uncomfortable or impossible. A vacuum brush may be ideal for weekly upkeep, while a small detailing brush may be necessary for ornate molding.
Professional and homeowner guidance repeatedly favors practical tools, small sections, clean cloths, and gentle products over brute force. Consistency matters more than owning a gadget with dramatic packaging and seventeen interchangeable heads.
Conclusion
The best way to clean baseboards is to work gently and in the correct order. Remove loose dust, wash with minimal moisture, treat stains individually, match the product to the finish, dry the surface, and clean the floor afterward. Painted trim usually responds well to mild dish soap, while wood and MDF require extra caution around water.
Once the deep cleaning is complete, a quick monthly dusting can keep the trim looking crisp. Your guests may never compliment your baseboards directly, but the entire room will look cleanerand the baseboards, humble creatures that they are, will accept the silent recognition.
Note: Always follow the cleaner and baseboard manufacturer’s instructions. Test products in a hidden area, provide ventilation, protect nearby flooring, and never mix household cleaning chemicals.