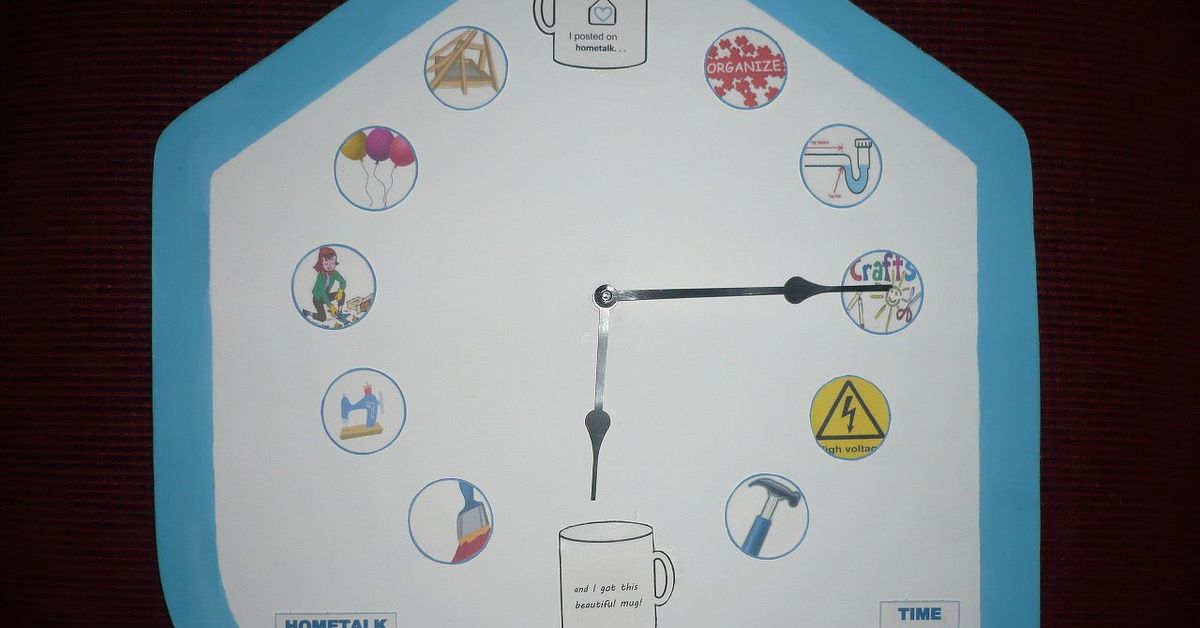
Back in September 2016, Hometalk hosted one of those challenges that make DIYers’ hearts beat faster:
create a unique project and share it with the community. For plenty of makers, that meant one thing
a statement wall clock. A clock isn’t just there to tell you you’re late again; it can be a showstopping
piece of wall art that anchors a room, shows off your style, and proudly says, “Yes, I made that.”
In this guide, we’ll walk through a full “HOMETALK CLOCK” project inspired by those 2016 contest vibes:
part farmhouse, part industrial, all DIY. You’ll learn how to plan your design, choose materials, and
build a large wall clock that looks like it came from a boutique home décor storewithout paying
boutique prices. Whether you’re a Hometalk regular or just love a good weekend project, this clock
tutorial gives you everything you need to get ticking.
Why DIY Wall Clocks Make Such Great Projects
Wall clocks hit that sweet spot of DIY: they’re practical, they’re decorative, and they’re highly
customizable. You can go rustic farmhouse with pallet wood and Roman numerals, sleek and modern with a
simple painted face, or playful with bright colors and stenciled numbers. Large wall clocks especially
have become a staple in farmhouse and Fixer Upper–inspired interiors, turning otherwise empty walls into
focal points that feel warm and welcoming.
Another perk? Most DIY wall clocks are beginner-friendly. With a pre-made clock movement kit and some
basic tools, you can build a piece that looks customwithout needing advanced woodworking skills. Many
popular tutorials use common materials like plywood, pallet wood, shiplap boards, or even cable reels,
proving you don’t need fancy lumber to get a high-end look.
Planning Your HOMETALK CLOCK Project
Before you start cutting wood or ordering clock hands the size of your forearm, take a moment to plan
your project. A little planning up front saves a lot of frustration laterespecially when you’re racing
a contest deadline or trying to finish before guests arrive.
1. Choose the Clock Size
Large DIY clocks usually range from about 24 inches to 36 inches in diameter, though some makers go even
bigger. A good rule of thumb is to make your clock roughly 50–70% of the width of the wall section where
it will hang, leaving at least 6–10 inches of space around it so it doesn’t look cramped. Over a sofa or
console table, center the clock about 8–10 inches above the top of the furniture for a balanced,
connected look.
2. Pick a Style
Ask yourself what kind of clock would fit your space:
- Farmhouse clock: pallet wood, cable reel, or shiplap boards, distressed white or gray paint, big Roman numerals.
- Color-block modern clock: smooth plywood face, bold geometric paint blocks, simple metal hands.
- Industrial rustic clock: dark stain, metal numbers, maybe a faux metal frame or bolts.
- Minimalist clock: no numbers at all, just clean lines and slim hands for a graphic, modern look.
3. Decide on the Numbers
You can paint numbers by hand, use stencils, buy pre-cut wood or metal numerals, or even go number-free.
If you’re not confident in your painting skills, large clock stencils designed for farmhouse clocks make
it much easier to get crisp, evenly spaced numerals.
Materials and Tools for a Farmhouse-Style HOMETALK CLOCK
Here’s a sample supply list for a 30-inch farmhouse-style clock, similar to many palette and shiplap
designs from 2016-era DIY tutorials:
Materials
- Plywood round (approximately 30″ diameter) or assembled pallet/shiplap circle
- Clock movement kit with long shaft (sized for thick wood) and oversized hands
- Wood glue and screws (if building from boards)
- Sandpaper (80- and 220-grit)
- Primer (optional) and paint or stain (e.g., dark walnut stain + whitewash)
- Topcoat: clear polyurethane or matte sealer
- Number options: stencils, vinyl decals, or wooden numerals
- Picture hanger hardware or French cleat for mounting
Tools
- Circular saw or jigsaw (if cutting your own circle)
- Drill with bits
- Clamps (useful if gluing boards together)
- Measuring tape and straightedge
- Compass or a push pin + string + pencil for drawing your circle
- Paintbrushes and/or foam rollers
Step-by-Step: How to Build Your HOMETALK CLOCK
Step 1: Build or Prepare the Clock Face
If you’re using a plywood round, your job is easy: sand the surface smooth with 80-grit, then finish with
220-grit. If you’re building a clock from pallet or shiplap boards, cut them to length, glue the edges,
and secure them from the back with cross supports or a backing board. Once the glue dries, you can draw
your circle and cut it with a jigsaw.
Many DIYers use the classic “push pin and string” trick to draw an even circle: find the center, push in
a small nail or pin, tie a string to it, and attach a pencil at the other end. Keep the string taut and
the pencil straight up and down, then trace your circle around.
Step 2: Drill the Center Hole
The clock movement will sit behind the clock face, with the hands on the front. Measure to find the exact
center of your circle and drill a hole large enough for the shaft of the movement to pass through. Check
your movement kit instructions for the recommended bit size to avoid a wobbly fit.
Step 3: Paint or Stain the Base
This is where your design really starts to show. Some popular combos:
- Classic farmhouse: dark stain on raw wood, then a light whitewash to soften the tone.
- Weathered gray: gray stain with a soft dry-brushed white on top.
- Modern color-block: solid base color with bold sections in contrasting hues.
Allow each coat to dry completely and gently sand between coats if needed. Finish with a clear topcoat if
you want extra durability, especially in high-traffic areas.
Step 4: Add Numbers or Indices
Once the base is ready and dry, lightly mark where your numbers will go. You can use a protractor, a
printable clock template, or divide the circle into 12 equal wedges. For farmhouse clocks, DIYers often
use stencils to paint large Roman numerals in a bold black or charcoal.
If you’re aiming for a minimalist or modern look, you might just mark 12, 3, 6, and 9 with simple ticks
or small blocks of paint. Fewer markers can make the design feel more open, especially on very large
clocks.
Step 5: Install the Clock Movement
Follow the instructions that came with your clock kit. Usually, you’ll:
- Insert the shaft through the hole from the back of the clock face.
- Add the provided washer and nut on the front to secure it.
- Attach the hour hand, then the minute hand, and finally the second hand (if using).
- Adjust the hands so they don’t touch each other or scrape the clock face.
Pop in a battery and set the time. If the clock hands snag anywhere, bend them very gently upward or
outward so they clear each other.
Step 6: Attach Hanging Hardware
Large clocks are heavier than they look, especially if they’re made from thick wood. Use a heavy-duty
picture hanger or a French cleat system rated for the weight of your piece. Always anchor into a stud or
use appropriately rated wall anchors. Safety firstno one wants a giant clock crashing down mid-Netflix
binge.
Design Ideas Inspired by the 2016 Contest Era
The September 2016 Hometalk contest era was full of creative twists on DIY wall clocks. While every
project was unique, a few trends stood out that still feel fresh today:
- Pallet wood and reclaimed boards: Makers loved turning leftover boards into big rustic clock faces.
- Oversized Roman numerals: The bigger the numerals, the more dramatic the statement.
- White + dark stain contrast: A dark background with crisp white numbers (or vice versa) made clocks pop from across the room.
- Subtle distressing: Sanded edges and light distressing gave the illusion of age and history without losing readability.
- Custom wording or monograms: Many DIYers added family names, established dates, or short words like “GATHER” to personalize the clock.
Want something more modern? Combine a neutral wood face with just four numbers and sleek black hands.
Or go full-on color-block using coral, navy, mustard, and teal to create a clock that doubles as a
graphic art piece.
Common Mistakes (and How to Avoid Them)
Even experienced DIYers hit a few bumps when they first build a clock. Here are some common pitfalls and
how to dodge them:
Misaligned Numbers
Uneven numbers are one of the fastest ways to make your clock look “off.” Use templates, printable
guides, or a protractor to space them precisely. Dry-fit your stencils or numerals before painting or
gluing anything down permanently.
Hands That Are Too Small (or Too Big)
Hands that are too short make a large clock look awkward, while overly long hands may hit the numerals.
Check the manufacturer’s recommendations for clock hand length based on face diameter, and measure your
design carefully before ordering your kit.
Underpowered Movement
Very large hands or thick faces require a high-torque clock movement. If your clock keeps stopping or
losing time, the movement might not be strong enough to handle the weight of the hands. Look for
“high-torque” or “suitable for large hands” in the product description.
Skipping the Sealer
In busy spaces or slightly humid rooms, unsealed wood can warp or absorb grime. A clear matte sealer
keeps your clock easier to clean and helps preserve your hard work.
How to Style Your DIY Clock in Your Home
Once your HOMETALK CLOCK is done, it deserves a prime spot. Large clocks look great:
- Centered above a sofa, flanked by two smaller pieces of art or sconces
- Over a console table in an entryway, paired with baskets and plants
- In a dining room as a stand-alone feature on an otherwise simple wall
- Above a fireplace mantel, especially in a farmhouse or rustic living room
Try to echo your clock’s materials around the room: a wood clock pairs well with wood picture frames,
woven baskets, and neutral textiles. Modern painted clocks fit beautifully with metal lamps, sleek
furniture, and bold pillows.
Care, Maintenance, and Safety Tips
Thankfully, your clock won’t be high-maintenance. Keep these basics in mind:
- Dust it regularly with a soft, dry cloth.
- Avoid harsh cleaners that might damage the finish or cloud the sealer.
- Change the battery at least once a year (Daylight Saving Time is a good reminder).
- Check the hanging hardware occasionally to ensure it’s still secure.
If your clock suddenly stops, the fix is often simple: replace the battery, make sure the hands aren’t
bent or touching, and confirm that the movement is still firmly attached.
Real-Life Experiences: Lessons from a HOMETALK CLOCK–Style Project
The September 2016 contest spirit was all about experimentation: “What can I make that I’ve never tried
before?” A big wall clock turned out to be the perfect answer. Here are some experience-based insights
that can help you get better resultsand enjoy the process along the way.
The Power of a Deadline
Nothing motivates like a contest deadline. Many makers discovered that putting a date on the calendar
pushed them to finally use that stack of pallet wood in the garage or that clock kit sitting in a drawer.
If you’re recreating the HOMETALK CLOCK vibe today, set your own “contest” deadline: a weekend challenge,
a friends-and-family reveal, or even a personal goal to finish before the next holiday.
Practice on Scrap First
One of the most common “I wish I’d known” moments is about paint and stain. On a big, highly visible
project like a clock, color and finish matter a lot. Many DIYers learned the hard way that stain can go
darker than expected and that dry-brushing can look streaky if you’re heavy-handed.
The fix is simple: always test your stain and paint combo on scrap wood first. Try your whitewash, your
distressing technique, and even your stencil method on a leftover board. When you like what you see,
transfer that exact process to your clock.
Stencils Are Your Friends
If hand-lettering Roman numerals sounds like a horror movie to you, you’re not alone. Many successful
clock makers leaned on stencils, vinyl decals, or printable templates to keep things neat and even. Doing
a quick test run with your stencilmaking sure the adhesive is right, the paint isn’t too thick, and the
brush is properly dabbed offdramatically reduces smudges and bleeding under the edges.
Imperfections Add Character
In the heat of a challenge, every tiny flaw can feel huge: a slightly smudged numeral, a hairline gap
between boards, or a tiny chip at the edge. Step back for a moment. Most people won’t notice those
details, and in rustic styles, they often add charm.
Some makers even leaned into those “flaws” by lightly distressing the entire piece so that intentional
wear blended with accidental imperfections. The result felt more like a beloved vintage find than a
brand-new project.
Community Feedback Is Gold
One of the standout benefits of sharing a project in a community like Hometalk is the instant feedback.
Commenters might suggest better hanging hardware, a different font for your numbers, or a clever way to
personalize the clock face. In the 2016 contest wave, makers often updated their posts with small tweaks
based on community input: adjusting the hand color, adding a subtle border, or re-centering a numeral.
Even if you’re not entering a contest now, you can recreate this experience: share progress photos on
social media, ask for opinions on color or style, and be open to new ideas. Sometimes the “I never would
have thought of that” comment is what takes your clock from good to unforgettable.
From One Clock to a New Hobby
A fun side effect of a HOMETALK CLOCK–style project is that it can nudge you into a whole new hobby. Many
DIYers who built one clock ended up making more for friends, family, or even craft fairs. Clocks are
relatively compact, highly giftable, and easy to customize with names, dates, or color schemes. Some
makers turned their 2016-era experiments into small side businesses, selling custom farmhouse clocks or
modern wall timepieces on marketplaces and at local events.
The biggest takeaway? Don’t underestimate what a single project can spark. One oversized, contest-inspired
clock might lead to new skills, new tools, and a new level of confidence in your DIY abilities.
Conclusion: Your Time to Make a Statement
A HOMETALK CLOCK project made for a September 2016–style contest isn’t just about building something that
keeps timeit’s about designing a piece that feels uniquely yours. From selecting the perfect diameter to
deciding between Roman numerals and minimalist ticks, every choice you make turns a simple circle of wood
into a conversation starter.
With thoughtful planning, the right materials, and a willingness to embrace both precision and a bit of
DIY charm, you can create a wall clock that looks like it came straight off your favorite home décor site.
Hang it proudly, snap a few photos, and who knowsmaybe your project will inspire the next wave of makers
just like those 2016 contest entries did.