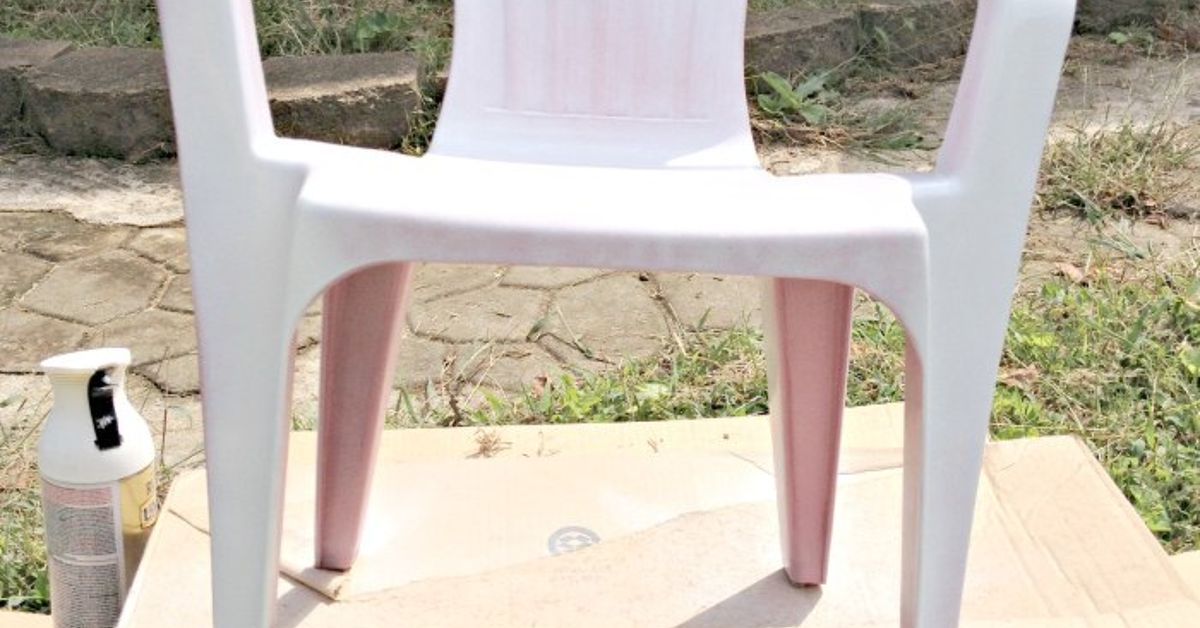
A gold dipped kids’ plastic chair proves that children’s furniture does not have to look as though it wandered out of a preschool supply closet. With careful preparation, the right coating, and a little metallic attitude, an inexpensive plastic chair can become a stylish accent for a playroom, bedroom, reading corner, or birthday-party setup.
Why a Gold Dipped Kids’ Plastic Chair Works
Plastic children’s chairs are practical for several excellent reasons. They are lightweight, affordable, easy to wipe clean, and generally unfazed by crackers, crayons, and mysterious sticky substances that nobody in the household admits to touching. Visually, however, many models are rather plain.
The gold-dipped effect changes that without covering every inch in metallic paint. Usually, the lower portion of the legs is painted gold while the seat and upper frame retain their original color or receive a contrasting finish. The result looks balanced and intentional rather than overwhelmingly shiny. Think “tiny designer chair,” not “miniature throne belonging to a cereal-box emperor.”
The dipped-paint trend has appeared across furniture makeovers involving children’s tables, stools, desk chairs, and accent chairs. DIY designers frequently use painter’s tape to create a crisp dividing line before adding metallic paint to the exposed legs. This approach is especially effective on simple furniture because the clean geometry allows the gold detail to stand out.
Choose the Right Plastic Chair
Start With a Stable, Undamaged Chair
Before thinking about color, inspect the chair as though you are a highly suspicious furniture detective. Look for cracks around the legs, stress marks beneath the seat, sharp edges, loose components, warping, or evidence that the chair has become brittle. Paint is decorative; it cannot repair structural damage.
Place the chair on a flat surface and press gently on the seat and back. All legs should remain firmly on the floor without rocking excessively. The chair should also be appropriately sized and rated for the child’s age and weight. The U.S. Consumer Product Safety Commission regularly emphasizes stability when discussing furniture used around children, since unstable products can create fall and tip-over hazards.
Avoid Painting Critical Contact Areas
This project is best suited to an ordinary play chair rather than a feeding chair, safety seat, step stool, or climbing product. Do not paint safety straps, hinges, foot grips, labels, fasteners, locking mechanisms, or surfaces intended to contact food. A high-chair tray, for example, should not become a laboratory for testing whether metallic paint pairs well with mashed bananas.
For the easiest transformation, choose a chair with smooth, uncomplicated legs and a color that works with gold. White, blush pink, navy, sage green, charcoal, lavender, and pale blue are reliable combinations. Bright red or yellow can also work when the room has a playful, energetic palette.
Materials and Supplies
- A structurally sound kids’ plastic chair
- Mild dish soap and warm water
- Clean, lint-free cloths
- Fine-grit sandpaper or a fine sanding pad
- Painter’s tape
- Plastic sheeting, cardboard, or a drop cloth
- Primer or adhesion promoter labeled for the chair’s type of plastic
- Metallic gold paint labeled for use on plastic
- An optional compatible clear protective coating
- Gloves, eye protection, and any protective equipment required by the product label
Compatibility matters more than brand loyalty. Some coatings are formulated to bond directly to certain plastics, while other systems require a separate bonding primer. Manufacturers offer primers specifically intended to improve adhesion on hard-to-paint materials, including plastics.
Read the entire label before beginning. Confirm that the primer, gold paint, and optional topcoat can be used together. Mixing unrelated coating systems can produce wrinkling, poor adhesion, slow curing, or a finish that chips when somebody looks at it sternly.
How to Make a Gold Dipped Kids’ Plastic Chair
Step 1: Clean the Chair Thoroughly
Wash the chair with mild dish soap and warm water to remove dirt, skin oils, food residue, wax, and cleaning-product buildup. Pay particular attention to the legs, underside, molded seams, and recessed areas.
Rinse away all soap and allow the chair to dry completely. Paint adheres best to a surface that is clean, dry, and free from contamination. Professional surface-preparation guidance similarly stresses removing dust, oil, dirt, and other materials that can interfere with adhesion.
Step 2: Test the Coating System
Apply the planned primer and paint to a small, inconspicuous area beneath the seat. Let the sample cure according to the product instructions, then check whether it scratches, flakes, remains sticky, or reacts with the plastic.
This small test may feel unnecessarily cautious until compared with the alternative: stripping a wrinkled gold coating from four chair legs while reconsidering every decision that led to this moment.
Step 3: Lightly Scuff the Paint Area
When permitted by the coating manufacturer, lightly scuff the portions that will be painted using fine-grit sandpaper or a sanding pad. The goal is not to reshape the chair. You simply want to reduce excessive gloss and create a slightly more receptive surface.
Use gentle, even pressure. Aggressive sanding can leave grooves that remain visible beneath metallic paint. Wipe away all dust with a clean cloth and allow the surface to dry.
Step 4: Mark the Gold-Dipped Line
Decide how high the gold should extend. On a small children’s chair, coating roughly the bottom quarter or third of each leg usually looks proportional. Measure upward from the floor so every line is positioned at the same height.
Wrap painter’s tape around each leg. Press the edge down firmly, particularly around curves and molded seams. Misaligned tape can make the finished chair look less “custom designed” and more “decorated during a minor earthquake.”
Cover the seat, back, and upper legs with plastic, paper, or clean bags so overspray cannot drift onto unpainted areas. DIY dipped-chair projects commonly rely on careful measuring, masking, and covering to create a sharp, controlled finish.
Step 5: Apply Plastic Primer if Required
Place the chair in a well-ventilated work area that complies with the coating label. Keep children and pets away from the project. Apply the plastic primer in light, controlled passes, maintaining the distance recommended by the manufacturer.
A heavy coat is not a shortcut. It is merely a fast route to drips, soft spots, and long drying times. Several thin passes generally produce a smoother result than one thick application. Allow the primer to dry or recoat for the exact period stated on the label.
Step 6: Build the Metallic Gold Finish Slowly
Shake or mix the gold paint exactly as directed. Metallic pigments can settle, so proper mixing is especially important for an even appearance. Begin each spray pass slightly beyond the chair leg, move steadily across it, and release after passing the opposite edge.
Rotate the chair between passes to reach every side. Apply light coats rather than attempting complete coverage immediately. Gold paint often looks uneven during the first coat; this is normal. Additional thin coats usually improve depth and consistency.
Paint products designed for plastic are intended to address the adhesion challenges presented by smooth synthetic surfaces. Furniture-paint manufacturers also recommend cleaning, deglossing when appropriate, and applying controlled coats for better results.
Step 7: Remove the Tape Carefully
Follow the coating manufacturer’s guidance about when to remove masking tape. In many projects, removing it after the paint has set but before it becomes extremely hard can reduce the risk of tearing the edge. However, product instructions take priority because formulations differ.
Pull the tape back slowly at an angle. Do not rush. A crisp border is one of the details that makes the gold-dipped effect look polished rather than homemade in the least flattering sense of the word.
Step 8: Allow the Chair to Cure Fully
Dry-to-touch time and full cure time are not the same. A surface may feel dry while the coating underneath remains soft. Do not return the chair to a child merely because the paint no longer transfers to a fingertip.
Let the finish cure for the full period required by the manufacturer, preferably in a secure, ventilated area away from children. Avoid stacking, scrubbing, sitting on, or dragging the chair during curing. The longer the finish is allowed to harden properly, the better its chance of surviving ordinary use.
Ventilation and Child-Safe Project Practices
Paints, primers, and aerosol products may release volatile organic compounds and other vapors. The U.S. Environmental Protection Agency recommends increasing ventilation when using products that emit VOCs and following all label precautions. It also notes that low- or zero-VOC products may reduce indoor pollution loads, although overall composition and performance still matter.
Poison Control warns that breathing solvent-paint fumes in poorly ventilated spaces can cause symptoms such as headache, dizziness, and nausea. Use only products intended for the proposed environment, avoid ignition sources, and never spray in a small enclosed room.
Children should not participate in sanding, priming, spraying, or handling uncured coatings. Store cans, solvents, used cloths, and sanding debris securely. Follow local disposal rules and every instruction concerning protective equipment, ventilation, temperature, humidity, drying, and cleanup.
For furniture that will remain in a nursery or children’s room, shoppers may also encounter products carrying UL GREENGUARD or GREENGUARD Gold certification. These programs evaluate chemical emissions, with the Gold level applying stricter limits intended for sensitive environments such as schools, healthcare facilities, and spaces used by children. A DIY-painted chair is not automatically certified simply because one component carries such a label, but the certification can still be a useful consideration when selecting new furnishings or compatible low-emission products.
Design Ideas for a Gold Dipped Plastic Chair
White and Gold
A white chair with gold feet is clean, bright, and easy to place in almost any room. It works especially well with pale wood, woven baskets, neutral rugs, and colorful books.
Blush Pink and Gold
This pairing feels warm and playful without being excessively sweet. Add a dusty-rose cushion or a nearby wall print to repeat the color.
Navy and Gold
Navy provides dramatic contrast and makes metallic details appear richer. It suits space-themed rooms, modern playrooms, and reading corners that need a more grown-up foundation.
Sage Green and Muted Gold
Sage and soft gold create a relaxed look inspired by nature. Pair the chair with botanical artwork, wooden toys, or a cream-colored rug.
Black and Gold
Black and gold can be striking, but use the combination thoughtfully in a child’s room. Surround the chair with lighter colors so it feels playful rather than like executive seating for a toddler who has just acquired a rival company.
How to Make the Finish Last
Even a well-prepared painted plastic chair will not behave exactly like color molded into the plastic at the factory. Children’s furniture is kicked, dragged, tipped, stacked, climbed on despite repeated reminders, and occasionally recruited as a vehicle. Some wear should be expected.
- Lift the chair instead of dragging it across hard floors.
- Clean it with a soft cloth and mild soap rather than abrasive scrubbers.
- Wipe spills promptly.
- Avoid harsh solvents unless the coating manufacturer approves them.
- Inspect the finish periodically for chips, peeling, or sharp edges.
- Stop using the chair if the plastic cracks or the structure becomes unstable.
An optional clear coat may improve resistance to scuffs, but only when it is compatible with both the metallic paint and the plastic substrate. Some clear finishes alter the color or sheen of metallic paint, so test first. A glossy topcoat may make gold appear brighter, while a satin or matte finish can create a softer, brushed-metal effect.
Common Mistakes to Avoid
Skipping the Cleaning Stage
Invisible oils and cleaning residues can prevent adhesion. A chair that appears clean may still need a proper wash.
Using Ordinary Paint Without Checking Compatibility
Plastic can be difficult to coat. Select products specifically labeled for the material or use a compatible adhesion-promoting primer.
Spraying Too Heavily
Thick coats are prone to runs, pooling, wrinkling, and slow curing. Metallic finishes look best when built in thin layers.
Rushing the Cure
A chair placed in service too early can develop fingerprints, dents, scratches, or sticking. Cure time is part of the project, not an annoying epilogue.
Assuming Paint Fixes an Unsafe Chair
No decorative coating can stabilize damaged plastic. If the chair is cracked, brittle, badly warped, or inappropriate for the child, replace it.
My Experience Creating a Gold Dipped Kids’ Plastic Chair
The most surprising part of this project was how little gold paint was needed to change the personality of the chair. Before the makeover, it looked completely ordinary: a practical plastic seat that could have been waiting in a pediatric office, daycare center, or unusually cheerful dentist’s lobby. After adding gold to the lower legs, the same chair suddenly looked coordinated with the room.
The preparation took longer than the exciting part. Washing the chair revealed dried marks around the underside of the seat that had somehow survived several casual wipe-downs. This confirmed an important lesson: “looks clean” and “ready for paint” are distant cousins, not identical twins. A proper wash, rinse, and drying period made the surface noticeably less slick.
Masking the legs also required more attention than expected. Measuring from the floor was far more reliable than estimating by eye. The first tape line looked straight until the chair was viewed from across the room, where it became obvious that one gold section was attempting to escape uphill. Repositioning the tape before painting took two minutes and probably saved the entire appearance.
During the first gold coat, the coverage looked thin and disappointing. The temptation to spray heavily was strong. Resisting that temptation was the correct decision. After several light applications, the color became richer and more uniform without developing drips. Metallic paint rewards patience and punishes enthusiasm applied at close range.
The most difficult stage was waiting for the coating to cure. The chair looked finished, felt dry, and seemed perfectly prepared to return to the playroom. It was not. A hidden test area still showed a faint impression when pressed firmly, so the chair remained off-limits longer than originally planned. That extra curing time made a real difference. Once returned to use, the feet resisted normal handling much better than they would have after an impatient same-day reveal.
In daily use, the chair became a favorite reading seat. The gold detail caught the light without making the entire piece flashy. It also connected visually with a brass-colored lamp and small gold frames elsewhere in the room. That repeated accent made the chair feel like part of a design plan rather than a random craft project.
After several weeks, the front edges of the feet showed the earliest signs of wear because the chair was frequently pushed rather than lifted. Small felt pads helped reduce scraping on the floor, although they had to be positioned carefully so they did not affect stability. The experience reinforced that a painted plastic chair should be treated as decorated furniture, not an indestructible playground prop.
Cleaning was simple with a damp microfiber cloth and diluted mild soap. Abrasive pads were avoided, as was aggressive scrubbing around the taped border. The crisp line between the original plastic and gold paint remained the most visually important detail, so protecting that edge became part of routine care.
The project also demonstrated the value of restraint. Painting the entire chair gold might have produced a dramatic photograph, but it would have been harder to maintain and less versatile in the room. Limiting the metallic finish to the legs created enough contrast while preserving the chair’s friendly, child-appropriate appearance.
Overall, the makeover worked because it combined a simple concept with disciplined preparation. The gold was merely the visible finale. Cleaning, testing, masking, using compatible products, applying thin coats, and allowing a full cure were the less glamorous steps that determined whether the chair looked polished or peeled after its first encounter with a toy box.
Final Thoughts
A gold dipped kids’ plastic chair is an affordable way to personalize a child’s space without replacing perfectly useful furniture. The design can look modern, whimsical, glamorous, or understated depending on the chair color and the tone of gold selected.
The key is to treat the makeover as a real furniture-finishing project rather than a five-minute encounter with a spray can. Begin with a safe, undamaged chair. Clean it carefully, test the coating system, mask the legs evenly, use paint intended for plastic, provide excellent ventilation, apply light coats, and allow the finish to cure completely.
Done properly, this small DIY project delivers a satisfying transformation: one part practical children’s chair, one part stylish room accent, and zero parts actual molten goldwhich is excellent news for both the budget and the carpet.