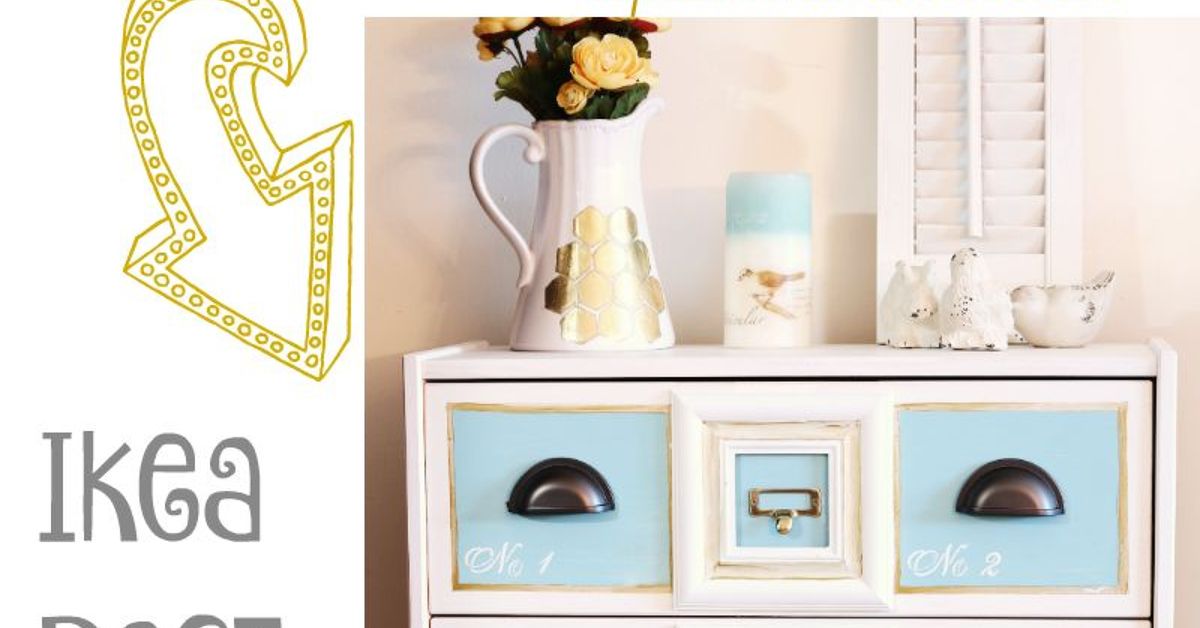
There is something wonderfully mysterious about an old apothecary cabinet. The rows of tiny drawers suggest rare herbs, handwritten formulas, antique maps, and possibly a secret compartment containing the world’s last decent instruction manual. Unfortunately, authentic vintage cabinets can be difficult to find, expensive to buy, and impractical for storing anything larger than a thimble.
That is why I decided to create a faux apothecary cabinet using an IKEA RAST dresser. The humble RAST is compact, made from unfinished pine, and practically begs to be customized. With a grid of decorative drawer fronts, vintage-style label pulls, stain, and a little patience, its three ordinary drawers can look like a collection of 18 tiny apothecary compartments.
The best part is that the transformation is mostly cosmetic. You still get three roomy, functional drawers behind the false fronts. In other words, the finished cabinet has the character of an antique card catalog without forcing you to divide your socks among 18 compartments the size of sandwich bags.
Why the IKEA RAST Works So Well for This Hack
The IKEA RAST dresser has long been a favorite among furniture hackers because of its straightforward shape and unfinished wood surface. The current three-drawer model sold in the United States is approximately 24 inches wide and 27 inches tall, making it suitable as a nightstand, office cabinet, entryway organizer, or compact accent chest.
Its pine construction is especially useful for a DIY apothecary cabinet. Pine can be painted, stained, distressed, waxed, or decorated with applied trim. The flat drawer fronts also provide a convenient foundation for creating the illusion of many smaller drawers.
This project does not require rebuilding the dresser or constructing complicated drawer boxes. The basic idea is simple:
- Assemble the RAST dresser.
- Cover each real drawer with several smaller decorative wood panels.
- Add a label pull to every panel.
- Finish the entire piece to resemble an aged storage cabinet.
Each large drawer continues to open normally. The small panels and hardware merely persuade the eye that there are many individual drawers. It is furniture trickery, but the respectable kind.
Planning the Faux Apothecary Drawer Layout
Choose the Number of False Drawer Fronts
I chose to divide each of the three real drawers into six smaller sections: three columns and two rows. That created 18 faux drawer fronts across the entire cabinet.
This arrangement gives the dresser a convincing vintage card-catalog appearance without making the individual panels too narrow. A four-column layout can also work, but the hardware may begin to look crowded unless you use especially small label pulls.
Do not cut your panels according to measurements found in another tutorial. Assemble your own dresser and measure the actual drawer fronts. Manufacturing tolerances, assembly pressure, and even a slightly crooked floor can affect the final spacing.
To calculate the panel width, subtract the total space needed for gaps from the usable width of the drawer. Divide the remaining number by the desired number of columns. Repeat the same process vertically for the rows.
A gap of approximately 1/8 inch between panels usually creates enough shadow to imitate separate drawers. Before cutting everything, make one complete test row from cardboard or scrap wood. This five-minute mock-up can prevent an afternoon of muttering at a table saw.
Decide How Deep the Detail Should Be
Thin plywood, hobby boards, or wood strips can all be used for the applied fronts. Material around 1/4 inch thick creates a noticeable drawer effect without adding excessive weight.
Thicker pieces produce deeper shadows and a more substantial appearance, but they can also make the finished drawer front heavy. Check that the real drawers continue to slide freely and that the added panels do not interfere with the dresser frame.
Pick the Overall Style
An apothecary-inspired IKEA RAST hack can lean in several directions:
- Traditional: Medium-brown stain, aged brass hardware, and cream paper labels.
- Industrial: Charcoal paint, blackened steel pulls, and white labels.
- Farmhouse: Weathered oak stain, light distressing, and antique bronze hardware.
- Modern vintage: Matte black paint with clean brass label holders.
- Library catalog: Warm walnut stain, small numbered labels, and a satin topcoat.
I wanted mine to look old without appearing as though it had recently been rescued from a swamp. A warm brown finish, subtle edge wear, and antique-brass label pulls created the right balance.
Materials and Tools
The precise quantities depend on your panel layout, but the following supplies cover a typical faux apothecary cabinet project:
- One IKEA RAST three-drawer dresser
- Thin plywood or solid-wood hobby boards
- 18 vintage-style label pulls
- Wood glue
- Short brad nails or pin nails, optional
- Wood filler
- Pre-stain wood conditioner
- Wood stain or furniture paint
- Clear protective topcoat or furniture wax
- Sandpaper in medium and fine grits
- Measuring tape and combination square
- Pencil and painter’s tape
- Saw appropriate for the panel material
- Drill and small drill bits
- Screwdriver
- Clamps or heavy flat objects
- Lint-free cloths and a vacuum
- Protective eyewear, gloves, and a dust mask
- Anti-tip furniture anchoring hardware
If you are buying hardware online, order one sample pull before purchasing the full set. Product photos have a magical ability to make tiny hardware look enormous and enormous hardware look suitable for a dollhouse.
How to Make a Faux Apothecary Cabinet From an IKEA RAST
Step 1: Assemble and Inspect the Dresser
Assemble the main dresser according to the manufacturer’s instructions, but leave the drawers removable. Work on a level surface and check that the cabinet is square before tightening everything completely.
Slide each drawer into the frame and examine the gaps. Correct any alignment problems now. Decorative panels can disguise plain furniture, but they cannot negotiate peace between a crooked drawer and an uneven cabinet frame.
Mark each drawer on the back as top, middle, or bottom. Small differences may develop during fitting, so returning every drawer to its original position makes final assembly easier.
Step 2: Fill Unwanted Factory Holes
If the existing knob holes will not be covered or reused, fill them with stainable wood filler. Allow the filler to dry fully, then sand it level with the surrounding pine.
Be aware that some fillers absorb stain differently from natural wood. Whenever possible, position the decorative panels so they cover the original holes. If you plan to paint the cabinet, the filled areas will be much easier to conceal.
Step 3: Sand the Pine
Lightly sand the dresser and decorative panel material in the direction of the wood grain. The goal is to smooth rough areas, soften sharp edges, and prepare the surface for an even finish.
Begin with approximately 150-grit sandpaper if the wood feels rough, then move to 180- or 220-grit. Avoid polishing raw pine to an extremely high grit before staining because an overly smooth surface may absorb less color.
Vacuum the dresser carefully and remove remaining dust with a clean, lint-free cloth. Sanding dust has a remarkable instinct for landing in the most visible part of a wet finish.
Step 4: Cut the Faux Drawer Panels
Measure the usable face of each real drawer separately. Lay out the three-column, two-row grid and include consistent spaces between every false front.
Cut one test panel first. Place it against the drawer and verify the proportions before producing the remaining pieces. A stop block on a miter saw or a cutting guide for a circular saw can help keep repeated cuts consistent.
After cutting, lightly sand every edge. Slightly easing the front edges makes the panels feel finished and helps each one catch a narrow highlight, strengthening the illusion that it is an independent drawer.
Step 5: Dry-Fit the Complete Grid
Arrange all six panels on one drawer without glue. Use small pieces of scrap wood, tile spacers, or stacks of cardstock to maintain even gaps.
Step back and inspect the layout from several angles. Check the outside margins, horizontal lines, and vertical columns. Repeat this test on all three drawers, then stack the drawers in the cabinet to make sure the grid remains visually aligned from top to bottom.
Number the panels on their backs. Once the pieces are removed for finishing, eighteen nearly identical rectangles can become surprisingly committed to chaos.
Step 6: Condition and Stain the Wood
Pine is a softwood that can absorb stain unevenly, creating dark patches and streaks. Applying a compatible pre-stain wood conditioner can help the surface accept stain more uniformly.
Always test the complete finishing system on scrap material first. Use the same sanding sequence, conditioner, stain, and topcoat planned for the cabinet. A stain that looks like warm walnut on a sample card may turn orange, gray, or suspiciously purple on actual pine.
Apply the conditioner and stain according to the product instructions. Wipe stain in the direction of the grain, remove excess consistently, and allow adequate drying time. Finish the cabinet frame, real drawer fronts, and decorative panels before attaching the panels. This is much easier than trying to push stain into 18 tiny corners afterward.
Step 7: Use Paint for a Different Look
Paint is an excellent alternative when you want stronger color or more predictable coverage. Bare pine should be cleaned and lightly sanded before painting. Knots may need to be sealed with an appropriate stain-blocking or shellac-based primer to prevent discoloration from bleeding through the finished surface.
Apply primer and paint in thin coats. A small foam roller can create a smoother finish on broad surfaces, while a quality angled brush is useful around corners. Light sanding between coats can reduce raised grain, dust nibs, and visible brush marks.
For an aged finish, apply a dark base coat followed by a contrasting top color. Once dry, sand selected edges, corners, and areas around the label pulls. Concentrate wear where hands would naturally touch the cabinet rather than attacking every edge equally. Real furniture usually ages through use, not through an argument with a belt sander.
Step 8: Attach the Decorative Panels
Return the finished panels to their numbered positions. Use a square and temporary spacers to establish the grid.
Apply a thin, even layer of wood glue to the back of each panel. Too much adhesive can squeeze into the gaps and become difficult to remove, especially from stained surfaces.
Press the panels into place and clamp them according to the glue manufacturer’s instructions. A flat board placed across the entire drawer can distribute pressure. If suitable for your panel thickness, short pin nails or brads may be used to hold the pieces while the adhesive cures.
Confirm that fasteners are short enough that they cannot protrude into the drawer interior. Nobody wants a vintage-inspired cabinet with unexpectedly modern finger traps.
Step 9: Install the Apothecary Label Pulls
Create a drilling template from cardboard or thin scrap wood. Mark the horizontal and vertical center of one decorative panel, then transfer the hole locations for the pull.
Test the template on scrap material before drilling the finished fronts. Once the placement is correct, use the same template for all 18 panels. A sharp drill bit and light pressure will reduce tear-out.
Install each pull with a manual screwdriver for the final tightening. A power driver can quickly strip a small screw or pull delicate hardware out of alignment.
If the supplied screws are too long, replace them with shorter screws rather than allowing the tips to enter the drawer. Small bolts with washers and nuts can also work, provided the hardware does not interfere with the drawer contents.
Step 10: Add Labels
The labels are a small detail with an outsized effect. They complete the apothecary or card-catalog illusion and can make the cabinet genuinely useful.
Possible label categories include:
- Letters, stamps, and mailing supplies
- Cords, chargers, and adapters
- Paintbrushes and craft tools
- Buttons, thread, and sewing notions
- Receipts, manuals, and warranties
- Photographs and keepsakes
- Office supplies
- Seasonal accessories
Because each row of small labels opens as one large drawer, group related categories together. For example, six labels on the top drawer might all describe office supplies. That keeps the labels useful instead of turning them into tiny decorative lies.
For an aged appearance, print labels on warm ivory paper rather than bright white stock. A typewriter-inspired serif font, archival numbering system, or handwritten lettering can all work. Keep the typography simple enough to read from a normal standing distance.
Step 11: Protect the Finish
A clear topcoat protects stained wood from moisture, fingerprints, and routine wear. Polyurethane generally offers stronger protection, while wax creates a softer, low-sheen appearance that suits distressed furniture.
Choose a finish compatible with your stain or paint and follow all drying and recoat instructions. Apply thin coats in a clean, ventilated workspace. Pay particular attention to the dresser top and the areas surrounding the pulls, since these surfaces receive the most contact.
Allow the finish to cure properly before placing objects on the cabinet. A surface can feel dry long before it is ready to support a lamp, stack of books, or decorative object without developing marks.
Step 12: Anchor the Cabinet to the Wall
Any dresser can become unstable when multiple drawers are open or when someone pulls, climbs, or leans on it. Secure the completed cabinet to the wall using appropriate anti-tip hardware installed according to the manufacturer’s directions.
Store heavier objects in the lowest drawer and avoid placing tempting items where children may try to climb to reach them. Decorative upgrades should never replace the safety hardware supplied with the furniture.
Common Mistakes to Avoid
Skipping the Full Dry-Fit
A small measuring error repeated across 18 panels becomes extremely obvious. Arrange every piece before using glue, and inspect the grid with all three drawers installed.
Staining Pine Without Testing
Pine can develop blotchy color. Test your conditioner and stain combination on leftover wood rather than experimenting on the front of the cabinet.
Using Hardware That Is Too Large
Oversized label pulls can make the false drawers appear cramped. Compare the pull dimensions with the actual panel size, not with a close-up product photograph.
Ignoring the Added Weight
Thin decorative panels are usually sufficient. Heavy boards and bulky hardware can make the drawers harder to operate and place unnecessary stress on the dresser.
Overdoing the Distressing
Natural wear usually appears around corners, edges, handles, and frequently touched surfaces. Random sanding in the middle of every panel can make the cabinet look manufactured rather than convincingly old.
Rushing the Cure Time
Glue, stain, paint, and clear finishes all need time to dry or cure. Reassembling too quickly can create fingerprints, stuck drawers, damaged corners, and labels permanently bonded to tacky topcoat.
Ways to Customize the Finished Cabinet
The basic faux apothecary design can be adapted to nearly any interior style. For a sophisticated office, use deep green paint, brass hardware, and numbered labels. For a lighter farmhouse room, try a pale wood stain with black pulls. A matte navy cabinet with warm brass hardware can function as an elegant nightstand.
You can also add furniture feet or a custom plinth, provided the modification does not reduce stability. A slightly wider wood top creates additional display space and can make the cabinet appear more substantial. Decorative side trim, corner molding, or a thin base frame can further disguise the original flat-pack profile.
For a less traditional variation, replace paper labels with small pieces of patterned wallpaper, pressed botanical prints, family photographs, or color-coded cards. The pulls still provide the apothecary silhouette, while the inserts make the piece personal.
My Experience With This Faux Apothecary Cabinet
The most important lesson from this IKEA RAST hack was that the visual effect depends far more on spacing than on expensive materials. My first instinct was to focus on finding the perfect antique hardware. In reality, even beautiful pulls looked wrong when the decorative panels were slightly uneven. Once the grid was properly measured and aligned, inexpensive hardware suddenly looked convincing.
Creating a cardboard template before cutting wood was one of the smartest decisions in the project. I tested several layouts and discovered that the smallest panels looked charming individually but far too busy when repeated across all three drawers. The three-column, two-row arrangement gave the cabinet enough detail without making it resemble an advent calendar for extremely organized squirrels.
The finishing stage also taught me to respect pine. On my first test piece, I applied dark stain directly to the sanded wood. The result had dramatic light and dark patches that looked less like antique furniture and more like a map of unpredictable weather. Using wood conditioner and wiping the stain consistently made the second sample noticeably more even.
I also learned not to judge the stain immediately after application. The color changed as it dried and shifted again after the clear coat was added. Testing the entire finish systemnot just the stainhelped me choose a shade that remained warm without becoming orange.
Installing 18 label pulls required more patience than expected. Measuring each one separately would have invited tiny differences, and tiny differences become a parade when repeated across the dresser. A single drilling template kept the hardware aligned and reduced the amount of measuring. I still checked the template every few panels because sawdust, clamps, and overconfidence form a dangerous DIY partnership.
Another useful discovery involved the labels themselves. At first, I filled them with unrelated vintage words because they looked decorative. That was charming for approximately three days. After repeatedly opening the wrong drawer, I replaced them with real categories. The cabinet became much more practical, while the old-fashioned font preserved the vintage character.
The false-front construction has held up well because the panels were attached with full, even glue coverage rather than a few large blobs. Spreading the adhesive thinly prevented squeeze-out and gave the wood consistent contact. Allowing the drawers to remain clamped overnight also helped keep the panels flat.
Living with the cabinet changed how I thought about storage. The exterior suggests many tiny specialized compartments, but the three large drawers remain flexible. One drawer can hold stationery, another can store electronics, and the bottom drawer can accommodate heavier supplies. The decorative labels make the contents easier to remember without limiting how the interior space is used.
Maintenance has been simple. Dust tends to collect around the label pulls, so a soft brush attachment works better than repeatedly removing the paper inserts. The clear topcoat makes the dresser top easy to wipe, and small scratches blend naturally with the aged finish. That is one advantage of vintage-inspired furniture: minor wear often improves the story rather than ruining the look.
Would I make the project again? Absolutely, although I would prepare every panel, drilling template, label, and piece of hardware before opening the stain. Organizing the materials in advance would shorten the process and reduce the number of moments spent searching for a screw that was definitely in my hand ten seconds earlier.
The completed cabinet feels far more substantial than the original dresser. It works because the project does not attempt to hide every trace of the RAST. Instead, it uses the dresser’s simple form as a foundation for texture, repetition, and vintage detail. The transformation is dramatic, but the construction remains approachable for a careful beginner.
Final Thoughts
A faux apothecary cabinet IKEA RAST hack is a practical way to create character-rich storage without buying a rare antique or building dozens of functioning miniature drawers. The project combines straightforward woodworking, careful measuring, decorative hardware, and a convincing finish.
The secret is restraint. Keep the panel spacing consistent, test the finish on scrap wood, align the label pulls with a template, and distress only where natural wear would occur. Those details determine whether the cabinet looks thoughtfully aged or simply attacked by craft supplies.
Once anchored securely to the wall, the finished piece can serve as a nightstand, craft organizer, office cabinet, entryway chest, or conversation starter. It offers the atmosphere of an old apothecary shop while quietly providing three generous drawers for the less romantic realities of modern life.
Note: IKEA products, dimensions, hardware, and construction details may change. Measure your assembled dresser before cutting decorative panels, follow all finish manufacturers’ safety instructions, and install the recommended anti-tip restraint before using the cabinet.