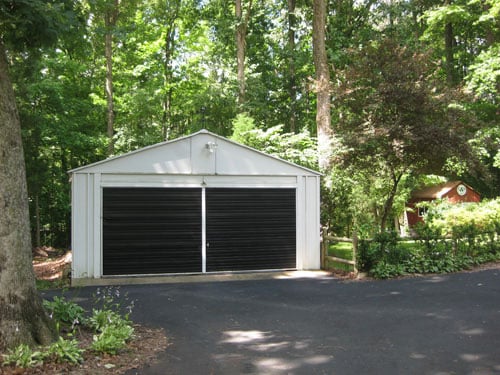
If your garage door is faded, chalky, scratched, or just giving “I’ve been through some things” energy, paint can work wonders. A freshly painted garage door boosts curb appeal, helps protect the surface from weather, and can make the whole front of your house look more intentional. Best of all, this is one of those rare home projects that delivers a big visual payoff without requiring a second mortgage or a reality TV film crew.
The trick is doing it in the right order. Painting a garage door is not just a matter of opening a can, humming confidently, and hoping for the best. Good results come from smart prep, the right exterior products, and a little patience between coats. Whether your door is steel, wood, vinyl, or composite, this guide walks you through the process step by step in plain English, with real-world tips that save time, reduce streaks, and help the finish last.
So grab your brush, your roller, and your determination. Your garage door is about to stop looking like the forgotten wallflower of the house.
Before You Open the Paint Can
Know What Your Garage Door Is Made Of
Start by identifying the material. Steel and aluminum doors are common and usually repaint well with proper cleaning, sanding, spot priming, and exterior acrylic paint. Wood doors can be gorgeous, but they need more protection from moisture and sun. Vinyl doors need extra care when it comes to color choice, because darker colors can absorb more heat and may lead to warping on some products. Composite doors usually follow a process similar to painted metal or engineered surfaces, but the manufacturer’s instructions should still win every argument.
If you still have the owner’s manual, now is its moment. Some manufacturers have specific instructions about prep, warranty coverage, finish type, and whether all sides of the door must be coated. That is especially important with wood doors and newer factory-finished products.
Choose the Right Day
Paint on a mild, dry day with no rain in the forecast. Extremely hot sun, damp weather, and strong wind can all turn a simple project into a sticky mess. In practical terms, aim for comfortable weather, moderate humidity, and enough daylight to finish without racing the sunset. A garage door is a large exterior surface, so conditions matter more than people think.
Pick the Right Paint Sheen
For most garage doors, satin or semi-gloss is the sweet spot. Satin gives you a softer, modern look while still offering good durability. Semi-gloss is tougher, easier to wipe down, and excellent if you want a crisper, more polished finish. Flat finishes are usually less practical here because garage doors take a beating from dust, rain, fingerprints, and the occasional mystery scuff that appears out of nowhere.
Tools and Materials You’ll Want Nearby
You do not need a contractor-sized trailer full of gear, but you do want the essentials within arm’s reach:
- Exterior acrylic latex paint
- Exterior primer suited to your door material
- Mild detergent or exterior cleaner
- Sponge, bucket, and hose
- Sandpaper or sanding block
- Wire brush for rusty areas on metal doors
- Painter’s tape and drop cloths
- Brush for edges and recesses
- Roller or paint sprayer for broad surfaces
- Safety glasses, gloves, and a ladder or step stool if needed
If you are a younger DIYer, get an adult to help with ladders, paint sprayers, or anything involving electrical disconnects. And if your door has damaged springs, bent tracks, or mechanical issues, call a pro before you paint. A pretty garage door that does not open is still a problem with better fashion sense.
Step-by-Step Tutorial for Painting a Garage Door
Step 1: Choose Your Color and Finish First
Do this before prep starts, not while standing in the paint aisle like a confused game show contestant. Your garage door color should work with the house, not start a feud with it. Safe choices include warm white, soft gray, charcoal, taupe, greige, and muted green. If your home has bold trim or shutters, the garage door usually looks best when it complements rather than competes.
For vinyl garage doors, stay cautious with dark colors unless the manufacturer clearly allows them. Lighter shades are often safer because they absorb less heat. On a wood door, darker colors can look rich and handsome, but they may also demand more upkeep in sunny climates.
Step 2: Prep the Workspace
Move cars, bikes, tools, and patio furniture away from the area. Lay down drop cloths and mask nearby trim, siding, windows, and hardware. Disconnect the automatic garage door opener so the door can be moved manually and does not decide to surprise you mid-project. If possible, position the door so the section you are painting is comfortable to reach at eye level.
This step is boring, yes. It is also the step that prevents you from finding paint freckles on the driveway three days later.
Step 3: Wash the Door Thoroughly
Paint sticks best to clean surfaces, not to dirt, chalk, mildew, grease, or spiderwebs that have signed a long-term lease. Wash the door with mild detergent or an exterior cleaner. Rinse well and let it dry completely. On especially dirty doors, a cleaner and degreaser may help, but always follow product directions.
If the door has loose or peeling paint, scrape or sand those areas until the edges are smooth. On glossy surfaces, lightly sanding helps dull the finish so primer and paint can grip better. For metal doors with rust spots, use a wire brush to remove loose rust, then spot prime those areas with a rust-inhibitive primer.
A good test is to run your hand across the dry surface. It should feel clean and mostly smooth, not gritty, greasy, or flaky. If it still feels suspicious, keep prepping.
Step 4: Prime the Surface
Primer is not glamorous, but it is the unsung hero of exterior painting. It improves adhesion, helps create a more even finish, and adds another layer of protection against weather and UV exposure. If your existing paint is sound and you are repainting with a similar color, some doors may not need full priming. But for bare spots, repairs, rust treatment, strong color changes, weathered surfaces, or raw wood, primer is a very smart move.
Use a primer designed for the specific material. For example, bare or exposed metal benefits from a primer that protects against rust, while slick surfaces like vinyl or glossy previous coatings may need a high-adhesion primer. Apply primer evenly and allow it to dry fully according to the label.
If your garage door has recessed panels, start there first. Then move to the rails, stiles, and broad outer sections. Working in a logical order keeps you from boxing yourself into a corner like a paint-splattered chess move.
Step 5: Paint the Door in Sections
Once the primer is dry, it is showtime. Stir the paint thoroughly. Begin at the top of the door and work downward. This helps catch drips before they set and keeps your finish looking more uniform. If the door has trim, paint the side edges and face of the trim first. For paneled doors, brush the recesses and inner edges before rolling the flatter surfaces.
Use a brush where precision matters and a roller or sprayer where speed and even coverage help. A roller gives great control and is beginner-friendly. A sprayer is faster and can look beautifully smooth, but it requires careful masking, a steady hand, and a bit of practice first. If you use a sprayer, overlap strokes consistently and keep the tool moving so you do not end up with runs.
Maintain a wet edge as you go. In normal human language, that means do not let one section dry completely before blending into the next. Working steadily helps reduce lap marks and patchiness.
Step 6: Apply a Second Coat
Most garage doors look better and last longer with two finish coats. The first coat establishes coverage; the second improves color depth, consistency, and durability. Let the first coat dry as directed by the paint manufacturer before adding the next one. Do not rush this part just because the door “looks dry enough.” Exterior paint can feel dry to the touch long before it is ready for another coat or daily use.
After the second coat, give the door adequate curing time before reconnecting the opener and putting the door back into regular service. That extra patience can be the difference between a clean finish and a smeared one with the personality of a fingerprint museum.
Material-Specific Tips That Matter
Steel and Aluminum Doors
These usually repaint very well. Focus on cleaning, sanding, and dealing with rust immediately. Spot-priming bare or rusty metal is critical. Exterior acrylic products are typically the safest and most flexible choice because they hold up well outdoors.
Wood Garage Doors
Wood looks beautiful but asks for commitment. Prime and paint thoroughly, especially exposed edges and vulnerable areas. Some wood-door manufacturers require all sides to be finished for warranty protection, particularly before or during installation. If you have a wood door, checking the manufacturer’s finishing instructions is not optional; it is smart insurance.
Vinyl Garage Doors
Use products appropriate for vinyl and lean toward lighter colors unless your manufacturer says otherwise. This is one of those situations where your dream of a dramatic inky-black door may need to take a seat. A warped garage door is not a design statement.
Mistakes to Avoid
- Painting a dirty door. Dirt, oxidation, and grease ruin adhesion.
- Skipping primer when the surface clearly needs it. Bare spots, rust, raw wood, and big color changes usually need more than optimism.
- Painting in direct blazing sun. Fast drying sounds efficient until the finish becomes patchy and hard to level.
- Ignoring the manufacturer’s instructions. Your garage door and paint label know things.
- Letting paint gum up seals or moving parts. Keep paint off weatherstripping, tracks, rollers, and hardware that must move freely.
- Trying to do it all in one heavy coat. Thick coats lead to drips, slow drying, and regret.
How to Keep the Finish Looking Good
Once the project is done, maintenance is refreshingly simple. Wash the door a few times a year to remove dirt and grime. Touch up chips or scratches before they spread. Keep an eye on weatherstripping and hardware, since a good-looking finish is only half the story if the door is letting in drafts or moisture.
In many climates, a properly painted garage door can look great for years before it needs another full repaint. The exact timeline depends on sun exposure, rain, temperature swings, and how much abuse the door gets from daily use. A south-facing door in harsh sun will usually age faster than one on a shaded side of the house.
Real-World Experiences: What Painting a Garage Door Actually Feels Like
Here is the part people do not always say out loud: painting a garage door is one of those projects that looks easy on paper and mildly chaotic in real life. You start the morning feeling heroic. By lunchtime, you are negotiating with painter’s tape, wondering why the roller has developed opinions, and trying not to step in the exact puddle of paint you swore you would avoid.
One common experience is underestimating the prep. A lot of homeowners assume the paint itself is the job, when in reality the prep is the job and the paint is the reward. The people who end up happiest are usually the ones who spend extra time washing, sanding, and masking. They may grumble during the process, but later they are the same people casually saying, “It really wasn’t too bad,” while admiring a smooth, even finish from the driveway.
Another very real experience is color panic. A sample that looked elegant and calm on a tiny swatch can suddenly feel much bolder once it covers an entire garage door the size of a small billboard. That is why testing color first matters. Morning light, afternoon sun, and evening shade can all make the same paint look slightly different. Many homeowners discover that the “safe” color ends up being the smartest choice, not because it is boring, but because it ties the whole exterior together.
Texture surprises are also common. A door that looked fairly smooth from ten feet away may reveal old brush marks, rust freckles, dents, or rough edges once you get close. That can be frustrating at first, but it also explains why a careful first coat may look only okay and a second coat looks dramatically better. Garage doors are large, exposed surfaces, and they love exposing every shortcut you tried to take.
Then there is the satisfaction factor, which is honestly much bigger than people expect. A newly painted garage door can make the whole front of the house feel cleaner, newer, and more cared for. It is one of those weekend projects where neighbors suddenly slow down a little when they drive by. Not in a creepy way. More in a “wait, that looks really good” way.
There is also a lesson in patience. Most bad garage door paint jobs are not caused by bad intentions. They are caused by rushing. Rushing the cleaning. Rushing the dry time. Rushing the second coat. Rushing to close the door because dinner is in an hour and the mosquitoes are organizing. The best results usually come from slowing down just enough to let the materials do their job.
And finally, there is the emotional truth of the project: once the garage door looks fresh, the rest of the exterior may suddenly seem a little too honest. The faded shutters, the tired mailbox, the porch light from another erathey all step into the spotlight. So yes, painting the garage door can improve curb appeal. It can also accidentally inspire your next three weekends of home improvement. Consider yourself warned.
Final Thoughts
A garage door makeover is one of the smartest ways to refresh your home’s exterior without replacing the door itself. The key is to treat it like a real exterior paint project, not a shortcut project. Clean well, sand what needs sanding, prime where needed, use the right paint, work in sections, and give the finish time to dry properly.
Do that, and your garage door can go from sun-faded and forgettable to polished and intentional. Not bad for a project that mostly requires paint, patience, and the ability to resist saying “good enough” too early.