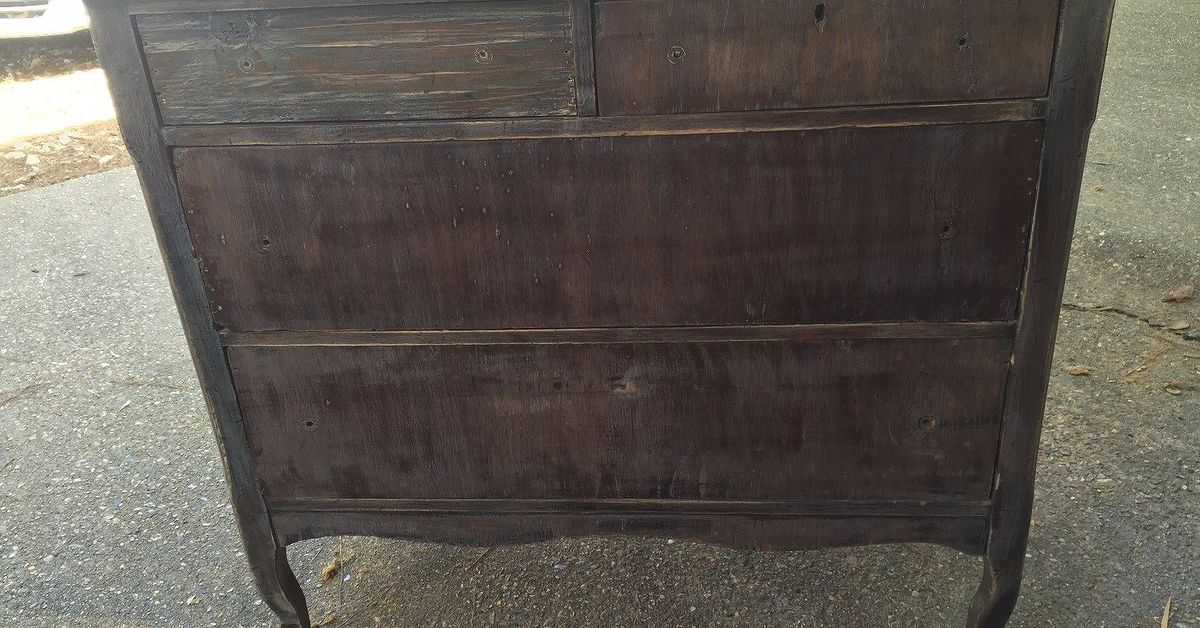
There are DIY projects that save money, and then there are DIY projects that make people stop mid-sentence and say, “Wait, that used to be a dresser?” Turning an old dresser into a bathroom vanity falls firmly into the second category. It has the charm of custom millwork, the personality of vintage furniture, and the satisfying energy of a project that looks wildly expensive once it is finished.
If you have ever browsed designer bathrooms and wondered why they feel richer, warmer, and more memorable than builder-grade spaces, here is a clue: they rarely look like they came straight from a flat-packed aisle. A repurposed dresser vanity brings shape, history, texture, and detail into a room that too often ends up looking like a glossy white box with plumbing.
The best part is that this project is not just about aesthetics. When done right, it can also give you useful storage, a tailored fit, and a bathroom centerpiece that does not look like everybody else’s. The trick is knowing how to choose the right dresser, how to plan for plumbing, and how to finish the wood so it can survive daily life in a humid room where toothpaste, hand soap, and splashy children may all conspire against your masterpiece.
This guide walks you through the full process of making a high-end sink from an old dresser, from selecting the right piece to styling it like it belongs in a boutique hotel. Grab your tape measure, your patience, and your willingness to say goodbye to at least one drawer. Let’s make something beautiful.
Why an Old Dresser Makes Such a Great Vanity
A dresser already has a lot of what a bathroom vanity needs: structure, storage potential, and a furniture-like presence. Unlike many stock vanities, an older dresser often has solid wood, better proportions, decorative drawer fronts, carved legs, or unique hardware that immediately adds character.
That is what creates the “high-end” effect. Luxury bathrooms do not always rely on gold-plated everything. Often, they feel elevated because they combine practical fixtures with pieces that look collected instead of ordered in one click. A dresser vanity brings that layered look without requiring a mansion, a celebrity designer, or a trust fund.
It also opens the door to customization. You can choose a dramatic vessel sink for a statement look, an undermount sink for a more classic built-in feel, or a drop-in sink if you want the simplest installation path. You can paint the dresser in a moody navy, a soft mushroom gray, a crisp black, or leave the wood tone visible and seal it properly for a richer, furniture-grade finish.
Start with the Right Dresser, Not Just the Cutest One
This is the part where excitement needs to shake hands with reality. Not every dresser deserves a second career as a bathroom vanity. Some are too shallow. Some are too fragile. Some have so many drawers that the plumbing situation becomes a three-dimensional puzzle you did not ask for.
Look for good bones
The best candidate is sturdy, level, and made from wood or high-quality furniture material that can handle modification. A dresser with a strong frame and relatively simple interior construction is easier to adapt than one packed with delicate dividers and tiny drawers.
Pay attention to height
This matters more than people expect. Standard bathroom vanities often land around the low-30-inch range, while vessel sinks sit above the countertop. So if your dresser is already tall and you add a raised sink bowl, the final setup may feel awkwardly high. In practical terms, a 34-inch dresser topped with a 6-inch vessel sink can look gorgeous but may feel less comfortable for everyday use. In that case, an undermount or drop-in sink may be the smarter choice.
Depth matters too
If the dresser is too shallow, the sink and faucet may feel cramped, and splash control becomes annoying. You also need enough room for the drain assembly and plumbing. Bathroom vanities vary, but many fall into a depth range that gives both visual balance and functional breathing room. A dresser with decent depth is much easier to work with than one that looks like it belongs in a hallway.
Fewer drawers can actually be a blessing
Yes, we all love storage. But plumbing is not sentimental. The drain and water lines will likely consume the center section, so dressers with fewer, larger compartments are often easier to convert. Many successful projects keep the bottom drawer functional and transform the upper drawer fronts into fixed decorative panels. That way, the piece still looks like a dresser even after the plumbing moves in.
Choose a Sink Style That Matches Your Dresser
The sink you choose affects the entire project: the look, the installation difficulty, the final height, and even how “designer” the vanity feels.
Vessel sink
A vessel sink sits above the countertop and instantly makes a dresser look custom. It is dramatic, sculptural, and especially good for powder rooms or guest bathrooms where style can take center stage. But it needs thoughtful planning. Because the bowl rises above the surface, you need a dresser height that keeps the final sink comfortable to use. You also need a taller faucet or a wall-mounted faucet with proper reach.
Undermount sink
An undermount sink gives a cleaner, more built-in appearance. It often feels more traditional and can make the vanity easier to wipe down because the countertop flows right into the sink opening. This is a strong choice if your dresser is on the taller side and you want the whole setup to feel refined rather than showy.
Drop-in sink
A drop-in sink is often the friendliest option for first-time DIYers. The rim covers the cut edges in the countertop, which can make installation more forgiving. It may not have the same couture vibe as a vessel sink, but it can still look polished when paired with the right top and hardware.
Step-by-Step: How to Make a High-End Sink from an Old Dresser
1. Measure everything before you buy anything
Measure the dresser width, depth, and height. Then measure your bathroom space, including wall location, existing plumbing position, and the swing of nearby doors. Also check where the drain line and shutoff valves sit in relation to the dresser’s frame and drawers. The glamorous part of this project begins with a tape measure, not a paintbrush.
2. Shut off water and plan the plumbing route
If you are replacing an existing vanity, turn off the water supply and remove the old unit. Dry-fit the dresser in place so you can mark where the pipes will need to pass through the back or interior. This planning step prevents the classic DIY tragedy of cutting a perfect sink opening only to realize the drain pipe meets a drawer support at exactly the wrong spot.
3. Remove or modify drawers
Most dresser vanity conversions require surgery on the drawers. Often, the top drawers are shortened, boxed around the plumbing, or converted into false fronts. The goal is to preserve the dresser’s original look while making space inside for the drain and supply lines. If you can keep one or more lower drawers functional, even better. That combination of beauty and usefulness is where the project really shines.
4. Reinforce the interior if needed
Some dressers need extra support once interior framing is removed. Add blocking or support rails where necessary, especially if you are installing a heavy stone top or a large sink. A high-end look is great, but a high-end look that does not wobble is even better.
5. Add or install the countertop
You can place the sink directly into a modified wood top, but many homeowners prefer to add a stone, quartz, marble, or sealed wood top for durability and easier maintenance. Stone instantly raises the luxury factor. Sealed wood gives a more relaxed, furniture-inspired look. Either way, dry-fit the top carefully before cutting openings.
6. Mark and cut sink and faucet openings
Use the sink template if one is provided. Mark the drain hole carefully and double-check faucet placement. If you are using a vessel sink, leave enough clearance behind the bowl for the faucet and backsplash. This is not the place for confident guessing. This is the place for measuring twice, walking away, measuring again, and then cutting.
7. Sand, prime, and paint or stain the dresser
Before finishing, clean the dresser thoroughly. Remove wax, grime, or old residue so the new finish can bond properly. Sand enough to smooth the surface and promote adhesion, but be cautious with older pieces. If the dresser or house dates to the pre-1978 era, use lead-safe renovation practices before disturbing old finishes.
For a painted vanity, use a high-quality primer and a durable cabinet-grade paint. Bathrooms are humid, hands are damp, and makeup spills have no respect for mediocre paint. Semi-gloss and similar durable sheens often make sense here because they resist moisture better and wipe clean more easily.
If you want a wood finish, stain the dresser if needed and protect it with a reliable clear topcoat. Water-resistant polyurethane or another durable protective finish can help shield the piece from routine splashes and daily wear.
8. Seal vulnerable areas
Pay special attention to joints, cut edges, sink openings, and the backsplash area. These spots are where water likes to sneak in and ruin your confidence. Apply caulk where the top meets the wall and around sink edges as needed. A dresser vanity fails slowly and quietly if moisture keeps entering the wood. Seal like you mean it.
9. Install the sink and faucet
Set the sink according to manufacturer instructions, secure the drain, connect the P-trap, and install the faucet. Check alignment from every angle before tightening everything down. Luxury is often just symmetry plus patience.
10. Anchor and level the vanity
Once the dresser is in position, make sure it sits level. Use shims if necessary, and secure the vanity properly so it feels stable. A furniture vanity may look like a freestanding antique, but it should still behave like a dependable bathroom fixture.
Design Choices That Make It Look Expensive
Use standout hardware
Swapping old pulls for unlacquered brass, matte black, polished nickel, or crystal knobs can instantly shift the dresser from “thrift-store survivor” to “custom designer piece.”
Pair styles intentionally
A curved antique dresser looks stunning with a simple white sink and elegant bridge faucet. A mid-century dresser works beautifully with a minimal rectangular vessel sink. The key is contrast with control, not chaos.
Choose the mirror like it matters
Because it does. An arched mirror, vintage mirror, or oversized framed mirror can make the vanity feel like the centerpiece it is meant to be. The wrong mirror makes the project look accidental. The right mirror makes it look commissioned.
Add a backsplash if the wall needs protection
Even a low stone backsplash can make the setup feel more finished while helping protect the wall from splashes. In family bathrooms, this tiny detail earns its keep quickly.
Style the countertop lightly
A soap dispenser, a small tray, a vase, and one pretty canister go a lot farther than crowding the vanity with every product known to skincare. High-end spaces breathe. Let yours breathe too.
Common Mistakes to Avoid
Choosing a dresser only for looks: If it is too tall, too shallow, or too flimsy, beauty will not save the project.
Ignoring plumbing before cutting: Always map the drain and supply lines first.
Forgetting faucet reach and sink clearance: A gorgeous faucet that barely reaches the basin is not elegant. It is annoying.
Skipping moisture protection: Bathrooms are harsh environments. Finish the wood like it is going into battle.
Keeping every drawer at all costs: Sometimes the high-end move is knowing when to fake a drawer front and move on with dignity.
Rushing the final install: Uneven placement, crooked hardware, and sloppy caulk can undo all your hard work in one afternoon.
Who This Project Is Best For
This project is ideal for homeowners who want a custom look without paying custom vanity prices. It is especially good for powder rooms, guest baths, and style-forward renovations where character matters as much as function.
It is also a smart choice if you already own a solid dresser with sentimental or decorative value. Instead of letting it collect dust in the garage or become the world’s fanciest junk magnet, you can give it a second life where everyone actually sees it.
That said, if you want the fastest possible install with zero modifications, a standard vanity may suit you better. A dresser conversion is more involved. It asks for planning, patience, and a willingness to improvise. But the payoff is a bathroom that does not look copied and pasted from a showroom aisle.
What This Project Feels Like in Real Life: The Experience Behind the Transformation
The experience of turning an old dresser into a high-end sink is part renovation, part treasure hunt, and part emotional roller coaster with a drill in its hand. At the beginning, it feels thrilling. You find a dresser with beautiful lines, maybe curved drawers or original brass pulls, and suddenly you can already see it in the bathroom under a soft wall sconce like it was born for the role. It feels clever, creative, and just rebellious enough to be fun.
Then the practical part starts, and reality enters wearing work boots. You realize the back panel needs to be cut, at least one drawer is about to lose its former identity, and the sink you loved online may turn the entire vanity into chin-height furniture. This is usually the stage where the project becomes real. It is no longer a pretty idea saved in a folder. It is sawdust, measurements, and standing in the bathroom staring at plumbing like it personally insulted you.
Still, this is where the project gets rewarding. Each decision makes the vanity feel more custom. Trimming a drawer box around the pipes, choosing a faucet that actually fits the sink, deciding whether to paint the dresser a dramatic charcoal or keep the wood grain visiblethese moments turn the piece into something personal. Unlike buying a factory vanity, this process leaves fingerprints everywhere in the best possible way. The final result reflects your taste, not just your budget.
There is also a surprising amount of satisfaction in preserving the dresser’s character. Keeping the original drawer fronts, reusing vintage hardware, or highlighting old wood details makes the project feel respectful instead of disposable. You are not just building a sink cabinet. You are giving an older piece a second life with a new purpose. That alone gives the vanity more soul than many brand-new alternatives.
The finishing stage is often where the magic shows up. Once the paint cures or the topcoat dries, the sink is installed, and the mirror goes up, the dresser stops looking like a project and starts looking intentional. That is the moment people love most. The room suddenly feels warmer, more layered, and more expensive. Even a simple bathroom can look elevated because the vanity no longer feels generic.
In everyday use, homeowners often notice two things. First, the vanity becomes the conversation piece of the room. Guests ask about it. Family members mention it. It has presence. Second, it changes how the entire bathroom feels. The room becomes less utilitarian and more designed. Instead of feeling like a place built purely for brushing teeth, it starts to feel like part of the home’s personality.
Of course, the experience is not perfectly glamorous. There may be a drawer you sacrifice for plumbing. There may be a caulk line you redo. There may be one late-night moment when you wonder why you did not just buy a ready-made vanity and call it a day. But once the project is finished, those frustrations tend to fade fast. What remains is the pride of having made something distinctive, functional, and beautiful with your own hands.
That is really the secret appeal of making a high-end sink from an old dresser. Yes, it can save money compared with a fully custom vanity. Yes, it looks fantastic. But the deeper reward is that it feels like yours in a way mass-produced pieces rarely do. It has history, craftsmanship, and a story. And honestly, that is the most luxurious detail of all.
Conclusion
Making a high-end sink from an old dresser is one of those rare home projects that balances style, practicality, and personality. It can transform a forgettable bathroom into a memorable one, especially when you choose the right dresser, plan the plumbing carefully, and finish every surface for moisture resistance and daily use.
The final look can lean vintage, modern, rustic, elegant, or somewhere in that delightfully hard-to-define place designers call “collected.” More importantly, it feels custom because it is custom. That old dresser becomes more than furniture. It becomes the feature that gives your bathroom warmth, depth, and a little bragging power. And frankly, any project that lets you say, “Oh that? It used to be a dresser,” is already winning.