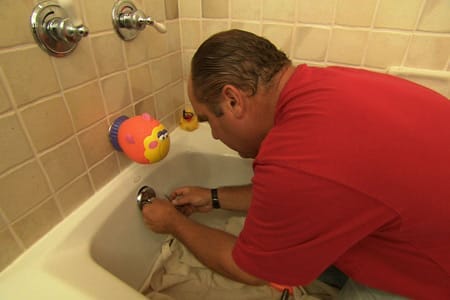
If your bathtub drain stopper has decided to become the star of a low-budget plumbing drama, welcome. One day it seals like a champ, and the next day it either refuses to hold water, refuses to open, or acts like it is personally offended by your bath plans. The good news is that most bathtub drain stopper problems are surprisingly fixable without turning your bathroom into a construction zone. In many cases, the culprit is something gloriously ordinary: hair, soap scum, a loose cap, a worn gasket, or a linkage that slipped out of adjustment.
This guide walks you through how to fix a bathtub drain stopper the smart way. We will cover the most common stopper types, how to remove each one, what usually goes wrong, and when cleaning, adjusting, or replacing the part makes more sense than arguing with it. Think of this as your practical, no-nonsense, slightly amused roadmap to getting your tub back in business.
Why a Bathtub Drain Stopper Stops Working
Before grabbing pliers and launching into battle, it helps to know what normally causes the problem. A bathtub drain stopper usually fails for one of four reasons:
- Buildup: Hair, soap scum, and mineral deposits collect around the stopper or just below it.
- Loose parts: Caps, knobs, set screws, or threaded sections work themselves loose over time.
- Misalignment: On trip-lever and pop-up styles, the linkage or plunger sits too high or too low.
- Wear and tear: Springs, seals, gaskets, and metal parts eventually wear out, rust, or lose tension.
The symptoms usually make the diagnosis easier. If the tub will not hold water, the stopper is not sealing. If it opens and closes but drains slowly, the real problem may be a partial clog under the stopper. If it will not move at all, something is jammed, cross-threaded, over-tightened, or simply old enough to qualify for vintage status.
Step One: Identify Your Drain Stopper Type
You cannot fix what you cannot identify. Bathtub drain stoppers come in several common designs, and each one comes apart a little differently.
Toe-Touch or Foot-Lock Stopper
This is the one you press with your toe to open or close. It is spring-loaded and usually sits right in the drain opening. If it stops clicking, stops sealing, or feels wobbly, the spring or threaded assembly may need cleaning, tightening, or replacement.
Push-Pull Stopper
This stopper opens when you pull up on the top knob and closes when you push it down. It is simple, common, and usually easy to remove by twisting the top section counterclockwise.
Lift-and-Turn Stopper
This one looks similar to a push-pull design but usually needs to be turned while lifting. Some models have a small set screw hidden under the knob. That tiny screw loves to hide like it pays rent.
Trip-Lever Stopper
This style uses a lever on the overflow plate rather than a stopper cap you press by hand. Inside the overflow tube, a linkage and plunger control the drain. If the tub will not hold water or drains too slowly, the plunger height may be off or the linkage may be dirty or worn.
Pop-Up or Flip-It Stopper
These are less dramatic to remove. A pop-up often pulls out with the connected arm, while a Flip-It style usually pulls or twists out and relies on O-rings or a gasket to seal.
Tools You May Need
You probably will not need a whole plumber’s truck. Most repairs can be handled with a few basics:
- Flathead screwdriver or Phillips screwdriver
- Needle-nose pliers
- Hex key or small Allen wrench
- Soft cloth or rag
- Old toothbrush or small cleaning brush
- White vinegar and mild soap
- Plumber’s grease
- Drain hair tool or small hook tool
- Replacement stopper, gasket, spring, or linkage kit if needed
If you are removing the actual drain basket or flange, you may also need a tub drain wrench or spud wrench. That is less about finesse and more about not mangling the metal crossbars inside the drain.
How To Fix a Bathtub Drain Stopper by Type
How To Fix a Toe-Touch Bathtub Drain Stopper
Start by putting the stopper in the open position. Try turning the cap counterclockwise. On some models, the cap and the internal shaft lift right out. On others, you may need to hold the center shaft while unscrewing the decorative top.
Once removed, inspect the assembly. If the stopper no longer clicks reliably, the internal spring may be worn or jammed with soap residue. Clean all parts with warm water and a little vinegar, wipe away buildup, and check the threads. If the stopper was simply loose, rethreading it snugly may solve the problem immediately.
If it still does not seal, inspect the gasket underneath. A flattened, cracked, or warped gasket will not hold water no matter how much optimism you throw at it. Replace the stopper assembly if the spring is weak or the gasket is damaged. This is often faster than trying to rehabilitate a part that has already emotionally checked out.
How To Fix a Push-Pull Stopper
Pull the stopper into the open position and twist the top cap counterclockwise. In many cases, the stopper lifts free once the cap loosens. Underneath, you may find a threaded post or removable body.
Clean the underside thoroughly. This area is famous for collecting a felt-like ring of hair and soap slime that looks like a science fair project no one asked for. If the stopper seals poorly, check whether the body is sitting straight and whether the threads are stripped. Reinstall carefully without forcing it. Cross-threading a drain stopper is a great way to create a new problem while fixing the first one.
If the mechanism feels stable but water still leaks out of the tub, replace the stopper. Simple designs are inexpensive, and once the threads or sealing surface wear down, repairs become less reliable.
How To Fix a Lift-and-Turn Stopper
Lift the stopper and look for a set screw under the knob or on the side of the stopper body. If you find one, loosen it with a screwdriver or hex key, then remove the stopper. If there is no visible screw, try unscrewing the knob from the top and then turning the entire assembly counterclockwise.
Here is where patience wins. Lift-and-turn stoppers often look like push-pull models, but they do not always behave the same way. Forcing the wrong part can scratch the finish or break the post. Once the stopper is off, clean the post, threads, and drain opening. Mineral buildup can make the mechanism feel stiff or keep it from seating flat.
Reassemble the parts carefully and test the seal. If the stopper still rocks, wobbles, or leaks, replace the assembly or the mounting post. A secure connection matters more than how confident you feel while tightening it.
How To Fix a Trip-Lever Bathtub Drain Stopper
This style takes a little more finesse because the important parts are hidden behind the overflow plate. Start by unscrewing the overflow plate and gently pulling it outward. The trip lever, linkage, and plunger should come with it. Pull slowly so you do not bend the rod.
Once the assembly is out, inspect the plunger, linkage, and threaded rod. If the tub will not hold water, the plunger may be sitting too high. If the tub drains slowly when open, the plunger may be too low, partially blocking the drain. That means the fix is often adjustment, not replacement.
Clean the entire assembly first. Remove hair, soap buildup, and any grime around the plunger. Then adjust the threaded rod or lock nuts so the plunger sits at a better depth. Reinstall the assembly, test the lever, run water, and see whether the tub now seals properly. You may need to repeat the adjustment once or twice to dial it in.
If the rubber seal is brittle, the rod is badly corroded, or the linkage is bent, replacement is the better move. Trip-lever repairs reward calm, incremental changes. Tiny adjustments often make a big difference.
How To Fix a Flip-It or Pop-Up Stopper
Flip-It stoppers are usually the easiest. Open the stopper, then twist or pull it out. Inspect the O-rings or sealing gasket. If they are worn, flattened, or cracked, replace them. Clean the drain opening before reinstalling anything.
Pop-up stoppers generally pull out with the attached arm once the lever is in the open position. Clean the stopper and linkage, inspect for bent parts, and make sure the stopper moves freely before reinstalling. If the arm resists, do not yank it like you are starting a lawn mower. Gentle wiggling is the grown-up approach.
If the Stopper Is Fine but the Tub Still Drains Slowly
Sometimes the stopper is innocent. The real issue is a clog right below it. After removing the stopper, shine a flashlight into the drain. If you see hair and soap residue, remove it manually with gloves or a drain hook. Flush with hot water afterward.
Try a Plunger
If the drain is still slow, add an inch or two of water to the tub, cover the overflow opening with a wet cloth, and plunge the drain for about 20 to 30 seconds. This helps create a proper seal and improves suction.
Use Hot Water and a Mild Cleaner
For soap scum and minor buildup, hot water can help. A baking soda and white vinegar flush can also loosen light residue. Let it sit briefly, then rinse with hot water. This works best for minor gunk, not a heroic hair monster living in the trap.
Use Chemicals Carefully
Harsh drain cleaners should be a last resort. They can be rough on older pipes, rubber parts, metal finishes, and your indoor air. If you use one, make sure it is rated for tubs and follow the label exactly. More is not better. More is usually just more expensive regret.
When You Should Replace the Entire Stopper
Not every bathtub drain stopper repair is worth stretching into a three-act saga. Replacement usually makes more sense when:
- The spring no longer clicks or returns properly
- The gasket or seal is cracked or permanently flattened
- The linkage is bent, rusted, or badly corroded
- The threads are stripped or cross-threaded
- The stopper still fails after cleaning and adjustment
If the drain basket itself is damaged, leaking, or fused in place with corrosion, you may need to remove the drain flange and replace more than just the stopper. At that point, a drain wrench, fresh plumber’s putty or approved sealant, and a bit more care are required.
Mistakes To Avoid
- Do not force the stopper. If it is stuck, check for a hidden set screw or different removal method first.
- Do not scratch the finish. Wrap plier jaws in a cloth before gripping decorative parts.
- Do not ignore the overflow opening. On some clogs, going through the overflow offers a straighter path.
- Do not reinstall dirty parts. A stopper put back onto a filthy drain is just a cleaner-looking problem.
- Do not overtighten. Too much enthusiasm can distort gaskets, jam clickers, and damage threads.
When To Call a Plumber
DIY bathtub drain stopper repair works well for many common issues, but some situations deserve professional help. Call a plumber if the tub still leaks after repeated adjustments, if multiple drains are backing up, if you smell sewage, if the drain assembly is heavily corroded, or if you suspect damage behind the tub. A stubborn stopper is annoying. A hidden leak is expensive.
Real-World Experiences and Lessons From Fixing Bathtub Drain Stoppers
In real homes, fixing a bathtub drain stopper is rarely about one dramatic broken part. More often, it is a chain of very normal little issues that add up. A homeowner notices the tub will not hold water during a bath, assumes the whole drain assembly is ruined, and starts mentally pricing out a plumber. Then the stopper comes out, and underneath is a compact, slightly horrifying mat of hair, soap residue, and mystery sludge that has been quietly building a tiny kingdom for months. After ten minutes of cleaning and a careful reinstall, the tub works again. Plumbing can be humbling like that.
Another common experience is mistaking the stopper type. Plenty of people think they have a push-pull model when it is really lift-and-turn, or they start unscrewing a decorative cap when the actual fastener is a hidden set screw. That usually leads to a moment of confusion, a pause, and the universal DIY thought: “Well, that probably should not be spinning like that.” The lesson is simple: identify the style first, then remove it the way it was designed to come apart. Ten seconds of observation can save twenty minutes of accidental chaos.
Trip-lever stoppers create a special category of experience. They look intimidating because the mechanism disappears into the overflow tube, and when you first pull the linkage out, it can feel like you have extracted a prop from an old submarine. But this is also the repair that teaches patience. Many trip-lever problems are caused by plunger height, not total failure. A small adjustment to the threaded rod can change everything. The first test may still fail, the second may be better, and by the third adjustment the tub suddenly holds water like it is proud of itself again. That is the kind of victory that makes people take entirely too much credit for one evening.
There is also the classic lesson about over-tightening. Homeowners understandably think tighter means better. Sometimes it does. Sometimes it means the clicker gasket squishes out of place, the threads bind, or the stopper sticks half-open. In practice, snug and aligned beats aggressively tightened every time. Bathtub drain parts are not lug nuts on a truck tire.
Many people also discover that the stopper was only half the story. They replace a worn toe-touch unit, feel triumphant, then notice the tub still drains slowly. That is usually because the old stopper was hiding a partial clog. Once the shiny new part is installed, the drain line still needs attention. Cleaning the drain opening, removing visible debris, and flushing with hot water often finish the job. The real experience here is learning that plumbing problems like company. They often arrive in pairs.
One of the best practical takeaways from repeated stopper repairs is that prevention matters more than heroics. A simple hair catcher, occasional cleaning, and a quick monthly rinse can save a lot of frustration. Most drain stoppers do not fail overnight. They usually send warning signs first: slower draining, a softer seal, a weak click, or a lever that feels different. Catch those early, and the repair is usually simple. Ignore them for six months, and suddenly your relaxing bath starts with a screwdriver and a pep talk.
So yes, fixing a bathtub drain stopper is often a very manageable DIY job. It rewards observation, light cleaning, careful adjustment, and a healthy respect for hidden screws. It is not glamorous, but it is satisfying. And few household victories are quite as sweet as watching a tub fill up properly after you fixed the problem yourself, especially when the entire repair cost less than a fancy coffee and required only minimal emotional damage.
Final Thoughts
If you want the simplest path to success, remember this: identify the stopper type, remove it gently, clean everything thoroughly, inspect the seal and moving parts, then adjust or replace only what is necessary. Most bathtub drain stopper issues are not a sign of plumbing doom. They are a sign that your drain has been collecting grime, wearing down a small part, or drifting out of alignment over time.
Take the repair step by step, protect the finish, and test after each change. With a little patience, your bathtub drain stopper can go from stubborn little nuisance back to silent, functional hero. Which is exactly the kind of personality we want from plumbing.