A blank wall is usually harmlessuntil you realize it contributes nothing to the room except the occasional mystery scuff. This easy mirror wall DIY hack changes that with inexpensive square mirrors from IKEA, a level, painter’s tape, and careful spacing. The finished grid can resemble a custom industrial window, a boutique-hotel feature wall, or an architectural detail that normally arrives with a contractor and a much less cheerful credit-card bill.
IKEA’s current U.S. catalog lists 12-by-12-inch BLODLÖNN mirrors in a four-pack with double-sided mounting tape. At the time of writing, the pack is listed at $12.99, although prices and availability can change. A 12-mirror layout therefore starts below $40, while a 16-mirror grid starts around $52 before paint and other supplies.
Why This IKEA Mirror Wall Hack Works
Repeating identical mirrors creates symmetry, rhythm, and the illusion of one oversized paneled mirror. The grid gives a dining room a focal point, makes a hallway feel intentional, and adds depth without using floor space.
Mirrors also bounce light and reflected views around a room, helping compact or dim spaces feel brighter and more expansive. Placement matters: a mirror wall can multiply a window, plant, or artwork, but it will reproduce clutter with equal enthusiasm. Check the full reflection before committing.
Tools and Materials
- IKEA square mirror tiles, such as BLODLÖNN
- Measuring tape, pencil, and painter’s tape
- Four-foot level or laser level
- Microfiber cloths and the recommended wall cleaner
- Optional paint, foam roller, and brush for a faux frame
- Optional mirror-rated adhesive if the supplied tape is unsuitable
- Gloves and eye protection
Do not substitute a random construction adhesive simply because its label says “maximum strength.” Choose a product specifically approved for mirrors and the wall material. The wrong formula can damage the reflective backing, while permanent glue may turn removal into a drywall-repair project. Frameless mirrors are commonly installed with mirror adhesive or mechanical clips, so follow the directions for the exact product and surface.
Plan the Grid Before Peeling the Tape
Choose a Wall With a Good Reflection
Look for a flat, dry surface that reflects something attractive. An entry wall can borrow a living room view, while a hallway grid can pull in daylight from a nearby window. Avoid loose paint, heavy texture, moisture problems, and high-impact areas near swinging doors or chair backs.
Do not place adhesive-mounted glass above a bed, crib, or seat where a falling tile could cause injury. For humid rooms, confirm that the mirror and mounting system are approved for those conditions. Adhesive gives a clean finish, but clips or a properly secured backing panel may be safer where moisture or maintenance is a concern.
Calculate the Finished Size
A three-column-by-four-row arrangement of 12-inch mirrors covers roughly 36 by 48 inches without gaps. With half-inch gaps, it becomes about 37 by 49.5 inches. A four-by-four grid is approximately 48 inches square before spacing.
Total width = mirror width × columns + gap width × spaces between columns.
Mock up the outer boundary and internal grid with painter’s tape. Step back from several angles and check the view from nearby seating. Center the installation on the furniture grouping or architectural feature that anchors the areanot automatically on the entire wall.
How to Build the IKEA Mirror Wall
1. Prepare the Surface
Remove dust, grease, cleaner residue, and loose paint. Fill holes and sand raised patches because mirrored tiles expose tiny differences in depth. Follow the cleaning and curing directions for the mounting product. General wall-preparation guidance calls for a smooth, clean surface, and many pressure-sensitive products require fully cured paint. For example, 3M recommends waiting seven days after painting for its own products; the instructions supplied with the IKEA mirrors or chosen adhesive take priority.
2. Establish Level Reference Lines
Never assume the ceiling, floor, baseboard, or doorway is level. Older houses are charming partly because almost nothing is straight. Use a laser or long spirit level to mark one horizontal line and one vertical line. For a centered installation, locate the midpoint and work outward.
3. Choose Tight Seams or Deliberate Gaps
Tight seams look minimal, but they make tiny inconsistencies obvious. Gaps of one-quarter to three-quarters of an inch are more forgiving and create a windowpane effect. Paint the visible bands before mounting the glass. Matte black looks industrial, bronze feels warmer, and matching the wall color produces a subtle floating grid.
4. Dry-Fit the First Row
Keep the adhesive liners in place and position the first row temporarily. Use identical cardboard or wood spacers to maintain the gaps. Recheck the row with the level. “About half an inch” is not a measurement; it is how a tidy grid slowly becomes modern art.
5. Mount One Mirror at a Time
Attach the first tile at the main reference point, press it exactly as directed, and install the neighboring pieces while checking level and spacing. Do not peel every liner at once unless you want the DIY equivalent of a timed game show.
In one documented IKEA dining-room makeover, installers used a laser level and measuring sticks to maintain alignment. Some mirrors initially fell, but the bond improved after each tile was pressed and held more carefully. The lesson is simple: preparation, pressure, and the required set time are essential.
6. Support, Set, and Clean
If the instructions require temporary support, use painter’s tape across the mirror faces or a straight ledger under the bottom row. Allow the mounting product to set for the specified period. Afterward, clean fingerprints with a microfiber cloth. Spray cleaner onto the cloth rather than flooding the seams. IKEA recommends water or window cleaner for BLODLÖNN, followed by drying with a clean cloth.
Easy Design Variations
Industrial Window Grid
Paint the gaps and outer border matte black, then install a three-by-four or four-by-four arrangement. This is especially effective in dining rooms, stair landings, and hallways.
Soft Floating Grid
Leave narrow gaps in the existing wall color. The mirrors appear to float, giving bedrooms and dressing areas a quieter, modern look.
Framed Mirror Panel
Add lightweight trim around the completed grid and paint the trim to match the interior bands. Keep molding from pressing against the glass edges.
Corner-Wrap Feature
Continue rows around a hallway corner, measuring each wall separately. Maintain one horizontal reference so both sections read as a continuous feature.
Mistakes That Make a Mirror Wall Look Cheap
Skipping the full mockup: A grid that seems large close up may look undersized from across the room.
Following a crooked ceiling: The mirror wall should be level even when the house is not.
Eyeballing gaps: Repetition magnifies inconsistency; use spacer blocks.
Ignoring surface condition: Dust, grease, weak paint, and wall texture can compromise the bond.
Choosing a bad reflection: Aim the grid at light, greenery, artwork, or an attractive viewnot the recycling bins.
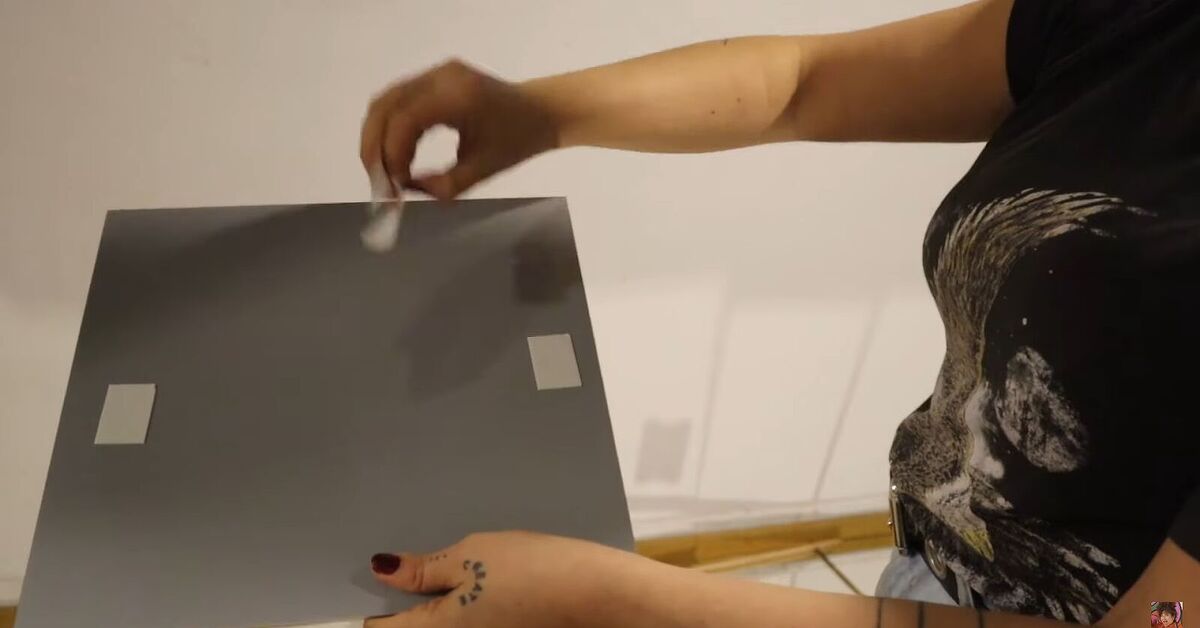
Assuming the tape is removable: IKEA describes the included BLODLÖNN tape as permanent and warns that it may mark the wall.
Is the Hack Renter-Friendly?
Not automatically. Permanent tape or mirror adhesive can damage paint and drywall paper. A landlord-approved alternative is to mount the tiles on a finished plywood or MDF panel, frame it, and secure the complete panel with correctly rated hardware. This still creates holes, but the repair may be more predictable than removing numerous adhesive patches.
Whatever method you use, calculate the total weight of the glass, panel, trim, and adhesive. Do not trust generic removable strips simply because each tile feels light. A grid multiplies both the weight and the consequences of a weak bond.
Real-World Lessons From IKEA Mirror Wall Projects
Finished photos make this project look like a quick peel-and-stick afternoon. In reality, attaching the mirrors is the easy part. Measuring, checking the reflection, correcting tiny lines, and accepting that the wall is somehow not square take most of the time. The best results come from approaching the job like a tile installation rather than casual wall decorating.
The First Tile Controls Everything
Spend more time on the first mirror than seems reasonable. Once it is level, square to the reference lines, and at the correct height, every later tile has a trustworthy starting point. An error of only one-eighth inch can become obvious across four columns. A laser level helps because the reference remains visible while both hands hold the glass, but a regular level works when checked frequently.
Walls Are Less Flat Than They Appear
Ordinary paint hides shallow dips and bumps. Reflective squares reveal them through uneven edges and distorted reflections. Before mounting, run a long level or straight board across the wall. Sand or fill small imperfections. If the wall has broader waves, use a wider intentional gap rather than forcing neighboring glass edges together.
Adhesive Success Begins Before Installation
When a tile falls, the tape receives the blame. Often the real culprit is dust, residue, fresh paint, texture, humidity, or insufficient pressure. The dining-room makeover noted earlier improved after the installers pressed and held each mirror more carefully. Do not solve a preparation problem by adding an unapproved glue. Follow the product’s surface, pressure, temperature, and setting requirements.
A small test on a sample of the same painted material can reveal immediate incompatibility. It cannot guarantee permanent performance, but it may save you from discovering after the third row that the wall finish and adhesive are not friends.
Cleaning Is Part of the Design
A 16-tile installation has 16 reflective faces plus seams where dust can settle. Fingerprints show clearly in side light. Use clean microfiber cloths, avoid abrasive pads, and apply cleaner to the cloth instead of spraying the wall. Black gaps disguise minor shadows; white gaps look crisp but usually show dust sooner. The glamorous wall comes with a slightly more glamorous cleaning routine.
Simpler Layouts Usually Look More Expensive
It is tempting to add mixed mirror sizes, decals, lights, shelves, and perhaps an indoor fountain while enthusiasm is high. Most successful mirror walls rely on one clear gesture: identical squares arranged in a disciplined rectangle. The reflections already provide movement, so the framework can stay restrained.
For a first project, a three-by-four grid with half-inch painted gaps is large enough to look architectural but manageable enough to align. Position it above a console, on a dining-room wall, or at the end of a hallway. Add only a few objects nearbya lamp, plant, or simple bowlso the mirror remains a focal point rather than part of a decorative traffic jam.
Final Verdict: Big Impact on a Small-Mirror Budget
This IKEA mirror wall DIY works because it turns a basic repeatable product into a custom-looking feature. The mirrors supply the shine; accurate measuring, consistent gaps, and thoughtful placement create the expensive finish. For the cost of a modest framed mirror, you can cover a larger area and tailor the proportions to the room.
Mock up the complete grid, inspect the reflection, prepare the surface, use an approved mounting method, and give the first tile your full attention. Done carefully, the result can brighten a dark corner, visually widen a hallway, and transform an empty wall into a statement feature with surprisingly humble flat-pack origins.
Note: IKEA prices, availability, paint formulas, wall materials, and mounting instructions can change. Confirm the current product directions and verify that the chosen mounting system is approved for the mirror, surface, room conditions, and total weight.