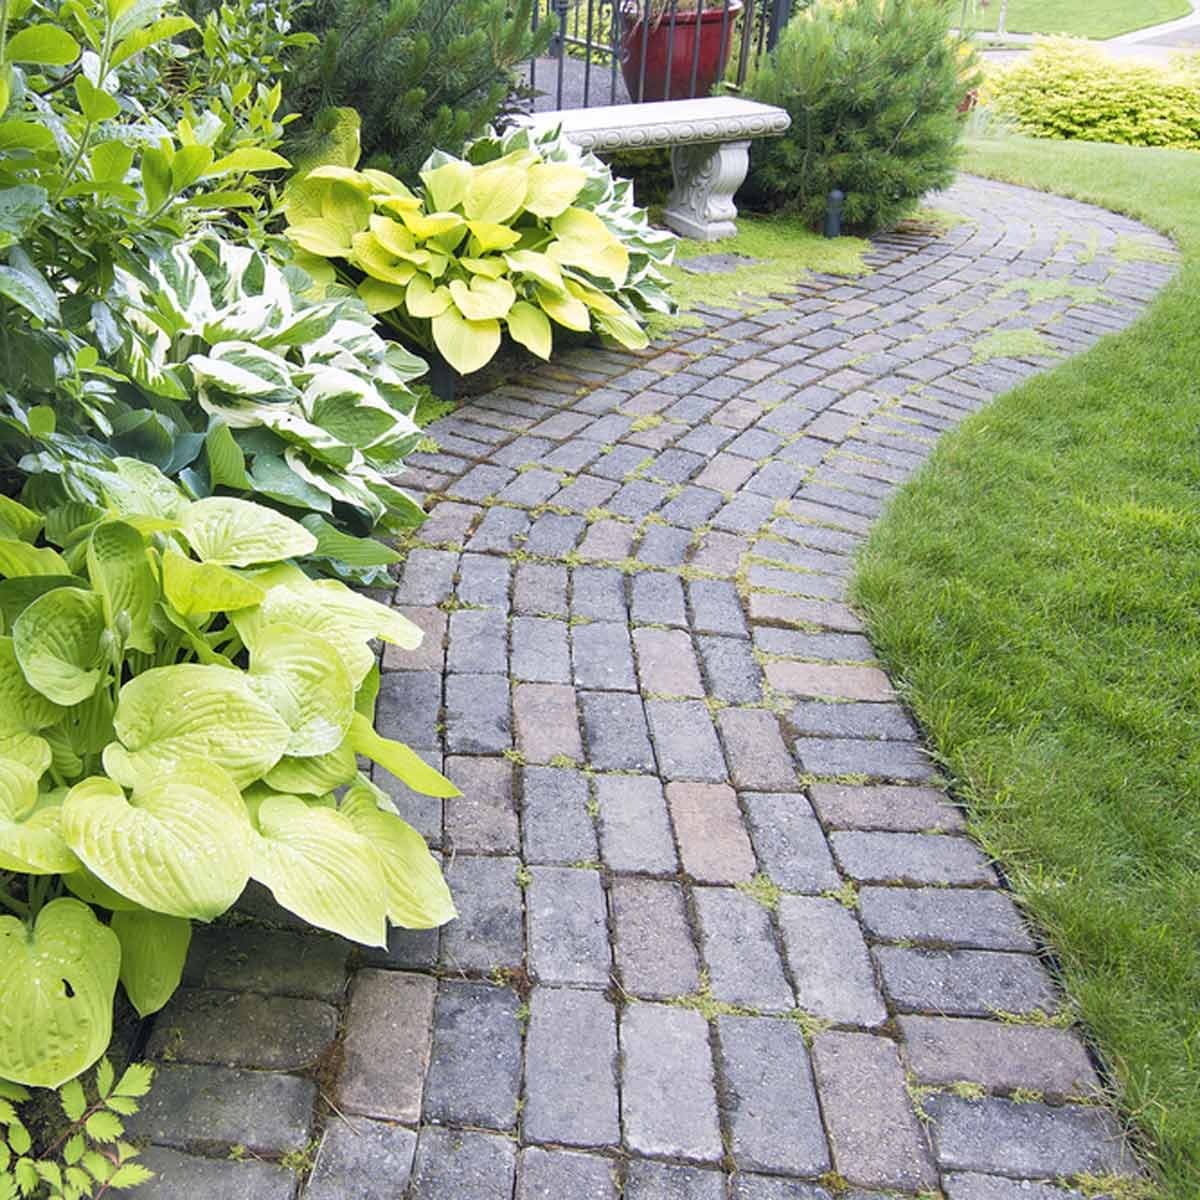
If your yard has a shady corner where grass gives up, flowers sulk, and the soil looks like it has joined a witness protection program, hostas may be the plant you have been waiting for. Hostas are the quiet celebrities of shade landscaping: low-maintenance, long-lived, elegant, and surprisingly dramatic when planted with a little intention. They do not scream for attention with neon blooms every five minutes. Instead, they win the garden game with leavesbig leaves, blue leaves, chartreuse leaves, rippled leaves, striped leaves, and leaves so large they look like they should come with their own zip code.
Hostas landscaping is especially useful for homeowners dealing with partial shade, woodland edges, foundation beds, north-facing yards, tree-covered corners, and shaded walkways. A well-planned hostas garden can look lush from spring through fall, even in areas where sun-loving annuals would pack their bags and leave. Better yet, hostas pair beautifully with ferns, astilbes, coral bells, brunnera, hydrangeas, hellebores, and ornamental grasses that tolerate shade.
This guide explains how to grow a hostas garden from the ground up: where to plant hostas, how to prepare the soil, how to choose varieties, how to design with texture and color, how to water and maintain them, and how to solve common problems such as slugs, deer, dry shade, and overcrowding. Grab your garden gloves. The shady side of the yard is about to get a glow-up.
Why Hostas Are Perfect for Shade Landscaping
Hostas, also called plantain lilies, are herbaceous perennials grown mainly for their ornamental foliage. They return each year after winter dormancy, forming mounded clumps that can be used as edging, groundcover, specimen plants, container accents, or mass plantings. Their leaves range from tiny and delicate to huge and architectural, with colors that include deep green, blue-green, gold, lime, cream, white, and variegated combinations.
One of the biggest reasons gardeners love hostas is their flexibility. They can soften the base of trees, fill awkward shady strips along fences, frame a pathway, or create a calm woodland garden where sunlight arrives in polite little patches. Unlike many flowering plants that offer a brief show and then fade into leafy background noise, hostas provide months of visual interest through foliage alone.
Most hostas also produce flower spikes in summer, usually in shades of lavender, pale purple, or white. Some varieties are fragrant, and the blooms can attract pollinators such as hummingbirds. Still, the main attraction is the foliage. Think of hosta flowers as the bonus fries at the bottom of the takeout bag: delightful, but not the main reason you came.
Choosing the Best Place for a Hostas Garden
Understand Your Shade
Before planting, study the light in your yard. Hostas generally perform best in filtered shade, dappled shade, or partial shade. Morning sun with afternoon shade is often ideal because it gives plants enough light to develop strong color without exposing them to the harshest heat of the day. Full afternoon sun, especially in hot climates, can scorch leaves and cause crispy brown edges. Crispy is great for potato chips. It is less charming on a hosta.
Deep shade is possible, but growth may be slower and leaf colors may be less vivid. Under dense trees, hostas may also struggle because tree roots compete for water and nutrients. If you are planting beneath maples, oaks, evergreens, or other large trees, plan to improve the soil and water carefully during dry spells.
Match Leaf Color to Light Conditions
Not all hostas want exactly the same light. Blue hostas usually need more shade because their blue color comes from a waxy coating on the leaves that can fade or burn in direct sun. Yellow and gold hostas often develop richer color with a few hours of gentle morning sun. Green and variegated hostas tend to fall somewhere in the middle, depending on the cultivar.
In cooler northern regions, some hostas can tolerate more sun if the soil stays consistently moist. In hot southern areas, afternoon shade is much more important. When in doubt, choose a location that receives morning light and protection from intense afternoon rays.
Preparing Soil for Healthy Hostas
Hostas are forgiving plants, but they are not fans of soggy, compacted, lifeless soil. The best soil for hostas is rich, loose, evenly moist, and well-drained. Before planting, work compost, leaf mold, aged manure, or other organic matter into the bed. This improves drainage in heavy soil and increases moisture retention in sandy soil.
If your soil is heavy clay, consider building a raised bed or slightly mounded planting area. Hostas dislike standing water, especially in winter, because soggy crowns can rot. If your soil dries out quickly, add organic matter and mulch after planting to conserve moisture. A soil test is also a smart move if you are building a large hosta garden. It can help you understand pH, nutrient levels, and whether amendments are truly needed instead of guessing like a gardener in a game show.
When planting under trees, avoid cutting major roots. Instead, create pockets of improved soil between roots and use smaller hosta varieties that can establish more easily. Add compost annually as a topdressing to keep the bed fertile and woodland-like.
How to Plant Hostas Step by Step
1. Plant at the Right Time
The best times to plant hostas are early spring and early fall. Spring planting gives roots a full growing season to establish. Fall planting works well after summer heat breaks, as long as the plants have enough time to root before the ground freezes. Avoid planting during extreme summer heat unless you are prepared to water consistently.
2. Dig a Wide Planting Hole
Dig a hole about as deep as the root ball and roughly twice as wide. Hostas have fleshy roots that spread outward, so a wide planting hole helps them settle in comfortably. Place the crown at soil level, not buried deeply. The crown is where the leaves meet the roots, and burying it too low can encourage rot.
3. Space Plants for Their Mature Size
Hostas can take several years to reach full size, so spacing matters. Miniature hostas may need only a small pocket near the front of a bed, while giant cultivars can spread several feet wide. Check plant tags and give each variety room to mature. Crowding looks cute for one season, then suddenly your garden becomes a leafy traffic jam.
4. Water Thoroughly After Planting
After planting, water deeply to settle soil around the roots. Continue watering regularly during the first growing season. Established hostas are tougher, but they still perform best with consistent moisture, especially during hot or dry periods.
Hostas Landscaping Ideas for a Beautiful Garden
Create a Layered Shade Border
A strong hostas garden uses layers. Place taller shrubs or small trees in the background, medium hostas in the middle, and small hostas or groundcovers near the front. This creates depth and keeps the bed from looking flat. Good companions include hydrangeas, azaleas, ferns, astilbes, coral bells, foamflower, lungwort, brunnera, hellebores, and Japanese forest grass.
Layering also helps mimic a woodland edge, where plants naturally grow at different heights. The result feels relaxed, lush, and established rather than like someone panic-bought 24 plants on a Saturday afternoon and hoped for the best.
Use Repetition for a Professional Look
One lonely hosta can look nice. Repeated hostas can look intentional. Planting in groups of three, five, or seven creates rhythm and helps guide the eye through the landscape. Repeating the same variety along a walkway or under a row of trees can make a shady space feel polished and calm.
For a more collected look, repeat colors rather than exact varieties. For example, use several blue-green hostas throughout the bed, then echo their cool tone with silver brunnera or blue-toned ferns. This gives the garden variety without visual chaos.
Mix Leaf Sizes and Textures
Hostas are foliage plants, so texture is everything. Combine large, puckered leaves with narrow, wavy leaves. Place smooth blue hostas near ruffled gold ones. Pair bold hosta leaves with fine-textured ferns for contrast. Add coral bells for colorful mounds, astilbes for feathery plumes, and hellebores for early-season flowers.
The trick is balance. Too many similar leaves can look dull, while too many wildly different varieties can look like a botanical yard sale. Choose a few dominant textures and repeat them across the bed.
Brighten Dark Corners with Variegated Hostas
Variegated hostas are excellent for shady corners because cream, white, gold, and light green markings reflect available light. A hosta with bright leaf margins can make a dark bed feel larger and more lively. Use variegated hostas near paths, patios, gates, and seating areas where their patterns can be appreciated up close.
Frame Pathways and Outdoor Rooms
Hostas make beautiful edging plants along shady paths. Small and medium varieties can soften stone walkways, gravel paths, and stepping-stone trails. Large hostas can frame a bench, water feature, pergola, or shaded patio. Because hostas form neat mounds, they add structure without looking stiff.
For a woodland path, combine hostas with ferns, mossy stones, mulch, and a few shade-tolerant flowering perennials. Add a bench and suddenly the area becomes a destination, not just the place where the garden hose goes to disappear.
Best Companion Plants for Hostas
Companion planting is one of the easiest ways to make hostas landscaping look rich and intentional. Choose plants that enjoy similar conditions: partial shade, organic-rich soil, and consistent moisture.
Ferns
Ferns provide fine, airy texture that contrasts beautifully with broad hosta leaves. They are especially useful in woodland gardens and beneath trees.
Astilbes
Astilbes add feathery flowers in pink, red, white, and lavender. They pair especially well with blue and green hostas in moist shade.
Coral Bells
Coral bells, or heucheras, bring colorful foliage in shades of burgundy, caramel, lime, silver, and purple. Use them near the front of hosta beds for contrast.
Brunnera and Lungwort
These spring-blooming perennials have silver-patterned leaves that brighten shade. Their delicate flowers arrive before hostas fully unfurl, extending the season of interest.
Hydrangeas
Shade-tolerant hydrangeas and hostas make a classic pairing. Hydrangeas provide height and flowers, while hostas cover the ground with lush foliage.
Watering, Mulching, and Fertilizing Hostas
Hostas like steady moisture, but they do not want to sit in swampy soil. Water deeply when rainfall is low, especially during the first year after planting. Morning watering is best because foliage dries before evening, reducing disease risk. Aim water at the soil rather than blasting the leaves like you are pressure-washing a driveway.
Mulch helps conserve moisture, regulate soil temperature, and reduce weeds. Apply a layer of shredded bark, leaf mold, pine needles, or compost around the plants, but keep mulch pulled slightly away from the crown. Piling mulch against the crown can trap moisture and invite rot.
In spring, feed hostas with compost or a balanced slow-release fertilizer. Avoid heavy late-season fertilizing, which can encourage tender growth before winter. Good soil and consistent moisture usually matter more than aggressive feeding.
Common Hosta Problems and How to Fix Them
Slugs and Snails
Slugs are the unofficial villains of the hosta world. Their damage appears as irregular holes in leaves, often after rainy weather or in damp, crowded beds. Reduce slug problems by removing debris, improving air circulation, watering in the morning, and avoiding overly thick mulch. Traps, barriers, and pet-safe slug controls can also help.
Deer and Rabbits
To deer, hostas can look like a gourmet salad bar. If deer are common in your area, use fencing, repellents, motion sprinklers, or choose planting locations close to human activity. Rabbits may also nibble young shoots. Protect new plantings until they are established.
Leaf Scorch
Brown leaf edges or bleached patches often indicate too much sun, too little water, or both. Move affected plants to a shadier location or increase watering during dry spells. Blue hostas and thin-leaved varieties are especially sensitive to intense sun.
Crown Rot and Poor Drainage
If hostas decline in wet soil, drainage may be the problem. Improve soil structure, raise the planting area, and avoid burying crowns too deeply. Do not let mulch or soil pile up around the base of the plant.
Dividing and Maintaining a Hostas Garden
Hostas do not need frequent division to stay healthy, but dividing can control size, refresh crowded clumps, and give you more plants for free. The best time to divide hostas is spring as shoots emerge or early fall after heat has passed. Dig up the clump, shake or rinse away excess soil, and cut it into sections with roots and at least one growing eye. Larger divisions with two or three crowns usually recover faster than tiny pieces.
After dividing, replant immediately and water well. Keep the soil moist while the new divisions establish. Do not panic if divided hostas look slightly offended for a few weeks. They are resilient plants, and most bounce back with proper care.
Routine maintenance is simple. Remove faded flower stalks if you prefer a tidy look. In fall, after foliage yellows and collapses, cut leaves back and clear debris to reduce pest and disease carryover. In cold regions, a light winter mulch can help protect crowns, especially for newly planted hostas.
Container Hostas for Patios, Porches, and Small Gardens
Hostas also grow well in containers, especially smaller and medium-sized varieties. Use a pot with drainage holes and a high-quality potting mix that holds moisture but drains freely. Containers are great for shaded patios, apartment balconies, front porches, and entryways where in-ground planting is limited.
Container hostas need more frequent watering than hostas in garden beds. In hot weather, check pots often. In cold winter regions, move containers to a protected spot, such as an unheated garage, shed, or sheltered wall, so freeze-thaw cycles do not damage roots.
Seasonal Care Calendar for Hostas
Spring
Clean up old debris, apply compost, divide crowded clumps if needed, and watch for emerging shoots. Protect tender new growth from rabbits and late frosts.
Summer
Water during dry spells, monitor for slugs, remove flower stalks if desired, and enjoy the full foliage display. Add mulch if soil dries too quickly.
Fall
Divide or transplant after heat breaks, cut back yellowing foliage, clean up fallen leaves, and prepare new beds for next spring.
Winter
Hostas rest underground during winter. Avoid soggy soil, protect containers in cold climates, and dream dramatically over plant catalogs like every respectable gardener.
Real-World Experience: Lessons from Growing a Hosta Garden
The first lesson many gardeners learn about hostas is that “shade plant” does not mean “plant it in the darkest corner and forget it exists.” A hosta garden performs best when shade is bright, soil is alive, and water is consistent. In practical terms, the hostas that usually look happiest are not buried under dense shrubs or abandoned under thirsty tree roots. They are placed where they receive soft morning light, open shade, or filtered sunlight through tree branches.
A good hosta bed often begins with observation. Spend a day watching how light moves across the space. The area beside a fence may be sunny at 8 a.m., shaded by noon, and pleasantly cool by late afternoon. That is prime hosta real estate. On the other hand, a west-facing wall that bakes after 2 p.m. may turn delicate hosta leaves into toasted paper. Gardeners who move a struggling hosta just a few feet into gentler light are often surprised by how quickly the plant improves the next season.
Soil preparation is another experience-based lesson. Hostas may survive in average soil, but they become noticeably fuller in soil amended with compost. In a new bed, mixing organic matter into the top several inches can make the difference between “technically alive” and “wow, did that thing double in size?” Mulch also matters, especially in summer. A moderate layer of mulch keeps the soil cool and moist, but the key is moderation. Too much mulch packed against the crown can create problems, so leave a little breathing room around each plant.
Design-wise, beginners often buy one of every hosta that looks pretty at the nursery. This is completely understandable. Hosta shopping can turn even a sensible adult into a leaf collector with a cart problem. But in the landscape, repetition usually looks better than randomness. Three matching blue hostas along a path, five gold hostas under a small tree, or a repeated pattern of green-and-white varieties can make a garden look designed rather than assembled during a caffeine spike.
Another practical tip is to combine hostas with companions that hide seasonal gaps. Spring bulbs can bloom before hostas fully emerge. Brunnera and lungwort provide early flowers and silver foliage. Ferns fill in around hostas with soft texture. Astilbes add height and color when hosta leaves are already mature. This layered approach keeps the garden interesting from early spring through fall.
Finally, every hosta gardener eventually negotiates with wildlife. Slugs may appear after rainy weeks. Deer may browse a prized clump overnight and leave behind emotional damage. The best strategy is prevention: good spacing, clean beds, morning watering, protective sprays or fencing where needed, and choosing thicker-leaved varieties in slug-prone areas. A hosta garden does not have to be perfect to be beautiful. In fact, a few nibbled leaves are often just proof that the garden is part of a living landscape. The goal is not museum perfection; it is a shady, calming, leafy retreat that gets better each year.
Conclusion
Hostas landscaping is one of the most reliable ways to transform shady areas into lush, elegant garden spaces. With the right location, rich well-drained soil, steady moisture, and thoughtful design, hostas can provide years of low-maintenance beauty. They work under trees, along paths, in foundation beds, beside patios, and in containers. They can be subtle and soothing or bold and dramatic, depending on the varieties you choose.
The secret to a great hostas garden is not complicated: match the plant to the light, improve the soil, water deeply, use mulch wisely, repeat varieties for visual rhythm, and mix textures with companion plants. Add a path, a bench, or a focal point, and your shady corner becomes a destination instead of a problem area. Hostas may be easygoing, but when used well, they are anything but boring.