Every Thanksgiving table has a star. Usually, it is the beautifully roasted turkey sitting proudly on a platter while everyone quietly calculates how much mashed potato can fit on one plate. This year, however, the bird may have competition. With a plain serving bowl, several thrifted belts, a strip of elastic, and a little imagination, you can create a Thanksgiving turkey serving bowl that is useful, reusable, and just goofy enough to become a family favorite.
This DIY Thanksgiving centerpiece does not permanently alter the bowl. Instead, the turkey decorations form a removable sleeve that stretches around the outside. Once the holiday is over, the bowl returns to normal duty, while the turkey costume goes into storage until next November. It is festive decorating without asking one innocent serving dish to be a turkey for the rest of its natural life.
Note: Keep paint, felt, leather, glue, elastic, and other craft materials entirely outside the food-contact area. Use a clean, food-safe bowl for serving, and follow the labels and safety instructions supplied with all adhesives and paints.
Why This Thanksgiving Turkey Serving Bowl Works
Many holiday crafts are adorable for approximately fifteen minutes and then become difficult to store, awkward to clean, or strangely threatening when discovered in a closet in March. This project avoids those problems because the decoration is removable and relatively flat when stored.
The basic design uses loops of leather or faux leather to suggest the turkey’s colorful tail feathers. Those loops attach to a snug elastic band placed around a flat-sided serving bowl. A shorter piece on the opposite side becomes the head and neck. Add eyes, a beak, and a red wattle, and the bowl suddenly looks ready to gobblealthough, fortunately, it is still better at holding dinner rolls than making noise.
The project also embraces practical upcycling. Old belts that are scratched, unfashionable, or missing useful buckles can become decorative material instead of household clutter. A thrift store is another good source, especially when you want a mixture of stitching, textures, and brown tones without paying new-belt prices.
A Decoration and Serving Piece in One
Unlike a tall floral arrangement, this turkey bowl can remain functional throughout the meal. Fill it with wrapped candy, caramel popcorn, dinner rolls, crackers, fruit, or another menu item suited to the bowl. It can sit on a buffet, kitchen island, dessert station, or children’s table without blocking everyone’s view.
Its personality also helps relaxed gatherings feel more welcoming. Elegant candles and linen napkins are lovely, but a bowl dressed as a turkey announces that guests are allowed to laugh, take seconds, and stop pretending they understand the correct purpose of every fork.
Materials for a DIY Turkey Serving Bowl
The exact quantities depend on the size and shape of your serving bowl. A medium or large bowl with fairly straight exterior sides is easiest to decorate because the elastic band has a stable surface to grip.
- One clean, food-safe serving bowl with flat or gently curved sides
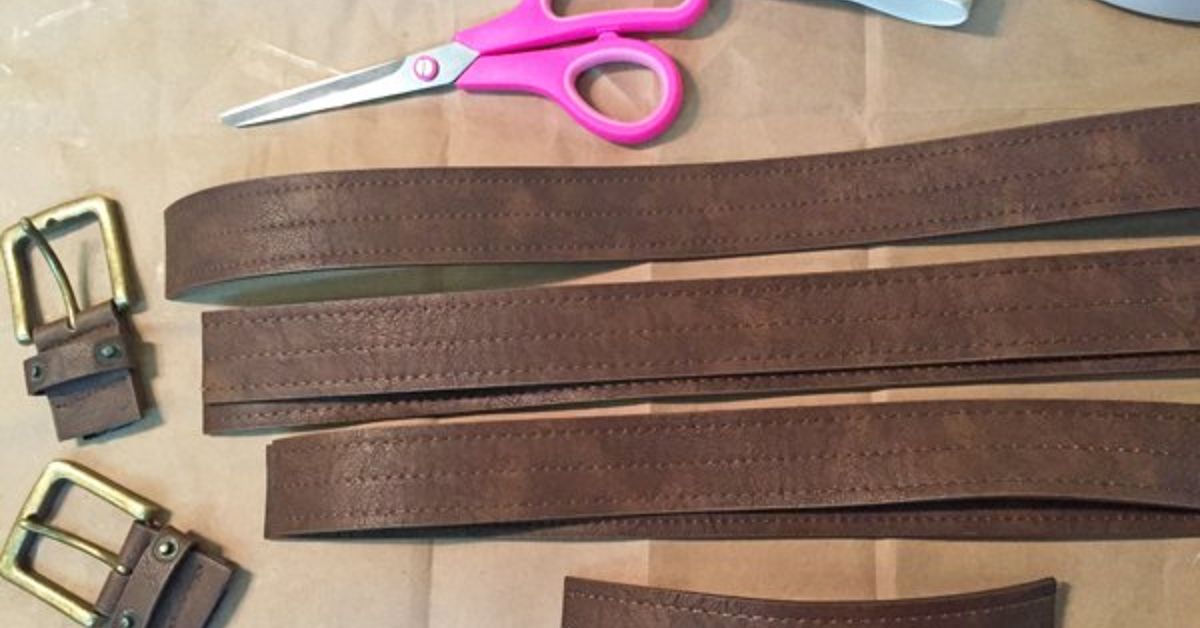
- Four to seven old leather, faux-leather, or fabric belts
- Wide waistband elastic, approximately 1 to 1.5 inches
- Strong fabric or leather adhesive
- Binder clips or clothespins
- Red, orange, and yellow acrylic craft paint
- Small paintbrush
- Orange and red felt
- Black permanent marker or two securely attached craft eyes
- Sharp scissors suitable for the selected belt material
- Flexible measuring tape
- Scrap cardboard or a protected painting surface
Choosing the Right Bowl
A bowl with a broad exterior wall gives the elastic room to sit securely. Very round bowls may encourage the band to slide downward, while narrow pedestal bowls may not provide enough space for the turkey’s face. Before cutting anything, wrap a temporary piece of elastic or ribbon around the bowl and gently move it. If it stays level without immediately heading for the floor, the bowl is a promising candidate.
White, cream, brown, copper, and clear glass bowls all work well. A neutral bowl allows the feathers to provide most of the color, while a warm wooden or amber-colored bowl creates a more rustic Thanksgiving decoration.
Leather Is Optional
Thrifted belts provide structure and handsome stitching, but they are not the only choice. Wide grosgrain ribbon, felt strips, canvas webbing, upholstery remnants, or faux-leather craft sheets can create a similar effect. Avoid brittle material that cracks when bent into a loop.
Whatever you use should be clean, dry, and free from strong odors. Remember that these pieces belong outside the bowl. Decorative materials should never hang over the rim or touch the food.
How to Turn a Serving Bowl Into a Thanksgiving Turkey
Step 1: Measure and Make the Elastic Band
Wrap the elastic around the widest practical section of the bowl. Pull it firmly enough that it will grip the bowl, but not so tightly that it curls, distorts, or becomes difficult to install. Allow approximately half an inch of overlap, mark the length, and cut.
Remove the elastic from the bowl before gluing. Overlap the ends and apply adhesive according to the manufacturer’s directions. Hold the joint with a binder clip until it is secure. Let it cure fully rather than repeatedly stretching it to “see whether it is ready.” Adhesive, like pie crust, rarely improves under constant supervision.
Step 2: Plan the Tail Feather Sizes
Arrange an odd number of belt strips for a balanced fan. Five is a practical starting point: one tall center feather, two medium feathers, and two shorter outer feathers.
For a medium bowl, sample lengths might be 22 inches for the center loop, 20 inches for the next pair, and 18 inches for the outer pair. These are guidelines rather than sacred turkey law. A smaller bowl may need shorter pieces, while an oversized punch bowl may require longer ones.
Before cutting every belt, form one loose loop and hold it behind the bowl. Check its height from several angles. The feathers should look generous without towering so high that they bend backward, strike a wall, or wave at guests across the room.
Step 3: Cut a Separate Head and Neck
Cut a shorter strip for the turkey’s neck and head. A piece around 7 to 9 inches works for many medium bowls. Round the top corners if the belt is wide and square, or leave the original curved end when it already resembles a head.
If you are using a belt with holes, position the strip so those holes do not land where the eyes or beak must go. Unless you are creating a historically inaccurate turkey with seven nostrils, a smooth face is easier to decorate.
Step 4: Add Color to the Feather Loops
Paint the inside surface of the belt strips in autumn colors. Deep red works nicely in the center, with golden yellow and burnt orange moving outward. Painting only the surface visible inside each loop preserves much of the original leather texture and stitching.
Apply thin coats instead of one heavy layer. Thick paint can crack when the strip bends. Let each coat dry completely, then flex a test area gently. If the paint flakes, switch to a product designed for flexible surfaces or use colored ribbon adhered to the inside instead.
Step 5: Attach the Tail Feathers
Lay the elastic flat with the seam facing you. Position the tallest feather over the seam so the finished centerpiece hides the overlap. Attach one end of the strip to the lower portion of the elastic. Bring the strip upward and over to form a loop, then attach the other end nearby.
Add the medium and shorter loops symmetrically on both sides. Leave a small, even space between them so each feather remains visible. Binder clips can hold the pieces while the adhesive cures.
Pause after attaching each pair and temporarily hold the band around the bowl. This quick check catches leaning feathers and uneven spacing before the glue becomes permanent. The goal is a cheerful fan, not a group of belts attempting to escape in different directions.
Step 6: Create the Turkey’s Face
Attach the short neck piece directly opposite the center tail feather. The upper portion should extend above the rim while the lower end remains secured to the elastic.
Cut a small triangle from orange felt for the beak and a rounded teardrop shape from red felt for the wattle. Glue them to the exterior side of the head. Draw two simple eyes with a permanent marker, or attach craft eyes securely if the decoration will remain out of reach of very young children and pets.
A slightly uneven face often makes the turkey more charming. One raised eyebrow can give it the expression of a bird that has just seen the Thanksgiving menu and would like to discuss alternative arrangements.
Step 7: Let Everything Cure
Follow the adhesive manufacturer’s full curing time. A joint that feels dry on the surface may still be weak underneath. Keep the decorated band off the serving bowl during this period so stray adhesive cannot transfer to it.
Step 8: Install and Test the Finished Turkey
Once every joint is dry, gently stretch the elastic around the bowl. Center the tail at the back and the head at the front. Confirm that no decoration crosses the rim or touches the interior.
Place the empty bowl on the table and lightly nudge it from different directions. Make sure the band does not slip and that the tall feathers do not make the bowl unstable. If the elastic slides, shorten it slightly or add a removable silicone grip strip between the elastic and the outside of the bowl.
What to Serve in a Turkey-Shaped Serving Bowl
Dry, room-temperature foods are the simplest choices because they reduce staining, condensation, and temperature concerns. Good options include dinner rolls, wrapped candy, crackers, snack mix, nuts, packaged treats, or caramel popcorn.
The bowl can also hold salads, vegetables, stuffing, mashed potatoes, or other traditional Thanksgiving side dishes when the original bowl is designed for those foods and temperatures. The removable decoration must stay outside, away from steam, sauces, and serving utensils.
Follow Basic Holiday Food-Safety Rules
Use only a clean bowl approved for food service. Wash your hands, bowl, and utensils before filling it. Hot foods should remain at 140°F or warmer, while cold perishable foods should remain at 40°F or colder.
Do not leave perishable dishes at room temperature for longer than two hours. When the surrounding temperature exceeds 90°F, the recommended limit falls to one hour. Refrigerate leftovers promptly in shallow containers so they cool more efficiently.
For a long open-house gathering, place smaller quantities in the turkey bowl and replenish them with fresh food rather than continuously adding new food on top of an older batch. This also keeps the presentation tidier. No turkey, real or decorative, looks its best while guarding three lonely spoonfuls of dried stuffing.
Creative Design Variations
Rustic Farmhouse Turkey
Use distressed brown belts, muted brick-red paint, mustard yellow, and cream felt. Pair the finished bowl with linen napkins, wooden serving utensils, mini pumpkins, and dried wheat.
Bright Kids’ Table Turkey
Replace leather with washable felt strips in red, orange, yellow, turquoise, and purple. Adults should handle sharp tools and any high-temperature glue equipment. Children can help choose colors, paint suitable materials, and draw paper versions of the face.
Elegant Neutral Turkey
Create the feathers from tan, chocolate, and ivory ribbon. Add a metallic gold beak and minimal black eyes. The recognizable silhouette keeps the design playful, while the restrained palette works with formal dinnerware.
No-Paint Version
Choose belts or ribbons that already have contrasting colors. Woven belts, embroidered straps, or patterned fabric can produce interesting feathers without paint. This version is faster and avoids waiting for multiple coats to dry.
Gratitude Turkey
Attach removable paper tags to the feathers and invite guests to write something they appreciate. Use small clips or loose ribbon ties rather than adhesive so the messages can be removed and saved. At the end of dinner, read a few aloudpreferably before the group becomes too sleepy to distinguish gratitude from gravy.
Common Problems and Simple Fixes
The Elastic Band Slides Down
The band may be too loose, too narrow, or positioned on a sharply curved part of the bowl. Shorten it, move it to a straighter section, or replace it with wider elastic. A small removable nonslip pad can improve grip without permanently changing the bowl.
The Feather Loops Collapse
Soft ribbon and thin fabric may need reinforcement. Add a second layer, insert flexible interfacing, or shorten the loops. Leather and heavy webbing generally hold their shape more easily.
The Bowl Tips Backward
The feathers are probably too tall or heavy for the bowl. Shorten them and remove metal buckles or thick hardware. The completed bowl should remain stable when empty as well as when filled.
The Paint Cracks
The coating may be too thick or unsuitable for flexible material. Sand away loose flakes outside the kitchen, clean the strip, and use thinner coats of flexible-surface paint. Colored felt or ribbon can conceal a damaged section without requiring another painted finish.
The Turkey Looks Crooked
Place the bowl at eye level and mark the center front and back of the elastic with removable chalk before assembly. Attach the center feather and head first, then work outward in matching pairs.
Using, Transporting, and Storing the Bowl
If you are taking the bowl to a Thanksgiving potluck, transport the food and decorative sleeve separately. Install the band after arriving so the feathers do not become crushed in the car. For hot or refrigerated dishes, use an appropriate insulated carrier and treat the turkey decoration as the final styling step.
After the gathering, remove the elastic before washing the bowl. Clean the bowl according to its manufacturer’s instructions. Spot-clean the decorative pieces only when their materials permit it, and allow everything to dry completely.
Store the turkey band in a shallow box with tissue paper supporting the loops. Avoid folding leather sharply or placing heavy decorations on top. Labeling the box is wise unless you enjoy opening it in July and briefly wondering why five belts have formed an alliance.
Conclusion: A Turkey That Earns Its Place at the Table
Turning a serving bowl into a Thanksgiving turkey is the kind of holiday project that succeeds because it combines humor with usefulness. The removable elastic construction preserves the original bowl, thrifted belts add texture and personality, and the feather colors bring a lively autumn accent to the table.
More importantly, the project is flexible. It can look rustic, modern, child-friendly, elegant, or gloriously ridiculous. Fill it with rolls, snacks, wrapped treats, or an appropriate side dish, and it becomes more than a decoration. It becomes part of the meal and, quite possibly, part of the family’s Thanksgiving tradition.
Once guests discover that the mysterious turkey is actually wearing old belts, expect questions, compliments, and at least one relative to inspect the construction closely. That is the best outcome for an easy DIY centerpiece: it holds food, starts conversations, saves reusable materials, and makes the dining room feel a little less serious.
What You Will Likely Experience While Making This Turkey Bowl
The first surprise is how much the bowl’s shape controls the entire project. A belt arrangement that looks perfectly proportioned on the worktable may seem enormous once it is wrapped around a smaller bowl. Testing one paper or fabric loop before cutting the good material prevents waste and gives you a realistic sense of scale. This is especially important with leather, because a belt does not politely grow back after an enthusiastic encounter with scissors.
The elastic band is usually the least glamorous component and the most important one. When it fits correctly, the whole turkey appears effortless. When it is slightly loose, the head begins sliding sideways and the tail slowly rotates around the bowl. A firm band with a little stretch is easier to install than one pulled to its absolute limit. It should grip the bowl without making you perform a wrestling move beside the Thanksgiving table.
Attaching the feather loops may also take longer than expected because adhesive needs time to set. Trying to secure all the pieces at once often creates a crowded line of clips and several feathers leaning in suspicious directions. Working from the center outward is calmer. Attach the tallest loop, check its alignment, and then add matching pieces on both sides. Symmetry becomes much easier when every left-side decision immediately receives a right-side partner.
Color choices look different after the loops are formed. A bright red stripe that seems overwhelming while flat may become only a small accent inside the finished feather. For that reason, stronger autumn colors often work better than timid shades. The original belt surfaces remain visible outside, while the painted interiors provide brief flashes of red, orange, and gold.
The face is the moment when the project stops looking like decorated elastic and suddenly becomes a turkey. Tiny changes make a large difference. Eyes placed too high can look startled; eyes placed too close together can look deeply concerned about the oven. Before gluing facial pieces, arrange them loosely and photograph the options with a phone. Comparing pictures is often easier than staring at the face until all turkeys begin to look normal.
Real-world serving introduces another lesson: decorative height should match the location. On a buffet or kitchen island, tall feathers create an attractive display. In the middle of a dining table, shorter feathers are usually friendlier because guests can see one another. A practical compromise is to use the turkey bowl on the buffet during dinner and move it to a snack or dessert station afterward.
Guests are likely to assume the decoration is permanently attached. Showing them that the entire turkey sleeve slips off the bowl usually earns the project additional praise. The removable design makes cleanup dramatically easier and means the same bowl can serve salad in summer without carrying a turkey face into an unrelated barbecue.
The final experience is storage. If the loops are supported rather than flattened, the turkey will need only minor adjustment the following year. A labeled box, a few pieces of tissue paper, and a dry closet are enough. When November returns, slide the band onto the bowl, straighten the feathers, and the turkey is back on dutyrested, reusable, and still completely unqualified to cook dinner.