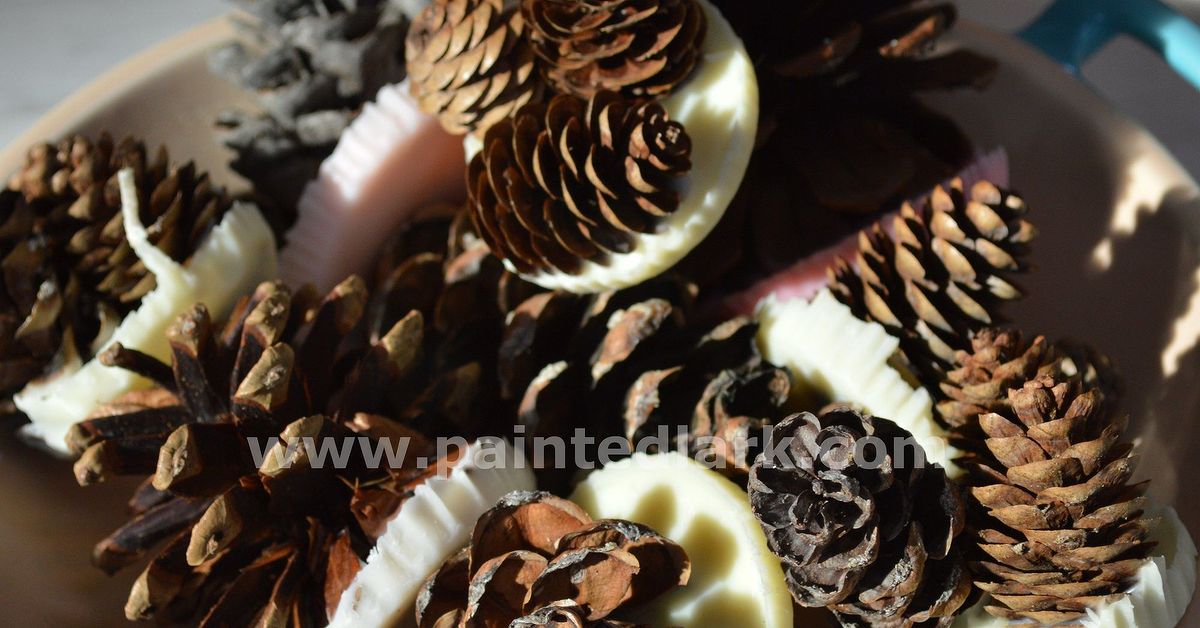
Pine cones are nature’s tiny wooden chandeliers. They look charming in bowls, wreaths, and holiday displays, but they also have a practical talent: helping you start a cozy wood fire without performing an awkward twenty-minute ritual involving crumpled newspaper and increasingly desperate blowing.
With dry pine cones, plain wax, and cotton twine, you can make attractive DIY pine cone fire starters for a fireplace, outdoor fire pit, or permitted campfire. They are inexpensive, surprisingly giftable, and simple enough for beginnersas long as an adult handles the melted wax and everyone respects basic fire safety.
This step-by-step guide explains how to prepare pine cones, melt wax safely, create reliable fire starters, store them correctly, and avoid the common mistakes that turn a relaxing craft into a sticky countertop incident.
Why Pine Cones Make Excellent Natural Fire Starters
A good fire starter needs to ignite easily and hold a flame long enough for dry kindling to catch. Pine cones already have an open, layered structure that allows air to circulate between their scales. Coating that structure with a modest amount of wax gives the flame a longer-lasting fuel source.
The cotton twine works like a large candle wick. Once lit, it transfers the flame to the wax and cone. The burning starter then warms the surrounding twigs and kindling until they ignite. It is not a replacement for dry firewood or proper airflow, but it makes the first stage considerably easier.
Benefits of homemade pine cone fire starters
- They use inexpensive or foraged materials.
- They help repurpose leftover plain candle wax.
- They are compact and easy to store.
- They look more attractive than a box of commercial cubes.
- They make practical fall, winter, housewarming, and camping gifts.
They are also forgiving. A slightly lopsided wax coating will still work perfectly well. Your fire has no interest in judging your craftsmanship.
Supplies You Will Need
A batch of approximately 10 to 12 medium pine cone fire starters requires only a short supply list:
- 10 to 12 clean, completely dry pine cones
- Approximately 12 to 16 ounces of beeswax, soy wax, paraffin wax, or plain leftover candle wax
- Natural cotton twine or candle wick
- A saucepan and heat-safe pouring container for a double boiler
- Metal tongs
- Scissors
- Parchment paper or a silicone craft mat
- A baking sheet or shallow tray
- Heat-resistant gloves or oven mitts
Which wax works best?
Beeswax creates firm, attractive coatings and has a naturally mild aroma, but it usually costs more. Paraffin is economical, widely available, and easy to melt. Soy wax works too, although softer formulations may create a thinner or more fragile finish.
Leftover candle wax is a budget-friendly option when it is clean and free from glass, metal wick tabs, glitter, plastic decorations, or embedded botanicals. Avoid heavily perfumed mixtures for indoor fires. Plain wax produces less unnecessary fragrance and gives you better control over the finished product.
Choose cotton, not mystery string
Use cotton twine or untreated candle wick. Synthetic string can melt, smoke, or produce unpleasant fumes. If the package does not identify the fiber, save it for gift wrapping rather than fire starting.
How to Prepare Pine Cones Safely
Collect open pine cones from a clean, permitted area. Avoid cones that are moldy, damp, painted, glittered, chemically scented, or covered in sap. Never remove natural materials from a national park, protected habitat, or private property without permission.
Brush away loose dirt, needles, and visible insects outdoors. If the cones are damp, place them in a dry, ventilated location for several days. Rotate them occasionally so moisture does not remain trapped near the base.
Complete dryness matters. Damp pine cones can sputter, smoke, and struggle to ignite. Moisture also prevents wax from adhering evenly. A cone that feels lightweight and has widely opened scales is generally a better candidate than one that is heavy and tightly closed.
Some craft instructions recommend heating pine cones in an oven, but air-drying is the simpler low-risk approach for this project. Pine resin is combustible, and forgotten cones are not the kind of surprise anyone wants to discover while preheating dinner.
How to Make DIY Pine Cone Fire Starters
Step 1: Protect the work area
Cover a baking sheet or tray with parchment paper. Set it beside your wax-melting station so you do not have to carry a dripping pine cone across the room. Wax has a remarkable ability to travel farther than expected.
Keep children and pets away from the work area. Wear closed-toe shoes, tie back long hair, and keep a lid nearby that can cover the wax container if necessary.
Step 2: Add the cotton wick
Cut a piece of cotton twine about 18 to 24 inches long for each cone. Tuck one end near the base, then wrap the twine securely between the lower scales. Continue wrapping upward in a loose spiral, leaving a 4- to 6-inch tail at the top.
The tail becomes the lighting wick. It also gives you a convenient handle while dipping. Tie it around one of the upper scales so it does not slide free.
Step 3: Melt the wax with indirect heat
Fill a saucepan with a few inches of water and bring it to a gentle simmer. Place the wax in a dedicated heat-safe metal container, pouring pitcher, or clean can, then set that container in the hot water.
Use low heat and melt only the amount needed. Do not place wax directly over a burner, and never walk away while it is heating. Wax is combustible if overheated. Good ventilation, indirect heat, and a calm working pace are far better than trying to set a speed record.
Do not add water to hot wax. Water can create splattering and serious burns. If the wax begins smoking, turn off the heat without moving the container and cover it with a metal lid. Never pour water onto burning wax.
Step 4: Dip each pine cone
Hold a cone by its twine tail or with metal tongs. Lower it slowly into the melted wax until most of the scales are coated. Lift it out and allow the excess wax to drip back into the container for several seconds.
Place the cone upright on the parchment-lined tray. Continue until every cone has received one coat.
Step 5: Build a second coat
Let the first layer cool and become firm, usually for 10 to 15 minutes. Dip each cone again for a thicker, more durable coating. Two thin layers generally look better and burn more predictably than one enormous wax blob.
There is no need to fill every gap. The open spaces help air move through the starter, which supports ignition. A pine cone should still look like a pine cone, not a geological specimen discovered inside a candle factory.
Step 6: Cool completely
Leave the finished starters on the lined tray until the wax is hard and cool throughout. Trim the wick tail if it is excessively long, but leave enough exposed twine to light safely.
Peel away any thin puddles of hardened wax around the base. Those scraps can return to the melting container for another batch.
Optional Variations That Keep the Project Simple
Use subtle seasonal colors
Wax made specifically for candle crafting can be tinted with candle-safe dye. Soft ivory, muted green, rust, or burgundy makes the fire starters look festive in a gift basket. Skip ordinary paint, food coloring, and random craft pigments, which are not designed to burn.
Create small starter bundles
Tie two or three small finished cones together with additional cotton twine. Bundles look impressive as gifts, but use only the amount needed to start a fire. More wax does not automatically create a better result; sometimes it simply creates a larger flame.
Keep indoor versions plain
Dried herbs, spices, and essential oils are often added for decoration or fragrance. However, they may burn differently, increase smoke, or produce aromas that become unpleasant once heated. For indoor fireplaces, a plain cone, plain wax, and cotton wick are the cleanest and most predictable combination.
How to Use a Pine Cone Fire Starter
- Open the fireplace damper fully or prepare an approved outdoor fire ring.
- Place one pine cone fire starter on the grate or fire-safe base.
- Arrange small pieces of dry kindling loosely around and above it.
- Leave gaps so air can circulate.
- Light the cotton wick with a long match or utility lighter.
- Allow the kindling to catch before gradually adding larger pieces of dry, seasoned wood.
One properly coated starter is usually enough for a small, well-built fire. Using several at once may create an unnecessarily large flare. If the kindling is wet, tightly packed, or poorly ventilated, adding more wax will not solve the underlying problem.
For an indoor fireplace, use a sturdy spark screen and keep combustible decorations, baskets, rugs, and firewood at a safe distance. For outdoor fires, check local restrictions, avoid windy conditions, and keep water nearby.
Storage and Gift Packaging
Store finished pine cone fire starters in a cool, dry place away from direct sunlight, heaters, stoves, and open flames. A lidded metal tin is a practical choice because it protects the wax from dust and discourages curious pets or children.
Avoid leaving them in a hot vehicle, attic, or sunny window. Most waxes soften when exposed to heat, and your neat pine cones may merge into one ambitious super-cone.
For gifting, arrange three to six starters in a metal pail, kraft box, or reusable tin. Add a box of long fireplace matches and a simple instruction tag:
Place one starter beneath dry kindling. Light the cotton wick. Use only in an approved wood-burning fireplace, fire pit, or campfire ring. Never leave a fire unattended.
Do not package fire starters in sealed plastic if they are still even slightly warm. Let the wax cure completely first.
Common Problems and Easy Fixes
The wax slides off
The pine cone may contain moisture, dust, or loose resin. Brush it clean, allow it to dry longer, and make sure the wax is fully melted before dipping.
The coating is too thick
Let the cone drip over the wax container for a longer time. You can also use a slightly warmernot smokingwax bath to create a thinner coating. Multiple light dips are easier to control than one heavy dip.
The wick will not stay attached
Wrap the twine between several scales near the base and tie a firm knot before spiraling upward. A small dab of melted wax can temporarily anchor it.
The starter burns, but the kindling does not ignite
The kindling is probably damp, too large, or packed too tightly. Use dry pencil-thin twigs or split kindling and leave air spaces. A fire starter begins the process; it cannot negotiate with a soggy log.
The fire produces excessive smoke
Check the airflow, wood moisture, chimney draft, and amount of wax being used. Burn only dry, seasoned wood and never burn plastic, trash, glossy paper, or pressure-treated lumber.
What Making a Batch Is Actually Like: Practical Experience Notes
A typical first batch begins with unreasonable confidence. The supplies look simple, the pine cones look cooperative, and melting wax appears to be only slightly more complicated than making tea. Then the first cone emerges carrying enough wax to qualify as a pillar candle.
The most useful lesson is to slow down. Letting each cone drip for five or ten extra seconds makes a dramatic difference. The wax settles into the scales instead of forming a heavy skirt around the bottom. Placing the cooling tray immediately beside the melting pot also prevents the dotted trail of wax that otherwise appears across the counter like evidence in a very cozy crime scene.
Twine placement affects the experience more than expected. A loose loop around the outside of the cone tends to slip during dipping. Wrapping the cotton string between the lower scales creates a secure anchor and leaves both hands feeling much less frantic. A longer tail is helpful during dipping, and it can always be trimmed once the starter cools.
The second coat is usually where the pine cones begin looking polished and gift-worthy. The first layer may appear thin or patchy. After it hardens, another quick dip creates an even finish without burying the cone’s natural texture. Waiting for the first layer to cool is important; dipping too soon can melt it away and return you to the beginning.
Batch size also matters. Making six to twelve starters feels efficient and manageable. Trying to coat forty cones in one session can turn a relaxing seasonal craft into an industrial production line, complete with cooling-space shortages and a mysterious disappearance of all available parchment paper.
During use, the biggest improvement comes not from adding more wax but from preparing better kindling. A starter placed beneath loose, dry twigs catches quickly and transfers its flame upward. The same starter buried beneath dense logs may burn out without accomplishing much. Building a fire is partly about fuel and partly about architecture; even flames appreciate a little breathing room.
Plain wax tends to provide the most predictable indoor experience. Heavily scented experiments may smell pleasant while cold but become overpowering when burned. Decorative herbs can also detach as glowing fragments. For a fireplace, simplicity wins: dry cone, modest wax coating, cotton wick, and dry wood.
Gift recipients often appreciate clear instructions more than elaborate packaging. A small label stating where the starters may be used, how many to light, and that fires must remain supervised turns a cute handmade present into a genuinely useful one. A metal tin is especially convenient because it looks rustic, stores neatly, and keeps wax flakes contained.
Finally, expect slight differences between pine cones. Large open cones hold more wax and create bigger starters, while small compact cones are easier to package and need less material. Sorting cones by size before dipping produces a more consistent batch. The imperfect ones still work, and those are excellent candidates for your own fireplace. Save the runway models for the gift basket.
Final Thoughts
DIY pine cone fire starters combine three satisfying things: a useful finished product, inexpensive materials, and a craft that does not require advanced artistic talent. Once the cones are clean and dry, the process is simply tie, melt, dip, cool, and store.
The smartest version of this project is also the simplest. Use untreated cotton twine, plain wax, modest coatings, dry kindling, and an approved wood-burning setup. Melt wax gently with indirect heat, keep the workspace supervised, and treat each finished cone as the combustible item it is.
Make a small batch for your own winter fires, package several as a practical housewarming gift, or keep a few with your camping supplies where fires are permitted. They are rustic, effective, and considerably more charming than wrestling with yesterday’s newspaper while your guests quietly put their coats back on.