A DIY carved vertical concrete retaining wall is what happens when practical landscaping shakes hands with backyard sculpture and says, “Let’s hold back a hill and look fabulous doing it.” Unlike a plain gray wall that quietly does its job, a carved concrete wall can mimic stacked stone, ledge rock, old-world masonry, or a rugged canyon facewithout hauling half a mountain into your yard.
But here is the friendly reality check: a retaining wall is not just a decorative backdrop for patio chairs and potted rosemary. It is a structure that resists soil pressure, water pressure, freeze-thaw movement, and the occasional ambitious squirrel. The carved surface is the beauty layer; the wall behind it must be planned, drained, reinforced, and built correctly.
This guide explains how to approach a carved vertical concrete retaining wall as a serious DIY project, where the art begins only after the engineering basics are respected. For small garden walls, raised planting beds, and decorative landscape borders, a skilled homeowner may be able to handle the job. For taller walls, walls supporting driveways, patios, pools, steep slopes, or structures, bring in a licensed engineer or qualified contractor before buying a single bag of mix.
What Is a Carved Vertical Concrete Retaining Wall?
A carved vertical concrete retaining wall is a retaining structure finished with a sculpted cement-based surface. The wall itself may be poured concrete, concrete masonry block, or another approved structural system. Over that surface, a vertical concrete overlay or carveable mortar is applied, textured, shaped, and colored to resemble natural stone, brick, timber, or custom relief work.
The keyword is vertical. Horizontal stamped concrete is pressed from above while wet. Vertical concrete has to cling to a wall without sagging like a tired pancake. That is why vertical overlay mixes are usually lightweight, polymer-modified, and formulated to remain workable long enough for stamping, carving, and detailing.
Why Choose Carved Concrete Instead of Real Stone?
Real stone is beautiful, but it is heavy, expensive, and occasionally rude to your lower back. A carved concrete retaining wall offers several advantages:
- Custom appearance: You can create irregular stones, deep grout lines, weathered ledges, or modern geometric panels.
- Lower material hauling: The carved finish is applied in place instead of stacking individual stones.
- Design flexibility: You can blend colors, add fossils, carve house numbers, or create a rustic garden-wall effect.
- Durability: Properly prepared concrete and masonry surfaces can accept long-lasting cement-based coatings.
- One-of-a-kind style: No two carved walls need to look the same, which is the point. Nature does not copy-paste.
The trade-off is skill. Carving realistic stone takes timing, patience, and practice. If you carve too early, the material smears. If you carve too late, you may feel like you are trying to sculpt a sidewalk with a butter knife.
Before You Build: Know the Limits of DIY
The most important part of a retaining wall is the part nobody compliments at cookouts: the footing, drainage, backfill, reinforcement, and soil design. Many local codes use height thresholds for permits, often around 4 feet measured in a specific way, and walls with surcharge loads may need design review even when they are lower. A surcharge is extra pressure from something above or behind the wall, such as a driveway, shed, patio, pool, fence, slope, or parked vehicle.
For a DIY project, keep the scope conservative. A low garden wall or raised bed wall is a very different animal from a six-foot wall holding back a driveway. One is a weekend warrior project; the other is a civil engineering exam wearing landscaping clothes.
Call a Professional When:
- The wall is tall enough to trigger local permit rules.
- The wall supports a driveway, patio, pool, building, or steep slope.
- The soil is soft, expansive, poorly drained, or recently disturbed.
- Water naturally flows toward the wall.
- The wall is near a property line, easement, sidewalk, or utility.
- You want multiple terraced walls close together.
Planning the Wall: Function First, Beauty Second
Start with the purpose. Are you retaining a small planting bed? Creating a terrace? Replacing a crumbling block wall? Adding a decorative feature along a patio? The answer determines wall height, thickness, drainage design, and finish choice.
Walk the site after rain. Notice where water collects, where soil washes out, and where downspouts discharge. Water is the villain in many retaining-wall failures. Soil is heavy enough on its own; saturated soil is like soil after Thanksgiving dinnerheavier, pushier, and not interested in your plans.
Basic Planning Checklist
- Measure the wall length and exposed height.
- Check local building codes and permit requirements.
- Locate underground utilities before digging.
- Plan drainage outlets that do not send water onto a neighbor’s property.
- Choose the carved pattern: stacked stone, fieldstone, ledgestone, block, or custom.
- Build a small sample panel before committing to the full wall.
Materials and Tools You May Need
Your exact materials depend on the structural wall type, but most carved vertical concrete retaining wall projects involve two systems: the retaining wall structure and the decorative carved surface.
Structural Materials
- Concrete or concrete blocks, depending on the design
- Rebar or approved reinforcement
- Gravel or crushed stone base
- Concrete footing materials
- Drainage stone for backfill
- Perforated drain pipe
- Landscape fabric or filter fabric
- Weep-hole pipe sleeves where appropriate
- Concrete adhesive, bonding agent, or approved primer
Carving and Finish Materials
- Vertical concrete overlay mix or carveable wall mix
- Scratch coat material if required by the system
- Texturing skins, rollers, or stamps
- Margin trowels and pointing tools
- Carving wedges and jointers
- Spray bottle for moisture control
- Concrete stains, mineral pigments, or color washes
- Breathable exterior-grade masonry sealer
Safety Gear
- Safety glasses
- Waterproof gloves
- Dust mask or respirator suitable for silica exposure when cutting or grinding
- Hearing protection
- Knee pads
- Long sleeves for wet cement handling
Wet concrete and mortar can irritate or burn skin. Dry cutting, grinding, or brushing cement-based materials can create silica dust, so use wet methods, dust collection, and proper respiratory protection when needed.
Step-by-Step: How to Build a DIY Carved Vertical Concrete Retaining Wall
Step 1: Mark the Layout
Use stakes, string lines, marking paint, and a level to map the wall. Keep curves gentle if you are new to formwork or block work. Tight curves look wonderful on paper and then behave like a math problem with a shovel attached.
Mark the front face of the wall, the footing width, and the drainage zone behind the wall. Leave enough room to work. You will need access behind the wall for pipe, gravel, fabric, and backfill.
Step 2: Excavate for the Footing
A concrete retaining wall needs a stable base. Footing dimensions depend on wall height, soil, climate, and design. As a general principle, footings for masonry walls are commonly wider than the wall itself and should be placed on compacted, stable material. In freeze-prone climates, footing depth and frost protection matter because freeze-thaw movement can shift the wall.
Remove organic soil, roots, loose fill, and mud. Compact the subgrade. Add a gravel base if specified. The goal is boring stability. Exciting soil is usually bad soil.
Step 3: Build the Structural Wall
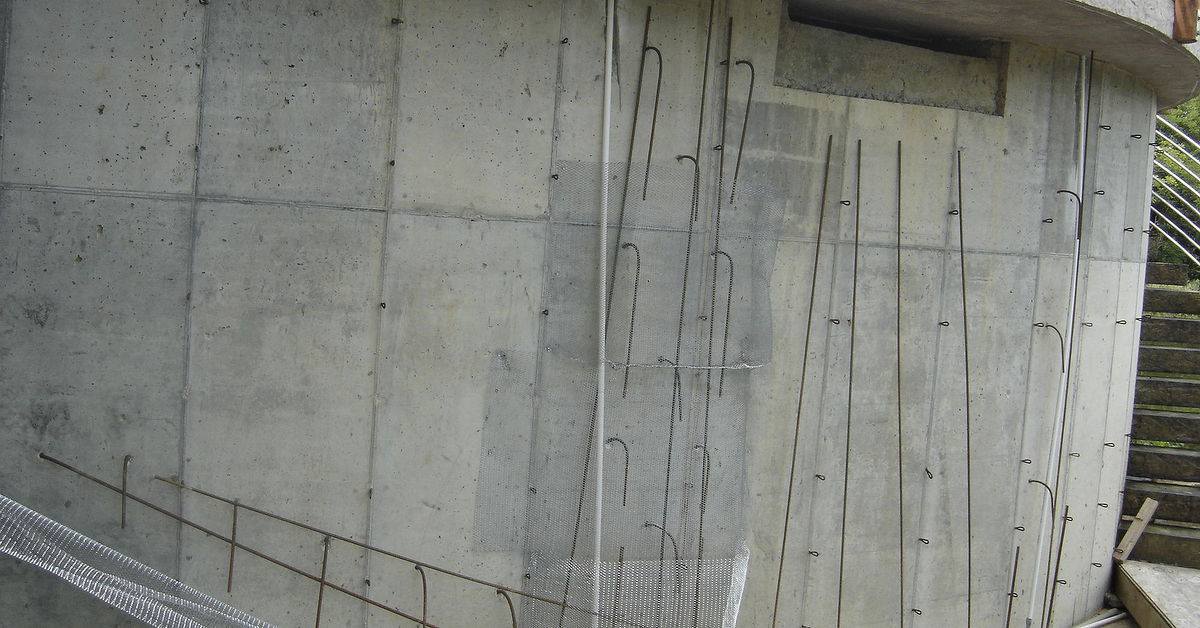
The wall may be poured concrete, reinforced concrete block, or another approved system. Follow the engineered plan or manufacturer guidance. Reinforcement should be placed correctly, not tossed in like spaghetti and optimism. If using concrete block, keep courses level, plumb, and aligned. If pouring concrete, build strong forms that can resist wet concrete pressure.
Do not rely on the carved overlay for structural strength. The overlay is decorative and protective, not a magic force field.
Step 4: Install Drainage Behind the Wall
Drainage is the quiet hero of a long-lasting retaining wall. Install a perforated drain pipe at the base behind the wall where water can collect. Slope the pipe toward a safe outlet. Surround it with clean drainage stone and wrap the drainage zone with filter fabric to reduce clogging from soil fines.
For many walls, a vertical zone of gravel or crushed stone behind the wall helps water move down to the drain instead of building pressure. Weep holes may also be used in concrete or masonry walls so trapped water can escape. Without drainage, water pushes. With drainage, water leaves. Be like drainage.
Step 5: Backfill in Lifts
Backfill gradually, using appropriate drainage stone near the wall and suitable soil farther back if allowed. Compact in layers, not all at once. Dumping all the soil behind the wall and hoping gravity will behave is not a construction method; it is a future repair invoice.
Keep heavy equipment away from the edge unless the wall is designed for that load. Even a small machine can add pressure behind a wall.
Step 6: Prepare the Front Surface
The carved finish needs a clean, sound surface. Remove dirt, dust, loose paint, sealers, grease, and weak concrete. Pressure washing, light grinding, or mechanical abrasion may be needed, but control dust and let the wall dry to the level recommended by the overlay manufacturer.
Some systems require a bonding agent. Others require a scratch coat. Follow the product instructions exactly. Decorative concrete is creative, but product chemistry is not interested in improvisational jazz.
Step 7: Apply the Scratch Coat
A scratch coat creates grip for the thicker carving coat. Apply it evenly and roughen the surface with horizontal scratches or texture while it is still workable. Let it cure as directed. If the scratch coat dries too fast, it may weaken or crack. Light misting and shade can help in hot weather.
Step 8: Apply the Carving Coat
Mix the vertical overlay to the correct consistency. It should be sticky enough to stay on the wall and firm enough to hold texture. Apply it in manageable sections. Beginners often try to cover too much wall at once, then race the clock like contestants on a concrete cooking show.
Thickness depends on the desired relief and product limits. Shallow brick patterns may need less material; deep ledgestone or fieldstone carving requires more build. Do not exceed the manufacturer’s recommended thickness unless the system allows it.
Step 9: Texture the Surface
Use texture skins, rollers, brushes, crumpled plastic, trowels, or rubber stamps to create stone-like grain. Start with broad texture first. The realistic detail comes later. Natural stone has pits, ridges, chips, and direction; it rarely looks like a kitchen sponge pressed evenly across a wall.
Vary the pressure. Rotate tools. Avoid repeating patterns. If three stones in a row look identical, your wall may start to resemble wallpaper wearing a hard hat.
Step 10: Carve the Stone Pattern
Once the overlay firms up but is still carveable, cut the grout lines. Use a margin trowel, carving wedge, three-way jointer, or homemade tool. Create irregular stone sizes, varied joints, and natural intersections. For stacked stone, keep horizontal lines generally level but not robotic. For fieldstone, mix large and small shapes.
Carve deeper shadow lines where stones overlap. Round some edges and chip others. Clean crumbs as you go. Keep a brush handy, but do not overwork the surface. Too much fussing can turn bold stone into mashed potatoes with ambition.
Step 11: Cure the Wall Properly
Curing helps cement-based materials gain strength and reduce cracking. Protect the wall from harsh sun, wind, freezing temperatures, and heavy rain during early curing. Depending on the product and weather, you may need light misting, plastic sheeting, damp curing, or curing compound.
Do not rush staining or sealing. Trapped moisture can cause cloudy sealer, poor adhesion, or color problems. Concrete rewards patience and punishes “good enough, let’s barbecue.”
Step 12: Color the Carved Concrete
Color transforms carved concrete from “nice gray shapes” into convincing stone. Use layered color rather than one flat shade. A typical approach might include a base tone, darker color in joints and low spots, lighter dry-brushed highlights, and subtle accent washes.
For natural stone effects, choose colors from the surrounding landscape. Tan, buff, gray, charcoal, rust, moss, and warm brown can all work. Avoid coloring every stone a different dramatic shade unless your design goal is “geology hosted a costume party.”
Step 13: Seal the Surface
Use an exterior-grade masonry or concrete sealer compatible with vertical overlays. A breathable sealer is often preferred outdoors because moisture needs a way to escape. Glossy sealers can look artificial on faux stone, while matte or satin finishes usually feel more natural.
Reapply sealer as recommended. Retaining walls live outside with rain, UV light, sprinklers, soil moisture, and temperature swings. Maintenance is not failure; it is how outdoor materials stay handsome.
Design Ideas for a Carved Vertical Concrete Wall
Rustic Fieldstone
Fieldstone works well in cottage gardens, informal landscapes, and older homes. Use irregular stones with varied sizes and rounded edges. Add earth-tone color washes and darker joints for depth.
Modern Linear Ledgestone
Ledgestone creates long, narrow horizontal pieces. It suits modern patios, fire pits, and clean landscape designs. Keep the lines organized but vary thickness so the wall does not look printed.
Old Brick or Block
A carved brick pattern can add charm to courtyard walls or urban gardens. Slightly uneven edges, worn corners, and soft color variation make the finish more believable.
Natural Rock Face
For a dramatic hillside look, carve larger fractured planes with deep cracks and shadow pockets. This style takes more sculpting skill but can look impressive around ponds, waterfalls, or terraced planting beds.
Common Mistakes to Avoid
Ignoring Drainage
Drainage is not optional decoration. A carved wall can look perfect on the front and still fail from pressure behind it. Install gravel backfill, filter fabric, drain pipe, and outlets appropriate for the site.
Building Too Tall Without Engineering
Low decorative walls are one thing. Tall retaining walls are another. Height dramatically increases lateral pressure. When in doubt, hire an engineer. It is cheaper than rebuilding the wall after it bows like a scared banana.
Carving Into the Structural Wall
Do not gouge structural concrete or block to create texture. Build the relief with an approved overlay. Carving should shape the finish layer, not weaken the wall.
Skipping the Test Panel
A test panel teaches you working time, texture, carving depth, and color behavior before the main wall becomes your very public practice canvas.
Using the Wrong Mix
Regular mortar or concrete may slump off a vertical surface. Use a product designed for vertical application or follow a proven system.
Maintenance Tips for Long-Term Performance
Inspect the wall at least once a year and after major storms. Look for clogged drains, soil settlement, cracks, bulging, loose overlay, efflorescence, or water stains. Keep downspouts directed away from the wall. Remove weeds whose roots may pry into joints. Touch up sealer when water no longer beads or when the finish starts absorbing moisture too quickly.
If you notice structural movementleaning, widening cracks, bulging, or sudden drainage changesstop treating it as a cosmetic issue. Get professional advice. Paint and sealer cannot fix soil pressure.
Cost Considerations
The cost of a DIY carved vertical concrete retaining wall depends on size, wall structure, drainage, reinforcement, overlay thickness, tools, color products, and whether you need engineering. Decorative materials are only part of the budget. Gravel, pipe, fabric, excavation, forms, rebar, concrete, tool rental, disposal, and permits can add up quickly.
To save money wisely, simplify the design rather than skipping structure. A shorter wall with excellent drainage and a tasteful carved finish beats a taller bargain wall that starts leaning before the tomatoes ripen.
of Real-World Experience: Lessons From a Carved Wall Project
The first lesson with a DIY carved vertical concrete retaining wall is that timing matters more than confidence. Confidence is great for starting. Timing is what keeps the project from becoming a wall-sized regret. The carving coat has a sweet spot: too wet, and the joints collapse; too dry, and every cut becomes a fight. Work in small sections, especially on your first wall. A four-foot section carved beautifully is better than twenty feet of panic-textured concrete.
The second lesson is to obsess over water management before you obsess over stone shapes. Most beginners want to jump straight to carving, because that is the fun part. Nobody posts glamorous photos of compacted gravel and perforated pipe. Still, the drainage system is what lets the pretty face survive. Spend extra time shaping the base, wrapping fabric, sloping the pipe, and confirming the outlet. Run a hose test before final backfill. If the drain does not move water during the test, it will not become a genius during a thunderstorm.
Third, make a sample board. Use scrap cement board or a small hidden wall area and test your mix, texture tools, carving lines, stains, and sealer. This sample is not a delay; it is tuition. You will learn how hard to press the roller, how wide the grout lines should be, how dark the stain dries, and how much texture looks natural. Many faux stone walls look fake because every stone is the same size. Real stone has rhythm, not repetition. Use big stones, small stones, long stones, squat stones, and a few awkward stones. Awkward stones are the secret ingredient.
Fourth, protect the work from weather. Sun and wind can dry the overlay too fast, especially on a vertical face. Work in shade when possible, mist lightly when appropriate, and avoid starting a large section if rain is coming. Rain can ruin fresh detail faster than a toddler with finger paint. Cold weather is also risky because cement-based materials need suitable temperatures to cure properly.
Fifth, color slowly. The best carved concrete walls usually have layered color, not one heavy coat. Start lighter than you think. Add darker tones into cracks and low spots, then highlight raised edges. Step back often. A wall viewed from two feet away looks different from a wall viewed across the patio. Also remember that sealer can deepen the color, so test before committing.
Finally, respect your body. Concrete work is heavy, wet, dusty, and repetitive. Wear gloves, protect your eyes, control silica dust, and take breaks. A beautiful retaining wall is not worth a back injury or cement burns. The goal is to finish with a wall that looks like stone, drains like a responsible adult, and lets you casually tell guests, “Oh that? I carved it,” while pretending that was not the most satisfying sentence of the year.
Conclusion
A DIY carved vertical concrete retaining wall can turn a practical landscape structure into a custom outdoor feature. The secret is treating the project as two jobs: first, build a safe retaining wall with proper footing, reinforcement, drainage, and backfill; second, create a carved concrete finish that adds texture, color, and personality.
For small walls, this can be a rewarding DIY project with a big visual payoff. For taller walls or walls carrying extra loads, professional design is the smart move. Either way, the carved surface should enhance the wall, not compensate for weak construction. Build the bones correctly, carve the face patiently, and your retaining wall can hold back soil while looking like it belongs in a landscape magazine that smells faintly of fresh mulch.