An Adirondack chair is one of those outdoor furniture classics that looks like it belongs in every backyard, porch, lake cabin, or suspiciously expensive vacation rental. Its wide arms practically beg for a cold drink, a paperback novel, and the firm commitment to ignore emails until Monday.
Unfortunately, sun, rain, pollen, mud, and the occasional bird with poor manners can turn a once-beautiful wooden Adirondack chair into something that looks like it survived a minor shipwreck. The good news: painting an Adirondack chair is a beginner-friendly DIY project. With proper preparation, exterior-rated paint, and a little patience, you can give that chair a fresh finish that looks polished instead of “I found this behind the shed.”
Why Painting an Adirondack Chair Is Worth the Effort
A fresh coat of paint does more than make your patio look prettier. Exterior paint can help protect wood from moisture, UV exposure, mildew, and everyday wear. A properly painted chair is easier to clean, less likely to splinter, and much more likely to survive another season of outdoor lounging.
Painting also gives you freedom to update your outdoor space without buying new furniture. A faded white chair can become coastal blue. A tired brown chair can become forest green. A bland gray chair can become sunny yellow, because apparently your backyard deserves a little personality too.
The biggest secret is simple: painting success depends more on preparation than on the final coat. Paint is not magic frosting for damaged wood. It needs a clean, dry, stable surface to grip. Exterior paint guidance from major coating manufacturers consistently emphasizes surface cleaning, sanding loose or glossy areas, repairing damage, priming exposed wood, and allowing the coating to dry and cure properly.
What You Need Before Painting an Adirondack Chair
Essential Supplies
- Mild dish soap or outdoor furniture cleaner
- Bucket, sponge, scrub brush, and clean rags
- Drop cloth, cardboard, or painter’s plastic
- Scraper or putty knife
- Sandpaper or sanding sponge in 120- and 180- to 220-grit ranges
- Exterior wood filler for cracks, holes, and screw depressions
- Exterior wood primer
- Exterior-grade paint made for wood
- Small angled paintbrush
- Foam roller or mini roller for wider flat areas
- Painter’s tape, gloves, safety glasses, and a dust mask
Choosing the Right Paint
For a wood Adirondack chair, choose an exterior-rated acrylic latex paint, exterior enamel, or outdoor furniture paint. These products are designed to handle changing temperatures, sunlight, moisture, and routine cleaning better than ordinary interior wall paint.
A satin or semi-gloss finish is usually a smart choice. Satin gives the chair a softer, less shiny appearance while still being easy to wipe clean. Semi-gloss offers more sheen and can make bright colors pop, although it may reveal more brush marks and wood imperfections.
Flat paint can look charming at first, but it is usually less practical for an outdoor chair that gets touched, leaned on, spilled on, dragged, and occasionally used as a temporary table for a plate of barbecue. For most homeowners, satin is the sweet spot between good looks and real-life durability.
If the chair has bare wood, water stains, knots, dark discoloration, or areas where old paint has worn away, use a quality exterior primer first. Primers help create a more even base, improve adhesion, and reduce the chance of stains or wood tannins bleeding through the topcoat.
Step-by-Step: How to Paint an Adirondack Chair
Step 1: Pick a Good Painting Day
Do not begin painting five minutes before rain, during heavy humidity, or when the chair is still damp from morning dew. Outdoor paint needs a reasonably dry surface and weather conditions that allow it to dry evenly.
For many exterior coatings, moderate temperatures are best. Several paint brands recommend painting when temperatures are generally above 50°F, while some furniture and exterior products specify a roughly 50°F to 90°F application range. Always follow the instructions on your particular primer and paint label, since dry time, humidity limits, and recoat windows vary by product.
Choose a day with a clear forecast and enough time for the primer and paint to dry. Shade is often better than blazing direct sun, because very hot surfaces can make paint dry too quickly and leave brush marks before you can smooth them out.
Step 2: Inspect the Chair Before You Paint
Give the chair a close inspection. Look for loose screws, cracked slats, wobbly arms, splinters, soft wood, mold, peeling paint, and rusted hardware. Paint can improve appearance, but it cannot repair structural problems.
Tighten loose screws before painting. Replace broken or rotted boards if necessary. If a screw head is sitting below the wood surface, fill the depression with exterior wood filler. Let the filler dry completely, then sand it smooth.
Pay extra attention to the bottom edges of the legs, the joints under the seat, and the back slats. These areas often take the most abuse because they collect moisture, dirt, and the occasional tiny backyard civilization of spiders.
Step 3: Clean the Chair Thoroughly
Wash the chair with mild soap and water or an outdoor furniture cleaner. Use a scrub brush to remove dirt, pollen, mildew residue, greasy sunscreen marks, and flaky debris. Clean the underside as carefully as the visible areas; paint does not care whether dirt is hiding in a glamorous location or underneath the seat.
Rinse the chair well and allow it to dry completely. Outdoor wood should be dry and free of mold or mildew before refinishing. Benjamin Moore’s outdoor furniture guidance specifically emphasizes checking both visible surfaces and undersides for moisture, mold, and mildew before applying a finish.
Do not rush this step. Painting damp wood can lead to poor adhesion, bubbling, peeling, and a finish that quits the job before you do.
Step 4: Scrape Loose Paint and Sand the Surface
Use a scraper or putty knife to remove peeling, bubbling, or loose paint. You do not need to strip every inch of old finish if it is still firmly attached. The goal is to remove anything unstable and feather the edges so the new paint will look smooth rather than lumpy.
Start with 120-grit sandpaper on rough patches, peeling edges, splinters, or heavy imperfections. Then move to 180- or 220-grit sandpaper to smooth the surface. Sand with the grain whenever possible.
For a chair with old paint in decent condition, light sanding is often enough. You are creating a slightly textured surface that gives primer and paint something to grip. Rust-Oleum and other refinishing experts recommend cleaning, lightly sanding rough or glossy surfaces, and removing sanding dust before painting.
After sanding, wipe the chair with a clean, damp cloth or tack cloth. Let it dry before priming. Dust left on the chair can create a gritty finish that looks less “freshly painted patio furniture” and more “cookie crumbs in the paint.”
Step 5: Take Safety Seriously With Old Paint
If the chair is very old and you do not know what kind of paint is on it, be cautious before sanding aggressively. Fine dust from old coatings can be hazardous. Use gloves, safety glasses, and a proper dust mask, especially when scraping or sanding.
The U.S. Environmental Protection Agency advises DIY renovators to use lead-safe work practices when disturbing older painted surfaces, particularly in homes built before 1978. While an Adirondack chair is not a wall, the same common-sense principle applies: avoid spreading unknown paint dust, keep children and pets away from the work area, and test questionable old coatings before extensive sanding.
Step 6: Apply Exterior Primer
Primer is especially important if you are painting bare wood, changing from a dark color to a light color, covering stains, or repairing areas with wood filler. It helps the topcoat go on more evenly and can improve durability.
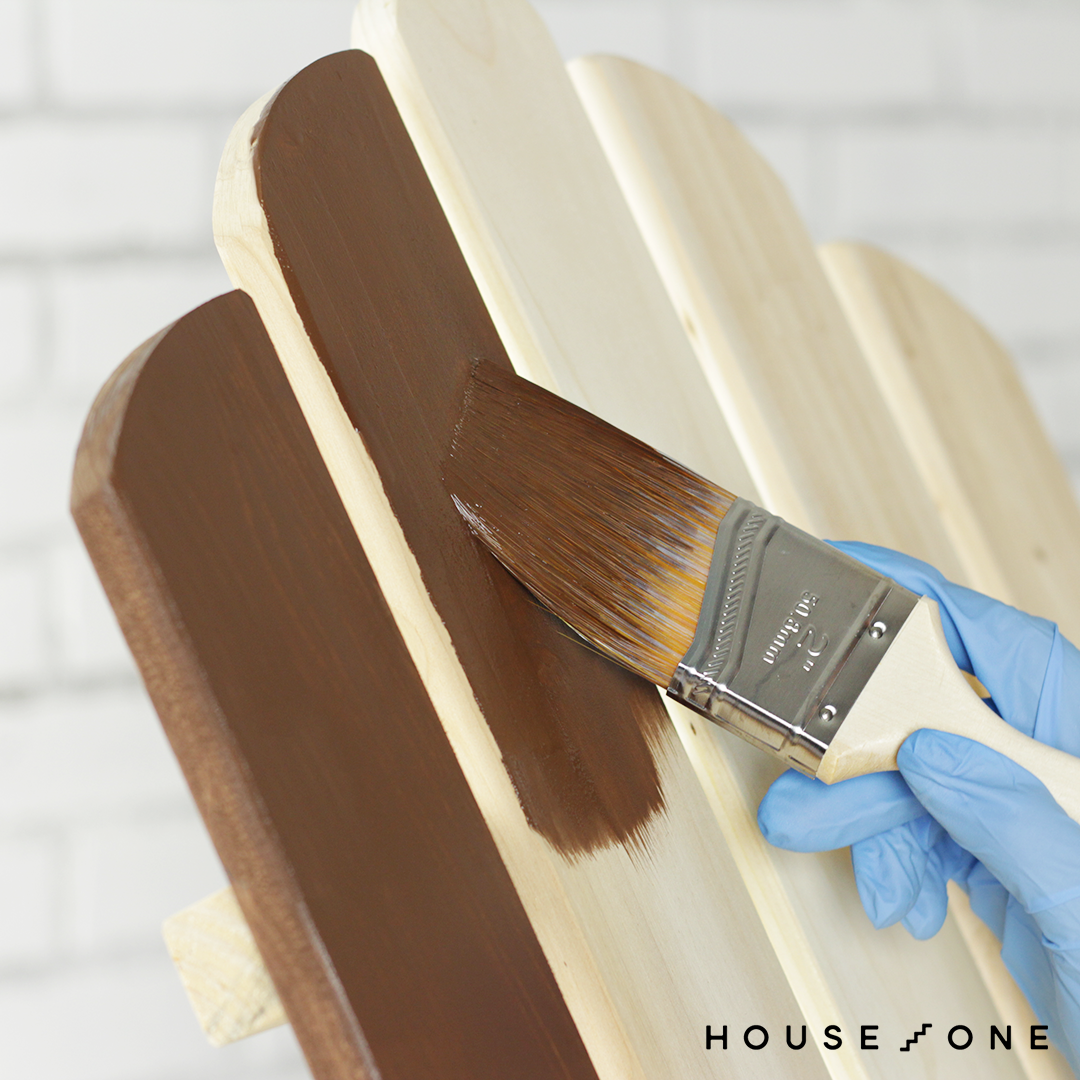
Use an angled brush to reach narrow spaces between the back slats, under the arms, around screw heads, and along the curved seat boards. Apply a thin, even coat rather than flooding the wood with primer.
Brush in the direction of the wood grain whenever possible. Sherwin-Williams and Lowe’s both recommend thin, grain-following application for wood surfaces, with light sanding after the primer dries when needed for a smoother finish.
Let the primer dry fully according to the label. Once dry, lightly sand any raised grain, drips, or rough spots with fine sandpaper. Remove all dust before applying paint.
Step 7: Paint the Tight Areas First
Start with the hardest-to-reach places: the gaps between slats, undersides of armrests, corners around joints, inside curves, and the lower sections of the chair. A small angled brush works best for these areas.
Then move to the larger surfaces, including the arms, seat, legs, and broad back slats. A foam roller can help create a smooth finish on flatter areas, but use a brush to catch drips and blend the edges.
Paint from top to bottom when possible. Begin with the back, then the arms, seat, legs, and underside details. This approach makes it easier to catch drips before they dry into permanent little paint stalactites.
Step 8: Use Thin Coats Instead of One Heavy Coat
Two thin coats are usually better than one thick coat. Heavy paint can sag, pool between slats, trap moisture, and create a finish that feels rubbery instead of smooth.
Apply the first coat evenly, then allow it to dry for the full time listed on the paint can. Do not judge dryness by poking it every seven minutes like it is a cake in the oven. Paint may feel dry to the touch long before it is ready for another coat.
After the first coat dries, inspect the chair in natural light. Lightly sand any drips or rough areas, wipe away dust, and apply the second coat. Bright, deep, or dramatic colors may need an additional coat for even coverage.
Step 9: Let the Chair Cure Before Using It
Drying and curing are not the same thing. Dry paint may no longer feel sticky, but curing is the longer process in which the coating hardens and becomes more durable.
Follow the paint label for cure time before sitting in the chair, stacking it, covering it, or placing it in regular outdoor use. Sitting in it too soon can leave pressure marks, scratches, or a strange imprint from your shorts that nobody asked to preserve.
Common Adirondack Chair Painting Mistakes to Avoid
Painting Over Dirt or Mildew
Paint sticks best to clean surfaces, not pollen, greasy fingerprints, algae residue, or mysterious backyard grime. Clean first, dry fully, then paint.
Skipping the Primer on Bare Wood
Some paint-and-primer products can work well on previously painted surfaces in good condition. But exposed wood, patched sections, knots, stains, and major color changes benefit from dedicated primer. Skipping it may result in uneven color, visible repairs, and early peeling.
Using Interior Paint Outside
Interior paint is not designed for rain, direct sunlight, temperature swings, or repeated cleaning. It may look fine for a few weeks, then start behaving like it has decided outdoor life is simply beneath it.
Painting in Bad Weather
Rain, fog, extreme heat, cold temperatures, and high humidity can interfere with drying and adhesion. Check the paint label and weather forecast before beginning.
Adding Too Much Paint at Once
Thick coats do not create a tougher finish. They usually create drips, slow drying, uneven sheen, and frustration. Thin, controlled coats win this contest almost every time.
How to Maintain a Painted Adirondack Chair
Once the chair is painted, maintenance is fairly easy. Wash it periodically with mild soap and water, especially after pollen season or a long stretch of wet weather. Avoid harsh abrasive cleaners that can dull the finish.
Inspect the chair once or twice a year for chipped paint, exposed wood, loose screws, and water damage. Touch up small chips early before moisture gets underneath the paint film and turns a tiny blemish into a peeling disaster movie.
If possible, move the chair under a covered porch during harsh weather or use a breathable outdoor furniture cover. Avoid wrapping it tightly in non-breathable plastic for long periods, since trapped moisture can encourage mildew and damage the finish.
When you eventually have leftover paint, store it in a tightly sealed, labeled container for touch-ups. Do not pour unused paint down drains or onto the ground. PaintCare operates paint-recycling programs and drop-off locations in participating U.S. states for many leftover architectural paints, primers, stains, sealers, and clear coatings.
Experience-Based Lessons From Painting Adirondack Chairs
Painting an Adirondack chair sounds simple because, technically, it is simple. There is no complicated wiring, no mysterious plumbing pipe, and no need to calculate load-bearing walls. Still, the project has a way of teaching useful lessons about patience, preparation, and why outdoor furniture has approximately seventeen more awkward angles than it first appears to have.
The first thing most people notice is that Adirondack chairs are not flat. They are made of slats, curves, wide arms, recessed spaces, angled backs, and small gaps that seem designed specifically to hide paint drips. A chair may look like a quick afternoon project from ten feet away. Up close, it becomes a tiny wooden obstacle course.
The practical lesson is to paint the difficult spots first. Brushing between the back slats before painting the broad armrests prevents you from smearing fresh paint with your sleeve later. Painting undersides and inner corners before the visible surfaces also makes the job cleaner. It feels backward at first, but it saves time and reduces the number of times you must twist your wrist into a shape usually associated with yoga classes.
Another common experience is discovering that “clean enough” is not actually clean enough. Outdoor chairs collect an impressive amount of invisible residue: sunscreen, pollen, dust, tree sap, cooking smoke, bird droppings, and whatever magical substance falls from the sky when nobody is watching. A chair can look dry and harmless but still have enough grime to interfere with paint adhesion. Taking an extra fifteen minutes to scrub and rinse the chair is almost always more valuable than buying a fancier paintbrush.
Color choice also becomes more interesting in real life than it does on a tiny paint chip. A cheerful turquoise may look playful in the store but nearly neon when it sits in full afternoon sun. A dark navy can feel elegant, but it may show pollen, dust, and scratches more quickly. White is classic, but it also collects marks like a magnet collects paper clips. Medium blues, muted greens, charcoal, terracotta, and warm gray shades often balance personality with practicality.
One of the biggest lessons is that paint needs time. It is tempting to finish the final coat, step back proudly, and immediately sit down with a drink to celebrate. That urge should be resisted. Fresh paint may feel dry but still be soft underneath. Early use can create dents, sticking, fingerprints, and mysterious fabric texture marks. Letting the chair cure fully is boring in the same way wearing a seatbelt is boring: it is not exciting, but you will be glad you did it.
Finally, the most satisfying part of painting an Adirondack chair is the transformation. A weathered chair with peeling paint can make an entire patio look neglected. After proper preparation and a fresh exterior finish, the same chair can become the visual anchor of the space. It feels less like throwing away old furniture and more like giving a familiar object another useful chapter.
That is the real charm of the project. You are not just painting wood. You are creating a better place to read, relax, host friends, watch sunsets, avoid household chores, and insist that the chair is “for outdoor ambiance” even though everyone knows it is your favorite seat.
Final Thoughts
Painting an Adirondack chair is one of the easiest ways to refresh an outdoor space without replacing furniture. Start with a clean, dry, stable surface. Repair damage, sand loose paint, prime exposed wood, use quality exterior paint, and apply thin coats with enough drying time between each one.
Do the preparation properly, and your chair can look sharp for seasons instead of just surviving until the next rainstorm. Then all that remains is the important part: sitting down, relaxing, and pretending you were never stressed about paint drips in the first place.