Note: This guide is written for home crafting, classroom projects, fiesta decorations, Cinco de Mayo parties, Día de los Muertos displays, and cheerful “my living room needs personality” emergencies. Use the flowers with cultural appreciation, especially when decorating for meaningful traditions such as ofrendas or community celebrations.
Introduction: A Flower That Never Wilts, Complains, or Needs Water
Mexican paper flowers are bright, joyful, inexpensive, and wonderfully forgiving. If you can fold paper like a fan and resist the urge to panic when tissue paper wrinkles, you can make them. Traditionally inspired by Mexican festive decorations, these flowers are often made with colorful tissue paper, crepe paper, or “papel de China,” then used for celebrations, altars, garlands, centerpieces, classroom crafts, weddings, and party backdrops.
The charm of Mexican paper flowers comes from their bold color and handmade texture. They do not have to look identical. In fact, they look better when they have a little personality. A slightly uneven petal? That is not a mistake; that is artistic confidence wearing a party hat.
In this guide, you will learn how to make Mexican paper flowers in 7 simple steps using tissue paper, scissors, and pipe cleaners or floral wire. You will also get practical tips on choosing colors, shaping petals, fixing common problems, and displaying your finished flowers. Whether you are decorating for Cinco de Mayo, Día de los Muertos, a Mexican-themed party, a school project, or a colorful weekend craft, this tutorial keeps things simple, beautiful, and budget-friendly.
What Are Mexican Paper Flowers?
Mexican paper flowers are decorative handmade flowers usually created from stacked sheets of tissue paper or crepe paper. They are often associated with Mexican celebrations because of their vivid colors and festive look. You may see them used near papel picado banners, on party tables, around doorways, in photo booths, or as part of Día de los Muertos decorations, especially when orange and yellow flowers are made to resemble marigolds.
Real marigolds, known in Mexico as cempasúchil, are especially important during Día de los Muertos because their strong color and scent are traditionally connected with remembrance and guiding loved ones back to the altar. Paper versions do not replace the cultural meaning of fresh flowers, but they can be a beautiful handmade addition when real blooms are unavailable, too expensive, or likely to be attacked by curious pets.
Materials You Need
Before starting, gather your supplies. The best part is that you do not need fancy craft-store wizardry. Most materials are easy to find and inexpensive.
Basic Supplies
- 6 to 8 sheets of tissue paper per flower
- Scissors
- Pipe cleaners, floral wire, twist ties, or thin craft wire
- Ruler, optional but helpful
- Pencil, optional for marking cuts
- Floral tape, optional for wrapping stems
- String or ribbon, optional for hanging flowers
Best Paper Size
For medium Mexican tissue paper flowers, cut your tissue paper into rectangles around 10 by 15 inches. For smaller flowers, use pieces around 5 by 8 inches. For large statement flowers, use full sheets or rectangles around 15 by 20 inches. The size does not have to be perfect, but the sheets should be roughly the same size so the petals open evenly.
Color Ideas
Use bright combinations such as pink and yellow, orange and red, purple and turquoise, or green and white. For a marigold-inspired flower, use orange, golden yellow, and a little darker orange in the center. For a fiesta look, mix several bold colors in one flower. For elegant wedding decor, try cream, blush, peach, and soft coral.
How to Make Mexican Paper Flowers: 7 Steps
Step 1: Cut and Stack the Tissue Paper
Start by cutting 6 to 8 sheets of tissue paper into equal rectangles. Stack them neatly on top of one another. If you want a contrasting center, place the color you want in the middle of the flower on top of the stack. For example, if you want yellow petals with a red center, put the red sheet on top before folding.
Do not worry if the edges are not mathematically perfect. Tissue paper has a casual beauty. It is basically the craft world’s way of saying, “Relax, nobody invited a geometry professor.”
Step 2: Fold the Stack Like an Accordion
Starting from one short end, fold the entire stack back and forth in accordion-style folds. Each fold should be about 1 inch wide for medium flowers. Smaller folds create more delicate petals, while wider folds create fuller, bolder petals.
Press each fold gently but firmly. You want the paper to hold its shape without crushing it into sadness. Keep folding until the entire rectangle looks like a paper fan.
Step 3: Secure the Center
Find the middle of your folded paper strip. Wrap a pipe cleaner, floral wire, or twist tie tightly around the center. Twist it a few times to secure it. If you are making a flower with a stem, leave the pipe cleaner long. If you are making flowers for a garland, wall display, or backdrop, you can keep the wire short and attach string later.
This center point is what holds the flower together, so make sure it is snug. Not so tight that it tears the tissue paper, but tight enough that your flower does not dramatically fall apart the moment someone says, “That’s cute!”
Step 4: Trim the Ends Into Petal Shapes
Now shape the ends of the folded paper. Use scissors to cut both ends into rounded, pointed, scalloped, or fringed shapes. Rounded ends make soft, classic flower petals. Pointed ends create a dahlia-like effect. Fringed ends work beautifully for marigold-style flowers because they create a fluffy, textured look.
If your stack is thick, cut slowly. Sharp scissors make a big difference. Dull scissors will chew the tissue paper like a tiny craft gremlin, leaving ragged edges that are less charming than intended.
Step 5: Gently Open One Side
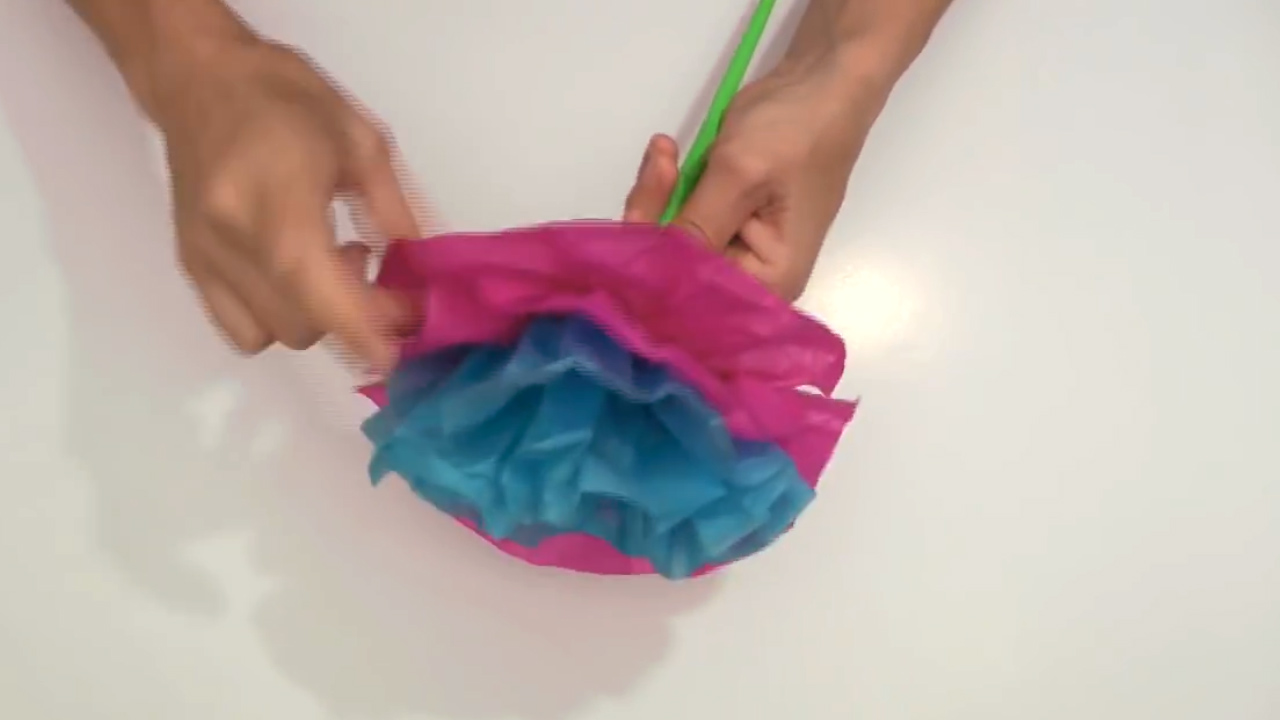
Fan out one side of the folded paper. Then begin lifting the top layer of tissue paper upward toward the center. Pull gently from the base near the wire, not from the outer edge. Tissue paper is delicate, and it will tear if you yank it like you are starting a lawn mower.
Separate one layer at a time. Lift it toward the center and fluff it slightly. Continue with each layer on the first side until half of the flower starts to bloom.
Step 6: Open the Other Side and Fluff the Flower
Repeat the same process on the other side. Lift each tissue layer carefully, alternating sides if needed to keep the flower balanced. Once all layers are separated, use your fingers to shape the petals. Fluff, twist, and adjust until the flower looks full.
If a small tear happens, ignore it unless it is huge. Real flowers have irregular petals too. The difference is that real flowers are dramatic about wilting, while your paper flower will keep looking fabulous for weeks.
Step 7: Add a Stem, Hang It, or Turn It Into Decor
After fluffing the flower, decide how you want to use it. To make a bouquet, wrap the pipe cleaner stem with green floral tape. For a garland, tie string around the center and attach several flowers in a row. For a table centerpiece, arrange multiple flowers in a jar, vase, basket, or painted can. For a wall display, tape or wire the flowers to a backdrop.
Mexican paper flowers look best in groups. Make several sizes and colors, then cluster them together. A single flower is cute; a bunch of them says, “Yes, this party has snacks and confidence.”
Helpful Tips for Better Mexican Paper Flowers
Use More Layers for Fuller Flowers
Four sheets of tissue paper will make a simple flower, but 6 to 8 sheets create a fuller, more dramatic bloom. For giant wall flowers, use 10 sheets or more, but be patient when separating the layers.
Try Different Edge Cuts
The petal shape changes the whole personality of the flower. Rounded edges look soft and traditional. Pointed edges look festive and starburst-like. Fringe cuts create a marigold or pom-pom effect. Scalloped cuts look sweet and decorative.
Mix Colors With Intention
For a realistic effect, place darker colors near the center and lighter colors on the outside. For a fiesta effect, stack contrasting colors randomly. For Día de los Muertos-inspired flowers, orange and yellow are classic choices because they echo the look of marigolds.
Do Not Rush the Fluffing
The most common mistake is pulling tissue paper too fast. Separate each layer slowly. If the paper resists, loosen the fold gently before lifting. Good fluffing is the difference between a flower and a confused paper taco.
Common Mistakes and How to Fix Them
The Tissue Paper Tears
A little tearing is normal. To reduce tearing, pull from the center instead of the outer edge. If a layer tears badly, trim the damaged area or hide it behind another petal. Once the flower is fully fluffed, small mistakes usually disappear.
The Flower Looks Flat
Add more layers next time, or fluff the existing layers upward toward the center. You can also gently squeeze the base of the petals to create more volume.
The Center Is Loose
Twist the pipe cleaner or wire more tightly around the middle. If the flower is already open, carefully pinch the center and add a second twist tie or a small piece of floral wire.
The Flower Looks Uneven
Uneven flowers often happen when the paper stack shifts during folding. Next time, align the paper before folding and hold it firmly. For the current flower, trim any overly long petals and fluff the shorter side more fully.
Creative Ways to Use Mexican Paper Flowers
Mexican paper flowers are wonderfully versatile. Use them to decorate party tables, classroom bulletin boards, door frames, photo booths, birthday backdrops, wedding arches, garden parties, and cultural celebration displays. They also make cheerful handmade gifts, especially when arranged in a bouquet with a ribbon.
For Cinco de Mayo decorations, pair paper flowers with papel picado banners, colorful table runners, painted clay pots, and festive serving dishes. For Día de los Muertos, use orange and yellow paper flowers thoughtfully around an altar, along with meaningful photos, candles, and other traditional elements. For everyday decor, make a few oversized flowers and hang them above a desk, bed, or reading corner.
How to Make Mexican Paper Flowers With Kids
This craft is excellent for children because it builds fine motor skills, color recognition, patience, and creativity. Younger kids may need help cutting the ends and securing the center, while older children can handle most steps independently. Pre-cutting tissue paper rectangles makes the activity smoother for classrooms or parties.
For safety, use child-safe scissors and avoid sharp floral wire with young kids. Pipe cleaners are usually easier and safer. Encourage children to choose their own color combinations. The results may include purple, green, red, and neon yellow in one flower. Is it botanically accurate? No. Is it delightful? Absolutely.
Experience Section: What Making Mexican Paper Flowers Teaches You
The first time you make Mexican paper flowers, you may think the process looks too simple to create anything impressive. You stack paper, fold it, tie it, cut it, and fluff it. That sounds almost suspiciously easy, like a recipe that claims “just five minutes” and then somehow uses every bowl in the kitchen. But once the petals begin opening, the transformation feels surprisingly magical. Flat tissue paper becomes a flower with volume, movement, color, and personality.
One of the best experiences with this craft is how quickly confidence builds. The first flower may look a little shy. The second one usually looks better. By the third, you start experimenting with colors, petal shapes, and sizes. Suddenly, you are not just following instructions; you are designing. That is why this project works so well for families, classrooms, and community events. Everyone can start with the same basic 7 steps, but no two flowers end up exactly alike.
Another enjoyable part is the way these flowers change a space. A plain table becomes festive. A bare wall becomes a photo backdrop. A simple jar becomes a centerpiece. The flowers are lightweight, so you can hang them almost anywhere with string, removable tape, or wire. They are also inexpensive, which means you can make a lot of them without treating your wallet like a piñata.
Making Mexican paper flowers also teaches patience in a gentle way. The only tricky part is separating the tissue layers. If you rush, the paper tears. If you slow down, the flower opens beautifully. That small lesson is oddly satisfying: delicate things need time. And yes, that includes tissue paper, craft projects, and sometimes your Monday morning mood.
For parties, the best approach is to make flowers in batches. Cut all your rectangles first, fold several stacks, then secure and trim them before fluffing. This assembly-line method saves time and keeps the colors consistent. If you are crafting with friends, assign tasks. One person cuts, one folds, one ties, and one fluffs. The fluffer gets the most dramatic job, obviously, because they reveal the final bloom.
From experience, the most beautiful displays usually mix sizes. Large flowers create drama, medium flowers fill space, and small flowers add detail. Try grouping three to five flowers together instead of spacing them evenly. Clusters look more natural and visually rich. For a marigold-inspired display, use mostly orange and yellow with a few deep red accents. For a fiesta backdrop, go wild with hot pink, turquoise, lime green, purple, and sunshine yellow.
The best thing about this craft is that it welcomes imperfection. Handmade decorations have warmth that store-bought items often miss. A slightly wrinkled petal, a lopsided bloom, or a surprising color combination can make the final display feel more personal. Mexican paper flowers are not about strict rules. They are about celebration, creativity, and making something joyful with your hands.
Conclusion
Learning how to make Mexican paper flowers is simple, affordable, and genuinely fun. With tissue paper, scissors, and pipe cleaners, you can create colorful flowers for parties, classrooms, cultural celebrations, home decor, and handmade gifts. The 7 steps are easy to follow: cut and stack the paper, accordion fold it, secure the center, trim the ends, open one side, open the other, and turn the finished bloom into a bouquet, garland, centerpiece, or wall decoration.
The secret is to use enough layers, choose lively colors, cut interesting petal shapes, and fluff slowly. Once you master the basic method, you can make small flowers, giant flowers, marigold-style flowers, fiesta flowers, and elegant floral decorations for almost any occasion. Best of all, these flowers never wilt, never need water, and never judge your snack choices while crafting.