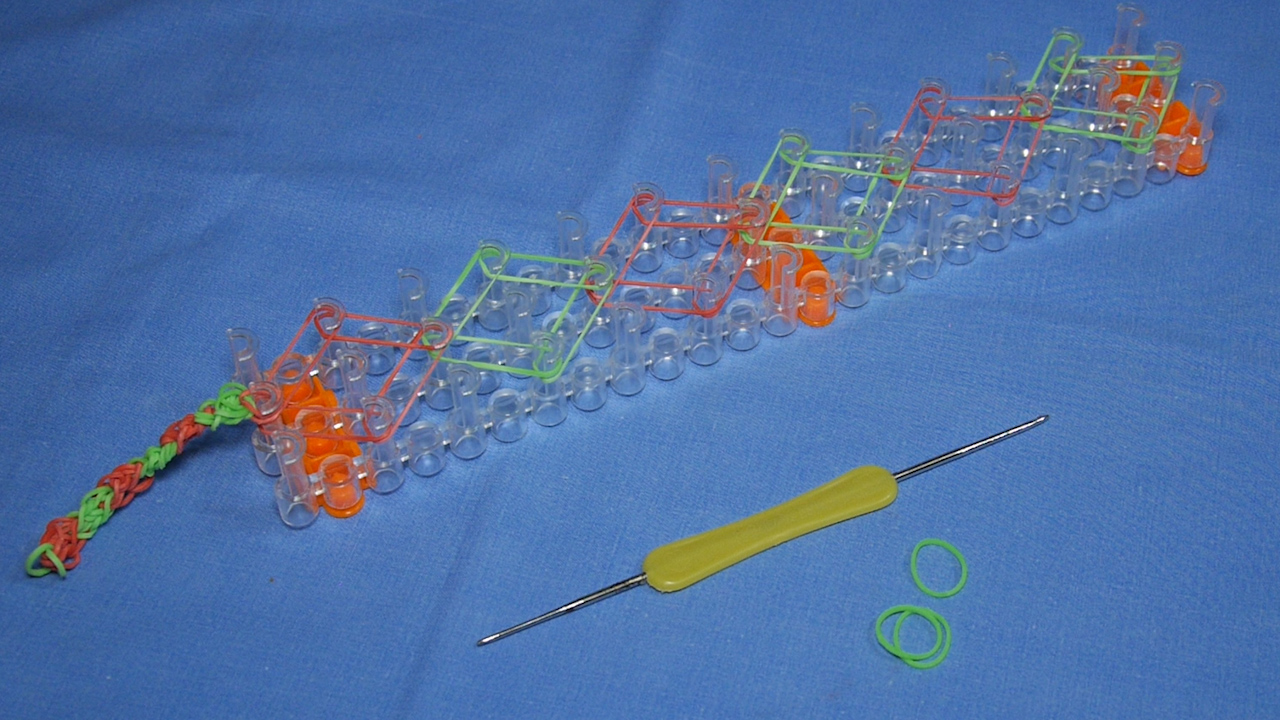
Learning how to make loom bracelets is one of those wonderfully sneaky crafts: it looks tiny, colorful, and innocent, and then suddenly your kitchen table has become a bracelet factory. The good news? You do not need to be a craft wizard, a jewelry designer, or a person who can untangle earbuds on the first try. With a handful of rubber bands, a loom or two fingers, a hook, and a clip, you can make bright, stretchy bracelets that are fun to wear, trade, gift, or stack until your wrist looks like a cheerful rainbow traffic jam.
This guide walks you through the basics in plain American English, from choosing supplies to making a simple single-chain bracelet, trying a no-loom version, fixing common mistakes, and leveling up to patterns like fishtail and wider designs. Whether you are a beginner, a parent helping a kid, a teacher planning a craft table, or an adult who just discovered the oddly calming joy of looping tiny bands, this tutorial will help you get started without losing your patienceor your last C-clip.
What Are Loom Bracelets?
Loom bracelets are handmade bracelets created by weaving small rubber or silicone bands together. The most popular version uses a plastic peg board called a loom, along with a hook and a small fastener such as a C-clip or S-clip. The bands are placed across pegs in a pattern, then pulled over each other to form a chain, braid, or decorative design.
The classic loom bracelet craft became popular because it is affordable, portable, colorful, and easy to customize. You can make a simple bracelet in about 10 minutes once you understand the motion. More advanced patterns can take longer, but the basic idea stays the same: place bands, loop bands, connect ends, admire your work, and immediately plan five more bracelets because “just one” is a lie crafts tell us.
Supplies You Need to Make Loom Bracelets
Before you start making a loom bracelet, gather your materials. A neat setup makes the process smoother and keeps your bands from rolling under the couch, where they will join the lost-sock civilization.
Basic Supplies
- Loom bands: Small elastic bands made for bracelet weaving. Choose colors you like and avoid old, brittle bands.
- Loom board: A plastic peg loom used to hold the bands while you build a pattern.
- Hook: A plastic or metal-tipped hook helps pull lower bands over upper bands.
- C-clip or S-clip: A small plastic fastener that connects both ends of the bracelet.
- Organizer box: Optional, but helpful if your bands are multiplying like confetti rabbits.
Can You Make Loom Bracelets Without a Loom?
Yes. You can make simple loom band bracelets using two fingers, two pencils, or a mini loom. A full loom board gives you more pattern options, but a no-loom bracelet is perfect for beginners, travel, classrooms, or quick crafting. The single-chain and fishtail styles are especially friendly for no-loom methods.
Safety Tips Before You Start
Loom bracelets are fun, but the supplies are small. Keep rubber bands, clips, beads, and charms away from toddlers, babies, and pets. Small parts can be choking hazards, and loose bands can be tempting to curious animals. Younger kids should have adult supervision, especially when pulling stretched bands off the loom because elastic bands can snap back.
If someone has sensitive skin or a possible latex allergy, check the product label carefully. Many modern loom bands are marketed as non-latex or silicone-based, but labels vary. When in doubt, test briefly, stop using the bracelet if irritation appears, and choose reputable craft supplies from trusted retailers.
How to Make a Basic Loom Bracelet: Single-Chain Pattern
The single-chain bracelet is the best first project. It teaches the basic motion of placing bands diagonally, turning the loom, hooking the bands, and finishing with a clip. It is simple, quick, and surprisingly satisfyinglike popping bubble wrap, but you get jewelry at the end.
Step 1: Set Up Your Loom
Place the loom in front of you with the arrow pointing away from your body. This direction matters because most beginner patterns are built one way and hooked back in the opposite direction. If your loom does not have arrows, choose one end as the “top” and keep it consistent.
Step 2: Choose Your Colors
Pick about 25 to 30 loom bands for a standard bracelet. Smaller wrists may need fewer bands, while larger wrists may need more. For your first bracelet, two colors are easier to track. Try alternating blue and white, pink and purple, black and neon green, or a full rainbow sequence if your bracelet wants to make a dramatic entrance.
Step 3: Place the First Band
Stretch the first rubber band diagonally from one peg to the next peg in the center or side row, depending on your loom style. The band should sit neatly around both pegs without twisting. It should be stretched, but not strained like it just remembered homework is due tomorrow.
Step 4: Continue Placing Bands
Add the next band diagonally from the second peg to the third peg. Continue up the loom, placing each new band so it overlaps the previous band by one peg. This creates a zigzag chain. Keep the pattern tidy, and make sure every band is seated near the bottom of the peg so it does not pop off while you work.
Step 5: Turn the Loom Around
When you reach the end, rotate the loom so the arrow points toward you. This is the moment beginners often forget, then wonder why the bracelet looks like it is filing a complaint. Turning the loom prepares the bands for the hooking stage.
Step 6: Hook the Bands
Starting at the peg closest to you, use your hook to grab the lower band inside the peg. Pull it up and over the peg, then place it onto the next peg in the chain. Repeat this motion peg by peg. Each band should loop over and connect to the next one, forming a flexible chain.
Step 7: Attach the Clip
When all bands are looped, attach a C-clip or S-clip to the last loop while it is still on the loom. This helps prevent the bracelet from unraveling. Gently remove the bracelet from the loom, then connect the other end to the same clip. Congratulations: you have made a loom bracelet. Please try not to announce your retirement from all other hobbies too loudly.
How to Make a Loom Bracelet Without a Loom
No loom? No problem. A simple rubber band bracelet can be made with two fingers or two pencils. This method is easy, portable, and great for learning the basic over-under motion.
Step-by-Step No-Loom Method
- Place one band around two fingers in a figure-eight shape.
- Add a second band above it without twisting.
- Add a third band above the second, also without twisting.
- Pull the bottom band on one finger up and over the top bands, dropping it into the center.
- Repeat on the other finger.
- Add one new band at the top.
- Again, pull the bottom band over the top and into the middle on both sides.
- Continue until the bracelet is long enough.
- Clip the two ends together with a C-clip or S-clip.
This finger method creates a soft chain that looks slightly different from a loom-board bracelet. Two pencils can make the process easier if your fingers get tired. Just tape the pencils together with a small spacer between them, such as an eraser, and use them like a tiny homemade loom.
How to Make a Fishtail Loom Bracelet
Once you can make a single-chain bracelet, try a fishtail bracelet. It is thicker, stretchier, and has a braided look. The fishtail is a favorite because it looks more complicated than it feels, which is exactly the kind of craft magic we support.
Fishtail Bracelet Instructions
- Place the first band on two pegs or two fingers in a figure-eight shape.
- Add a second band above it without twisting.
- Add a third band above the second band.
- Pull the bottom band on the right side up and over the top two bands.
- Pull the bottom band on the left side up and over the top two bands.
- Add one new band to the top.
- Repeat the process: bottom band over the top on both sides, then add a new band.
- Continue until the bracelet fits your wrist comfortably.
- Secure the final loops with a clip and connect the ends.
The key to a neat fishtail bracelet is consistent tension. Do not pull the bands too tightly, or the bracelet may feel stiff. Do not leave them too loose, or the braid may look uneven. Aim for a gentle, steady stretch.
Color Ideas for Loom Bracelets
Choosing colors is half the fun. The other half is pretending you did not spend 20 minutes deciding between teal and slightly different teal. Here are easy color combinations that work well for beginners:
- Rainbow order: Red, orange, yellow, green, blue, purple.
- Sports team colors: Use two or three colors from a favorite team.
- Holiday colors: Red and green, orange and black, pastel spring shades, or red, white, and blue.
- Ombre effect: Start with dark shades and gradually move to lighter ones.
- Glow bands: Use glow-in-the-dark bands for sleepovers, parties, or dramatic hallway entrances.
- Minimal style: Use all white, all black, or clear bands for a cleaner look.
Common Loom Bracelet Mistakes and How to Fix Them
The Bracelet Falls Apart
This usually happens when the clip is not attached to both end loops, or when a loop slips off before the bracelet is secured. Attach the clip before removing the bracelet from the loom. If a loop escapes, use your hook to catch it and pull it back into place.
The Bands Keep Popping Off
Bands may pop off if they are stretched too far, placed too high on the pegs, or pulled roughly. Push bands down on the pegs as you work. Use smooth hook movements instead of quick yanks. Your loom is a craft tool, not a wrestling opponent.
The Bracelet Is Too Tight
Add a few extra bands or use an extension chain. A bracelet should sit comfortably on the wrist without pinching. If it leaves marks, it is too tight. If it slides off during normal movement, it is too loose.
The Pattern Looks Uneven
Uneven patterns usually come from inconsistent tension or skipped loops. Slow down and check each peg before moving to the next one. For multi-color patterns, arrange your bands in order before you begin so you do not accidentally create a “random chaos chic” design unless that is the plan.
Fun Loom Bracelet Patterns to Try Next
After mastering the single chain and fishtail, you can move into more detailed designs. Some patterns use only two pegs, while others need a full loom.
1. Double Chain Bracelet
A double chain looks fuller than a single chain but remains beginner-friendly. It is great for two-color designs and gift bracelets.
2. Inverted Fishtail Bracelet
This style creates a tighter, more textured braid. It takes a little more attention, but the finished bracelet looks polished and durable.
3. Dragon Scale Bracelet
Dragon scale bracelets are wider and bolder. They usually require more pegs and more bands, making them a good next step once you feel confident with basic looping.
4. Starburst Bracelet
The starburst pattern creates flower-like bursts across the bracelet. It is eye-catching, colorful, and best attempted after you understand how cap bands and layered placement work.
5. Beaded Loom Bracelet
Beads add names, initials, or decorative accents. Make sure the bead holes fit your bands, and keep small beads away from younger children. Letter beads are especially fun for friendship bracelets, party favors, and personalized gifts.
How to Make Loom Bracelets Look More Professional
Small details make a big difference. Use fresh bands that stretch evenly. Sort colors before starting. Keep your loom facing the correct direction. Measure the bracelet against the wrist before finishing, and avoid overstretching it while checking the size. For a cleaner look, tuck loose loops carefully and choose clips that match or blend with the bracelet colors.
If you are making bracelets as gifts, package them in small paper envelopes, clear bags, or handmade cards. Add a note with the bracelet pattern name and colors. A simple bracelet becomes much more special when it feels intentional.
Creative Ways to Use Loom Bracelets
Loom bracelets are not limited to wrists. You can make rings, backpack charms, zipper pulls, keychain decorations, pencil toppers, anklets, bookmarks, or mini garlands. Longer chains can become necklaces, headbands, or decorative wraps for water bottles. Just remember that loom bands are stretchy craft materials, not heavy-duty straps, so keep them for decoration and light wear.
Why Loom Bracelet Making Is Great for Kids and Adults
For kids, loom bracelets help build fine motor skills, patience, pattern recognition, and color planning. For adults, the repetitive motion can be relaxing. It is the kind of craft that gives your hands something to do while your brain quietly resets. Unlike some hobbies, it does not require a large workspace, expensive equipment, or a three-hour cleanup involving glitter. That alone deserves applause.
Loom bracelets are also social. Kids trade them with friends, siblings create matching sets, parents and children make them together, and teachers can use them for classroom rewards or creative stations. The craft encourages experimentation: What happens if you use three colors? What if you alternate transparent and solid bands? What if you make a bracelet for the dog? Actually, skip that last one unless it is purely decorative and safely out of chewing range.
Extra Experience: Lessons Learned from Making Loom Bracelets
One of the best parts of making loom bracelets is that the first few attempts teach you more than any perfect tutorial can. The first bracelet may look a little lumpy. The second one usually looks better. By the fifth one, you may find yourself giving advice like a tiny rubber-band professor. That learning curve is part of the fun.
The biggest lesson is to slow down during the hooking stage. Most mistakes happen because beginners rush. Placing the bands is easy to see, but hooking requires attention. When you pull the wrong band over a peg, the pattern may twist or unravel. The fix is simple: pause after every few loops and check the chain. If it looks connected and even, keep going. If something looks strange, back up gently with the hook instead of pulling everything off in a dramatic craft meltdown.
Another useful experience is learning how much bracelet length changes after removal from the loom. A bracelet can look longer while stretched across the pegs, then shrink slightly once it comes off. For beginners, it helps to make the bracelet a little longer than you think you need, then test the fit before clipping it permanently. A comfortable bracelet should stretch over the hand but not squeeze the wrist.
Color planning also improves with practice. Random colors can be fun, but intentional color patterns often look cleaner. Lay the bands in a small row before you begin: red, blue, red, blue, or dark purple, medium purple, light purple. This simple step prevents accidental color jumps. It also helps younger makers follow a pattern without constantly digging through a pile of bands.
Storage matters more than people expect. Loom bands are tiny, and tiny things love escaping. A divided organizer box saves time and frustration. Keep clips in their own section because clips are the first thing to disappear. If you make bracelets often, sort bands by color family instead of exact shade. That keeps cleanup realistic. Nobody needs to spend Saturday separating “sky blue” from “slightly nervous sky blue.”
Finally, loom bracelets are more enjoyable when you treat mistakes as experiments. A skipped loop might create an interesting texture. A strange color mix might become someone’s favorite bracelet. A too-short bracelet can become a ring, zipper charm, or keychain loop. Not every project needs to be perfect to be useful, wearable, or fun.
Conclusion
Learning how to make loom bracelets is simple once you understand the rhythm: place the bands, turn the loom, hook the loops, secure the clip, and adjust the fit. Start with a single-chain bracelet, then try a no-loom version, fishtail bracelet, or wider pattern as your confidence grows. Choose safe supplies, supervise younger makers, and keep small parts away from little kids and pets.
The best loom bracelet is not always the most complicated one. Sometimes it is the bracelet with your favorite colors, the one you made with a friend, or the slightly crooked first attempt that proves you started. Grab your bands, pick a pattern, and begin. Your future wrist stack is waiting.