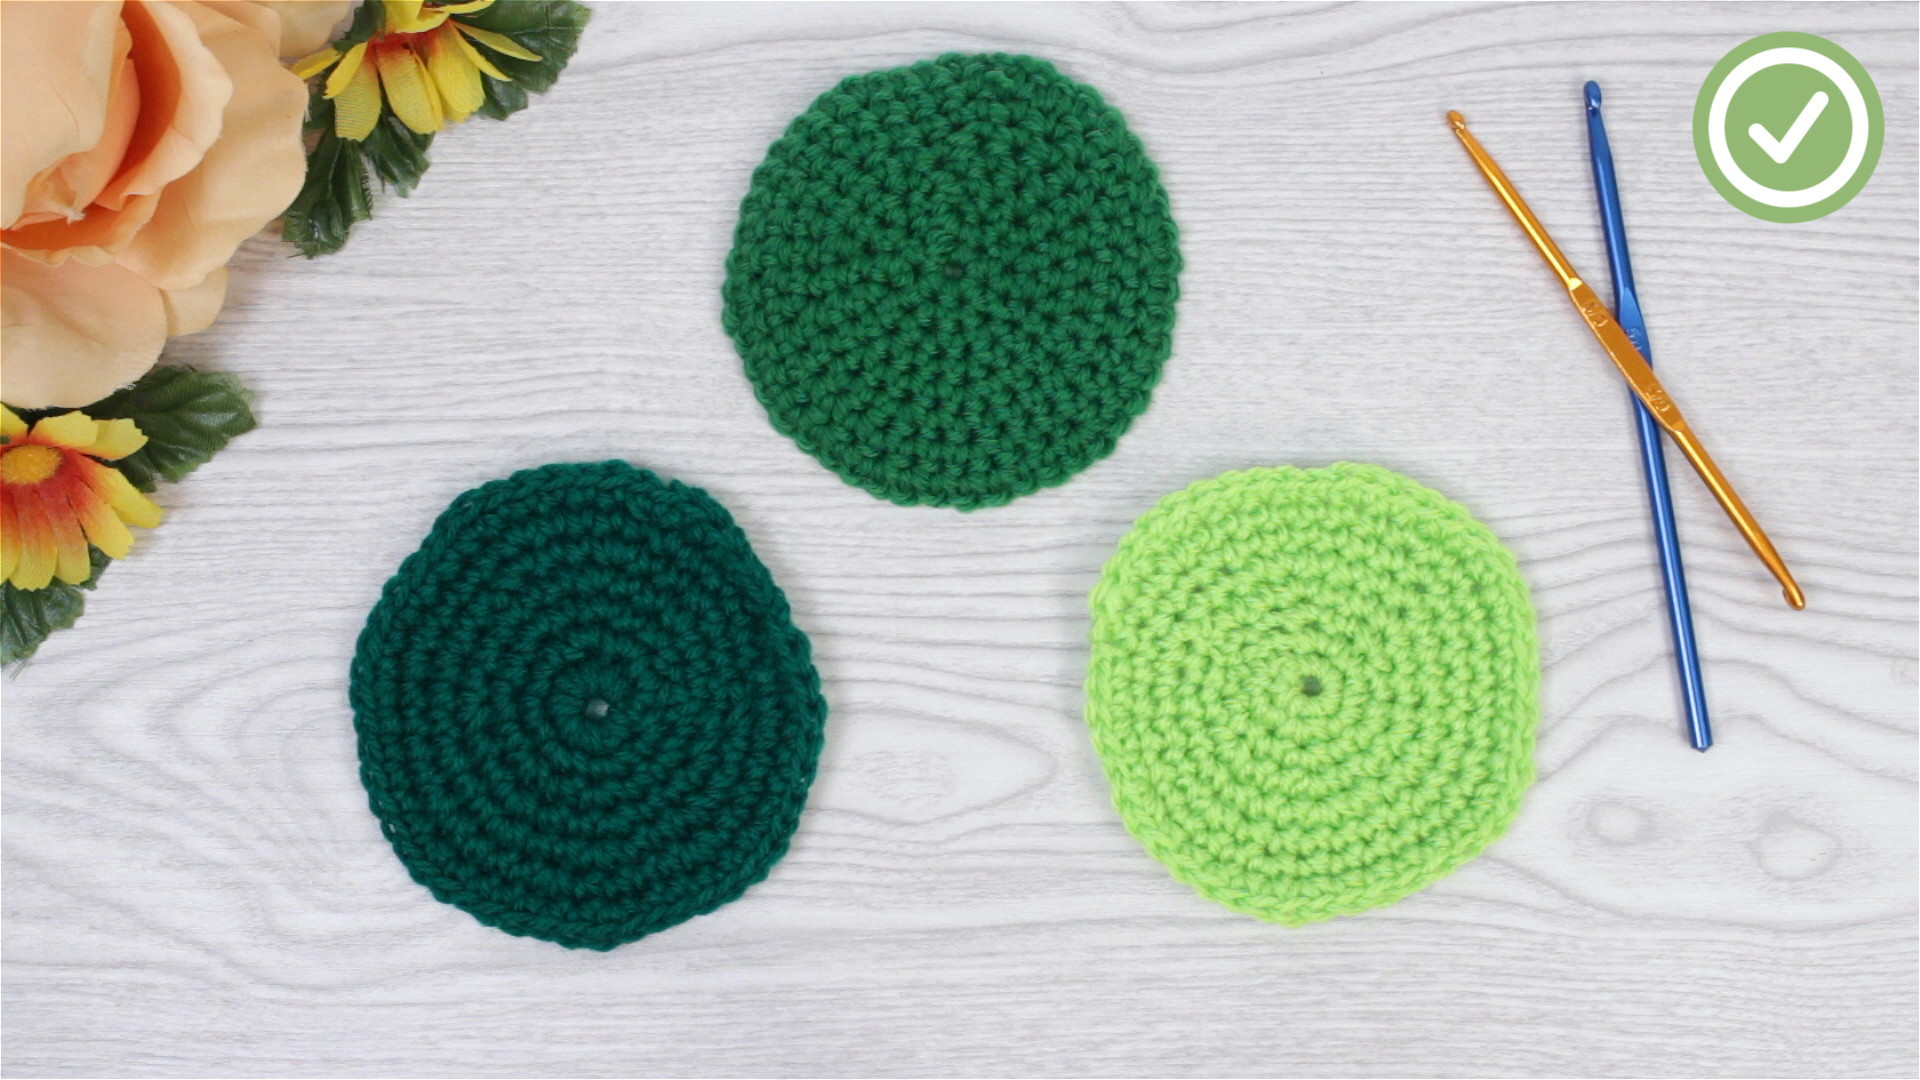
Crocheting in the round is one of those skills that looks fancy from across the room but is actually very learnable once you understand the rhythm. If you can make a chain, work basic stitches, and count without dramatically losing your place every six seconds, you can do this. And yes, counting is part of the deal. Crochet in the round is where hats, baskets, granny motifs, coasters, amigurumi, and plenty of “I meant to make one and somehow made seven” projects begin.
If you have only crocheted in rows, working in circles or tubes can feel like the yarn equivalent of entering a roundabout with no traffic signs. But once the logic clicks, it becomes addictive. You start in the center, build outward or upward, and create shapes that feel a little more polished and a lot more fun. This guide will show you how to crochet in the round, explain the difference between joined and continuous rounds, walk through the most common starting methods, and help you avoid beginner mistakes like twisting chains, missing the first stitch, or accidentally inventing a crochet potato.
What Does “Crochet in the Round” Mean?
To crochet in the round means you work in a circle or spiral instead of turning your project at the end of each row. Rather than going back and forth, you keep moving around a center point or around a closed loop. This technique is used for flat shapes like circles and granny squares, as well as three-dimensional pieces like hats, sleeves, stuffed toys, and bowls.
There are two main ways to work in the round:
1. Joined Rounds
In joined rounds, you finish each round with a slip stitch into the first stitch of that round. Then you chain to begin the next round. This method creates a clear round-by-round structure, which is great for beginners because it makes counting easier. It also works especially well for lace, mandalas, granny squares, and projects where you want neat transitions between rounds.
2. Continuous Rounds
In continuous rounds, also called spiral rounds, you do not join at the end of each round. You simply keep crocheting into the next stitch. This method is common in amigurumi and many seamless projects because it avoids a visible joining seam. The tradeoff is that you absolutely need a stitch marker unless you enjoy suspense and surprise geometry.
What You Need Before You Start
You do not need a suitcase full of supplies. A few basics will do:
- Medium-weight yarn in a light color so you can easily see your stitches
- A crochet hook that matches your yarn label
- Scissors
- A yarn needle for weaving in ends
- At least one stitch marker, safety pin, or scrap of contrasting yarn
If you are learning how to crochet in the round for the first time, choose smooth yarn rather than fuzzy yarn. Fluffy novelty yarn is charming in the way a raccoon in a tuxedo is charming: memorable, but not helpful when you are trying to see where your hook goes.
Three Common Ways to Start Crocheting in the Round
Most round crochet projects begin with one of these methods. Each works. Some are just tidier than others depending on the project.
Magic Ring (Magic Circle)
The magic ring is a favorite for projects that need a tight, nearly invisible center. You create an adjustable loop, crochet your first round into it, then pull the tail to close the hole. This is ideal for amigurumi, hats, circles, and motifs where you do not want a gap in the middle.
Why people love it: It closes tightly and looks clean.
Why beginners side-eye it: It can feel slippery and dramatic the first few times.
Chain Ring
This method is simple and beginner-friendly. You chain a small number of stitches, usually 2 to 6 depending on the pattern, then join with a slip stitch to form a ring. You work your first round into that ring. It is easy to learn, though it can leave a small hole in the center.
Work Into the Second Chain From the Hook
Some simple circles begin by chaining 2, then working all stitches for Round 1 into the second chain from the hook. This is common in beginner tutorials for single crochet circles. It is straightforward and less fiddly than a magic ring, though the center may not close as tightly.
How to Crochet in the Round: Basic Step-by-Step
Let’s start with a simple flat circle in single crochet using joined rounds. This is one of the easiest ways to understand the structure.
Step 1: Make Your Starting Ring
You can use a magic ring, a chain ring, or chain 2 and work into the second chain from the hook. For beginners, chain 2 is often the least intimidating place to start.
Step 2: Work the First Round
Make 6 single crochet stitches into the center ring or into the second chain from the hook. Then join with a slip stitch to the first single crochet if you are working joined rounds.
Step 3: Increase Evenly
To keep a flat circle flat, you need to add stitches at a regular rate. For single crochet, the classic formula is simple: add 6 stitches per round.
That looks like this:
- Round 1: 6 single crochet
- Round 2: 2 single crochet in each stitch around = 12
- Round 3: 1 single crochet, increase around = 18
- Round 4: 2 single crochet, increase around = 24
- Round 5: 3 single crochet, increase around = 30
See the pattern? Each round adds one more regular stitch between increases. That spacing is what keeps the circle from ruffling like lettuce or curling like a nervous hedgehog.
Step 4: Mark the Beginning of the Round
If you are working continuous rounds, place a stitch marker in the first stitch of the round and move it up as you go. If you are working joined rounds, you may still want to mark the first stitch so you do not accidentally slip stitch into the wrong place.
Step 5: Count Frequently
Yes, it is tedious. It is also the difference between “I made a circle” and “Why is this now a bowl?” Count at the end of every round, especially while learning.
How Increases Work in Different Stitches
If you are crocheting with taller stitches, you need more stitches in the starting round and more stitches added overall to keep the shape flat. Here is the beginner-friendly version:
- Single crochet circle: usually starts with 6 stitches and increases by 6 each round
- Half double crochet circle: often starts with 8 stitches and increases by 8 each round
- Double crochet circle: often starts with 10 to 12 stitches and increases by the same amount each round
The reason is simple: taller stitches take up more height and width, so they need more room to spread out. If you use too few increases, the circle cups. If you use too many, it waves.
Joined Rounds vs. Spiral Rounds: Which Should You Choose?
Use Joined Rounds When:
- You want clean, clearly defined rounds
- You are making granny squares, coasters, mandalas, or lace motifs
- You are changing colors often
- You are still learning and want easier stitch counting
Use Continuous Rounds When:
- You want a smoother, less obvious seam
- You are making amigurumi or rounded 3D shapes
- You do not want to chain and slip stitch at the end of each round
- You remember to use a stitch marker like the responsible fiber artist you are becoming
Common Beginner Mistakes and How to Fix Them
Your Circle Is Ruffling
You are probably increasing too much. Check your stitch count and make sure your increases are evenly spaced rather than randomly sprinkled in like confetti.
Your Circle Is Curling Into a Bowl
You may not be increasing enough, or your tension may be very tight. Add the correct number of increases and consider going up one hook size if your stitches are stiff.
You Cannot Tell Where the Round Starts
Use a stitch marker every round. This is not cheating. This is wisdom.
You See a Hole in the Center
Use a magic ring for a tighter start, or pull the starting tail more firmly before weaving it in.
Your Join Looks Bulky
That can happen in joined rounds, especially with taller stitches. Try tightening your slip stitch slightly, or learn a more seamless starting technique later. For now, neat and consistent is more important than invisible.
A Simple Practice Pattern
Try this tiny coaster-sized circle to practice:
Round 1: Chain 2, 6 sc in second chain from hook. Join.
Round 2: Chain 1, 2 sc in each stitch around. Join. (12)
Round 3: Chain 1, *1 sc in next stitch, 2 sc in next stitch; repeat from * around. Join. (18)
Round 4: Chain 1, *1 sc in next 2 stitches, 2 sc in next stitch; repeat from * around. Join. (24)
Round 5: Chain 1, *1 sc in next 3 stitches, 2 sc in next stitch; repeat from * around. Join. (30)
Fasten off, weave in ends, and admire your nicely behaved circle. If it lies flat, congratulations. If it resembles a tortilla chip, congratulations even more, because now you know what to adjust.
Projects That Use Crochet in the Round
Once you get the hang of this technique, a lot of patterns suddenly make sense. Common examples include:
- Beanies and top-down hats
- Amigurumi animals and dolls
- Granny squares and hexagons
- Coasters and placemats
- Baskets and bowls
- Sleeves, yokes, and circular shawls
The real magic is that one simple concept branches into endless designs. Flat circles become motifs. Tubes become hats. Tight spirals become stuffed toys. Crochet in the round is less a single trick and more a gateway skill.
Tips That Make Learning Easier
- Start with single crochet before trying fancy stitches
- Use a light yarn and a medium hook size
- Read the tops of your stitches before you try to crochet faster
- Move your stitch marker the second you reach it
- Count out loud if necessary; your yarn will not judge you
- Practice both joined and continuous rounds so patterns do not intimidate you later
Why This Skill Is Worth Learning
Learning how to crochet in the round opens up a huge part of the crochet world. It gives you better control over shape, teaches you how increases really work, and helps you understand pattern construction on a deeper level. It also makes you feel oddly powerful. One minute you are making six tiny stitches in a loop; the next minute you are shaping a hat crown or a tiny octopus with undeniable personality.
Like most crochet skills, it gets easier with repetition. Your first magic ring may look suspicious. Your second one may unravel in protest. By the fifth, your hands start to understand the choreography. Soon, crocheting in the round becomes just another tool in your kit, ready whenever a pattern says “join to form a ring” and you no longer break into a cold sweat.
Conclusion
If you want to learn how to crochet in the round, begin with the basics: pick a simple starting method, use a stitch marker, count your stitches, and increase evenly. Practice a small flat circle first, then try a spiral project like amigurumi or a joined-round project like a coaster or granny square. Once you understand the structure, the technique stops feeling mysterious and starts feeling wonderfully logical.
Best of all, it is a skill that pays off immediately. The more you practice, the more your crochet looks intentional, balanced, and polished. So grab your hook, make that little ring of possibility, and start stitching. Your future hats, baskets, and tiny yarn creatures are waiting.
Experience: What Learning to Crochet in the Round Really Feels Like
The first time many people try crocheting in the round, they expect it to feel smooth and elegant. In reality, it often feels like trying to pat your head, rub your stomach, and count to twenty-four at the same time. There is usually a moment where you stare at the tiny circle in your hand and wonder whether you are making a coaster or accidentally summoning a very small yarn storm. That is normal. In fact, that confusion is almost part of the tradition.
A common early experience is struggling with the magic ring. On paper, it sounds so simple: make an adjustable loop, crochet into it, pull it closed, and enjoy your neat center. In real life, the yarn tail may slide away, the loop may collapse too early, and the whole thing can feel unnecessarily dramatic for an object smaller than a cookie. But once you get it, really get it, the payoff is immediate. Suddenly your centers look tighter, your work looks cleaner, and you start feeling like someone who casually knows useful fiber secrets.
Another experience that shows up quickly is the battle between confidence and counting. Round crochet rewards rhythm, but it punishes guessing. Plenty of beginners discover they have one extra stitch in Round 3, two missing stitches in Round 4, and a powerful desire to pretend that math is optional in the arts. Sadly, crochet does not agree. But this is also where progress becomes visible. The moment you begin counting consistently, marking your rounds, and recognizing where increases belong, your work improves fast. It is one of those satisfying skills where discipline turns into freedom.
There is also a strange little joy in watching shape appear. A flat circle expands under your fingers in a way that feels almost architectural. A spiral tube begins to resemble a hat. A lumpy ball becomes the body of a stuffed animal. Crocheting in the round teaches you that shape is not magic at all; it is structure, repetition, and tiny adjustments. That realization can be empowering, especially for beginners who once thought patterns were mysterious code written by very patient wizards.
Many crocheters also talk about the calming effect of round work. Once the setup is done and the pattern clicks, the motion becomes steady and soothing. There is less turning, less stopping, and often less visual clutter than row-based crochet. You can settle into the movement, follow the marker, and let the rounds build. It becomes easy to understand why so many people reach for circular projects when they want something relaxing but still productive.
Over time, crocheting in the round also builds trust in your own hands. At first, every join looks suspicious and every stitch marker feels like a lifeline. Later, you begin to notice subtle details: the difference between a true increase and an accidental one, the way tension changes the shape, the point when a circle starts to ripple before it fully misbehaves. That awareness is a real milestone. It means you are no longer just following instructions. You are reading the fabric itself.
And perhaps the best experience of all is this: one day a pattern will say, “Work in continuous rounds,” and instead of panic, you will shrug, grab a marker, and keep going. That is when you realize crocheting in the round has moved from “new technique” to “trusted skill.” And honestly, that feels pretty great.