If you have ever built a beautiful fence in Minecraft and then realized you trapped yourself out with the cows, congratulations: you have discovered why the fence gate exists. A gate is one of those tiny, easy-to-overlook items that suddenly becomes the star of the show the moment you start farming, breeding animals, organizing villagers, or building a base that does not feel like a medieval prison run by a confused potato.
In Minecraft, when most players say “gate,” they usually mean a fence gate. It works like a simple doorway for fences, opens and closes quickly, and can even be controlled with redstone. Better yet, it is cheap to craft, fast to place, and useful in both beginner farms and fancy late-game builds.
This guide walks you through exactly how to make a gate in Minecraft in 10 clear steps. Along the way, you will also learn what materials to gather, how to place the gate correctly, how to avoid common mistakes, and how to use fence gates for smarter building. By the end, you will not just know the recipe. You will know how to make the thing actually useful.
What Is a Gate in Minecraft?
A fence gate is the block that lets you create an entry point in a fenced area. Think of it as the polite version of smashing a hole in your animal pen and hoping the sheep respect boundaries. Fence gates connect cleanly with surrounding fence pieces, open with one click or tap, and match the wood type you choose for the recipe.
They are commonly used for animal farms, village enclosures, garden borders, house entrances, stable doors, crop protection, and decorative builds. They also work well in redstone builds, hidden entrances, and some lava-and-water contraptions because open fence gates behave differently from solid blocks.
What You Need Before You Craft a Gate
Before you make a gate, gather these basics:
- At least 1 log of any wood type
- A Crafting Table
- Enough wood to turn into 2 planks and 4 sticks
Here is the nice part: one log is enough for one fence gate. One log becomes four planks, and two planks can be turned into four sticks. That gives you exactly what you need for a single gate recipe. Minecraft may be a sandbox survival game, but every now and then it behaves like it wants to help.
How to Make a Gate in Minecraft: 10 Steps
Step 1: Find a Tree
Start by finding any tree near your spawn area. Oak is the classic beginner option, but you can use spruce, birch, jungle, acacia, dark oak, mangrove, cherry, pale oak, crimson, or warped materials depending on what style you want.
If you are early in a survival world, do not overthink the aesthetics yet. Your first goal is function. You can always upgrade from “humble oak ranch gate” to “grand cherry blossom estate entrance” later.
Step 2: Gather Wood Logs
Punch or chop the tree until you collect at least one log. More is better if you also plan to make surrounding fences. A gate by itself is useful, but a gate floating in the middle of nowhere is less “farm entrance” and more “performance art.”
If you have an axe, use it. If not, your fist works fine. Minecraft has always respected the ancient building tradition of “hit tree until house happens.”
Step 3: Turn Logs into Wooden Planks
Open your inventory or crafting interface and convert the log into wooden planks. One log usually gives you four planks. Those planks are the base ingredient for both the gate and the sticks needed to craft it.
Try to keep your materials matching when possible. If you are building a spruce cabin with dark trim, a spruce fence gate will look more intentional than a random oak gate that wandered in from another biome.
Step 4: Craft Sticks
Use two planks to craft four sticks. That gives you the exact number required for one fence gate. If you are building a full fence line, craft extra sticks now to save time later.
Sticks are one of those Minecraft ingredients that somehow disappear faster than snacks at a sleepover. You use them for tools, torches, fences, arrows, and all sorts of other recipes, so making extras is rarely a bad idea.
Step 5: Place or Open Your Crafting Table
Fence gates use a 3×3 crafting grid, so you need a Crafting Table. If you do not already have one, craft it from four planks and place it on the ground. Then interact with it to open the full crafting interface.
This is the point where Minecraft changes from “I am collecting random wood” to “I am an architect with a plan.” Or at least a player trying to stop pigs from escaping every 12 seconds.
Step 6: Arrange the Fence Gate Recipe
In the 3×3 crafting grid, place the materials like this:
That recipe creates one fence gate. The easiest way to remember it is this: for a fence, the planks and sticks are arranged one way; for a gate, the pattern is reversed. The sticks go on the sides, and the planks go in the middle.
Step 7: Choose the Gate Style You Want
Before you drag the finished gate into your inventory, take a second to think about the wood type. This is where function meets style. Different wood families create different-looking gates, and that can change the entire feel of a build.
For example:
- Oak gate: simple, classic, and easy for starter farms
- Spruce gate: great for cabins, medieval builds, and darker palettes
- Birch gate: bright and clean for modern or cozy builds
- Cherry gate: perfect for decorative gardens and soft color themes
- Mangrove gate: bold and rich for tropical or swamp builds
- Crimson or warped gate: excellent for Nether-inspired bases
A lot of Minecraft building is just block placement plus taste. The gate may be a small detail, but small details are what make a build look finished instead of “I gave up halfway and called it rustic.”
Step 8: Place the Gate Between Fence Blocks
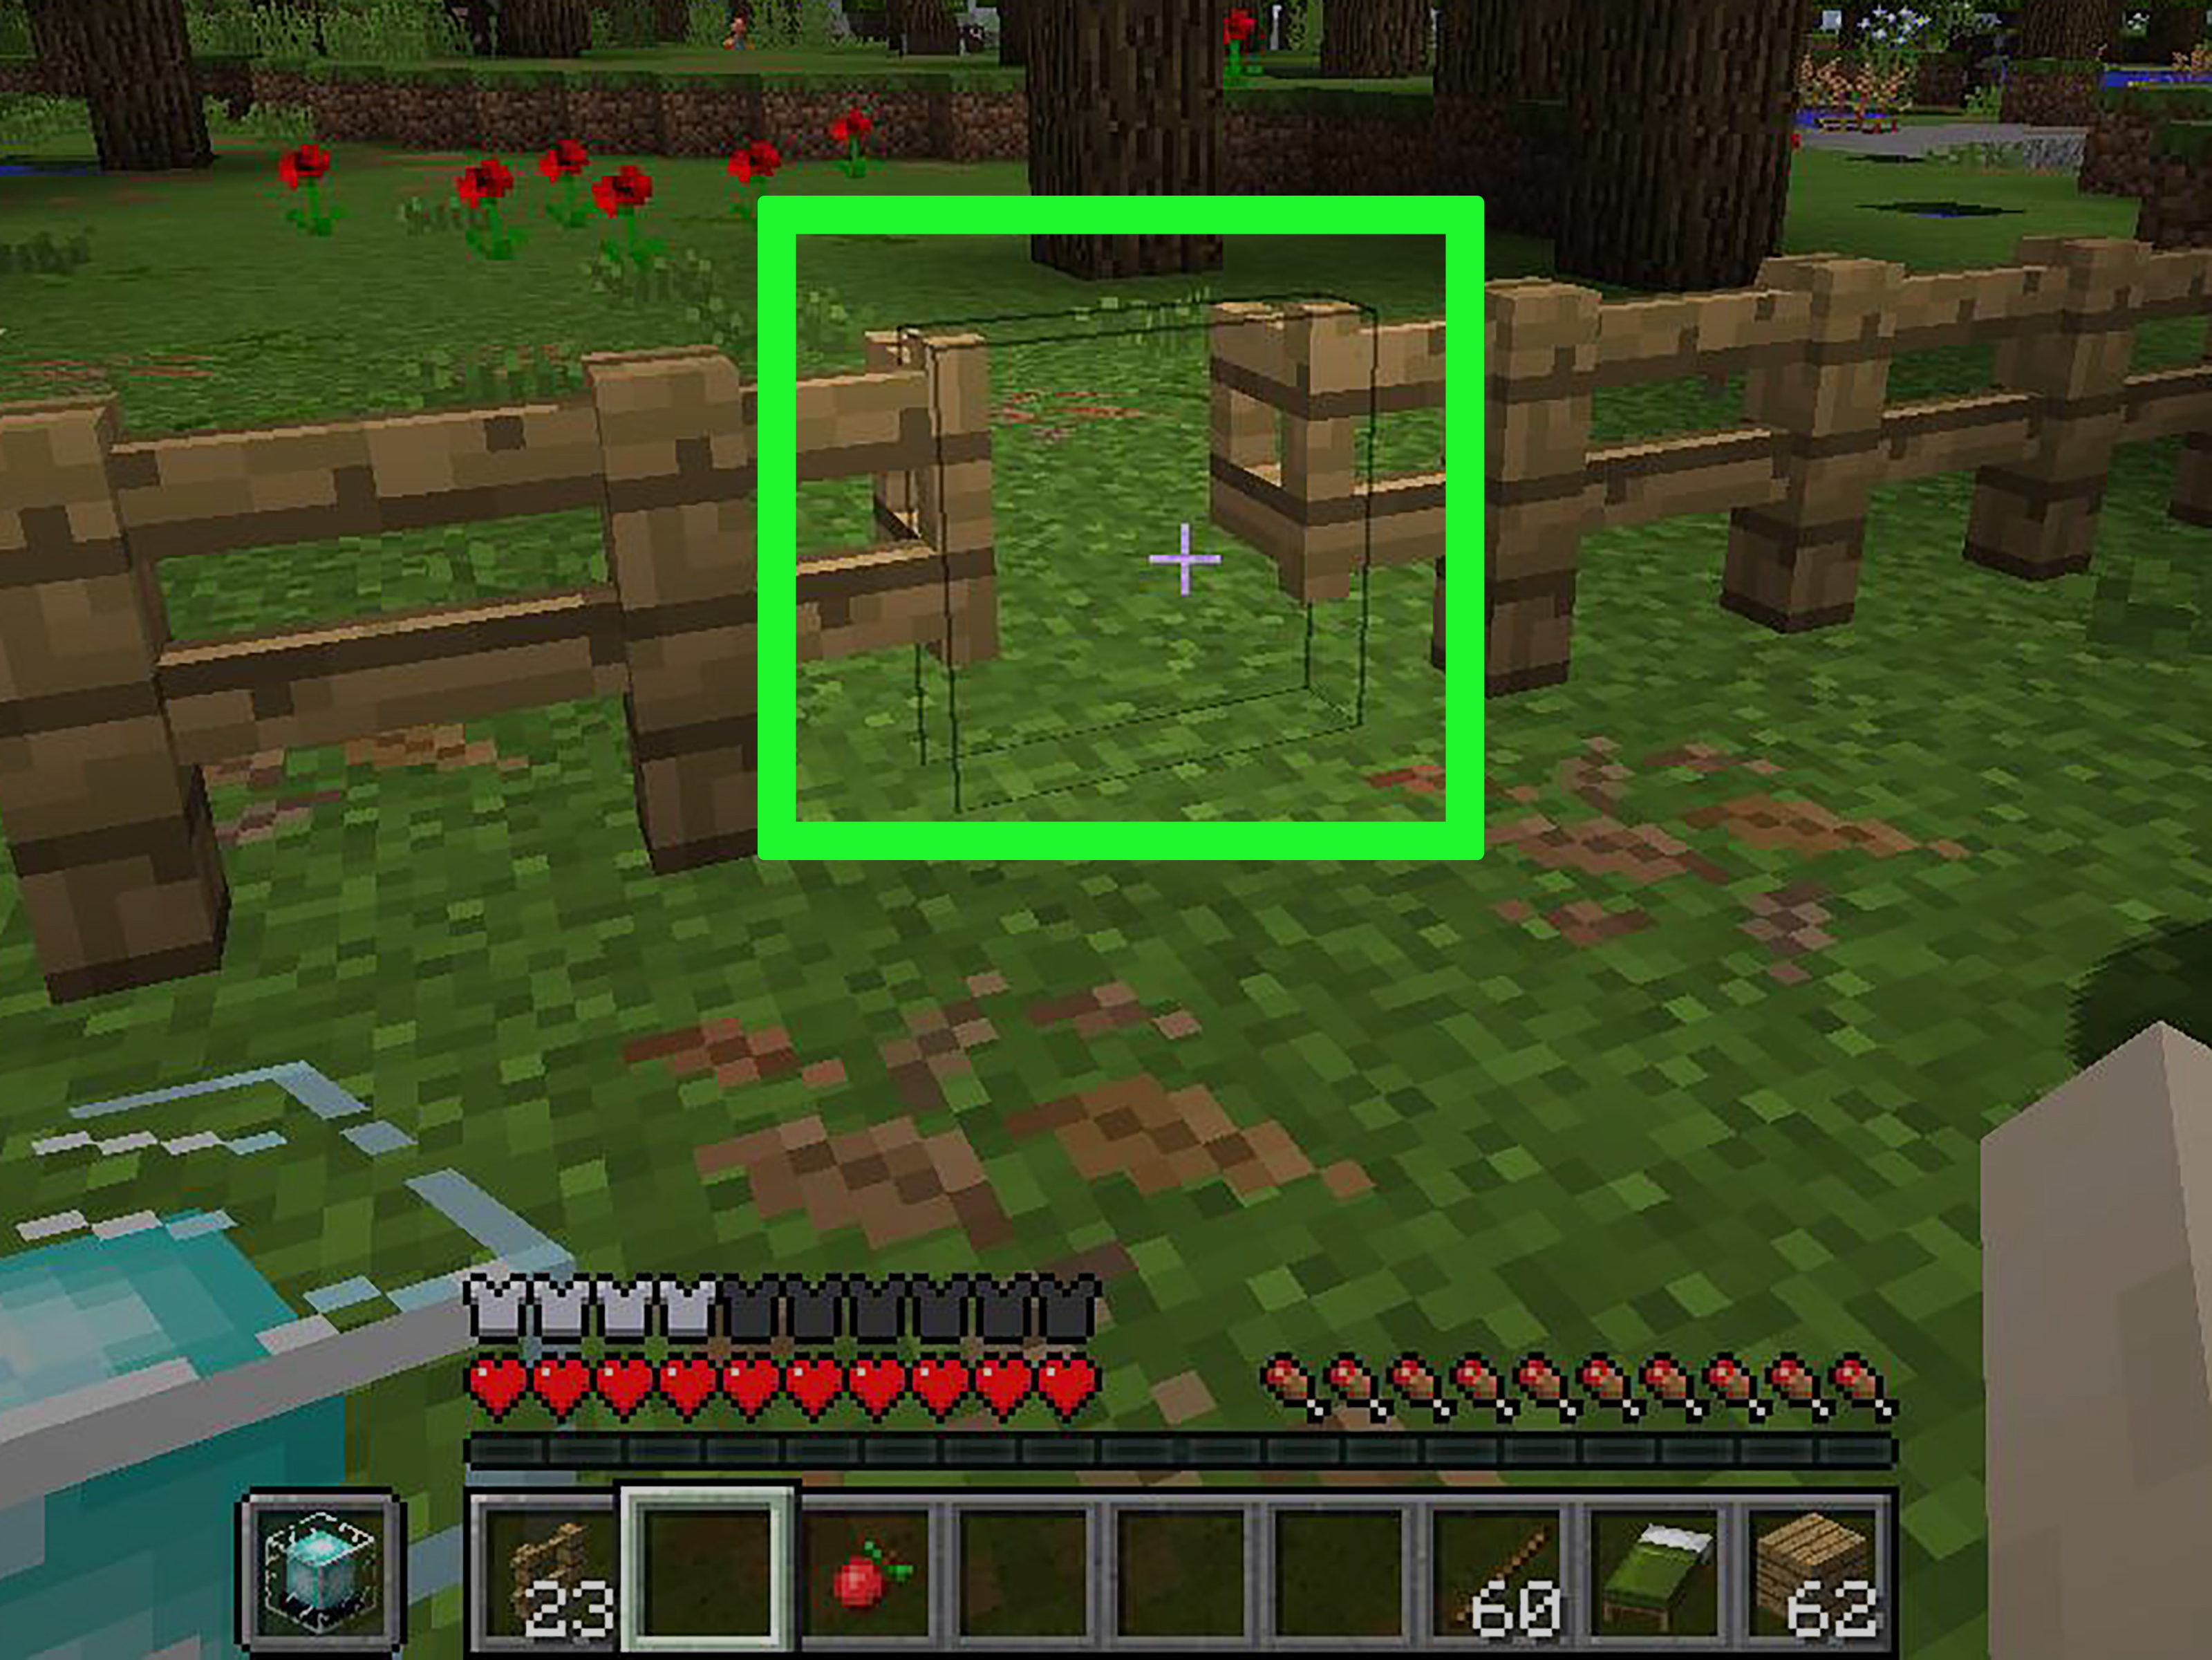
Now go to the area where you want your entrance. Build your fence line first, but leave a one-block gap where the gate should go. Then place the fence gate in that opening.
If placed correctly, the gate will sit neatly between the fences and connect visually with them. This is ideal for animal pens, crop borders, house pathways, or stable entrances. You can also place a gate by itself, but it is most effective when integrated into a fenced boundary.
Example: if you are building a cow pen, create a rectangular fence perimeter and leave one block open near the front corner. Place the gate there so you can enter, feed, breed, and leave without needing to jump over the fence every time like a caffeinated acrobat.
Step 9: Open and Test the Gate
Interact with the gate to open it. Interact again to close it. That is the basic use, but testing matters. Make sure it swings the way you expect, fits your path, and does not create an awkward bottleneck in your build.
This is especially important in animal areas. If the gate opens directly into a crowd of sheep, cows, or pigs, you may accidentally let them spill out as soon as you enter. A smart fix is to give yourself a little space inside the gate, or use a double-entry setup with two gates and a small holding area between them.
Step 10: Upgrade the Gate with Smarter Building Tricks
Once you understand the basic gate, you can make it much more useful. Here are a few practical upgrades:
- Add a path block or slabs leading to the entrance so the gate feels intentional.
- Use redstone if you want a gate that opens as part of a mechanism.
- Pair it with fences, walls, or landscaping for a cleaner entrance design.
- Build a double-gate buffer zone for animals, so nothing escapes when you step in.
- Use it decoratively in stalls, barns, courtyards, gardens, and custom house fronts.
Fence gates are also surprisingly useful in advanced builds. Some players use open fence gates in trick designs involving lava, water, mob movement, or hidden bases. So even though the recipe is simple, the block itself has more creative value than beginners often realize.
Why Fence Gates Matter More Than New Players Think
At first glance, a fence gate feels like a tiny quality-of-life item. Then you start playing survival seriously and realize it solves a bunch of annoying problems at once. It gives you controlled access, keeps mobs or animals in place, makes your base look cleaner, and saves time on everyday movement.
That matters because Minecraft is a game of repetition. You do not open a gate once. You open it hundreds of times while harvesting crops, breeding animals, trading with villagers, sorting your builds, or running back from a cave with one heart and a deeply personal feud against skeletons.
Common Mistakes When Making a Gate in Minecraft
Using the Fence Recipe by Accident
This is the classic mistake. If you swap the positions of the sticks and planks, you get fences instead of a gate. Not a disaster, but not what you wanted either.
Forgetting the Crafting Table
You need the full 3×3 crafting grid for a fence gate. The small inventory crafting area is not enough.
Choosing the Wrong Placement
If the gate is in a cramped corner, it can be annoying to use. Leave yourself room to move naturally through the entrance.
Making a Pen with Only One Layer of Security
If animals crowd the gate, they can rush the opening. A little airlock-style entry with two gates is much safer for packed pens.
Fun and Useful Fence Gate Ideas
Once you know how to craft one, try using gates in more creative ways:
- Build a horse stable with matching spruce fences and gates
- Create a cottage garden with cherry fence gates
- Use mangrove gates around a swamp house walkway
- Design a redstone-controlled barn entrance
- Make a hidden base entrance using open fence gates in a trap design
One fun fact: fence gates can interact with redstone and even wind charges, which means they are not just decorative. They can become part of a functional build system. That tiny little gate can be the difference between a static base and one that feels alive.
500-Word Experience Section: What It Feels Like to Use Gates in Real Minecraft Survival
The first time most players really appreciate a fence gate is not during crafting. It is during a small disaster. Maybe you finally bred your first cows, proudly built a fence around them, and then realized there was no entrance. So you jumped over the fence, fed the animals, turned around to leave, and somehow three cows, two sheep, and one pig escaped like they had been planning a prison break all week. That is the moment the humble gate stops being “just another block” and starts feeling like one of the smartest quality-of-life items in the game.
In early survival, fence gates make a base feel organized. Without them, your animal pens look temporary, your gardens feel awkward, and your movement around the base becomes clunky. With them, everything suddenly makes sense. You have an actual front entrance to the wheat field. The cow pen has a clean access point. The horse enclosure looks intentional instead of improvised. It is a tiny upgrade, but it changes the rhythm of how your base works.
As your world grows, the usefulness only gets bigger. A single starter gate turns into multiple gates for farms, villager trading halls, decorative courtyards, and stable doors. Different wood types start to matter more, too. You stop thinking only about recipes and start thinking about style. Oak feels practical. Spruce feels sturdy. Cherry feels elegant. Mangrove feels bold. Suddenly, making a gate is not just a crafting action; it is part of your design language.
There is also a very Minecraft kind of satisfaction in hearing that quick little click when a gate opens and closes. It feels efficient. Familiar. Reliable. When you are doing repetitive survival tasks, good base flow matters. Running from your storage room to your farms, then to your animals, then back to the furnace area is smoother when your layout includes proper entrances instead of awkward jumps over fences. Small friction adds up in long play sessions, and the gate removes a lot of it.
Experienced players also learn that fence gates are more versatile than they look. They are useful in mob farms, hidden entrances, redstone tricks, and decorative builds. They can look rustic, cozy, fancy, or even slightly dramatic depending on what surrounds them. A gate at the front of a tiny farm says “starter survival world.” A row of matching gates in a detailed stable says “this player has a plan.”
That is really the charm of Minecraft building. The game rewards simple blocks used well. A fence gate is cheap, small, and easy to ignore, but it solves practical problems and improves the look of almost any structure. Once you get used to building with gates, you start adding them everywhere, and honestly, that is a good instinct. In Minecraft, a good entrance is not just convenient. It is a sign that your world is becoming a place, not just a pile of blocks.
Final Thoughts
Making a gate in Minecraft is easy, but using it well is what levels up your build. With just four sticks, two planks, and a crafting table, you can create a fence gate that keeps your pens organized, your base accessible, and your builds much more polished.
If you are just starting out, make one simple oak gate and get your farm working. If you are more advanced, use wood variants, redstone, and smarter layouts to turn basic entrances into design features. Either way, learning how to make a gate in Minecraft is one of those small skills that keeps paying off every single time you play.