I have a confession: I used to think “seasonal decor” meant “owning an impressive collection of stuff I only touch once a year.”
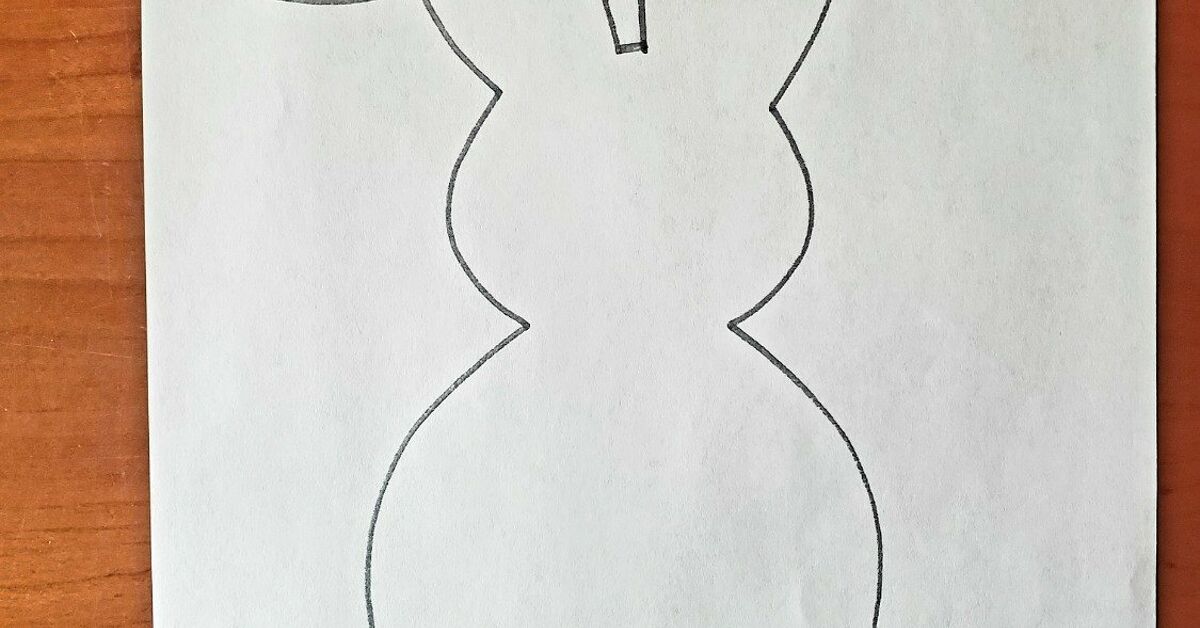
Then I discovered the magic of a simple clipart bunny outline. One humble bunny silhouette can become a garland,
a framed print, a porch sign, a table centerpiece, and (if you’re feeling fancy) the reason your neighbors start “casually” asking
if you sell your crafts on the side.
This post walks you through exactly how I turned a basic bunny outline into cute Easter bunny decor that looks
store-bought (but costs “I found this in my craft drawer” money). I’ll share what worked, what didn’t, and a few shortcuts that
saved my sanitybecause crafting is supposed to be relaxing, not an Olympic event.
Why a Clipart Bunny Outline Is the Ultimate DIY “Cheat Code”
A clean bunny outline is essentially a reusable blueprint. It’s simple enough to cut by hand, but bold enough to read from across
the room. That makes it perfect for:
- Fast cutting (even if you’re allergic to complicated shapes)
- Easy scaling (tiny gift tags to giant door hangers)
- Endless styles (farmhouse, modern, pastel, minimalist, vintage)
- Low-risk creativity (you can dress the bunny up without re-drawing it every time)
Materials I Used (and Smart Substitutions)
You can make this DIY bunny decor with whatever you have on hand. Here’s my “nice-to-have” list plus budget swaps.
Core supplies
- Bunny outline (clipart or template you can print)
- Cardstock (65–110 lb is ideal for clean edges)
- Printer (or a local print shop if your printer is in a bad mood)
- Scissors and/or craft knife + cutting mat
- Adhesive: glue stick, double-sided tape, or hot glue
For sturdier decor (optional)
- Foam board (quick, lightweight) or thin plywood (durable)
- Acrylic paint + small foam roller or brush
- Sealer (matte spray sealer or brush-on sealer)
For “cute factor upgrades”
- Pom-poms or cotton balls (tail, obviously)
- Ribbon, twine, or jute (garlands and hangers)
- Scrapbook paper (patterns without complicated art skills)
- Washi tape (instant personality)
- Faux florals (for wreaths and sign corners)
Step-by-Step: Turning a Bunny Outline Into Decor That Looks Boutique
Step 1: Choose a Bunny Outline That Cuts Cleanly
For the most versatile printable bunny template, pick a silhouette with:
one solid outer shape, minimal skinny parts, and enough “bunny-ness” to read instantly (ears matter).
If your outline has super thin ankles or a wispy tail, it may tear when you cutask me how I know.
Step 2: Print at the Right Size (Without Guessing)
Decide what you’re making first, then size your bunny accordingly:
- Garland bunnies: 4–6 inches tall
- Framed art: 7–10 inches tall (in an 8×10 or 11×14 frame)
- Shelf sitters: 8–12 inches tall (so they don’t look like they’re hiding)
- Door hanger/porch sign: 14–22 inches tall
Printing tip: use “actual size” if you’re matching a frame, or scale by percentage if you’re making a set. I like to print one test
page on cheap paper before I commit to the fancy cardstock.
Step 3: Make a “Master Template” You Can Reuse
Before you cut your final materials, create a sturdy master template:
- Print your bunny outline on regular paper.
- Glue it onto cardstock or a cereal box panel (the unsung hero of crafting).
- Cut it out carefullythis becomes your tracing template for future projects.
This step sounds extra, but it’s the difference between “I made decor” and “I now own a bunny-decor empire.”
Step 4: Cut Like a Pro (Even If You’re Not One)
For crisp edges:
- Scissors: keep your hand steady, turn the papernot your wrist.
- Craft knife: use a fresh blade and make several light passes instead of one dramatic slice.
- Batch cutting: stack 2–3 sheets of cardstock and cut at once (any more and your edges get fuzzy).
Step 5: Add Depth (So It Doesn’t Look Like Flat Clipart)
This is where “cute” becomes “wow.” Choose one of these upgrades:
- Layering: mount the bunny on a slightly larger backing shape (offset in a contrasting color).
- Texture: use linen-look cardstock, kraft paper, or light canvas fabric.
- Pattern: cut the bunny from patterned scrapbook paper for instant charm.
- Tail detail: hot glue a pom-pom or cotton ball where a tail would logically exist.
3 Easy Bunny Decor Projects I Made With the Same Outline
1) The “Looks Expensive” Framed Bunny Silhouette
This is the fastest route to “I decorate” credibility.
- Cut one bunny from black cardstock (classic silhouette) or pastel (soft spring vibes).
- Cut a circle/oval backing in a patterned paper (think gingham, florals, subtle dots).
- Layer onto white cardstock, then place in a frame.
- Add a tiny bow at the bunny’s neck or a pom-pom tail for dimension.
Styling note: if your home leans modern, keep it monochrome. If your home leans cozy, add texture (linen paper, kraft, or a soft
floral print).
2) Bunny Garland With Pom-Pom Tails
A bunny garland is basically instant Easter. It’s also oddly satisfying to make.
- Cut 8–12 bunnies from cardstock.
- Glue a small pom-pom tail on each bunny (centered near the lower back).
- Punch holes near the top of the ears (or tape bunnies to twine from behind).
- String onto twine or ribbon, spacing evenly.
Pro move: alternate solids and patterns, or alternate “facing left” and “facing right” bunnies for a playful look.
3) A Bunny “Shelf Sitter” Sign (Lightweight, No Power Tools)
Want a chunkier look without woodworking? Foam board is your best friend.
- Trace your bunny template onto foam board and cut with a craft knife.
- Paint the edges first (it makes the whole thing look more finished).
- Cover the front with patterned paper (use adhesive, then smooth gently).
- Seal with a clear matte sealer if you want extra durability.
- Hot glue a simple stand to the back (a folded strip of foam board works).
Bonus Ideas: 9 Ways to Use a Bunny Outline (So You Get Your Money’s Worth)
- Gift tags: mini bunnies with names written on the belly
- Cake toppers: bunny silhouette on a skewer (use cardstock + glue)
- Window decor: cut from removable vinyl or static-cling sheets
- Table place cards: fold cardstock, attach a tiny bunny, write names
- Stencil decor: paint bunnies onto canvas drop cloth or paper placemats
- Wreath accent: attach a bunny silhouette to a grapevine wreath
- Tiered tray decor: small bunny + mini florals + pastel eggs
- Door hanger: enlarge the outline and add a bow + faux greenery
- Kids’ craft station: let them “decorate the bunny” with stickers and crayons
If You Use a Cutting Machine (Cricut/Silhouette): Quick Tips
If you have a cutting machine, you can turn a bunny outline into a clean cut file workflow:
- Keep the outline simple: fewer nodes = cleaner cuts.
- Use Print Then Cut for colored/patterned bunnies printed at home.
- Do a quick test cut on scrap cardstock before cutting your “good paper.”
Don’t have a cutting machine? You’re still winning. Hand-cut bunnies have charming “I made this with love” energy. (That’s what we
call it. Not “slightly uneven ears.”)
Troubleshooting: What Went Wrong and How I Fixed It
Problem: My bunny edges look rough
- Use sharper scissors or a fresh craft blade.
- Switch to heavier cardstock so it doesn’t crumple.
- Cut slower and rotate the paper as you cut curves.
Problem: My printed bunny is the wrong size
- Double-check print settings (“fit to page” can shrink designs).
- Write your target height on the template and scale intentionally next time.
- Print a “draft” on plain paper first to confirm sizing.
Problem: Glue wrinkles my paper
- Use a glue stick or double-sided tape for smoother results.
- Apply adhesive to the backing surface, then press the paper down gently.
- Burnish with a gift card wrapped in a soft cloth.
How I Styled the Finished Bunny Decor (Without Buying New Stuff)
The easiest way to make DIY decor look cohesive is repeating a few details:
- Color palette: 2–3 main colors (e.g., cream + sage + blush)
- One repeated texture: twine, linen paper, or wood tones
- One repeated shape: bunnies + eggs + a simple floral
I placed my framed bunny on the mantel, hung the garland below, and added a small bowl of pastel eggs. Simple. Springy. No clutter
avalanche.
Clipart and Template Use: A Quick Reality Check
Not all “free” clipart is free for everything. If you’re crafting for your own home, many templates are fine for personal use. If
you plan to sell items, you’ll want to confirm the clipart license allows commercial use. When in doubt, choose clipart explicitly
labeled for commercial use or use public-domain/clearly licensed artwork.
Conclusion: One Bunny Outline, Unlimited Easter Decor
If you’re on the fence, start with the garland. It’s quick, forgiving, and wildly cheerful. Then make the framed silhouette when
you’re feeling confident. And if you make a foam board shelf sitter, congratulationsyou are now “the person who crafts,” whether
you meant to be or not.
The best part? You can pack all of this away flat, reuse your master template next year, and pretend you’re effortlessly prepared
for Easter like some kind of seasonal wizard.
My Experiences Making Clipart Bunny Outline Decor (The Real Story)
The first time I tried this, I assumed the hardest part would be “art.” Plot twist: it was my printer. I printed a bunny outline
and immediately got humbled by the classic combo of faint ink and paper that mysteriously curled like it had places to be. After a
quick reality check, I switched to “draft” mode for test prints and saved the good settings for the final cardstock. That one move
alone made everything feel smootherlike I was crafting on purpose instead of improvising through chaos.
My second lesson was about scale. I printed the bunny “about the size of a bunny,” which is not a measurement system recognized by
any craft community. The bunnies came out too small for a mantel garland, so from across the room it looked like I was celebrating
Easter with a string of vaguely rabbit-shaped confetti. I reprinted at a consistent height (around 5 inches), and suddenly the
garland had that cute, intentional look you see in styled photos. That’s when I started writing sizes directly on the master
templatefuture me deserves fewer surprises.
Cutting was… meditative, until it wasn’t. On bunny number six, my scissors started chewing the cardstock instead of slicing it.
I swapped to sharper scissors and slowed down on the curves, turning the paper rather than twisting my wrist. That tiny change
cleaned up the ear edges and made each bunny look crisp. For the ones I’d already cut, I “rescued” them by adding a backing layer
in a slightly larger shape. Not only did it hide imperfections, it added depthaccidental design win.
The best upgrade I tried was the humble pom-pom tail. I thought it might look too cutesy, but it’s the detail everyone notices
first. I tested cotton balls, too. They look adorable, but they shed like a tiny snowstorm if you handle them a lot. Pom-poms
held up better for garlands that get stored and reused. I also learned to hot glue tails after the bunnies are fully assembled,
not beforeotherwise I kept flattening the pom-poms while pressing layers together, which is basically the craft equivalent of
stepping on fresh frosting.
My favorite “adult crafting” trick was limiting the palette. When I used every pastel I owned, my decor looked like an Easter egg
exploded. When I picked three tones (cream, sage, and a soft blush), the whole setup looked calmer and more expensive. I used the
same ribbon on the garland and the framed silhouette, and suddenly everything matched like it was planned. It wasn’t planned. But
it looked plannedand that’s the goal.
Last lesson: keep your master bunny template. Seriously. I nearly tossed mine because it had pencil marks and glue smudges, but
it’s now my “crafting shortcut.” Every year, I trace it onto whatever material I’m usingcardstock, foam board, even kraft paper
and I can knock out a coordinated set of bunny decor in an afternoon. If you do nothing else from this post, do that. Your future
Easter self will feel powerful.