A pantry makeover sounds like one of those dreamy home projects that belongs on a weekend TV show: cheerful music, matching jars, a professional organizer gliding through the kitchen with laser focus, and a family suddenly discovering they owned seven unopened bags of brown sugar. But in real life, a pantry makeover is less about perfection and more about function. It is about opening the door and not being attacked by a rogue cereal box. It is about finding the pasta before the water boils away. It is about creating a pantry that helps you cook faster, shop smarter, waste less food, and maybe even feel a little smug every time you reach for the peanut butter.
The good news? You do not need a mansion-sized walk-in pantry, custom cabinetry, or a budget that makes your wallet cry softly in the corner. A pantry makeover can work for a cabinet, a closet, a freestanding shelf, a deep drawer, or a tiny corner of the kitchen. The secret is not buying every clear container on the internet. The secret is designing a pantry around how your household actually eats, shops, cooks, snacks, and forgets about half-used bags of tortilla chips.
This guide walks you through a practical, beautiful, and realistic pantry makeover from start to finish. We will cover decluttering, cleaning, zoning, containers, labels, shelf layout, small pantry ideas, food safety, maintenance habits, and real-life experience from the trenches of pantry chaos. By the end, your pantry will not just look better. It will work better.
What Is a Pantry Makeover?
A pantry makeover is the process of redesigning, reorganizing, and refreshing your food storage area so it becomes easier to use every day. It may include removing expired food, wiping shelves, grouping ingredients by category, adding bins or baskets, using clear containers, improving lighting, labeling items, adjusting shelf heights, or creating dedicated zones for snacks, baking supplies, canned goods, breakfast items, and dinner staples.
In simple terms, a pantry makeover turns “I know we bought cumin sometime during the last presidential administration” into “It is right here, labeled, visible, and not hiding behind three cans of beans.”
The best pantry makeover is not just pretty. A pantry that looks gorgeous for one photo and collapses into chaos after the next grocery run is not a system; it is a stage set. A truly successful pantry is easy to maintain even when life is busy, kids are hungry, dinner is late, and someone puts the crackers back in the pasta zone like a tiny domestic criminal.
Step 1: Empty Everything First
The first step in any serious pantry makeover is to take everything out. Yes, everything. Not just the easy items in front. Not just the boxes with attractive packaging. Pull out the cans, spices, sauces, baking ingredients, snack bags, mystery jars, bulk foods, oils, breakfast items, and that one bag of lentils you bought when you briefly became “a lentil person.”
Emptying the pantry gives you a clear picture of what you own, what you overbuy, what you never use, and what has quietly expired while living rent-free in the back corner. It also helps you measure the real space you have. Many pantries feel too small because they are storing too many duplicates, old items, bulky packaging, or products that do not belong there.
Sort Everything Into Categories
Once everything is out, sort items into practical groups. Common pantry categories include:
- Breakfast foods
- Snacks
- Baking ingredients
- Pasta, rice, grains, and beans
- Canned goods
- Spices and seasonings
- Oils, vinegars, and sauces
- Meal prep staples
- Kids’ lunchbox items
- Backstock or bulk items
This step is where the pantry starts telling you the truth. Maybe you have five kinds of pasta but no sauce. Maybe you own enough tea to hydrate a small village. Maybe your baking shelf contains four open bags of flour because each one was hiding behind a different box. Do not judge yourself. The pantry is not a courtroom. It is a storage space asking for better management.
Step 2: Check Dates and Food Quality
Before putting anything back, check expiration dates, “best by” dates, packaging condition, and freshness. Shelf-stable foods can last a long time when stored properly, but they are not immortal. Toss items that are expired beyond comfort, stale, contaminated, leaking, bulging, badly dented, torn open, or suspicious in smell or texture.
For dry goods such as flour, rice, oats, cereal, nuts, and crackers, inspect for pests, unusual odors, or clumping caused by moisture. Spices do not usually become unsafe simply because they are old, but they lose flavor over time. If your paprika smells like red dust and regret, it is probably time to replace it.
Use the First-In, First-Out Rule
A smart pantry makeover should reduce food waste. One easy habit is the first-in, first-out method: place older items in front and newer items behind them. This helps your household use what is already open or closer to its date before starting something new. It is the pantry version of “no ingredient left behind.”
Step 3: Clean the Pantry Like You Mean It
With everything removed, clean the pantry before reorganizing. Vacuum crumbs, wipe shelves, clean corners, and remove sticky spills. If the pantry has shelf liner that is damaged, peeling, or collecting crumbs like a tiny archaeological site, replace it. A clean surface makes the whole makeover feel fresh and helps prevent pests.
For wood shelves, use a gentle cleaner appropriate for the finish. For wire shelves, wipe the bars and check that small items will not tip over. For deep cabinets, clean the back wall and corners because that is where crumbs, forgotten pasta shapes, and snack dust like to retire.
Step 4: Create Pantry Zones That Match Real Life
The heart of a pantry makeover is zoning. Zones are designated areas for specific types of food or tasks. Instead of randomly placing items wherever they fit, you give every category a logical home.
For example, a family that packs school lunches may need a lunch zone with granola bars, crackers, fruit cups, sandwich bags, and nut-free snacks. Someone who bakes weekly may need a baking zone with flour, sugar, cocoa, baking soda, extracts, chocolate chips, and measuring tools. A busy cook may want a dinner zone with pasta, rice, canned tomatoes, broth, beans, and sauces grouped together.
Best Pantry Zones to Consider
- Everyday zone: Items used daily, such as coffee, cereal, oats, and peanut butter.
- Cooking zone: Rice, pasta, grains, oils, vinegars, canned tomatoes, and sauces.
- Baking zone: Flour, sugar, baking powder, cocoa, extracts, sprinkles, and decorating supplies.
- Snack zone: Chips, crackers, granola bars, popcorn, nuts, and dried fruit.
- Backstock zone: Extra unopened items bought in bulk or during sales.
- Kid-friendly zone: Approved snacks at a safe, reachable height.
- Specialty zone: Holiday ingredients, entertaining supplies, or less-used appliances.
Zones work because they reduce decision fatigue. When every item has a destination, putting groceries away becomes faster. Cooking also becomes easier because related ingredients live together instead of playing hide-and-seek across five shelves.
Step 5: Choose the Right Containers, Bins, and Baskets
Pantry storage products can be incredibly helpful, but they should serve your pantry, not boss it around. Before buying anything, measure your shelves. Measure height, width, and depth. Also measure the items you actually store. A beautiful basket is not useful if it cannot hold your family’s favorite cereal or if it turns every snack run into a wrestling match.
Clear bins are excellent for grouping snacks, packets, cans, baking supplies, and backstock because they allow you to see what is inside. Baskets add warmth and texture, especially in open pantries, but they work best with labels because you cannot always see the contents. Airtight containers are ideal for dry goods like flour, sugar, rice, pasta, oats, and cereal, especially if original packaging is flimsy or hard to reseal.
When to Decant Food Into Containers
Decanting means transferring food from original packaging into reusable containers. It can make a pantry look clean and consistent, but it should be done thoughtfully. Decant foods you use regularly and can identify easily: flour, sugar, rice, pasta, oats, cereal, lentils, and baking staples. Keep cooking instructions, expiration dates, or allergen information when needed by cutting out the label or writing the date on the container.
A common mistake is decanting everything because it looks beautiful online. Then two weeks later, nobody knows whether the mystery beige powder is pancake mix, bread flour, or powdered optimism. Label containers clearly and include dates when appropriate.
Step 6: Use Vertical Space
Most pantries have wasted vertical space. Tall shelves often hold short items, leaving empty air above cans, jars, and boxes. A pantry makeover should make that air work for you.
Use shelf risers for cans, spices, mugs, or small jars. Add stackable bins where appropriate. Install under-shelf baskets for wraps, bags, napkins, or lightweight snacks. Use tiered spice racks so every jar is visible. Add hooks or door-mounted racks if the pantry door has unused space. In a small pantry, the door can become prime real estate for spices, packets, foil, plastic wrap, or small bottles.
Deep Shelf Solutions
Deep shelves are both a blessing and a trap. They hold a lot, but they also create a shadowy back zone where ingredients go to be forgotten. Use long clear bins with handles so you can pull out a whole category at once. Turntables work well for oils, vinegars, condiments, nut butters, and sauces. Can risers help you see what is in the back instead of buying another can of chickpeas every week until your pantry becomes a bean museum.
Step 7: Label Everything That Needs a Label
Labels are not just for people who own label makers and alphabetize their soup. Labels help everyone in the household maintain the system. They tell people where items belong, which is especially useful after grocery shopping.
Use labels for broad categories rather than overly specific ones. “Baking” is easier to maintain than separate labels for “powdered sugar,” “brown sugar,” “cake flour,” and “emotional support chocolate chips.” For bins, labels such as snacks, breakfast, pasta, canned goods, baking, grains, sauces, and backstock are usually enough.
You can use printed labels, chalkboard labels, adhesive tags, clip-on basket labels, or simple masking tape and a marker. A pantry makeover does not need calligraphy. It needs clarity.
Step 8: Place Items Based on Frequency of Use
A beautiful pantry can still be annoying if the items you use every day are stored on the top shelf behind the emergency fondue pot. Place frequently used items at eye level or within easy reach. Store heavy items, bulk goods, and small appliances on lower shelves. Keep lightweight backstock or occasional-use items higher up.
For families with children, create a snack bin at kid-friendly height if appropriate. This can reduce the daily chorus of “Where are the snacks?” by approximately 87 percent, depending on the child and the snack inventory. Keep sweets, special treats, or allergy-sensitive foods in a separate area if your household needs that structure.
Step 9: Make the Pantry Fit Your Cooking Style
The best pantry makeover reflects your real kitchen habits. If you cook mostly quick weeknight dinners, prioritize meal-building staples: pasta, rice, beans, canned tomatoes, broth, sauces, tortillas, and seasonings. If you love baking, create a generous baking zone. If you meal prep, group containers, grains, protein add-ins, and sauces together. If you entertain often, reserve space for crackers, serving napkins, sparkling drinks, and appetizer ingredients.
Your pantry should not copy someone else’s lifestyle. A pantry designed for a smoothie-loving minimalist will not work for a family of five with sports snacks, school lunches, bulk cereal, and a Costco membership that gets a little too much exercise.
Small Pantry Makeover Ideas
A small pantry can still be mighty. In fact, small pantries often become more efficient because there is no room for clutter to hide. The key is to edit aggressively and use every inch with intention.
Use Matching Bins for Visual Calm
Matching bins can make a small pantry feel less chaotic, even if the contents are ordinary groceries. Choose bins that fit the shelf depth and height. Clear bins make it easy to see what you have, while woven or solid bins create a cleaner look for open shelving.
Install Door Storage
If your pantry has a door, use it. A slim over-the-door rack can hold spices, sauces, packets, snacks, wraps, or small jars. This keeps narrow items from getting lost on deeper shelves.
Remove Bulky Packaging
Boxes take up a surprising amount of space. Remove individually wrapped snacks from bulky cardboard and place them in a bin. Decant dry goods when it makes sense. Flatten recyclable packaging immediately so it does not become pantry clutter.
Use Turntables in Corners
Corners are where bottles and jars disappear. A turntable lets you spin items forward instead of knocking over three sauces to reach one bottle of vinegar.
Walk-In Pantry Makeover Ideas
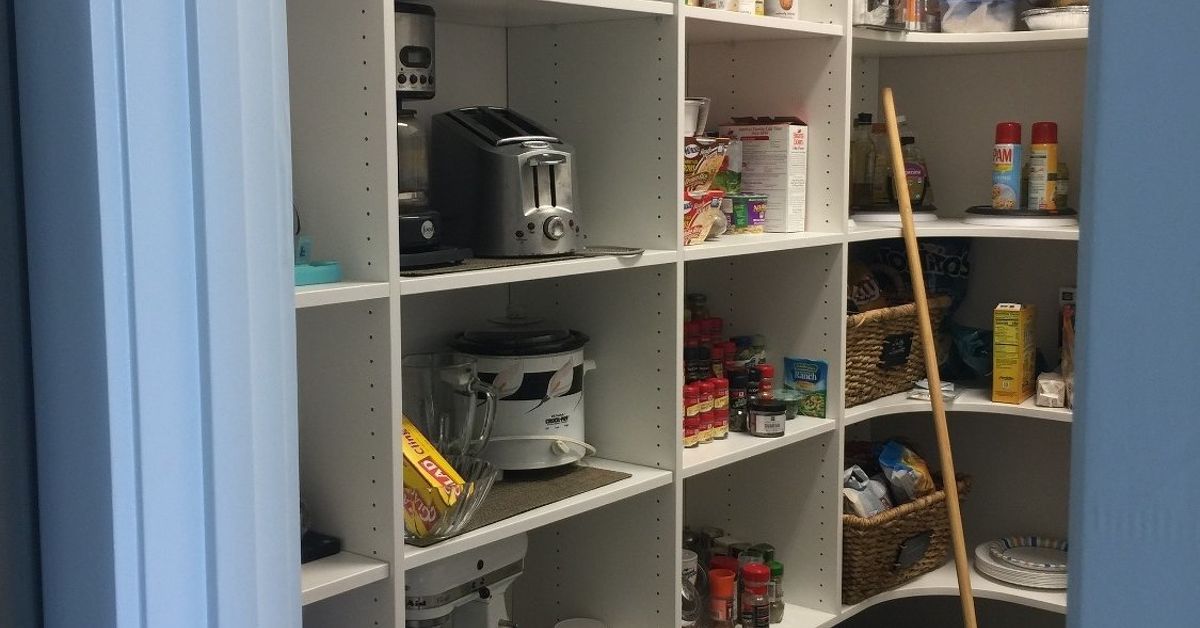
A walk-in pantry offers more storage, but it can also become a dumping ground if it lacks structure. Divide the pantry into sections by wall, shelf, or task. Use one area for everyday foods, another for bulk backstock, another for appliances, and another for entertaining or serving pieces.
Good lighting is especially important in a walk-in pantry. If the space is dim, add battery-powered lights, LED strips, or brighter fixtures where possible. A pantry should not feel like a cave where snacks go missing.
For larger pantries, consider adding a small counter area if space allows. This can become a landing zone for grocery bags, small appliance use, coffee supplies, or meal prep. Keep the counter mostly clear so it does not become a parking lot for random household items.
Budget-Friendly Pantry Makeover Tips
You do not need to buy a full set of expensive organizers to transform your pantry. Start by using what you already own. Shoeboxes, jars, baskets, trays, file organizers, small crates, and drawer dividers can all become pantry tools. Wash and reuse glass jars for dry goods. Use simple adhesive labels or painter’s tape. Rearranging shelves and grouping items costs nothing but time.
If you do buy products, purchase slowly. Start with the categories that cause the most frustration. Maybe you need can risers, a spice rack, or three deep bins for snacks. Solve the biggest problems first instead of shopping for an imaginary pantry personality.
Common Pantry Makeover Mistakes to Avoid
Buying Organizers Before Decluttering
This is the classic mistake. Buying bins before sorting food often leads to containers that do not fit your shelves, your groceries, or your habits. Declutter and measure first. Shop second.
Over-Decanting
Decanting every single item can create more work than convenience. Keep foods in original packaging when cooking instructions, nutrition facts, or expiration dates are important.
Creating Too Many Categories
A pantry with 42 micro-categories may look precise, but it can be exhausting to maintain. Use broad, intuitive zones that your household can understand quickly.
Ignoring Maintenance
A pantry makeover is not a one-time miracle. It needs light maintenance. Spend five minutes before grocery shopping checking what you already have. Spend ten minutes monthly removing expired items, wiping crumbs, and resetting messy bins.
How to Maintain Your Pantry After the Makeover
The real success of a pantry makeover shows up weeks later. Can you still find what you need? Are groceries easy to put away? Are duplicates under control? Is the snack bin still a snack bin, or has it become a lawless kingdom of crumbs?
Use these habits to maintain order:
- Check inventory before shopping.
- Put new groceries behind older items.
- Keep categories together.
- Do a quick monthly expiration check.
- Wipe spills immediately.
- Do not overfill bins.
- Adjust zones when your habits change.
A pantry system should be flexible. If your family suddenly starts eating oatmeal every morning, give oats a better location. If nobody touches the protein bars, stop giving them prime shelf space. Your pantry should evolve with your real life.
Pantry Makeover Experience: What Actually Works in Real Life
After helping organize and analyze countless home systems, one thing becomes clear: pantry makeovers succeed when they are honest. The most beautiful pantry in the world will fail if it ignores the way people behave when they are tired, hungry, rushed, or unpacking groceries with one hand while answering a text with the other.
One practical experience is that clear containers are most useful for high-turnover foods. Flour, sugar, rice, pasta, cereal, oats, and snacks benefit from visibility because you can quickly see when supplies are low. But specialty items used only twice a year may not deserve an expensive container. They can live in a labeled bin with other occasional ingredients. This keeps the makeover affordable and prevents the pantry from becoming a showroom for containers instead of a useful food storage space.
Another real-life lesson is that snack zones need boundaries. Without a defined bin or shelf, snacks expand like they have been given a motivational speech. Chips lean into crackers, granola bars migrate into baking supplies, and suddenly nobody can find the raisins. A dedicated snack bin creates a natural limit. When the bin is full, the pantry is telling you not to buy more snacks yet. Listen to the bin. The bin has wisdom.
Deep shelves also require a different strategy than shallow shelves. In a deep pantry, loose items disappear quickly. Long bins with handles make the biggest difference because they let you pull out a whole group instead of reaching blindly into the back. This works especially well for baking supplies, pasta, breakfast foods, and backstock. A turntable is excellent for bottles and jars, but it is not magic for everything. Square and rectangular bins often use shelf space more efficiently.
Labels are another small detail with a huge payoff. Without labels, one motivated person may understand the system, but everyone else in the house treats the pantry like a guessing game. Labels turn personal organization into household organization. They do not need to be fancy. A simple printed label or handwritten tag works. The point is to remove confusion.
One overlooked experience is the importance of leaving empty space. Many people finish a pantry makeover by filling every inch because it feels efficient. But a pantry needs breathing room. Empty space allows for grocery overflow, seasonal ingredients, new products, or a temporary surplus after a sale. A pantry packed to maximum capacity looks impressive for five minutes and then becomes impossible to maintain.
Lighting also matters more than people expect. A dark pantry encourages duplicates because you cannot see what you own. Even a small battery-powered light can make the space feel cleaner and easier to use. In a walk-in pantry, lighting can be the difference between a functional storage room and a mysterious cave of forgotten noodles.
The final experience-based tip is to schedule a reset, not a rescue mission. A pantry that is ignored for a year becomes a project. A pantry checked for five minutes every week stays manageable. Before grocery shopping, scan the shelves. Toss empty boxes. Move older items forward. Add missing staples to your list. This tiny habit prevents clutter, reduces waste, and saves money because you stop buying the same ingredient again and again.
A great pantry makeover should make your kitchen feel easier. It should support weeknight dinners, lunch packing, baking, snacking, grocery planning, and everyday routines. It does not have to look perfect. It has to make sense. If you can open the pantry, find what you need, put things back without stress, and avoid buying your sixth bottle of soy sauce, the makeover has done its job beautifully.
Conclusion
A pantry makeover is one of the most satisfying home organization projects because it delivers instant results and long-term benefits. It helps you save time, reduce food waste, avoid duplicate purchases, simplify cooking, and make your kitchen feel calmer. Whether you have a tiny cabinet or a full walk-in pantry, the formula is the same: empty, sort, clean, declutter, zone, contain, label, and maintain.
The best pantry is not the one with the fanciest jars or the most dramatic before-and-after photo. It is the one that works for your real life. It holds what you use, shows what you have, and makes everyday meals easier. Start small, be practical, and build a system your household can actually keep. Your future self, standing in the kitchen on a busy Tuesday night, will be deeply grateful.