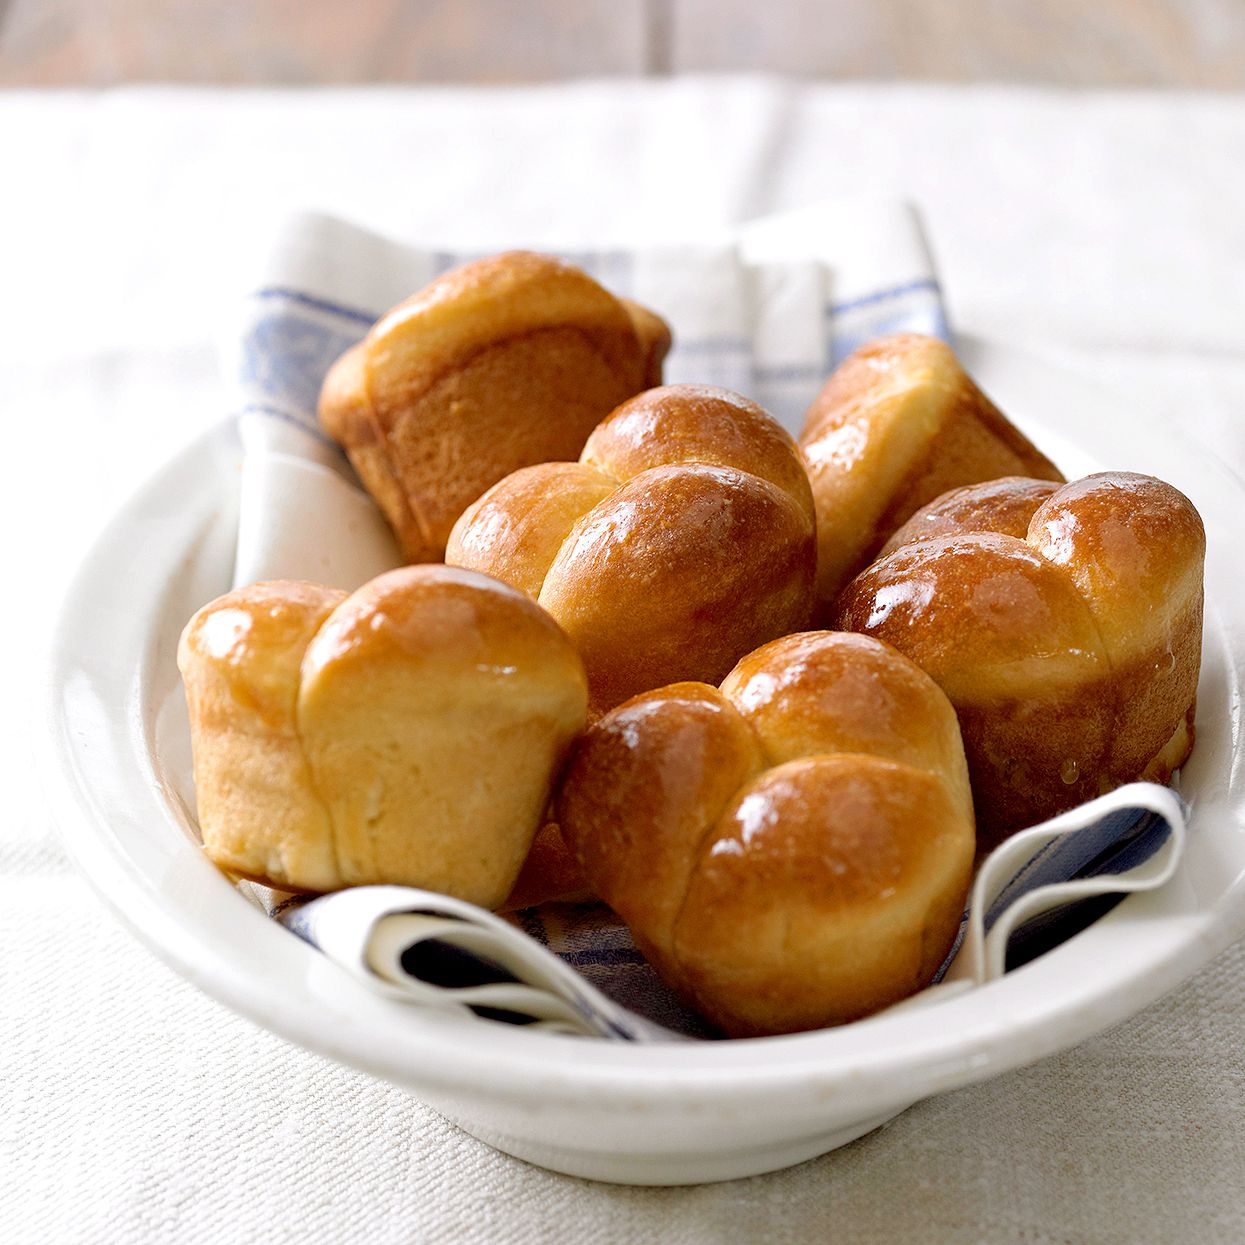
A classic dinner roll recipe is one of those kitchen treasures that makes an ordinary meal feel like somebody put on nice shoes for dinner. Soft, golden, buttery, and warm enough to fog up your glasses, homemade dinner rolls have a way of stealing attention from the roast, the soup, the holiday turkey, and occasionally the person who cooked everything else.
The beauty of this recipe is that it does not require bakery wizardry, a mysterious family heirloom starter, or a degree in “advanced gluten behavior.” It uses simple pantry ingredients: flour, yeast, milk, butter, sugar, salt, and an egg. The result is a batch of fluffy dinner rolls with tender interiors, lightly browned tops, and that irresistible pull-apart texture that makes people reach for “just one more” until the bread basket is suspiciously empty.
This guide walks you through the full process: mixing, kneading, proofing, shaping, baking, storing, freezing, reheating, and troubleshooting. Whether you are preparing Thanksgiving dinner, Sunday supper, a cozy weeknight soup night, or a sandwich situation that deserves better than sad bread, these classic homemade dinner rolls are ready to rise to the occasion.
Why This Classic Dinner Roll Recipe Works
Great dinner rolls are all about balance. Too much flour and they become dry. Too little structure and they spread like they lost confidence. Too much heat and the yeast panics. Too little patience and the dough refuses to become fluffy. This recipe keeps things simple while respecting the science that makes yeast dough behave.
Milk adds richness and tenderness. Butter gives flavor and a soft crumb. Sugar lightly feeds the yeast and rounds out the flavor without turning the rolls into dessert. An egg helps create structure and color, while all-purpose flour keeps the dough soft and manageable. The final brush of melted butter is not optional in spirit, even if technically you could skip it. But why would you do that to yourself?
Ingredients for Soft Homemade Dinner Rolls
Main Ingredients
- 1 cup whole milk, warmed to about 105°F to 110°F
- 2 1/4 teaspoons active dry yeast or instant yeast
- 1/4 cup granulated sugar
- 1 large egg, room temperature
- 1/4 cup unsalted butter, melted and slightly cooled
- 3 1/2 to 4 cups all-purpose flour
- 1 1/2 teaspoons fine salt
- 2 tablespoons melted butter, for brushing
Optional Flavor Boosters
- 1 tablespoon honey for a lightly floral sweetness
- 1/2 teaspoon garlic powder for savory dinner rolls
- 1 tablespoon chopped fresh herbs, such as rosemary, thyme, or parsley
- Flaky salt for finishing
For the softest dinner rolls, whole milk is the friend you want in the kitchen. Lower-fat milk will still work, but whole milk gives the dough a richer flavor and a more tender texture. If you use instant yeast, you may mix it directly with the flour. If you use active dry yeast, dissolve it first in warm milk with a little sugar to make sure it wakes up from its tiny yeast nap.
Step-by-Step Instructions
Step 1: Activate the Yeast
Pour the warm milk into a large mixing bowl. Add the yeast and 1 tablespoon of the sugar. Stir gently and let it sit for 5 to 10 minutes, until the mixture looks foamy on top. That foam is your signal that the yeast is alive, awake, and ready to do its bread-lifting job.
If nothing happens after 10 minutes, your yeast may be expired, your milk may have been too hot, or your kitchen may be hosting a tiny bread tragedy. Start over with fresh yeast before adding the rest of the ingredients. It is much better to discover this early than after you have spent an afternoon lovingly staring at dough that refuses to rise.
Step 2: Mix the Dough
Add the remaining sugar, egg, melted butter, salt, and 2 cups of flour to the yeast mixture. Stir with a wooden spoon or use a stand mixer fitted with a dough hook. Gradually add more flour, 1/2 cup at a time, until a soft dough forms.
The dough should be slightly tacky but not wet. A little stickiness is good because soft dough makes soft rolls. If you keep adding flour until the dough feels completely dry, the finished rolls may turn out heavy. Think of the dough as a friendly handshake, not a bag of sand.
Step 3: Knead Until Smooth
Knead the dough for 6 to 8 minutes by hand or about 5 minutes in a stand mixer on medium-low speed. The dough should become smooth, elastic, and springy. If kneading by hand, lightly flour the surface as needed, but avoid dumping flour everywhere like you are trying to create a winter scene.
A properly kneaded dough should stretch without tearing immediately. You do not need to chase perfection, but you do want the dough to feel cohesive and elastic. Kneading develops gluten, which helps the dinner rolls rise tall instead of collapsing into buttery little pancakes.
Step 4: First Rise
Place the dough in a lightly greased bowl and turn it once so the surface is coated. Cover with plastic wrap, a clean towel, or a reusable bowl cover. Let it rise in a warm spot for 60 to 90 minutes, or until doubled in size.
A warm kitchen helps, but do not put the dough somewhere hot. Yeast enjoys warmth; it does not enjoy being roasted. A good spot is inside a turned-off oven with the oven light on, or on the counter away from drafts. When the dough has doubled, press it gently with two fingers. If the indentation remains briefly before slowly filling in, it is ready.
Step 5: Shape the Rolls
Lightly grease a 9×13-inch baking pan. Punch down the dough gently to release excess gas, then turn it onto a lightly floured surface. Divide it into 12 equal pieces for large rolls or 15 pieces for smaller rolls.
To shape each roll, pull the edges of a dough piece toward the center, pinch them underneath, then roll the dough ball against the counter using a cupped hand. This creates surface tension, which helps the rolls rise smoothly and bake into round, beautiful little bread clouds.
Step 6: Second Rise
Arrange the shaped rolls in the prepared pan, leaving a little space between them. Cover and let them rise for 30 to 45 minutes, until puffy and nearly doubled. They should look soft and full, like they have had a very relaxing afternoon.
During the final 20 minutes of rising, preheat the oven to 375°F. A properly preheated oven helps the rolls spring upward quickly and brown evenly.
Step 7: Bake Until Golden
Bake the dinner rolls for 18 to 22 minutes, or until the tops are golden brown and the centers are cooked through. If using an instant-read thermometer, the interior should register around 190°F.
Remove the rolls from the oven and immediately brush the tops with melted butter. This gives them a glossy finish, a richer flavor, and the kind of aroma that causes people to wander into the kitchen pretending they were “just checking on something.”
Recipe Card: Classic Dinner Rolls
Yield
12 large rolls or 15 medium rolls
Prep Time
25 minutes
Rise Time
1 hour 30 minutes to 2 hours 15 minutes
Bake Time
18 to 22 minutes
Total Time
About 2 hours 30 minutes
Pro Tips for the Best Dinner Rolls
Use Warm, Not Hot, Liquid
Yeast is alive, which means temperature matters. Warm milk helps activate yeast, but hot milk can damage it. Aim for milk that feels warm to the touch, not steaming. A thermometer is helpful, especially for beginners.
Do Not Over-Flour the Dough
The number one reason homemade dinner rolls turn out dense is too much flour. Add flour gradually and stop when the dough is soft, elastic, and just slightly tacky. Bread dough should not feel like cookie dough. It should feel alive, stretchy, and a little bouncy.
Let the Dough Fully Rise
Rise time depends on room temperature, yeast freshness, and dough temperature. Instead of watching the clock like a nervous bread detective, watch the dough. When it doubles in size during the first rise and looks puffy after shaping, it is ready.
Brush with Butter Twice
For extra-flavorful rolls, brush them with melted butter before baking and again right after baking. The first layer helps with browning; the second adds shine and softness. This is the dinner roll equivalent of wearing a nice jacket and then adding a scarf.
Make-Ahead Dinner Roll Instructions
These classic dinner rolls can be made ahead, which is wonderful news if your kitchen schedule already looks like a holiday traffic jam. After shaping the rolls and placing them in the pan, cover the pan tightly and refrigerate overnight. The cold temperature slows the yeast, allowing the rolls to develop flavor while you sleep.
The next day, remove the pan from the refrigerator and let the rolls sit at room temperature for 60 to 90 minutes, or until puffy. Then bake as directed. This method is especially useful for Thanksgiving, Christmas, Easter, or any dinner where oven space is being negotiated like prime real estate.
How to Freeze Homemade Dinner Rolls
You can freeze dinner rolls either before or after baking. To freeze unbaked rolls, shape them, place them on a parchment-lined baking sheet, and freeze until firm. Transfer to a freezer bag. When ready to bake, place them in a greased pan, cover, thaw in the refrigerator overnight, then let rise at room temperature before baking.
To freeze baked rolls, cool them completely, wrap tightly, and freeze for up to 2 months. Reheat covered in a 300°F oven until warm. Brush with a little melted butter after reheating to bring back that fresh-baked magic.
Common Dinner Roll Problems and How to Fix Them
Why Are My Rolls Dense?
Dense rolls usually come from too much flour, under-kneading, expired yeast, or not enough rise time. Use the lower amount of flour first, knead until elastic, and let the dough rise until it doubles rather than relying only on the timer.
Why Did My Rolls Not Rise?
Your yeast may have been old, the liquid may have been too hot, or the room may have been too cold. Always check yeast activity if using active dry yeast, and give the dough a warm, draft-free place to rise.
Why Are My Rolls Dry?
Dry dinner rolls usually mean the dough had too much flour or the rolls were baked too long. Pull them from the oven when they are golden and cooked through, then brush with butter immediately.
Why Are My Rolls Pale?
Pale rolls may need a few extra minutes in the oven, a slightly higher rack position, or a light butter brush before baking. Milk, egg, sugar, and butter all help encourage browning.
Flavor Variations
Garlic Butter Dinner Rolls
Stir 1/2 teaspoon garlic powder into the melted butter used for brushing. Add chopped parsley after baking for a savory finish.
Honey Butter Rolls
Mix 2 tablespoons softened butter with 1 tablespoon honey and brush over the warm rolls. These are excellent with ham, roasted chicken, or breakfast eggs.
Herb Dinner Rolls
Add 1 tablespoon finely chopped rosemary, thyme, chives, or parsley to the dough. Herb rolls are perfect for holiday dinners and creamy soups.
Pull-Apart Cheese Rolls
Sprinkle a little shredded cheddar or Parmesan between the rolls before the second rise. Keep the amount modest so the rolls still bake evenly.
What to Serve with Classic Dinner Rolls
Classic dinner rolls are welcome almost anywhere. Serve them with roasted turkey, baked ham, pot roast, chicken noodle soup, beef stew, chili, mashed potatoes, or a simple salad. They also make excellent sliders for leftover meat, mini breakfast sandwiches, or late-night snacks when you are standing in the kitchen pretending not to eat another roll.
For a cozy meal, pair these rolls with tomato soup and salted butter. For a holiday table, serve them in a lined basket with honey butter. For weeknight dinners, use them to mop up sauces, gravies, and any evidence that dinner was once on the plate.
Storage and Reheating Tips
Store cooled dinner rolls in an airtight container at room temperature for up to 3 days. Avoid refrigerating them if possible, because refrigeration can make bread stale faster. For longer storage, freeze them and reheat as needed.
To reheat, wrap rolls in foil and warm in a 300°F oven for 8 to 10 minutes. For a single roll, microwave it for about 10 seconds, then brush with butter if desired. The microwave is fast, but the oven gives the best texture.
Experience Notes: What Making Classic Dinner Rolls Teaches You
Baking a classic dinner roll recipe is more than following a list of instructions. It is a small lesson in patience, touch, timing, and trusting the dough even when it looks unimpressive at first. Many home bakers begin the process expecting perfection, then panic when the dough sticks to their fingers. But slightly tacky dough is not a mistake. In fact, it is usually a sign that the rolls are heading toward softness instead of dryness.
One of the best experiences with homemade dinner rolls is learning how dough changes under your hands. At first, it may look rough and shaggy, like it has no intention of becoming anything elegant. After a few minutes of kneading, it smooths out. It stretches. It becomes elastic. That transformation is deeply satisfying because you can feel the recipe working before you ever put anything in the oven.
The first rise is another memorable part of the process. You cover the bowl, walk away, and return to find the dough doubled and full of air. It feels a bit like kitchen magic, except the magic is yeast quietly eating sugar and producing carbon dioxide. Not as glamorous as a wand, perhaps, but much better with butter.
Shaping the rolls also improves with practice. The first few may look uneven, and that is perfectly fine. Homemade rolls should look inviting, not machine-made. The goal is to create a smooth top by tucking the edges underneath and rolling each piece gently against the counter. After a batch or two, your hands learn the motion, and the process becomes almost relaxing.
The aroma of baking dinner rolls is one of the great rewards of home baking. It fills the kitchen with warmth before the rolls even reach the table. Guests notice it. Family members appear suddenly. Someone will ask, “Are those ready yet?” at least three times. This is normal. Fresh bread has a way of turning adults into impatient cartoon characters.
Another useful lesson is that dinner rolls are forgiving. If the dough rises a little slowly, give it more time. If the rolls are not perfectly equal, they will still taste wonderful. If the tops brown faster than expected, tent them loosely with foil. Bread baking teaches adjustment, not panic.
Over time, this recipe becomes personal. You may prefer honey instead of sugar, extra butter on top, a sprinkle of flaky salt, or a little rosemary in the dough. You may discover that your kitchen is chilly in winter and your dough needs an extra 20 minutes to rise. You may learn that your family likes 15 smaller rolls instead of 12 large ones because smaller rolls create the illusion that eating three is reasonable.
The best part is serving them warm. A basket of classic dinner rolls has a generous, old-fashioned charm. It says, “Sit down, eat well, and do not worry, there is butter.” Whether you make them for a holiday feast or a simple Tuesday dinner, they bring comfort to the table in a way few recipes can. And when the last roll disappears, you will know exactly why homemade bread has never gone out of style.
Conclusion
A classic dinner roll recipe does not need to be complicated to be impressive. With warm milk, good yeast, butter, a little patience, and careful shaping, you can make soft homemade dinner rolls that taste fresh, rich, and deeply comforting. The key is to keep the dough soft, let it rise fully, and finish the baked rolls with melted butter while they are still warm.
These rolls are simple enough for beginners and reliable enough for holidays. They can be made ahead, frozen, flavored, reheated, and served with almost any meal. Once you master the basic method, you will have a go-to bread recipe that belongs in every home kitchen.