Your nightstand has one job: keep your bedtime essentials close without turning into a tiny wooden landfill. Yet somehow, by Wednesday night, it may be holding three water glasses, tangled charging cords, a book you are definitely going to finish, two lip balms, a mystery receipt, and one sock that has clearly abandoned its partner.
The good news? A Simple DIY Nightstand Organizer can solve the chaos without requiring fancy tools, a huge budget, or a dramatic bedroom makeover. With a few basic materialsthink small trays, drawer dividers, adhesive cord clips, recycled boxes, wood scraps, or a repurposed containeryou can create a bedside storage system that looks neat, works hard, and makes your nighttime routine feel calmer.
This guide walks you through practical, beginner-friendly ideas for building and styling a DIY nightstand organizer. Whether you have a tiny bedside table, a nightstand with drawers, a floating shelf, or no nightstand at all, you can create a setup that keeps your essentials visible, reachable, and pleasantly under control.
Why a Simple DIY Nightstand Organizer Is Worth Making
A cluttered nightstand may seem harmless, but it can make your bedroom feel busier than it needs to be. The bedroom should feel like a place to rest, not a lost-and-found desk with a pillow nearby. A nightstand organizer gives every small item a home, which makes it easier to wind down at night and reset quickly in the morning.
The best part is that DIY organization is flexible. Store-bought organizers can be useful, but they rarely match your exact habits. Maybe you need a slot for a paperback, a small dish for earrings, a hidden pocket for charging cords, and just enough space for hand cream. When you build or customize your own bedside table organizer, you can design around your real lifenot around a product photo where nobody owns a phone charger.
Start With a Quick Nightstand Declutter
Before you make anything, clear the entire surface and empty the drawer if your nightstand has one. Wipe everything down. This step is oddly satisfying, like giving your furniture a tiny spa day.
Sort Everything Into Three Categories
Use three simple piles: keep nearby, relocate, and toss. Items you use every night can stay. Items that belong in the bathroom, office, kitchen, or closet should go back to their actual homes. Expired products, old receipts, dry pens, and random packaging can leave immediately. They have served their purpose. We thank them for their service.
Choose Your Bedside Essentials
A good rule is to keep only what supports your nighttime or morning routine. Common essentials include a lamp, book, phone charger, glasses, tissues, lip balm, hand cream, sleep mask, journal, pen, water bottle, and medication if needed. The list should be short enough that your nightstand still has breathing room.
Materials for a Simple DIY Nightstand Organizer
You do not need a professional workshop. Many DIY bedside organizer ideas use items you may already have at home. Look for containers, trays, and dividers that can be cleaned, painted, covered, stacked, or glued together.
Easy Materials to Use
- Small wooden boxes or craft crates
- Cardboard boxes from tea, phones, or stationery
- Drawer dividers or small bins
- A serving tray, ceramic tray, or acrylic tray
- Adhesive cord clips or cable holders
- Felt pads or cork sheets
- Wood glue, hot glue, or double-sided mounting tape
- Paint, stain, peel-and-stick wallpaper, or contact paper
- Small hooks for headphones, glasses, or charging cords
If you want a sturdier project, use thin plywood or pine boards. If you want a no-saw, no-drill project, use small containers and adhesive accessories. The right version is the one you will actually finish before your enthusiasm wanders off to reorganize the pantry.
DIY Idea #1: The Tray-and-Divider Nightstand Organizer
This is the easiest version and works beautifully for renters, small bedrooms, and anyone who wants results in less than an hour.
How to Make It
Choose a tray that fits comfortably on top of your nightstand. Place a small dish or shallow container inside the tray for tiny items such as earrings, lip balm, or hair ties. Add a slim cup or repurposed candle jar for pens, reading glasses, or a small flashlight. Keep the rest of the tray open for a book, water bottle, or phone.
The tray creates a visual boundary. Instead of letting small objects spread across the surface like they are claiming territory, everything stays inside one neat zone. It also makes cleaning easier because you can lift the entire tray, wipe the nightstand, and put it back.
Best For
This organizer works best for people who prefer a clean surface but still want essentials within reach. It is also great for guest rooms because visitors can instantly understand where to put things.
DIY Idea #2: A Drawer Organizer for Hidden Bedside Storage
If your nightstand has a drawer, use it wisely. A drawer without dividers often becomes a cave of tangled cords, cough drops, old batteries, and at least one object you do not remember buying.
How to Make It
Measure the inside of the drawer: width, depth, and height. Then use small bins, cardboard dividers, or adjustable drawer organizers to create sections. Assign each section a purpose. For example, one area can hold chargers, another can hold skincare, another can hold a journal and pen, and another can hold sleep accessories.
For a budget-friendly DIY version, cut strips from sturdy cardboard and cover them with contact paper. Create a grid that fits inside the drawer. Hot glue the intersections if you want the dividers to stay in place. Add a piece of felt, cork, or drawer liner underneath to keep items from sliding every time you open the drawer with dramatic sleepy energy.
Best For
This option is ideal if you dislike visual clutter. Your nightstand surface can stay minimal while the drawer stores the practical items you reach for every evening.
DIY Idea #3: A Charging Station Organizer
Phone chargers, smartwatch chargers, earbuds, and tablets can turn a peaceful nightstand into a cable jungle. A DIY charging station keeps cords controlled and prevents that nightly game of “Which black cable is this?”
How to Make It
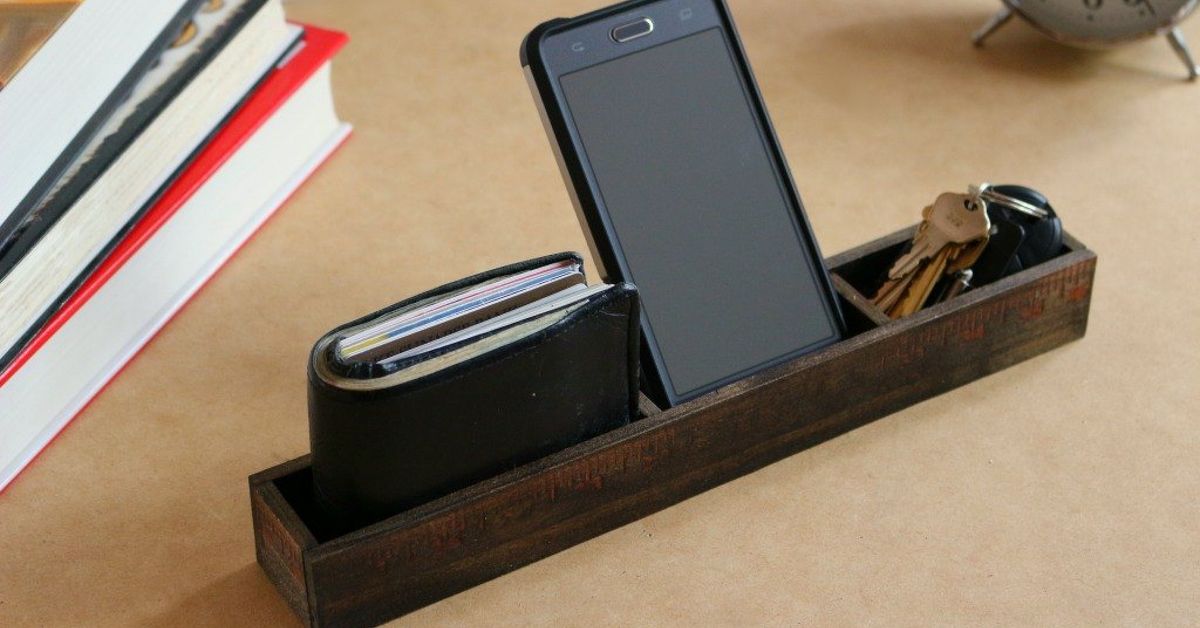
Start with a small wooden box, bamboo box, or sturdy cardboard container. Cut or drill small openings in the back for cords. If you are using cardboard, reinforce the holes with tape or adhesive grommets. Place a power strip behind the nightstand or inside a ventilated cable box, then guide each cord through its own opening.
Add adhesive cord clips to the back or side of the nightstand so the cable ends do not fall to the floor. Label each cord with small tags if several devices share the same area. For a cleaner look, paint the box to match your bedroom furniture or wrap it in peel-and-stick wallpaper.
Safety Tip
Do not cover power adapters with fabric or place them in a sealed container where heat can build up. Keep charging areas ventilated, avoid overloading outlets, and replace damaged cables immediately.
DIY Idea #4: A Wall-Mounted Bedside Organizer
If your nightstand is tinyor if you do not have oneuse vertical space. Wall-mounted storage can hold nighttime essentials without stealing floor space.
How to Make It
Mount a small wooden crate, floating shelf, or narrow wall pocket beside the bed. Add a hook underneath for headphones, a sleep mask, or a charging cable. If you rent, use removable wall hooks or a lightweight hanging organizer that can attach to the bed frame.
You can also repurpose a small spice rack, picture ledge, or wall file holder. Paint it to match the room, then use it for books, glasses, lotion, or a small plant. Just make sure it is securely installed and not positioned where you might bump it while reaching for the snooze button.
Best For
This is perfect for small bedrooms, dorm rooms, apartments, and narrow layouts where every inch matters. It also works well if your bed sits close to a wall and a traditional nightstand feels too bulky.
DIY Idea #5: A Bedside Caddy Organizer
A bedside caddy slips between the mattress and bed frame or hangs over the bed rail. It is especially useful for bunk beds, platform beds, children’s rooms, dorm rooms, and minimalist bedrooms.
How to Make It
For a sewn version, use sturdy fabric such as canvas or denim. Create pockets sized for a book, tablet, glasses, tissues, and a phone. Sew the pockets onto a larger fabric panel, then tuck the top section under the mattress.
For a no-sew version, repurpose a fabric placemat or small hanging organizer. Use fabric glue or iron-on hem tape to create pockets. Add a strip of non-slip shelf liner to the part that goes under the mattress for better grip.
Best For
This organizer is great when you want storage but do not want another piece of furniture. It is also helpful for kids who love bedtime reading but somehow store books in a pile that resembles a literary landslide.
How to Design Zones in Your Nightstand Organizer
The smartest organizer is not just pretty; it is organized by function. Think in zones instead of random storage.
The Sleep Zone
This area holds items that help you relax: sleep mask, earplugs, hand cream, lip balm, lavender spray, or a small journal. Keep it simple. Your nightstand is not a pharmacy, beauty counter, or tiny convenience store.
The Tech Zone
This zone holds your phone, charger, smartwatch, earbuds, or e-reader. Use cord clips, a charging dock, or labeled cable channels to prevent tangles.
The Reading Zone
Keep one current book or magazine nearby. If you stack six books on the nightstand, that is not a reading zoneit is a bedside library with structural ambitions.
The Tiny Item Zone
Use a dish, mini bowl, or small box for jewelry, hair ties, lip balm, and other small objects. Tiny items need boundaries or they will disappear into the bedroom dimension where bobby pins and single socks live.
Style Tips for a DIY Bedside Organizer
Function matters most, but style helps your organizer feel intentional. Choose materials that match your room. Wood adds warmth, acrylic feels modern, metal looks industrial, and woven baskets bring a cozy texture.
Stick to a small color palette. If your room uses white, natural wood, and soft green, let your organizer follow that direction. Paint mismatched containers the same color to make them look like a set. Add labels only where they help; too many labels can make a relaxing bedroom feel like a supply closet.
Keep height in mind. Taller containers belong at the back or side of the nightstand so they do not block your lamp or make the surface feel crowded. Low trays and shallow bowls work best for the front area.
Common Mistakes to Avoid
Keeping Too Much “Just in Case” Stuff
If you do not use it at night or in the morning, it probably does not belong on your nightstand. Extra chargers, random paperwork, old receipts, and five half-used lotions can move elsewhere.
Buying Containers Before Measuring
Always measure first. A beautiful organizer that does not fit your drawer is just clutter with good lighting.
Ignoring Cords
Cord clutter can make even a clean nightstand look messy. Use clips, cable sleeves, labels, or a charging box to keep wires controlled.
Forgetting Maintenance
No organizer stays magical forever. Spend two minutes each morning removing empty cups, trash, and items that wandered in from other rooms.
A Simple Maintenance Routine
At night, return items to their zones before turning off the light. In the morning, remove water glasses, wrappers, tissues, and anything that does not belong. Once a week, wipe the surface and check the drawer. Once a month, reset the organizer completely by taking everything out and putting back only what you still use.
This routine is short, realistic, and much easier than waiting until your nightstand develops its own zip code.
Real-Life Experiences With a Simple DIY Nightstand Organizer
The biggest surprise about making a simple DIY nightstand organizer is how quickly it changes your bedroom habits. At first, the project feels small. You are just adding a tray, a divider, a cord clip, or a little box. But after a few nights, you begin to notice that your bedtime routine feels smoother. You are not searching for your lip balm under a book. You are not untangling a charger from your lamp cord. You are not balancing a water glass on top of a notebook like a sleepy circus performer.
One practical experience many people have is realizing that the nightstand is usually not the real problem. The problem is decision fatigue. At the end of the day, when you are tired, you do not want to make choices about where things go. A good organizer removes the decision. Glasses go in the tray. Charger snaps into the clip. Book rests in the reading slot. Lotion stays in the small bin. When every object has a clear place, tidying becomes almost automatic.
Another helpful lesson is that the first version does not need to be perfect. In fact, it probably should not be. Try a temporary setup for one week before painting, mounting, or permanently gluing anything. You may discover that the phone slot needs to be closer to the outlet, the book compartment is too narrow, or the jewelry dish should not sit near the edge unless you enjoy crawling under the bed like a detective looking for earrings.
DIY organizers also teach you what you truly use. Many people start by keeping too many products nearby: lotion, hand cream, cuticle oil, sleep spray, two notebooks, three books, headache medicine, tissues, tech accessories, and a candle. After a week, the daily essentials become obvious. The rest can move to a drawer, bathroom cabinet, or closet. This is where the nightstand becomes calmernot because it is empty, but because it is honest.
Small-bedroom users often get the biggest benefit. When there is limited space, a wall pocket, floating shelf, or bedside caddy can feel like gaining an extra drawer out of thin air. A mounted organizer beside the bed can hold a book, phone, and glasses without crowding the floor. For renters, removable hooks and lightweight organizers are especially useful because they add function without making permanent changes.
Parents may also find that bedside organizers help children build better habits. A simple caddy with pockets for a book, water bottle, tissues, and a small flashlight can make bedtime feel more independent. Kids know where things belong, and the floor is less likely to become a landing zone for books, stuffed animals, and yesterday’s socks. The organizer does not magically make bedtime faster, but it does remove at least one excuse from the nightly negotiation committee.
The most satisfying experience is waking up to a clean bedside surface. It sets a calmer tone for the morning. Instead of starting the day by facing clutter, you see a small, orderly space that supports your routine. That little visual win matters. It reminds you that organization does not have to be dramatic, expensive, or Instagram-perfect. Sometimes it is just a tray, a few dividers, and the bold decision to stop storing old receipts next to your pillow.
Conclusion
A Simple DIY Nightstand Organizer is one of the easiest ways to make your bedroom feel cleaner, calmer, and more functional. By decluttering first, choosing only true bedside essentials, and creating smart zones for sleep, tech, reading, and tiny items, you can turn your nightstand into a helpful part of your routine instead of a clutter magnet.
Whether you build a drawer organizer, a charging station, a wall-mounted shelf, a bedside caddy, or a simple tray system, the goal is the same: make your essentials easy to reach and easy to put away. Keep it simple, measure before you build, and give your organizer a quick reset each week. Your future sleepy self will appreciate the effortand may even stop blaming the nightstand for the missing lip balm.