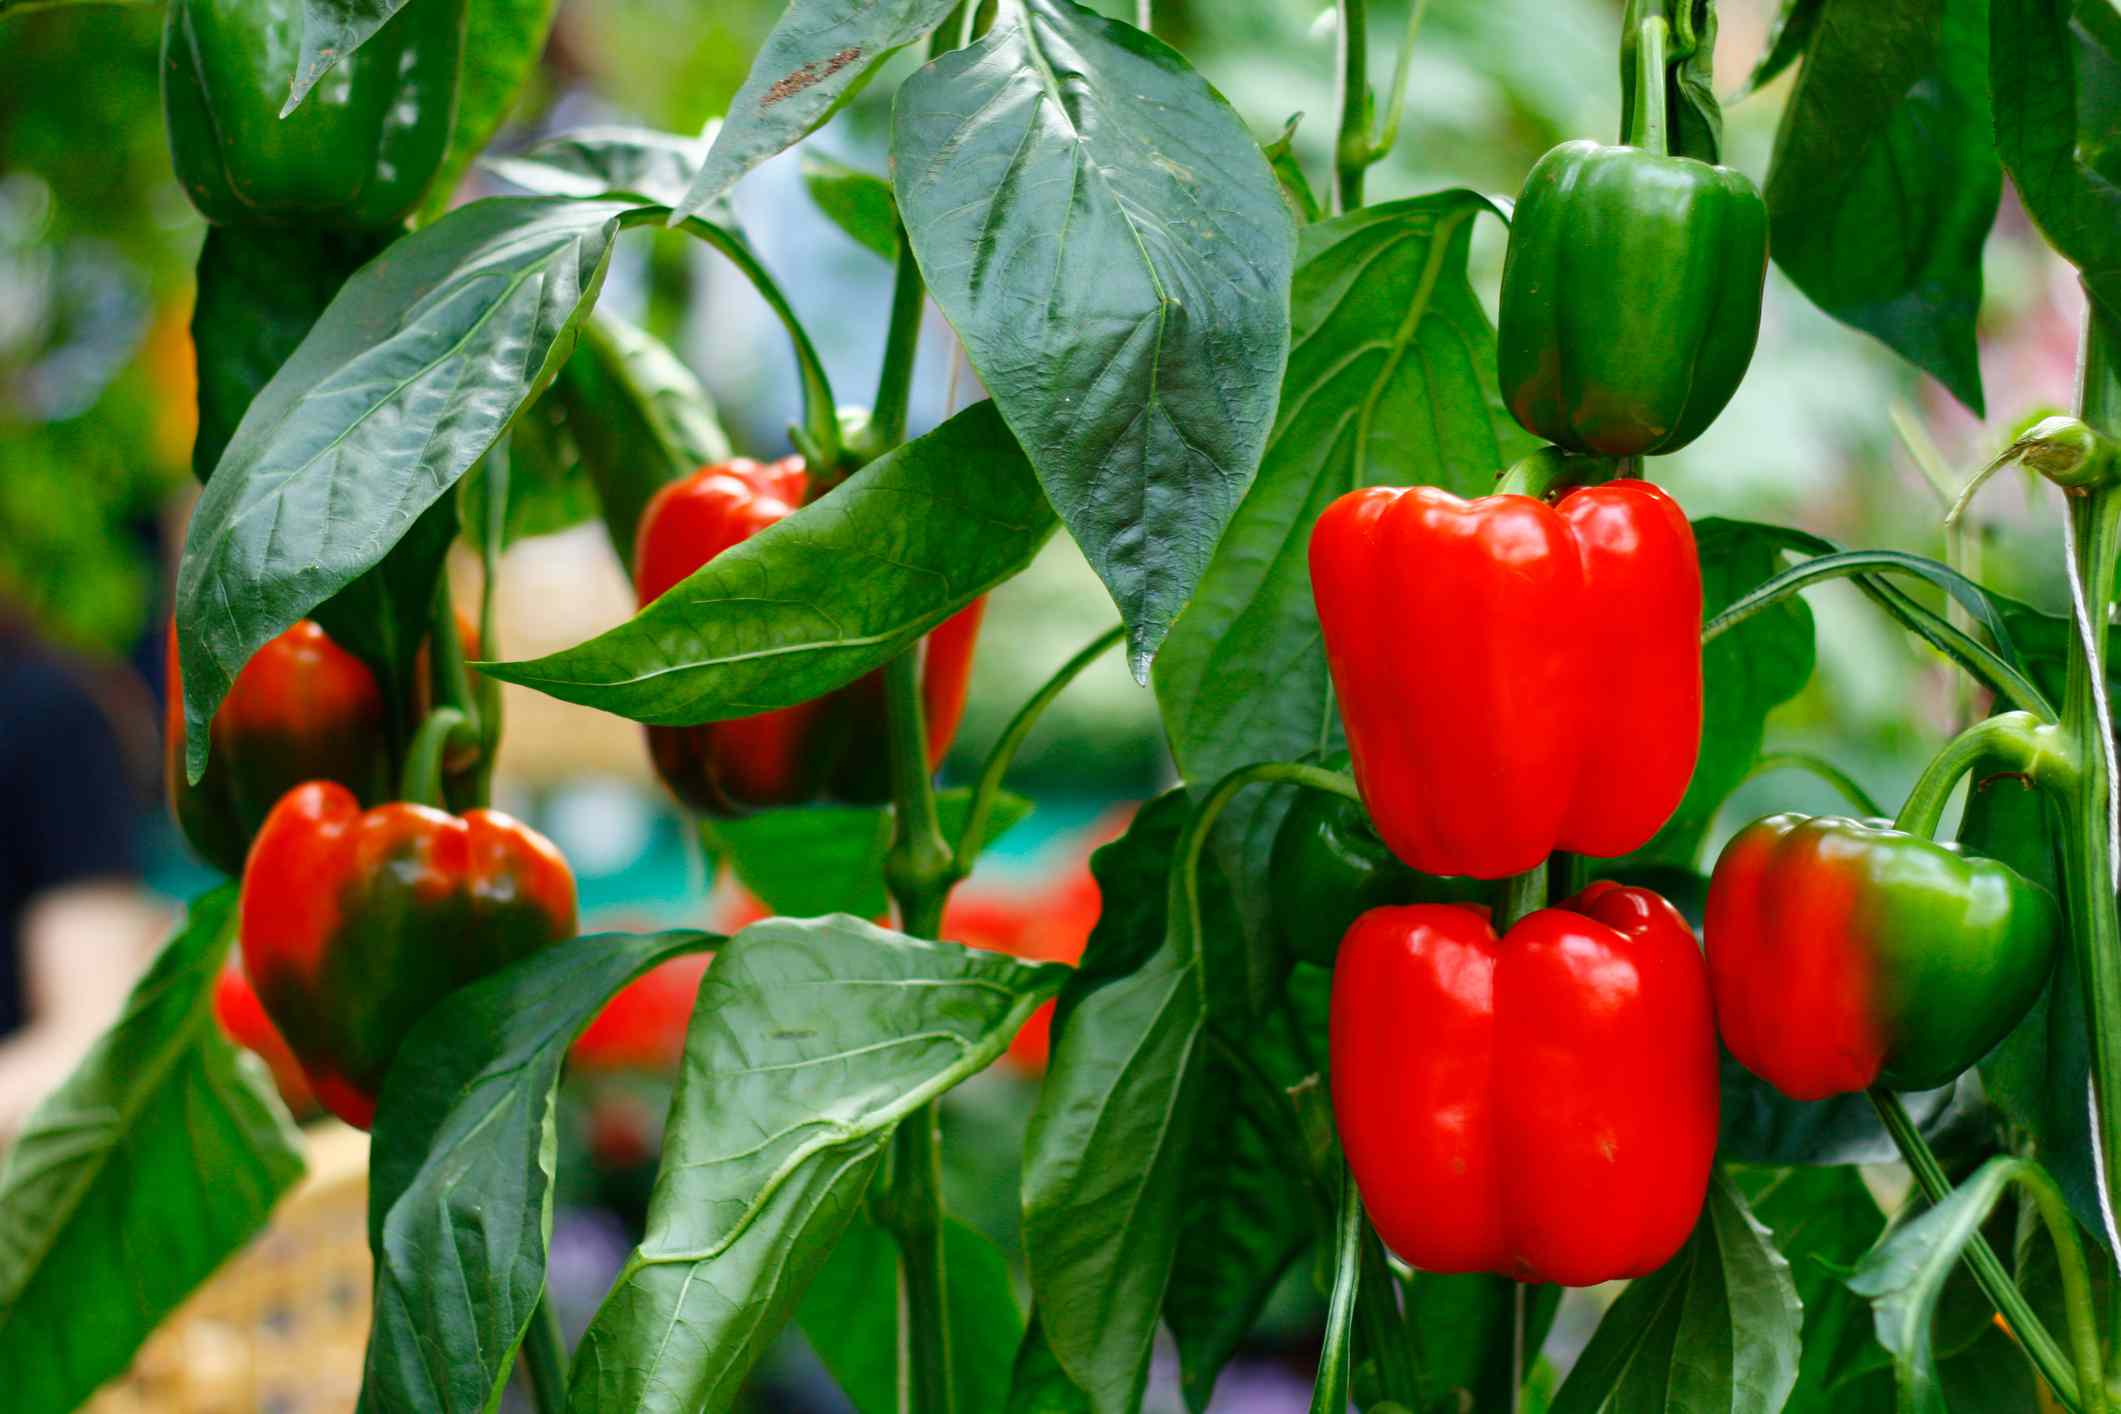
Peppers are the garden’s little overachievers. They come in candy-sweet bells, smoky poblanos, snack-sized minis, fiery jalapeños, dramatic cayennes, and tiny ornamental firecrackers that look like they were designed by a chili-loving jeweler. Better yet, peppers can produce a big harvest in a surprisingly small space, which makes them perfect for backyard beds, raised gardens, patio containers, and sunny balcony corners.
But peppers do have one diva trait: they hate being cold. Plant them too early, and they will sit there looking offended. Give them warm soil, steady moisture, full sun, and a little patience, and they can reward you with crisp, colorful fruit from summer into fall. This pro-gardener guide walks you through how to grow peppers in your garden from seed to harvest, with practical tips you can use whether you want sweet bell peppers for fajitas or hot peppers that make your salsa politely threaten your eyebrows.
Why Peppers Are Worth Growing at Home
Store-bought peppers are useful, but homegrown peppers are a different experience. The flavor is brighter, the texture is fresher, and the variety options are far more exciting. Most grocery stores offer green, red, yellow, and orange bell peppers, plus maybe a few jalapeños if the produce manager is feeling adventurous. In a garden, you can grow frying peppers, banana peppers, shishitos, poblanos, serranos, habaneros, paprika peppers, lunchbox peppers, and heirloom bells in colors that look like a farmers market rainbow.
Peppers also fit beautifully into small-space gardening. A single healthy pepper plant can produce steadily for weeks, and many varieties grow well in containers. They are tidy, upright plants that usually do not sprawl like squash or take over like mint, which is basically the garden version of a houseguest who never leaves.
Choose the Right Pepper Varieties for Your Garden
The first step in growing peppers successfully is choosing varieties that match your climate, cooking habits, and patience level. Pepper seed packets and plant tags usually list “days to maturity,” but remember that peppers are commonly counted from transplanting, not from the day you start seeds indoors. A bell pepper that says 75 days may still require several weeks of indoor growth before it reaches the garden.
Sweet Peppers
Sweet peppers include bell peppers, mini snack peppers, banana peppers, pimentos, and Italian frying peppers. Bell peppers are popular, but they can be slower to color than smaller sweet varieties. If your growing season is short, try compact or early-maturing sweet peppers. Green bell peppers are simply immature peppers, while red, yellow, orange, purple, or chocolate peppers are usually allowed to ripen longer on the plant.
Hot Peppers
Hot peppers range from mildly spicy jalapeños to habaneros and super-hot types that should come with a tiny warning siren. Heat comes mainly from capsaicin, which is concentrated around the placenta, the pale inner tissue near the seeds. For beginners, jalapeño, serrano, cayenne, Anaheim, and poblano peppers are productive and versatile. If you are growing very hot varieties, label them clearly. Future you will appreciate not confusing a sweet lunchbox pepper with a habanero during snack time.
Short-Season and Container-Friendly Peppers
Gardeners in cooler regions should look for short-season varieties that mature in 60 to 75 days from transplanting. Patio gardeners should choose compact or dwarf types and use a container that gives roots enough room. A 5-gallon pot is a good practical minimum for many pepper plants, though larger containers make watering easier and help prevent heat stress.
Start Pepper Seeds Indoors
Peppers are usually grown from transplants because they are slow to germinate and need a long, warm season. Start seeds indoors about eight weeks before your average last spring frost. Some extra-slow hot peppers may need 10 to 12 weeks. If you are buying plants, choose sturdy transplants with healthy green leaves, stocky stems, and no flowers or fruit. A pepper plant already carrying fruit in a tiny nursery pot may look impressive, but it is often stressed and less ready to establish strong roots.
Seed Starting Basics
Use a clean seed-starting mix rather than heavy garden soil. Plant seeds about one-quarter inch deep, keep the mix evenly moist, and provide bottom heat if your house is cool. Pepper seeds germinate best in warm conditions, often around 80°F to 85°F. Once seedlings emerge, move them under bright grow lights or into the sunniest window you have. A weak, leggy pepper seedling is not doomed, but it is already asking for a motivational speech.
Harden Off Before Transplanting
Before pepper plants move outdoors full time, harden them off for 7 to 10 days. Set them outside in a protected, lightly shaded area for a few hours, then gradually increase sun and wind exposure. This transition helps prevent leaf scorch, transplant shock, and general pepper drama. Bring plants indoors if cold nights return.
Pick the Best Garden Site for Peppers
Peppers need full sun. Aim for at least six hours of direct light, though eight to 10 hours is better for strong growth and heavy fruiting. Fruiting vegetables are hungry for sunlight because they are not just making leaves; they are making dinner.
Choose a spot with fertile, well-drained soil and easy access to water. Avoid planting peppers where tomatoes, potatoes, eggplants, or peppers grew last year if you can. These crops are in the nightshade family and may share some pest and disease issues. A simple crop rotation can reduce pressure from soilborne problems over time.
Prepare the Soil Like a Pro
Peppers prefer loose, fertile soil that drains well but still holds moisture. Before planting, work compost into the top several inches of soil. Compost improves structure, supports beneficial soil life, and helps sandy soil hold water while helping clay soil breathe. The goal is soil that feels crumbly, not like beach sand and not like modeling clay.
A soil test is the best way to know your pH and nutrient levels. In general, peppers perform well in slightly acidic to near-neutral soil. Avoid dumping fertilizer into the bed “just in case.” Too much nitrogen can produce lush leaves and fewer peppers, which is great if your goal is a pepper shrub and not actual peppers.
Raised Beds and Containers
Raised beds warm faster in spring and drain well, which peppers appreciate. Containers are also excellent for peppers, especially in small spaces. Use a high-quality potting mix, not garden soil, which can compact in pots. Make sure every container has drainage holes. A pepper plant sitting in soggy soil is not being pampered; it is being slowly annoyed to death.
When and How to Transplant Peppers
Timing is one of the biggest secrets to growing peppers well. Do not rush them into the garden just because the calendar says spring. Peppers are warm-season crops and should go outside after the danger of frost has passed, nighttime temperatures are consistently above 50°F, and the soil has warmed. Many gardeners wait until soil temperatures are around 60°F to 65°F before transplanting. If planted into cold soil, peppers may simply stop growing for a while.
Spacing Pepper Plants
Most pepper plants should be spaced 18 to 24 inches apart, depending on the variety. Compact types can be closer, while large bell peppers and vigorous hot peppers need more breathing room. Good spacing improves airflow, makes harvesting easier, and reduces disease pressure.
Planting Steps
Water transplants before planting. Dig a hole about the size of the root ball, gently remove the plant from its pot, and set it at roughly the same depth it was growing before. Firm soil around the roots and water deeply. Unlike tomatoes, peppers should not be buried deeply along the stem. They prefer a normal transplanting depth and a smooth start.
Mulch for Warmth, Moisture, and Weed Control
Mulch is one of the easiest ways to improve pepper plant performance. Organic mulch, such as straw, shredded leaves, or compost, helps conserve moisture, reduce weeds, and prevent soil from splashing onto leaves and fruit. In cooler climates, black plastic mulch can help warm the soil early in the season. In hot regions, organic mulch may be better because it keeps soil temperatures more stable during summer heat.
Apply mulch after the soil has warmed. If you spread thick organic mulch too early in a cool spring, it can slow soil warming. That is helpful in July, not so helpful in April.
Water Peppers Consistently
Peppers like steady moisture, not swamp life and not desert survival training. Most garden peppers need about one inch of water per week from rain or irrigation, and more during hot, dry weather or when grown in containers. Water deeply at the base of the plant rather than sprinkling the leaves. Drip irrigation or a soaker hose is ideal because it keeps foliage drier and delivers water where roots can use it.
Inconsistent watering can contribute to blossom-end rot, a frustrating condition that creates sunken, leathery spots near the blossom end of fruit. It is linked to calcium movement in the plant, but uneven soil moisture is often the trigger. Before reaching for a miracle calcium spray, check your watering habits, mulch coverage, and soil pH.
Feed Peppers Without Overdoing It
Peppers are moderate feeders. Mix compost into the bed before planting and use a balanced vegetable fertilizer according to your soil test or product label. Once plants begin setting fruit, a light side-dressing can support continued production. Avoid heavy nitrogen feeding once plants are established because it can encourage leaves at the expense of flowers and fruit.
If your plants are huge, green, and gorgeous but not producing peppers, consider three possible causes: too much nitrogen, temperature stress, or poor pollination conditions. Garden plants can be beautiful and unproductive, just like a meeting with too many slides.
Support Pepper Plants Before They Flop
Many pepper plants look sturdy early in the season, then suddenly lean under the weight of fruit. Use small tomato cages, stakes, or plant supports before branches start breaking. Large bell peppers, poblanos, and heavy-yielding snack peppers especially benefit from support. Tie stems loosely with soft garden ties, leaving room for growth.
Manage Flowers, Fruit Set, and Summer Heat
Pepper flowers are generally self-pollinating, but bees and other pollinators can improve fruit set. Extreme heat can cause blossoms to drop, especially when daytime temperatures soar and nights stay hot. If plants look healthy but fail to set fruit during a heat wave, do not panic. Keep them watered, avoid overfertilizing, and wait for more moderate weather. Once temperatures improve, pepper plants often start producing again.
In very hot climates, afternoon shade cloth can reduce sunscald on ripening fruit. Sunscald appears as pale, papery patches on peppers exposed to intense sunlight. Healthy foliage protects fruit naturally, so avoid aggressive pruning. Peppers are not tomatoes; they usually do not need major pruning to perform well.
Watch for Common Pepper Problems
Aphids and Soft-Bodied Insects
Aphids may cluster on new growth and undersides of leaves. A strong stream of water can knock them off, and beneficial insects often help control them. If needed, insecticidal soap can be used according to label directions. Avoid spraying when plants are blooming and pollinators are active.
Cutworms, Flea Beetles, and Caterpillars
Cutworms can clip young plants at soil level, while flea beetles chew tiny holes in leaves. Caterpillars may chew foliage or fruit. Check plants every day or two, especially early in the season. Handpicking, collars around young transplants, row covers, and good garden cleanup can reduce damage.
Blossom-End Rot
Blossom-end rot is not a contagious disease. It is a physiological disorder tied to calcium movement and water stress. Prevent it by maintaining even moisture, mulching, avoiding root damage, and following soil test recommendations for pH and nutrients.
Disease Prevention
Prevent disease by spacing plants properly, watering at soil level, rotating crops, and removing diseased plant debris. Do not work among pepper plants when foliage is wet if you can avoid it. Wet leaves and crowded plants are basically an engraved invitation to fungal problems.
How to Harvest Peppers
You can harvest many peppers at either the immature or fully ripe stage. Green bell peppers are harvested before they fully color, while red, yellow, and orange peppers are left longer on the plant. Fully ripe peppers are usually sweeter and often more nutritious, but leaving them to ripen takes more time and can slow the production of new fruit.
Use scissors or pruners to cut peppers from the plant. Pulling can snap branches, especially on brittle stems. Harvest regularly to encourage continued production. If frost is coming, pick mature peppers before cold weather damages the fruit. Some partially colored peppers will continue to color after harvest, though the flavor is best when ripened on the plant.
Growing Peppers in Containers
Container peppers are perfect for patios, decks, and renters who want a portable salsa supply. Choose a pot at least 12 inches wide and deep for compact varieties, and go larger for bell peppers or vigorous hot peppers. A 5-gallon container is a dependable choice for most single pepper plants.
Place containers where they receive full sun. Water whenever the top inch of potting mix feels dry, and expect to water more often during hot weather. Because nutrients wash out of containers faster than garden beds, feed container peppers regularly with a balanced fertilizer. Do not let pots sit in saucers full of water. Peppers like a drink, not a bathtub.
Pro Gardener Tips for a Better Pepper Harvest
Do Not Plant Too Early
The most common pepper mistake is planting too soon. A pepper plant set out into cold soil may survive but stall. Waiting one extra week can produce stronger plants than rushing the season.
Grow More Than One Type
Plant a mix of early, midseason, sweet, and hot peppers. This gives you a longer harvest window and more kitchen flexibility. A garden with only one pepper variety is fine, but a garden with six varieties is a personality.
Label Everything
Labels matter, especially if you grow hot and sweet peppers together. Pepper seedlings look similar, and mystery peppers are only fun until someone bites into the wrong one.
Harvest Often
Frequent harvesting keeps plants productive. If you want red ripe peppers, let some fruit mature fully, but keep picking others green or partially colored so the plant continues setting new peppers.
of Real-World Pepper Growing Experience from a Pro Gardener
After growing peppers for years in raised beds, containers, and the occasional “I ran out of space, so this pot goes by the back door” situation, I can tell you this: peppers reward calm gardeners. They are not as fast as zucchini, which seems to produce fruit if you merely compliment it. Peppers take their time. In cool spring weather, they may sit still for two weeks and make you wonder if they are secretly plastic. Then warm nights arrive, roots settle in, and suddenly the plants start pushing out glossy leaves and flower buds.
One of the best lessons I learned is to stop babying pepper plants with too much fertilizer. Early in my gardening life, I thought more food meant more peppers. What I got instead were leafy green bushes that looked like they belonged in a garden catalog but produced very little fruit. Now I focus on compost, balanced nutrition, and steady watering. Once fruit set begins, I feed lightly and consistently rather than dumping on fertilizer like I am seasoning soup.
Another practical lesson: mulch is not optional in a serious pepper patch. In one garden bed, I left the soil bare because I planned to mulch “later.” Later became never, because gardeners are optimists with calendars. That bed dried out quickly, weeds moved in, and a few fruits developed blossom-end rot. The mulched bed beside it stayed cooler, held moisture longer, and produced cleaner, healthier peppers. Since then, I mulch after the soil warms and treat it like putting a blanket over the root zone.
Spacing also matters more than beginners think. Pepper plants look small at transplanting, so it is tempting to squeeze them together. Do not let those innocent little seedlings fool you. By late summer, crowded peppers become a tangled jungle where air circulation is poor, harvesting is awkward, and pests can hide like tiny criminals. Giving each plant 18 to 24 inches of space makes the bed easier to manage and often improves the harvest.
For containers, my favorite trick is using larger pots than the plant tag suggests. A small pot can grow a pepper, but a larger pot forgives missed waterings and keeps roots cooler during hot afternoons. I also rotate containers occasionally so plants grow evenly toward the sun. It is a small detail, but gardening success is often a stack of small details done consistently.
Finally, grow what you actually eat. It is fun to grow a wildly hot pepper, but if your household treats mild salsa like a dangerous sport, one super-hot plant may be enough. On the other hand, if you cook stir-fries, fajitas, omelets, soups, and roasted vegetables, sweet peppers and frying peppers will disappear quickly. A good pepper garden should fit your kitchen, not just your seed catalog dreams. Start with a few reliable varieties, learn how they behave in your climate, and expand from there. The best pepper harvest is not only big; it is useful, delicious, and easy to enjoy.
Conclusion
Growing peppers in your garden is all about warmth, sunlight, patience, and consistency. Start with strong transplants, wait until the soil is truly warm, plant in full sun, water evenly, mulch well, and keep an eye out for pests before they become a pepper soap opera. Whether you grow sweet bells, smoky poblanos, crunchy lunchbox peppers, or hot chilies, a little pro-level care can turn a few plants into a colorful harvest that keeps your kitchen busy all season.