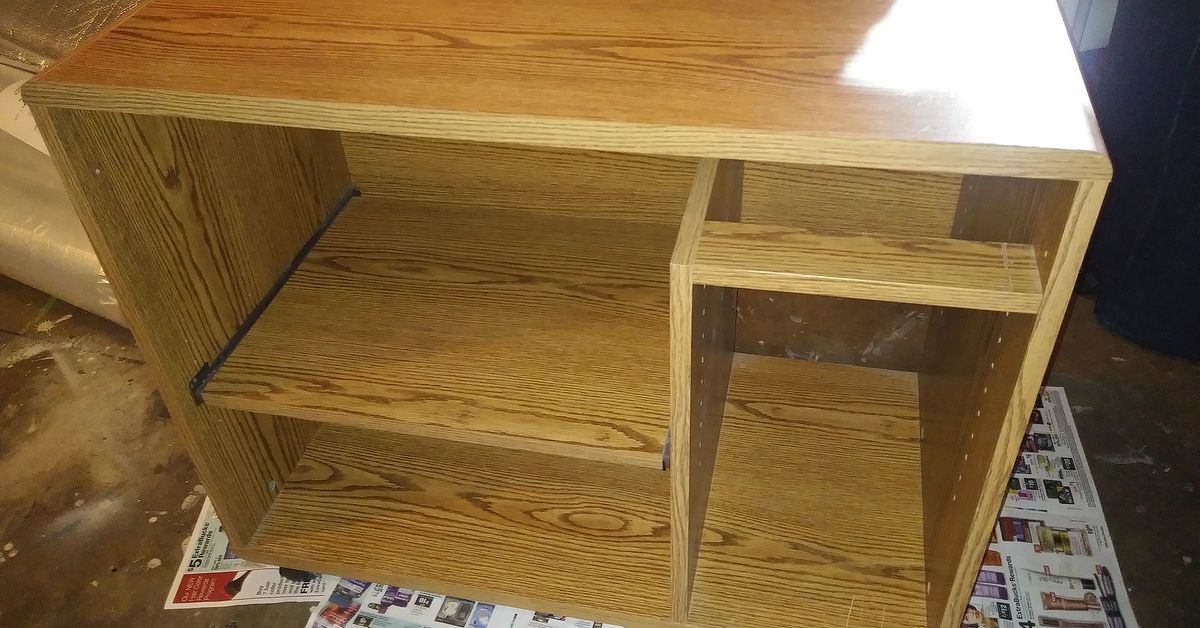
A particle board desk makeover is one of those DIY projects that looks suspiciously simple until you meet the enemy: slick laminate, swollen corners, chipped edges, mysterious coffee rings, and that one drawer that has been “temporarily” stuck since 2019. The good news? You do not need a woodshop, a designer budget, or a dramatic HGTV-style reveal where everyone cries under perfect lighting. With the right prep, primer, paint, and patience, an old particle board desk can become a stylish, durable, work-from-home hero.
Particle board desks are everywhere because they are affordable, lightweight, and easy to manufacture. Many are covered with laminate, veneer, or a melamine-like surface that resists stains but also resists paint like a cat resists a bath. That is why the makeover process is less about “just paint it” and more about creating a surface that paint can actually grip. Skip the prep and your beautiful new finish may peel faster than a cheap sticker on a water bottle.
This guide walks through how to refinish a particle board desk step by step, including cleaning, repairing damage, sanding, priming, painting, sealing, styling, and learning from real-life makeover experiences. Whether your desk came from a dorm room, a thrift store, a flat-pack box, or the “free curb alert” section of your neighborhood group, it has potential. It just needs a little attentionand possibly a stern conversation with a sanding sponge.
What Makes Particle Board Different from Solid Wood?
Before grabbing a paintbrush, it helps to understand what you are working with. Particle board is made from compressed wood particles, resin, and adhesives. Unlike solid wood, it does not have attractive grain running all the way through. That means you usually cannot sand it deeply or stain it like oak, pine, walnut, or maple. If you sand too aggressively, you can chew through the laminate layer and expose a fuzzy, crumbly core.
Most particle board desks have a thin decorative surface: laminate, paper veneer, thermofoil, or a faux wood finish. This outer layer is smooth and nonporous, which makes it easy to wipe clean but difficult for paint to bond to. A successful particle board desk makeover depends on four things: cleaning off grime, lightly roughing up the surface, using a bonding primer, and protecting the final finish.
Tools and Supplies for a Particle Board Desk Makeover
You do not need every tool in the hardware aisle. In fact, please do not buy the whole aisle unless you are trying to make the cashier nervous. For most makeovers, the following supplies are enough:
- Degreasing cleaner or mild dish soap
- Microfiber cloths or lint-free rags
- Painter’s tape
- Screwdriver or drill for removing hardware
- Fine- or medium-grit sanding sponge, usually around 120 to 220 grit
- Wood filler, epoxy filler, or patching compound for chips
- Putty knife
- Tack cloth or damp cloth for dust removal
- Bonding primer made for slick surfaces
- Quality furniture paint, cabinet paint, acrylic enamel, or latex enamel
- Foam roller and angled brush
- Water-based polyurethane, polycrylic, or clear furniture topcoat
- Respirator or dust mask, safety glasses, and gloves
A desk is a high-touch surface. It deals with wrists, laptops, notebooks, coffee mugs, charging cables, elbows, and the occasional snack emergency. For that reason, cabinet-grade paint or enamel paint usually performs better than basic wall paint. Wall paint is made for walls. Desks are tiny battlefields.
Step 1: Inspect the Desk Before You Commit
Start by giving the desk a full inspection. Look for loose legs, bubbling laminate, swollen corners, peeling edges, missing screws, and weak drawer tracks. If the desk wobbles like a newborn deer, fix the structure before worrying about color. Tighten hardware, replace missing fasteners, and glue down loose laminate where possible.
Some particle board desks are too damaged to rescue, especially if water has caused severe swelling. A little puffiness on one corner can be patched and disguised. A desktop that has expanded like bread dough in a humid kitchen may not be worth the effort. Be honest. DIY confidence is wonderful, but so is knowing when a desk has entered its retirement era.
Step 2: Disassemble What You Can
Remove drawers, knobs, handles, cable covers, shelves, and detachable legs if possible. This makes the desk easier to clean, sand, prime, and paint. Put screws and hardware into labeled bags so you do not end up crawling around the floor later muttering, “It was just here.”
If the desk is flat-pack furniture, avoid taking apart every structural panel unless necessary. Particle board screw holes can weaken after repeated assembly and disassembly. Remove what helps the makeover, but do not turn the project into a puzzle with 47 panels and no emotional support.
Step 3: Clean Like the Paint Depends on ItBecause It Does
Paint does not stick well to dust, skin oils, food residue, furniture polish, or old adhesive. Clean every surface with a degreasing cleaner or a mix of mild dish soap and warm water. Pay special attention to the front edge of the desktop, drawer pulls, keyboard area, and anywhere hands regularly touch.
After cleaning, wipe the desk with plain water to remove cleaner residue, then let it dry completely. This step is not glamorous, but it is the difference between a smooth makeover and paint that peels off in tiny sheets while you stare at it in betrayal.
Step 4: Repair Chips, Dents, and Swollen Edges
Particle board desks often suffer most at the corners and edges. If the laminate has chipped away, gently remove loose material. Do not dig into stable areas. Use wood filler or epoxy filler to rebuild missing corners, dents, and screw holes. Apply the filler with a putty knife, slightly overfilling the damaged area so you can sand it smooth later.
For edges that are badly worn, consider adding iron-on edge banding, peel-and-stick trim, or a thin wood strip. Edge banding can make a budget desk look surprisingly polished. It also protects the vulnerable particle board core from future bumps and moisture.
Let filler dry according to the product directions. Then sand it flush with the surrounding surface. The goal is not perfection under a microscope. The goal is a smooth enough surface that the finished desk looks intentional instead of “painted during a power outage.”
Step 5: Lightly Sand the Laminate Surface
For laminate or glossy particle board furniture, sanding is about scuffing, not stripping. Use light pressure with a sanding sponge or fine-grit sandpaper. You want to dull the shine so primer has something to grab onto. You do not want to sand through the top layer and expose the soft particle board underneath.
Work evenly across the desktop, sides, drawer fronts, and legs. Be gentle on corners and edges because they can chip easily. After sanding, remove every bit of dust with a vacuum, tack cloth, or lightly damp microfiber cloth. Dust left behind can create gritty paint texture, and nobody wants a desktop that feels like a sidewalk.
Step 6: Prime with a Bonding Primer
Primer is the secret handshake between slick laminate and paint. A bonding primer is designed to stick to difficult surfaces such as laminate, glossy finishes, and previously painted furniture. Apply a thin, even coat with a foam roller on flat areas and a brush on corners or detail work.
Do not glob on primer. Thick coats dry slowly and can leave ridges. Two thin coats are usually better than one heroic coat. Allow the primer to dry fully before painting. If the manufacturer recommends a longer cure time for best adhesion, respect it. Paint chemistry is not impressed by impatience.
Step 7: Paint the Desk in Thin, Smooth Coats
Once the primer is dry, apply your chosen paint. A foam roller creates a smoother finish on broad surfaces, while an angled brush helps with edges and tight spots. Start with a thin coat. It may look streaky at first, especially if you are painting a dark desk white or a white desk dramatic charcoal. Do not panic. The second coat is where the magic starts behaving.
Let each coat dry properly before adding the next. Lightly sanding between coats with very fine sandpaper can remove dust nibs or roller texture. Wipe clean before applying another coat. Most desks need two coats of paint, though bold color changes may need three.
Best Paint Finishes for a Desk
Satin, semi-gloss, and enamel finishes are popular for desk makeovers because they are easier to clean than flat paint. Matte finishes look modern, but they may show fingerprints and scuffs faster. If you love a matte look, use a durable clear topcoat to protect it.
Step 8: Seal the Surface for Daily Use
A particle board desk makeover should not stop at paint if the desk will be used every day. A clear protective topcoat helps resist scratches, moisture rings, and general life chaos. Choose a water-based polyurethane, polycrylic, or furniture topcoat that is compatible with your paint.
Apply thin coats with a clean brush or foam applicator. Let each coat dry as directed, and lightly sand between coats if the product recommends it. The desktop deserves extra protection because it receives the most wear. Drawer fronts and sides can usually get by with fewer coats, but the top surface should be treated like prime real estate.
Design Ideas for a Stylish Particle Board Desk Makeover
The practical steps matter, but the fun part is choosing the look. A particle board desk can fit almost any style with the right finish and hardware.
Modern Minimalist
Paint the desk soft white, warm gray, mushroom beige, or matte black. Add slim metal pulls and keep the desktop clutter-free. This style works beautifully in small apartments, bedrooms, and home offices where visual calm is the goal.
Two-Tone Upgrade
Paint the base a solid color and add a faux wood contact paper or peel-and-stick desktop film on top. A black base with a walnut-look top can make a budget desk look custom. Just seal edges carefully so the film does not lift over time.
Color Pop Workspace
If your room needs personality, try sage green, navy blue, terracotta, dusty pink, or deep teal. A desk is smaller than a wall, so it is a safe place to experiment. Worst case, you repaint it. Best case, your workspace finally stops looking like a waiting room.
Industrial Look
Use charcoal paint, black metal hardware, and a dark faux concrete or weathered wood top. Add a desk lamp with a metal shade and a cable management tray underneath. Suddenly your old particle board desk has loft energy, even if the loft is technically a corner of your bedroom.
Common Mistakes to Avoid
Skipping Primer
This is the classic mistake. Regular paint does not bond well to slick laminate. Primer may feel like an extra step, but it saves the entire project.
Sanding Too Aggressively
Particle board is not solid hardwood. Heavy sanding can damage the thin surface layer and make repairs harder. Scuff gently and evenly.
Painting Over Dust
Dust creates texture, bumps, and poor adhesion. Clean after sanding every single time.
Using the Desk Too Soon
Paint may feel dry before it is fully cured. Be gentle for the first several days. Avoid heavy monitors, hot mugs, desk mats with rubber backing, or aggressive cable dragging until the finish has hardened.
Ignoring Moisture
Particle board hates water. Use coasters, wipe spills quickly, and seal exposed edges. Moisture is the villain in this story, and it does not need a dramatic soundtrack to cause damage.
Budget Breakdown: How Much Does a Particle Board Desk Makeover Cost?
A basic makeover can cost between $35 and $100 if you already own some tools. Primer, paint, sandpaper, filler, and a clear coat are the main expenses. New hardware may add $10 to $40, depending on your taste. Peel-and-stick film, edge banding, or decorative legs can raise the budget but also make the final result feel more custom.
Compared with buying a new desk, refinishing can be a smart choice, especially if the existing desk is the right size and shape. It is also satisfying to rescue furniture that might otherwise end up in the trash. Sustainability looks good in satin black.
Maintenance Tips After the Makeover
After your particle board desk makeover is complete, treat the surface with care. Use a desk pad under keyboards and writing areas. Add felt pads under monitor stands, lamps, and organizers. Clean with a damp cloth instead of harsh chemicals. Avoid soaking the surface, especially near seams and edges.
If small chips appear later, touch them up quickly before moisture reaches the particle board core. Keep a little leftover paint in a labeled jar for repairs. Future you will be grateful, and future you already has enough emails to deal with.
Real-World Experience: What I Learned from a Particle Board Desk Makeover
The first thing I learned during a particle board desk makeover is that the desk always looks worse before it looks better. Once the drawers are removed, the surface is scuffed, and the filler patches are drying, it is very easy to wonder whether you have ruined a perfectly usable piece of furniture. This is normal. The “ugly middle” is practically a required stage of DIY. It is the part where your desk looks like it lost a fight with a hardware store.
One of the most useful experiences is learning how much cleaning matters. An old desk can look clean but still have layers of hand oils, dust, lotion, coffee residue, and furniture polish on the surface. On one makeover, the area near the keyboard tray felt slightly slick even after a quick wipe. A second cleaning with a degreaser made a huge difference. The primer rolled on more evenly, and the paint did not separate or bead. Since then, I never rush the cleaning stage. It is boring, but it works.
Another lesson is that particle board edges need extra love. The desktop may look fine, while the corners reveal the desk’s true age. Tiny chips become very obvious after painting, especially with dark colors. Filling and sanding those edges before priming makes the final piece look much more professional. For one desk, adding simple black edge banding completely changed the look. It covered old damage and gave the desk a sharper, cleaner outline.
I have also learned that thin coats beat thick coats every time. It is tempting to load the roller and cover everything quickly, especially when the first coat looks patchy. Resist that urge. Thick paint can stay soft, collect dust, and show roller marks. Thin coats dry better and look smoother. The same rule applies to topcoat. A careful, thin protective layer is better than a glossy puddle that dries with streaks.
Color choice can change the mood of the entire workspace. A white desk feels clean and bright but may show scuffs faster. Black looks elegant but reveals dust like it is hosting a tiny gray parade. Soft green, warm beige, and muted navy are forgiving and stylish. For small rooms, painting the desk the same color as nearby walls can make it feel less bulky. For a creative office, a bold desk color can make work feel a little less like work.
The most important experience is patience. Letting primer cure, allowing paint to dry, and waiting before heavy use can feel painfully slow. But the finish lasts longer when each layer has time to harden. On a rushed project, a monitor stand left a mark in the paint after only two days. On a patient project, the same type of finish held up beautifully because the desk was left alone for several extra days. Waiting is not exciting, but neither is repainting the same desktop twice.
A particle board desk makeover also teaches you to respect limitations. You cannot turn particle board into heirloom walnut, and you cannot sand it like solid maple. But you can make it attractive, functional, personal, and durable enough for everyday use. That is the real win. The goal is not to create museum furniture. The goal is to create a desk that makes you happy when you sit down to work, study, write, game, plan, or pretend to organize your life with a fresh notebook.
In the end, the biggest surprise is how much confidence one makeover can give you. Once you transform a tired particle board desk, other furniture starts looking suspiciously possible. A bookcase, nightstand, file cabinet, or old TV stand may suddenly seem like your next project. This is how DIY begins: one innocent desk, one can of primer, and then somehow you are comparing drawer pulls at midnight.
Conclusion
A particle board desk makeover is a practical, affordable way to refresh a workspace without buying new furniture. The key is preparation: clean thoroughly, repair damage, scuff the surface, use a bonding primer, paint in thin coats, and protect the finish with a clear topcoat. Particle board may not be fancy, but it is surprisingly makeover-friendly when handled correctly. With the right color, hardware, and a little patience, even a scratched, outdated desk can become a stylish centerpiece for your home office, bedroom, craft room, or study nook.
Think of it as furniture redemption. Your desk has survived coffee spills, deadline panic, tangled chargers, and maybe a few questionable snack choices. Give it a second chance, and it might reward you with years of better-looking productivity.