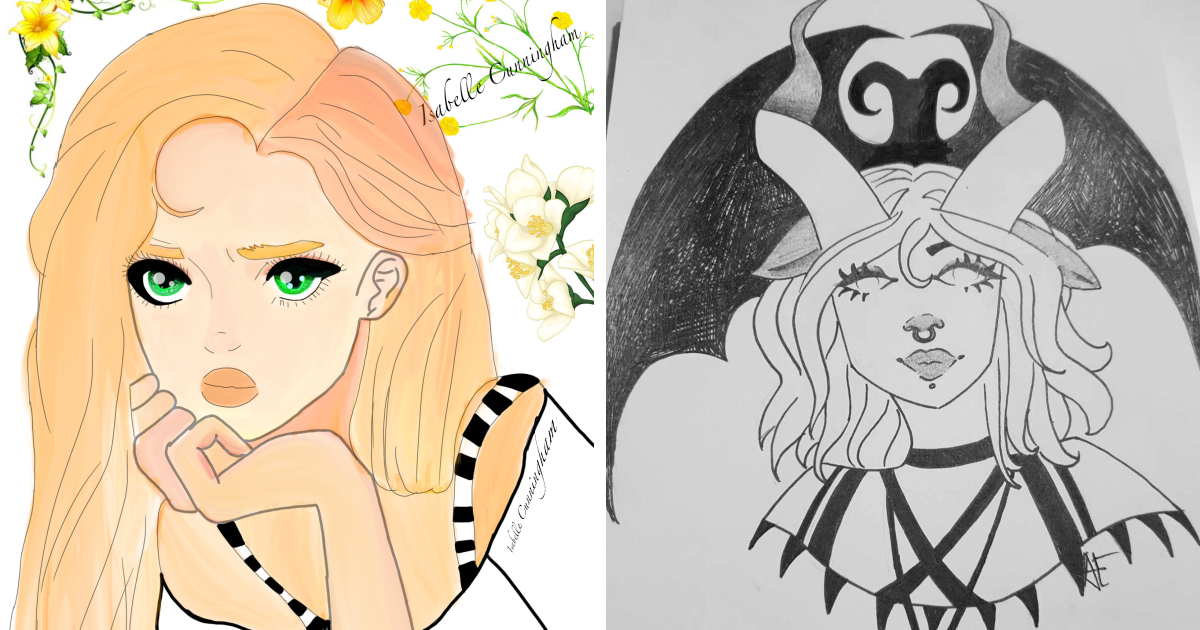
Let’s be honest: “Draw yourself, but better” sounds like a dare from a chaotic best friend. It’s half art prompt, half identity crisis, and 100% internet fuel.
But that is exactly why this challenge works. It blends playful pressure with personal storytelling, which is why “Hey Pandas” drawing prompts keep pulling people in.
You’re not just sketching a face. You’re translating your vibe, your mood, your chaos, your “I had coffee and confidence today” energy into lines and shapes.
The good news: “better” does not mean “photorealistic.” Better can mean clearer proportions, stronger lighting, more personality, cleaner linework, richer shading, or a style that actually feels like you.
If your last self-portrait looked like a potato with eyebrows, no stress. Potatoes are a valid artistic era. We’re upgrading from “recognizable-ish” to “intentional and expressive.”
In this guide, you’ll get a practical, artist-tested roadmap: how to set up, what to focus on first, how to avoid common portrait mistakes, how to level up whether you draw traditionally or digitally, and how to build momentum without burning out.
You’ll also get a long-form experience section at the end so you can see what progress really feels like in practice, not just in motivational captions.
Why This Challenge Works So Well
Self-portrait prompts are powerful because they combine skill-building with identity-building. Museum education resources have used self-portrait projects for years to help people explore who they are, not just what they look like.
That means this challenge is both technical and personal, which is why it sticks.
Better Is A Direction, Not A Destination
The fastest way to quit is to aim for “perfect.” The fastest way to improve is to aim for “clearer than yesterday.”
Better might mean:
- your eyes finally sit on the same horizontal axis,
- your nose has structure instead of mystery,
- your lighting reads in three values instead of one gray cloud,
- your portrait actually communicates a mood.
Small wins compound. If you can improve one thing per drawing, your “before and after” in 30 days will surprise you.
Set Up Like A Pro Before You Draw
Reference And Lighting
Use one of these setups:
- Mirror setup: Great for observational drawing and subtle expression shifts.
- Phone photo setup: Best when you want a frozen pose and consistent light.
- Hybrid setup: Start from a photo, then refine while checking a mirror.
Keep light simple: one main light source at about 45 degrees from your face. Avoid overhead-only lighting unless your goal is “haunted raccoon chic.”
Tools That Actually Help
Traditional: HB and 2B pencils, kneaded eraser, smooth sketch paper, blending stump if you like softer transitions.
Digital: one hard brush, one soft brush, one textured brush, and a lasso tool. Keep your brush pack minimal. Too many brush choices can become a hobby by themselves.
Composition Choices
Decide this before you start:
- Head-and-shoulders, close-up, or half-body?
- Straight-on, three-quarter view, or profile?
- Neutral background or symbolic props?
If you are a beginner, choose a three-quarter view with simple background. It gives form and depth without overwhelming you.
The Seven-Step Way Better Portrait Method
Step 1: Define The Story In One Sentence
Before line one, write: “This portrait should feel like…”
Examples:
- quiet confidence,
- sleep-deprived but resilient,
- comic-book energy,
- soft and thoughtful.
This sentence guides every decision: line quality, shadow shape, edge softness, color temperature, even eyebrow attitude.
Step 2: Block The Big Shapes First
Start with the head mass, neck angle, and shoulder line. Then mark brow line, nose base, and chin.
Do not start with eyelashes. Eyelashes are a late-game luxury item.
Think in geometry: oval, wedge, plane, rhythm. Great portrait artists simplify first, detail second.
Step 3: Lock Proportions Using Measurement
Use comparative measurement:
- Distance between eyes vs width of nose,
- Nose base to chin vs brow to nose base,
- Mouth width relative to iris centers,
- Ear top and bottom alignment with brow and nose zones.
If something looks “off,” zoom out mentally: it is often a big placement issue, not a tiny detail issue.
Step 4: Build Features As Forms, Not Symbols
Don’t draw “an eye icon.” Draw eyelids wrapping around an eyeball sphere.
Don’t draw “a lip sticker.” Draw upper and lower forms with plane changes and value shifts.
This one shift instantly makes portraits look more dimensional and less cartoon-by-accident.
Step 5: Map Three Value Groups
Keep early shading simple:
- Light areas hit by the source,
- Midtones turning away,
- Shadows core and cast shapes.
If your value pattern is strong, your portrait works even before details. This is one of the most reliable quality jumps.
Step 6: Control Edges For Focus
Sharp edges pull attention. Soft edges push forms back.
Put the sharpest edges around your focal point, usually one eye plus eyebrow and nearby nose bridge.
Let secondary areas stay softer so your drawing breathes.
Step 7: Add Identity Signals
This is the “but way better” magic. Add personal cues intentionally:
- signature hairstyle shape,
- glasses reflection,
- favorite hoodie texture,
- small object that tells your story (headphones, sketchbook, game controller, coffee mug).
A self-portrait without identity cues can be technically solid but emotionally flat. Add one or two details that make it unmistakably you.
Three Style Paths You Can Choose Right Now
1) Realistic Upgrade
Focus on accurate proportions, gradual value transitions, and subtle asymmetry. Real faces are not perfectly mirrored; keep tiny differences.
2) Stylized Upgrade
Exaggerate shapes with intention: bigger eyes, sharper jaw rhythm, bold lineweight. Keep proportion logic consistent so stylization feels designed, not random.
3) Graphic Flat-Shape Upgrade
Use simplified planes and limited values. Prioritize silhouette clarity and clean negative space. Great for social posts and fast iterations.
Common Portrait Mistakes And Fast Fixes
- Mistake: Features floating on face. Fix: Rebuild head planes before details.
- Mistake: Eyes too high. Fix: Re-check eye line near face midpoint in your chosen angle.
- Mistake: Muddy shading. Fix: Separate light and shadow families first; blend less.
- Mistake: Flat hair helmet. Fix: Draw big hair masses, then selective strands.
- Mistake: Over-rendering everything. Fix: Pick one focal zone and simplify the rest.
- Mistake: Over-relying on filters. Fix: Train observation with one raw reference each week.
Try This 30-Minute Panda Practice Sprint
- 5 minutes: Story sentence + composition thumbnail.
- 7 minutes: Head shape and feature placement.
- 8 minutes: Three-value block-in.
- 7 minutes: Focus area refinement.
- 3 minutes: One identity cue and clean-up.
Do this three times a week. Frequency beats marathon sessions every single time.
How To Improve Fast Without Burnout
Keep a simple review template after each drawing:
- One thing that worked,
- One thing that felt off,
- One specific goal for the next portrait.
Also save your “ugly drafts.” They are evidence of experimentation, and experimentation is where style is born.
Experience Stories From The Hey Pandas Self Portrait Challenge
Across classroom-style prompts, online art communities, and informal friend groups, the same experience pattern appears again and again. Day one usually starts with excitement plus panic.
People open a blank canvas, grab a mirror or front-camera photo, then spend ten minutes deciding whether their nose is impossible to draw, whether their jawline secretly changed overnight, and whether they should “just do anime and call it a day.”
The first portrait often looks stiff. Faces are centered too perfectly. Expressions are cautious. Hair is either overworked strand-by-strand or simplified into one giant shape that resembles a dramatic helmet.
By the second week, something shifts. Artists stop asking “Is this perfect?” and start asking “What is this portrait trying to say?” That single mindset change makes drawings more alive.
A student who began with a flat, careful front-view portrait tries a three-quarter angle and suddenly gets depth. Another artist switches from random smudging to clear light-shadow grouping and their work jumps in quality almost immediately.
Someone else realizes their strongest skill is line rhythm, not heavy rendering, and leans into clean contour drawing with selective shading. The portraits become less generic and more personal.
The emotional side is just as important. People report that drawing themselves repeatedly can feel awkward at first, then oddly grounding. Instead of chasing a perfect selfie version, they start noticing subtle differences in mood and posture:
tired eyes after a long day, a softer mouth shape when calm, a firmer brow on focused days. These details become artistic choices rather than insecurities.
Many participants say that the challenge teaches them to observe themselves with curiosity instead of criticism. That is a huge win, both creatively and mentally.
Around week three, technical growth becomes visible. Feature placement gets more accurate. Neck-to-head proportions improve. Backgrounds become intentional instead of accidental emptiness.
Digital artists create cleaner layer structures and reduce brush chaos. Traditional artists gain confidence with value control and eraser highlights.
Most importantly, artists stop restarting every ten minutes. They learn to push through ugly middle stages, which is where real skill is built.
By the final stretch, “way better” looks different for each person. For one artist, it means photorealistic shading. For another, it means a bold stylized portrait with unmistakable personality.
For many, it simply means they can now finish a portrait with intention and feel proud of decisions they made on purpose.
The strongest portfolios from these challenges usually include process snapshots, not just polished finals. You can literally see confidence increasing from sketch to sketch.
If you try this challenge, expect a messy first pass, a stubborn middle phase, and a very satisfying finish. Keep your old drawings, date your files, and compare week one to week four.
Progress will likely show up in places you did not expect: cleaner design, stronger storytelling, and a kinder creative voice in your own head.
That is what “draw a picture of you, but way better” really means. Not becoming someone else on paper, but becoming clearer, sharper, and more intentional as yourself.
Conclusion
The Hey Pandas self-portrait prompt is fun because it looks simple and secretly trains serious fundamentals: observation, proportion, value, edge control, and visual storytelling.
If you keep the process focused, “better” becomes measurable in every session. Use one clear light source, block big shapes first, simplify values, choose one focal area, and add identity cues with intention.
Then repeat. A lot.
You do not need perfect symmetry, expensive tools, or magical talent. You need structure, consistency, and enough humor to survive the weird phase where your sketch looks like a confused celebrity impersonator.
Stay with it. The next portrait is usually the one where everything starts clicking.