Want your bedroom to look like you hired a designer, but your wallet is currently in “instant noodles and good intentions” mode? A DIY wooden headboard is one of the best upgrades you can make on a tiny budget. It adds warmth, texture, and that custom-built look without requiring a full woodworking shop or a second mortgage.
This guide walks you through an easy, cheap DIY wooden headboard idea you can build for about $45 (especially if you use budget pine, furring strips, leftover stain/paint, and basic hardware you may already have). It’s beginner-friendly, customizable for different mattress sizes, and stylish enough to look much more expensive than it is.
We’ll cover planning, materials, a simple step-by-step build, budget-saving tips, common mistakes, finishing advice, and a practical “real-world experience” section at the end so you can avoid the classic DIY plot twists.
Why This $45 DIY Wooden Headboard Works So Well
A wooden headboard gives you the biggest visual payoff for the least effort. Unlike building an entire bed frame, this project focuses on the part people actually notice first: the vertical statement piece behind the pillows. That means less lumber, fewer cuts, and faster assembly.
This design uses a simple planked wood look with a basic frame or backer approach. You can keep it rustic, paint it modern, stain it warm walnut, or distress it for farmhouse style. If you want to get fancy later, you can add trim, a shelf, or even LED lightingbut the base version still looks great and stays affordable.
Project Snapshot
- Project type: DIY wooden headboard (budget planked style)
- Skill level: Beginner
- Time: 3–6 hours build time (plus drying/curing time for finish)
- Estimated cost: About $45 (depending on wood prices and what supplies you already own)
- Best for: Renters, first-time DIYers, bedroom makeovers, budget decor upgrades
What You’ll Need for a Cheap Wooden Headboard
Budget Materials (Example for a Queen-Style Build)
- 1/4-inch plywood or project panel (backer) or skip the backer and build a slat-only version
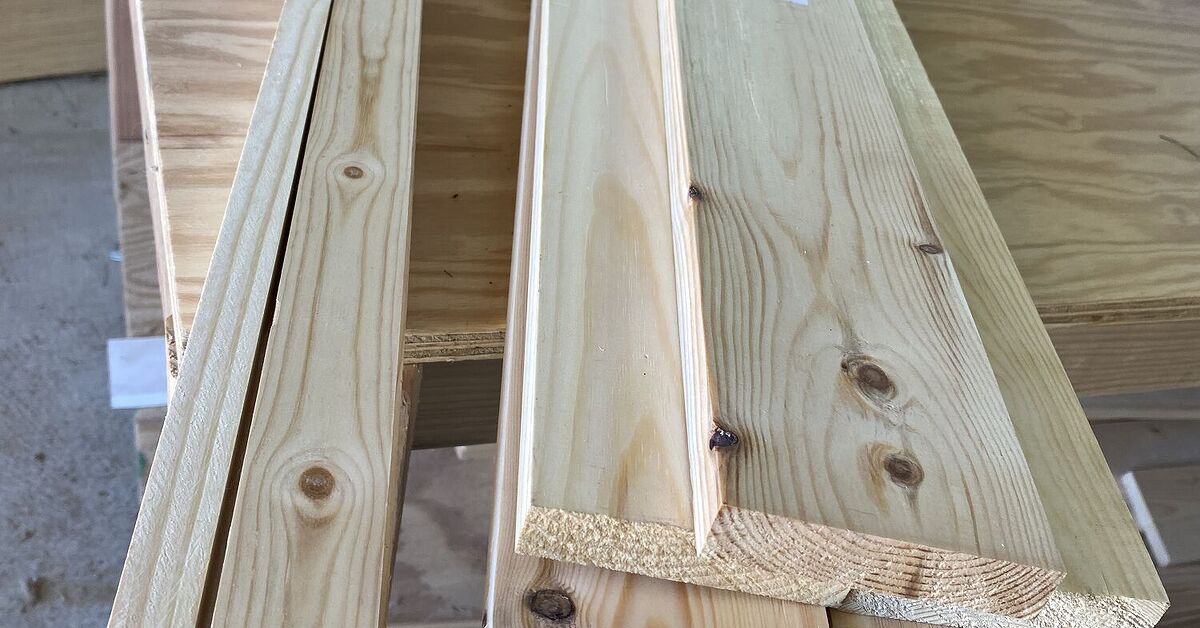
- Budget pine boards or furring strips (1×3 and/or 1×4)
- 1×2 or 1×3 boards for side frame/trim (optional but recommended)
- Wood glue
- 1 1/4-inch wood screws or brad nails
- Sandpaper (120-grit and 220-grit)
- Wood filler (optional)
- Stain or paint (leftover works great)
- Clear topcoat/polyurethane (optional but smart for durability)
- Mounting hardware (L-brackets, bolts to bed frame, or cleat-style hanging hardware)
Tools
- Tape measure
- Pencil and speed square
- Circular saw or miter saw
- Drill/driver
- Sander (or sanding block if you like elbow workouts)
- Clamps (helpful, not mandatory)
- Safety glasses, hearing protection, and dust mask/respirator
How to Build an Easy DIY Wooden Headboard for About $45
Step 1: Measure Your Bed and Pick Your Headboard Size
Start by measuring the mattress width and the space behind your bed. A common mistake is building a headboard that technically fits the bed but looks tiny on the wall. A good rule: make it the same width as the bed frame or slightly wider for a custom look.
For a classic layout:
- Full: around 53–54 inches wide
- Queen: around 60 inches wide
- King: around 76 inches wide
Height is flexible. Most DIY wooden headboards look balanced in the 40–55 inch range depending on mattress height and room scale. If you’re unsure, tape out a rectangle on the wall first. It takes 5 minutes and can save you from “why does this look like a postage stamp?” later.
Step 2: Choose a Simple Design That Saves Money
The cheapest beginner design is a horizontal planked headboard (or vertical planks if you prefer). Why? Straight cuts, minimal waste, and fewer specialty tools. Many popular DIY plans use inexpensive pine or furring strips because they’re easy to find and easy to customize.
If you want the most stable and beginner-friendly version, build it in layers:
- Backer panel (plywood/project panel)
- Decorative planks attached on front
- Optional trim/frame around edges
If your goal is pure budget mode, you can skip the backer panel and fasten planks to cross braces on the back.
Step 3: Make a Basic Cut Plan (Queen Example)
Here’s a simple queen-size example you can adjust:
- Finished size target: 60 inches wide x 48 inches tall
- Backer panel: 1 piece at 60 x 36 inches (or similar project panel size)
- Face planks: enough 1×3 or 1×4 boards cut to 60 inches to cover the front
- Side trim: 2 pieces at 48 inches
- Top trim: 1 piece at 60–62 inches (depending on style)
- Bottom support/cleats on back: 2–3 pieces as needed
Pro move for budget builders: ask the store to make a few straight cuts on plywood or project panels. It saves time, helps with transport, and reduces “I measured twice but somehow cut a trapezoid” events.
Step 4: Cut, Label, and Dry Fit Everything
Cut all pieces first, then lay them out on the floor before assembly. Label the back of each board with a pencil (top, left, right, center) so you don’t mix up slightly different cuts.
Check for warped boards. Budget pine and furring strips are great for price, but they can twist or bow. Pick the straightest boards in the stack at the store and let them acclimate indoors for a day if possible.
Step 5: Sand Before Assembly (Yes, Before)
Sanding individual boards before assembly is much easier than trying to squeeze a sander into corners later. Start with 120-grit to smooth rough lumber and finish with 220-grit for a cleaner stain-ready surface. Always sand with the grain.
Vacuum or wipe off the dust before finishing or gluing. Dust is the glitter of woodworking: it gets everywhere and shows up in the final finish if you let it.
Step 6: Assemble the Headboard
Assembly depends on your design, but the easiest method is:
- Place the backer panel on a flat surface.
- Apply wood glue to the back of each plank.
- Set planks in place tightly (or leave small even gaps for a modern slat look).
- Fasten with brad nails or screws from the back (if using a backer) or from the front into hidden supports.
- Add side trim and top trim.
- Check for square before the glue sets.
If you’re skipping the backer, attach planks to two or three horizontal support braces on the back. This still looks great and can reduce cost and weight.
Step 7: Fill, Sand, and Finish
Fill nail holes if you want a cleaner finish. Sand lightly again after filler dries. Then choose your finish:
- Stain: best if you want visible wood grain
- Paint: best for modern, coastal, or kid-room styles
- Clear coat only: best for a raw/natural wood look
If you’re using softwood like pine, a wood conditioner can help reduce blotchiness before stain. Test your stain color on scrap wood first. Pine loves surprises, and not all of them are good.
After staining, let it dry fully, then apply a protective topcoat if desired. This helps prevent scratches, especially if you lean pillows or your head against it regularly.
Step 8: Mount It Safely
You have three common mounting options:
- Attach to bed frame: Great for standard metal frames with headboard brackets
- Wall mount (cleat or brackets): Clean floating look
- Freestanding behind the bed: Easiest, but less secure unless well-supported
For wall mounting, anchor into studs whenever possible. If you’re renting, check your lease rules before committing to heavy wall hardware.
How to Keep a DIY Wooden Headboard Under $50
The “$45 headboard” is absolutely doable, but it depends on smart choices. Here’s how to keep the math friendly:
Sample Budget Breakdown (Approximate)
- Furring strips / budget pine boards: $18–$25
- Small plywood/project panel or back supports: $8–$15
- Screws / nails / glue (partial use): $5–$8
- Sandpaper / filler (partial use): $3–$5
- Finish (using leftovers): $0–$10
Total: roughly $34–$63, with $45 being a realistic target if you already own some supplies or use offcuts/scrap wood.
Budget tip: If stain + polyurethane pushes you over budget, use paint you already have. Painted headboards hide cheap lumber imperfections better than stain and still look polished.
Beginner Mistakes to Avoid
1) Buying Crooked Boards Because They’re Cheap
Cheap is good. Crooked and twisted is not. Sight down each board before buying. A few extra minutes in the lumber aisle saves a lot of frustration during assembly.
2) Skipping the Test Layout
Always dry-fit your boards before gluing and nailing. This helps you balance grain patterns, knots, and seams so the finished headboard looks intentionalnot like a lumber yard audition.
3) Staining Without Sanding Properly
Rushed sanding leads to blotchy stain and visible scratches. Sand with the grain, remove dust, and test on scraps first. If your wood is soft and porous, consider conditioner for a more even result.
4) Not Allowing Enough Dry/Cure Time
“Dry to the touch” is not the same as “fully cured.” If you install the headboard too soon, you can trap odors, dent the finish, or leave marks from pillows and blankets.
5) Forgetting Safety Basics
Wear eye protection, hearing protection, and dust protection when cutting and sanding. Wood dust and finish fumes are not part of the rustic aesthetic.
Style Variations You Can Build From This Same Idea
Farmhouse Plank Headboard
Use wider boards, add a chunky top cap, and finish with a warm medium-brown stain. Perfect for cozy bedrooms and linen bedding.
Modern Minimal Headboard
Use narrow planks with tight spacing and paint it matte black, soft white, or greige. Keep trim minimal for a clean profile.
Rustic Reclaimed-Look Headboard
Mix stain tones lightly across planks or distress edges with sandpaper after painting. This gives texture without needing true reclaimed wood.
Chevron or Patterned Upgrade
Once you’re comfortable with straight cuts, you can reuse the same concept and create a chevron or herringbone panel using thinner strips. It costs more and takes longer, but the look is dramatic.
DIY Wooden Headboard FAQ
Can I build this without a nail gun?
Yes. Use wood glue plus screws. A brad nailer is faster, but not required for a basic build.
What wood is best for a cheap headboard?
Pine and furring strips are usually the best budget choices. They’re easy to cut, widely available, and work well for painted or stained finishes.
Do I need a plywood backer?
Not always. A backer makes alignment easier and creates a flatter, sturdier panel, but a slat-only design with rear braces can be cheaper and lighter.
Can I make a headboard for a king bed using the same method?
Absolutely. Just scale the width, add more support on the back, and double-check your mounting hardware so it stays rigid.
Is $45 realistic in 2025?
It can be, especially if you use inexpensive pine/furring strips, skip premium hardware, and use leftover paint or stain. If you buy every supply new, your final cost may land closer to $60–$100.
Final Thoughts
If you want a bedroom upgrade that looks custom but doesn’t eat your budget, this easy cheap DIY wooden headboard idea for $45 is a winner. It’s simple, flexible, and beginner-friendlyand it lets you create a piece that fits your room instead of settling for whatever is in stock at the store.
Start with straight boards, measure carefully, sand more than you think you need to, and don’t rush the finish. Do that, and you’ll end up with a headboard that looks far more expensive than the receipt suggests.
Experience-Based DIY Notes (Composite, 500+ Words)
The following section is a composite of common DIYer experiences with budget wooden headboards, included to help you plan better and avoid the most frequent beginner issues.
One of the most common experiences with a cheap DIY wooden headboard is realizing that the shopping trip matters almost as much as the build. Many first-time DIYers assume wood is wood, grab the first bundle of furring strips they see, and go home excitedonly to discover that two boards are twisted like propellers and one looks like it spent the week training to become a boomerang. People who report the smoothest builds usually spend extra time at the store checking straightness, looking for cleaner grain on visible pieces, and choosing boards with fewer deep cracks near the ends.
Another common experience: the project feels intimidating until the first few cuts are done. Beginners often overestimate the difficulty of a wooden headboard because it sounds like “furniture,” but in practice, this is one of the friendliest furniture-style projects to start with. Most builders say the confidence boost comes fast. Once the boards are cut and arranged on the floor, the project suddenly shifts from “I hope this works” to “Okay, this is actually happening.”
A lot of DIYers also mention that dry fitting the layout becomes a surprisingly fun design step. Knots, grain patterns, and color variations in budget pine can look random in a stack, but when arranged intentionally, they add character. People often swap boards around several times before fastening them, especially when creating a rustic or farmhouse look. That extra 10–15 minutes can make the finished headboard look much more expensive.
The biggest frustration, by far, is usually the finishnot the construction. Builders frequently report that cutting and assembly go faster than expected, but stain can turn into a mini drama if the wood wasn’t sanded evenly or dust wasn’t fully removed. A very common lesson is to test stain on scraps from the same wood batch before applying it to the whole headboard. Another recurring note: cheap pine can absorb stain unevenly, so a conditioner or a paint finish often produces a more predictable result.
People also underestimate drying and curing time. A headboard may feel dry enough to touch, but if it’s installed too soon, pillows can stick slightly, the finish can imprint, or the smell can linger longer than expected. DIYers who are happiest with the final result usually give the finish more time than the label’s minimum recommendation, especially in humid weather.
On the mounting side, the most repeated advice is simple: decide how you’ll mount it before you build it. Some people finish a gorgeous headboard and then realize their metal bed frame brackets don’t align with the spacing they assumed. Others discover a wall-mounted version would have looked cleaner in a small room. Planning the mounting method early helps determine how much support to add on the back and where to place screws or braces.
Finally, many DIYers say this project leads to a productive side effect: once the headboard is done, the rest of the room suddenly looks “unfinished,” and they end up repainting, replacing bedding, or building matching nightstands. That may sound like a warning, and honestly, it is. But it’s also part of the appeal. A low-cost wooden headboard often becomes the project that makes people realize they can build attractive, useful pieces themselves. For around $45 and a weekend, that’s a pretty good trade.