If you have ever opened PowerPoint on your Mac, stared at the ribbon, and thought, “Surely adding a video should not feel like assembling a spaceship,” welcome. You are in good company. The good news is that adding video to PowerPoint on a Mac is not hard once you know which method fits your situation. The even better news is that you have more than one option, so you are not stuck wrestling with a single mysterious button while your deadline breathes down your neck.
Whether you want to drop in a product demo, a lecture clip, a recorded screen tutorial, or a quick talking-head intro, there are four practical ways to get it done. Some methods are best for offline presentations. Others are perfect when you want to keep your file size under control. And one of them is the lifesaver you will want when inspiration strikes five minutes before a meeting and you need to record something fast.
In this guide, you will learn how to add a video to PowerPoint on a Mac by embedding a file, linking to a file, inserting an online video, or recording your own clip first and then bringing it into the presentation. Along the way, we will also cover video formats, playback settings, common mistakes, and a few sanity-saving tips so your presentation does not become a slideshow followed by a public troubleshooting session.
Before You Add a Video: A Few Smart Mac-Friendly Prep Steps
Before diving into the four methods, take a minute to set yourself up for success. This small bit of prep can save you from the classic “Why is my slide showing a sad empty box instead of a video?” moment.
Use a format PowerPoint actually likes
On a Mac, PowerPoint generally plays nicest with MP4 files encoded with H.264 video and AAC audio. MOV files often work too, and some versions also support WebM, but MP4 is the safe, dependable choice. Think of it as the plain black T-shirt of video formats: not flashy, but it works with almost everything.
Check your PowerPoint version
If you want to insert an online video from YouTube or Vimeo, newer Mac versions of PowerPoint are far more cooperative than older ones. In recent versions, you can usually paste a video URL and insert it directly. In older versions, online video support may be limited or absent, which means local files are the better bet.
Keep presentation and video files organized
If you plan to link to a video instead of embedding it, store the video in the same folder as your PowerPoint deck. That way, when you move the presentation to another folder, another Mac, or another frazzled coworker’s desktop, the link has a fighting chance of surviving.
Test playback in Slide Show mode
Do not trust the tiny preview on the slide. Always test the video in Slide Show view. A clip that looks fine on the editing screen can behave very differently once the presentation starts, especially if you want it to autoplay or run full screen.
Way 1: Embed a Video File Stored on Your Mac
This is the most common method, and for many people, it is the best one. If you already have a video saved on your Mac, embedding it directly into PowerPoint is straightforward and reliable.
How to do it
- Open your presentation and go to the slide where you want the video.
- Click the Insert tab.
- Select Video, then choose the option that points to your Mac, such as This Device or Movie from File.
- Choose your video file and click Insert.
That is it. Your video is now part of the presentation file rather than floating around as a separate piece of media you may or may not remember to bring later. In other words, it is the “I would like fewer surprises in my life” option.
Why this method works well
Embedded video is ideal for offline presentations, conference rooms with suspicious Wi-Fi, classroom lectures, sales decks, and any setting where you do not want to rely on the internet. It also gives you access to more playback features inside PowerPoint, including start behavior, full-screen playback, and other presentation controls.
Best use case
Use this method when the video is important to the presentation and you need it to play smoothly without depending on an outside website. If your audience absolutely must see that demo clip, embed it.
Extra Mac tip
If you are working quickly, some users like dragging a video straight from Finder onto a slide. That shortcut can work, but the Insert menu is usually more predictable, especially if you want consistent results and fewer weird formatting surprises.
Way 2: Link to a Video File Instead of Embedding It
Sometimes you want the video in the presentation, but you do not want the PowerPoint file to balloon into something the size of a small planet. That is where linking comes in.
How it works
Instead of storing the video inside the PowerPoint file, PowerPoint keeps a path to the video file on your Mac. On the slide, it still looks like a video. Behind the scenes, though, it is more like PowerPoint saying, “Trust me, I know where that clip lives.”
How to do it
- Go to the slide where you want the video.
- Click Insert and then Video.
- Choose the file from your Mac.
- Use the small arrow next to Insert if available, then select Link to File.
This method keeps your PowerPoint smaller, which can be useful if you are emailing the deck, storing it in shared folders, or working with several long videos.
The trade-off
Linked videos are efficient, but they are also dramatic. Move the video file, rename it, stash it in a different folder, or send only the PowerPoint without the media file, and the link can break. Then your presentation arrives ready to play absolutely nothing.
When linking is the better choice
Choose this method when file size matters and you control the presentation environment. It is useful for internal training decks, personal presentations, or situations where the presentation and media folder will stay together from start to finish.
Pro move
Create one folder for the deck and every related media file. Keep the PowerPoint file, linked video files, and backup copies there. It is not glamorous, but neither is explaining to a room full of people why your keynote moment has turned into mime.
Way 3: Insert an Online Video from YouTube, Vimeo, or Another Supported Service
If your video already lives online, there is no reason to download it first unless you need offline playback or advanced editing inside PowerPoint. For recent Mac versions of PowerPoint, adding an online video is often as simple as copying the URL and pasting it into the right dialog box.
How to do it
- Open the video in your web browser.
- Copy the video URL from the address bar.
- Go back to PowerPoint and select the target slide.
- Click Insert > Video > Online Video.
- Paste the URL and click Insert.
For some older PowerPoint versions, especially older Office 2016 setups, you may need the embed code instead of a simple URL. In that case, YouTube’s Share and Embed options can give you the code you need.
Why people love this method
It is fast, it keeps your presentation file smaller, and it is great for public content like YouTube explainers, Vimeo reels, and internal Microsoft Stream videos. If someone else updates the hosted video, your presentation can reflect that newer version without re-embedding a whole file.
The catch
Online videos stream from the original website, so you need a stable internet connection when presenting. Also, certain PowerPoint playback tools do not apply to online clips the same way they do to embedded files. That means trimming, fading, and some full-screen options may be limited or unavailable.
Best use case
Use online video when the clip is short, public, and easy to stream, or when you want to keep the PowerPoint file lean. It is excellent for webinars, remote meetings, classroom discussions with solid Wi-Fi, and presentations that reference current online content.
Way 4: Record a New Video on Your Mac, Then Add It to PowerPoint
This method is perfect when you do not already have a video file but need one fast. Maybe you want to record your screen for a tutorial, capture yourself explaining a slide, or create a quick webcam intro that makes the presentation feel more personal.
Option A: Record your screen with QuickTime or Screenshot
On a Mac, QuickTime Player can launch screen recording tools, letting you capture the full screen or a selected area. This is ideal for software demos, walkthroughs, and “here is exactly where to click” training videos.
Option B: Record yourself with Photo Booth
If you want a quick talking-head clip, Photo Booth makes it easy to record video using your Mac’s camera. Once recorded, you can export the video and insert it into PowerPoint like any other local media file.
Trim it before you add it
QuickTime Player is handy for simple edits. If your recording begins with five seconds of you adjusting your posture like a startled raccoon, trim the awkward part before inserting the file. Clean videos look more professional and keep the audience focused on your message instead of your pre-recording existential journey.
Why this method is so useful
Recording your own clip gives you total control. You can tailor the message to the presentation, explain a process in your own voice, and add context a downloaded video cannot provide. It is especially useful for teachers, consultants, marketers, and anyone building tutorial-style presentations on a Mac.
Playback Settings That Make Your Video Look Better
Once your video is on the slide, do not stop there. A few playback settings can make the whole thing feel much more polished.
Set the video to start automatically
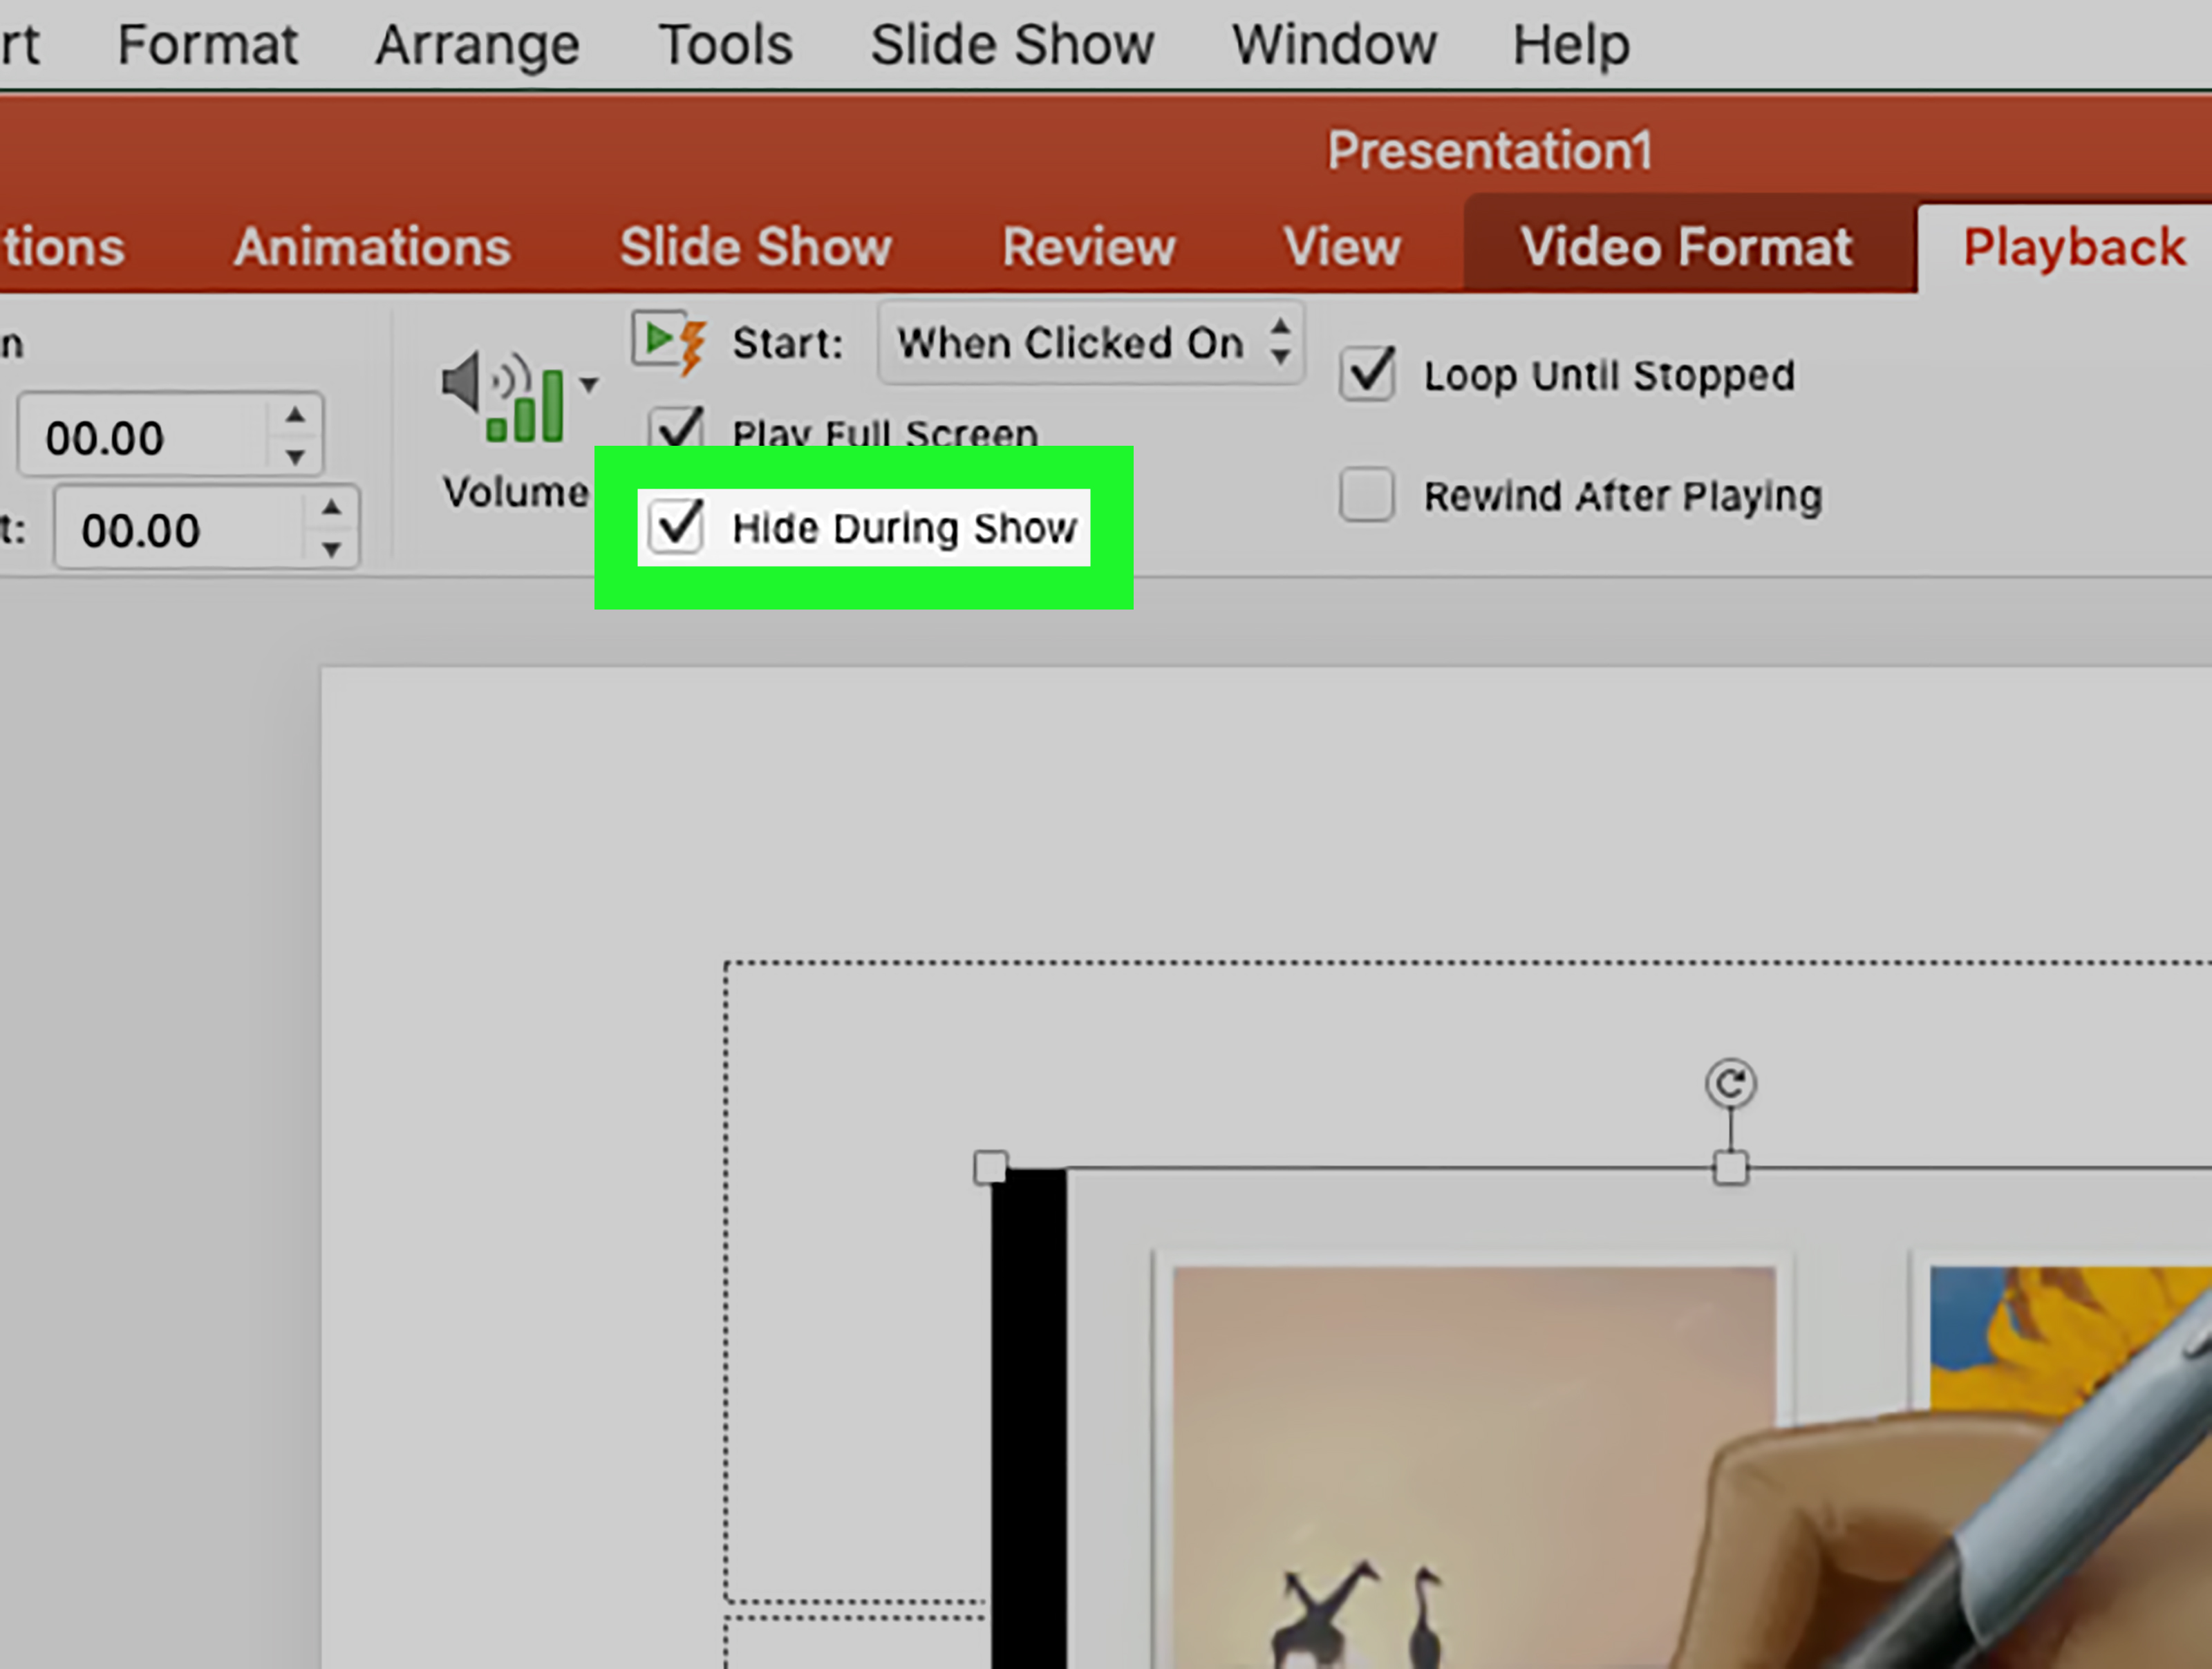
If you want the clip to begin as soon as the slide appears, select the video, go to the Playback tab, and change Start to Automatically. This is useful for demos, scene-setting clips, and presentations where you do not want to pause and click around.
Use full-screen playback for impact
If the video is the main event, full-screen playback can make it more immersive. Just be sure to test it first. A low-resolution clip can look rough when stretched, and online videos may not always support the same full-screen behavior as local files.
Preview the slide in Slide Show mode
Always preview the actual slide show. This helps you confirm whether the video starts the way you expect, fills the screen correctly, and sounds decent through the audio setup you will use during the real presentation.
Common Problems and How to Fix Them
The video will not insert
This usually points to format or codec trouble. Convert the file to MP4 with H.264 video and AAC audio and try again. That format is the most dependable across PowerPoint setups.
The file is huge
If your deck is getting bloated, use a smaller MP4, shorten the clip, or consider linking instead of embedding. You can also trim unnecessary footage before inserting it.
The online video will not play
Check your internet connection first. Then verify that your PowerPoint version supports online video on Mac. If you are dealing with a very old version, switching to a downloaded local file is often the simplest fix.
The linked video disappeared
It probably moved. Restore the original file location or place the presentation and media in the same folder and reinsert the video. Linked media is useful, but it has a memory like a goldfish if you change folders mid-project.
The presentation is old and media acts weird
If you are reviving an older deck, update the file format if PowerPoint offers the option. Older presentations sometimes behave better once converted to newer PowerPoint formats.
Real-World Examples of Which Method to Choose
For a classroom lesson
Embed a local video file. School Wi-Fi can be heroic one minute and decorative the next.
For a lightweight sales deck sent by email
Link to the file or use a short online video. That keeps the PowerPoint from becoming an attachment nobody can download without taking a coffee break first.
For a webinar with stable internet
Use an online YouTube or Vimeo clip. It is fast, clean, and easy to update.
For a software tutorial built on your Mac
Record the screen with QuickTime or Screenshot, trim the clip, then insert the MP4 into PowerPoint. It feels custom because it is.
What the Experience Is Really Like: 500 More Words from the Mac Side of the Desk
Working with video in PowerPoint on a Mac is a little like packing for a trip. If you plan well, everything feels smooth and efficient. If you toss random things into a bag at the last second, you end up standing in a hotel lobby wondering why you brought three chargers and zero socks. Video behaves the same way. The process is easy when you decide early whether your presentation needs reliability, flexibility, or a small file size.
In my experience, the first decision is always about control. If the presentation matters and the video is central to your message, embedding a local file feels best. There is something very calming about knowing the clip is inside the deck and not depending on hotel Wi-Fi, conference center bandwidth, or a browser tab that suddenly decides now is the perfect moment to reload. Embedded video is the dependable friend who shows up on time with snacks.
Linking to a file, on the other hand, feels efficient right up until you move one folder. Then it becomes a scavenger hunt. This is not a reason to avoid it; it is just a reason to be organized. When you keep a tidy project folder on your Mac, linked video can be incredibly useful, especially for larger presentations with multiple clips. It keeps things lighter and faster to share. But it does ask for discipline, which is rude, frankly.
Online video is a dream when it works. You paste a URL, the thumbnail appears, and suddenly your slide looks smarter, more current, and much less like it was built in a panic. It is excellent for recent interviews, trailers, explainers, or brand videos already hosted elsewhere. The trade-off is trust. You are trusting the internet, the platform, and the room setup. That can be perfectly fine in a webinar or office meeting. It can also be a thrilling gamble in a ballroom with 400 people and one overloaded guest network.
Recording your own video on a Mac is probably the most satisfying method because it gives you creative control. QuickTime screen recordings are great for tutorials and demos, and Photo Booth clips are surprisingly useful when you want a human introduction at the start of a presentation. Even a short ten-second webcam clip can make a slide deck feel warmer and more intentional. It adds personality without turning the whole thing into a documentary about your lighting setup.
The most important lesson is that PowerPoint on a Mac rewards testing. Not guessing. Not hoping. Testing. Play the video in Slide Show view. Listen to the audio through the speakers you will actually use. Advance the slide the way you plan to during the real presentation. If the clip is supposed to autoplay, confirm it. If it is supposed to fill the screen, check that too. Tiny preview windows are liars.
There is also a subtle design lesson here. Just because you can add video does not mean every slide should become a streaming platform. The best presentations use video strategically. One short clip that proves a point is usually stronger than three long ones that slow the pace. On a Mac, as anywhere else, the smartest video choice is the one that supports the story instead of stealing the stage from it.
So yes, adding video to PowerPoint on a Mac is absolutely doable. More importantly, it is flexible. Once you understand the four methods and when to use each one, the whole process feels less technical and more creative. Which is exactly how presentation building should feel.
Final Thoughts
If you need the simplest, safest option, embed a local video file. If you need a smaller deck, link to the file and keep everything in one folder. If the clip already lives online and your connection is reliable, use the online video option. And if the video does not exist yet, record it on your Mac and then insert it like a pro who definitely did not figure it out five minutes before the meeting.
The best method depends on your presentation environment, your PowerPoint version, and how much control you want over playback. Once you know that, adding video to PowerPoint on a Mac becomes much less intimidating and a lot more useful. Which is nice, because your slides should make you look prepared, not like you are negotiating with a haunted media box.