Hidden files in Windows 7 are a little like socks in a dryer: you know they exist, but somehow they vanish when you need them most. One minute you are looking for AppData, ProgramData, or a missing backup folder; the next minute Windows acts like those files joined a witness protection program. The good news is that Windows 7 gives you several reliable ways to reveal hidden files and folders without downloading extra software or performing any wizardry that requires a cape.
In this guide, you will learn four practical ways to show hidden files in Windows 7, along with a few important warnings, real examples, and troubleshooting tips. Whether you are trying to find a lost program setting, open a hidden folder, or just confirm that a file still exists, these methods will help you do it safely and quickly.
Why Windows 7 Hides Files in the First Place
Before jumping into the steps, it helps to understand why certain files are hidden at all. In Windows 7, hidden files and folders are often protected because they contain system data, application settings, or background information that the average user does not need to touch every day. Think of them as the behind-the-scenes crew in a stage play. You do not usually see them, but the whole performance depends on them.
Some of the most common hidden locations include:
- AppData, which stores settings for many programs
- ProgramData, which holds shared application data
- $Recycle.Bin, which stores deleted files before they are permanently removed
- Desktop.ini and other protected system files that control how folders behave
That is why Windows 7 hides them by default. It is trying to protect you from accidental deletion, editing, or moving files that could cause weird behavior later. Helpful? Yes. Annoying when you need those files? Also yes.
One Quick Warning Before You Start
Showing hidden files is usually safe. Deleting or modifying them casually is not. If all you need is to see hidden files in Windows 7, you can usually turn on the setting, do your work, and turn it off again afterward.
You should also know that Windows 7 itself is an older operating system. Microsoft ended standard support for Windows 7 years ago, so if this computer is still connected to the internet regularly, you should treat it with extra caution and avoid changing unfamiliar system files unless you know exactly what they do.
Now let’s get into the methods.
Way 1: Show Hidden Files from Windows Explorer
This is the method most Windows 7 users will find easiest. If you already have a folder window open, you can change the setting directly from Windows Explorer.
Steps
- Click the Start button and open Computer, or open any folder on your PC.
- In the upper-left area of the window, click Organize.
- Select Folder and search options.
- Click the View tab.
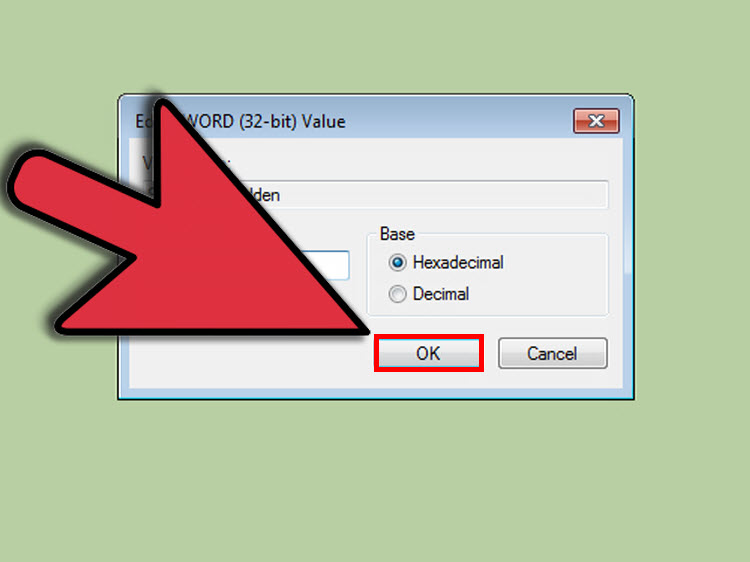
- Under Advanced settings, find Hidden files and folders.
- Select Show hidden files, folders, and drives.
- Click Apply, then OK.
That is it. Windows 7 will now display hidden items in folders and drives. Hidden items often appear slightly faded compared with normal files, which is Windows’ polite way of saying, “You can look, but try not to break anything.”
When to Use This Method
Use this option when you are already browsing folders and want the fastest route. It is especially handy if you are trying to find locations like C:\Users\YourName\AppData or C:\ProgramData.
Extra Tip
While you are on the View tab, you may also want to uncheck Hide extensions for known file types. This lets you see file extensions such as .txt, .ini, .dll, or .jpg, which makes file identification much easier. Just do not confuse that with bravery. Seeing more information is good. Renaming the wrong extension is not.
Way 2: Show Hidden Files Through Control Panel
If you prefer the classic settings route, Control Panel is another reliable way to reveal hidden folders in Windows 7. This method is useful if you are not already inside Windows Explorer or you simply like taking the scenic route.
Steps
- Click Start and open Control Panel.
- Choose Appearance and Personalization.
- Click Folder Options or Show hidden files and folders.
- Open the View tab.
- Under Hidden files and folders, choose Show hidden files, folders, and drives.
- Click Apply, then OK.
This does the same job as the Explorer method, but some users find it easier because the Control Panel layout is more familiar. It is also a nice workaround when the menu inside Explorer feels buried or mysterious.
Best Use Case
This approach works well when you are helping someone else over the phone. Saying “Open Control Panel” is often easier than explaining where the Organize button lives. It is also a good method if you want to review several folder settings at once.
Way 3: Use the Start Menu Search or the Run Command
If clicking through menus feels slow, Windows 7 gives you a shortcut. You can jump almost directly to the setting by searching from the Start menu or using a Run command.
Method A: Start Menu Search
- Click Start.
- In the search box, type show hidden files or folder options.
- Click the matching result, such as Show hidden files and folders or Folder Options.
- Go to the View tab.
- Select Show hidden files, folders, and drives.
- Click Apply and OK.
Method B: Run Command
- Press Windows + R on your keyboard.
- Type
control folders. - Press Enter.
- In the Folder Options window, open the View tab.
- Choose Show hidden files, folders, and drives.
- Click Apply and OK.
This is the speed-run version of the task. It is perfect for advanced users, support technicians, or anyone who enjoys making Windows look a little less complicated than it really is.
Why This Shortcut Matters
Sometimes you know exactly what setting you need, but not where Microsoft decided to hide it this week. Using Start search or control folders cuts through the maze and opens the right window almost instantly.
Way 4: Show Hidden Files with Command Prompt
If you want a more technical option, Command Prompt can help you view hidden files in Windows 7 without relying on the graphical interface. This method is especially useful if Explorer is misbehaving, a folder seems empty, or you want to confirm whether hidden files exist in a specific location.
Basic Commands
Here is what those commands do:
dir /ashows all files, including hidden and system items, in the current folderdir /a:hfilters the list to hidden items onlyattrib "path"displays the attributes of a file or folder so you can see whether it is hidden
Example
Let’s say you want to check whether AppData exists in your user folder. Open Command Prompt and type:
If AppData appears in the results, the folder is there even if Explorer was not showing it before.
What If You Want to Permanently Unhide One Item?
If you are not just trying to display hidden files globally, but want to remove the hidden attribute from a specific file or folder, you can use:
Only use that if you intentionally want that item to stay visible all the time. Otherwise, the safer move is simply turning on the regular hidden-file display setting in Folder Options.
Why This Method Is Useful
Command Prompt is great for troubleshooting. It does not care whether Explorer is being dramatic. It simply tells you what is there. When a folder appears empty or you suspect a file still exists but is hidden, this method can confirm it fast.
Should You Also Show Protected Operating System Files?
Maybe. Usually not.
Windows 7 has a separate setting called Hide protected operating system files (Recommended). If you clear that box, you may see deeply sensitive system files like desktop.ini and other operating system components. That can be useful for very specific troubleshooting tasks, but it is overkill for routine file hunting.
For most people, the better rule is simple: turn on “Show hidden files, folders, and drives,” but leave protected operating system files hidden unless you have a clear reason to reveal them.
Common Reasons People Need Hidden Files in Windows 7
- Finding AppData to reset or copy program settings
- Opening ProgramData for shared software files
- Checking whether files were hidden by cleanup tools or malware
- Locating a missing backup or import folder
- Viewing file extensions before editing or moving important items
- Confirming that deleted files are sitting in $Recycle.Bin
In other words, hidden files are not always suspicious. Sometimes they are just inconveniently shy.
Troubleshooting: Hidden Files Still Do Not Appear
1. You changed the setting, but nothing shows up
Make sure you clicked Apply before closing the window. Also reopen the folder or press F5 to refresh Explorer.
2. The folder is still invisible
Try typing the full path directly into the Explorer address bar, such as C:\Users\YourName\AppData. If the folder opens, the issue may be with display settings or navigation, not the folder itself.
3. The hidden option seems broken
Occasionally, malware or a damaged setting can interfere with hidden-file visibility. In that case, using Command Prompt with dir /a can confirm whether the files are present.
4. You can see hidden files now, but they look faded
That is normal. Windows uses a lighter appearance to remind you that the items are hidden by attribute, even though you chose to display them.
Real-World Experiences with Hidden Files in Windows 7
One of the most common experiences people have with hidden files in Windows 7 starts with a simple sentence: “I know that folder exists, but I can’t find it.” Usually the missing target is AppData. A user is trying to migrate browser settings, copy a game save, or fix a software problem, and every online instruction says to open AppData. They click through C:\Users\YourName, stare at the screen, and immediately feel like the internet has lied to them. It has not. Windows is just being overprotective.
Another common situation happens after a virus scare or a cleanup tool gone wild. Files are technically still on the drive, but they have been marked hidden. The desktop looks emptier than a refrigerator the night before grocery day. In those moments, turning on Show hidden files, folders, and drives can feel like a magic trick. Suddenly folders reappear, icons return, and panic levels drop from “everything is gone forever” to “okay, maybe I can still fix this.”
There is also the classic family-tech-support story. Someone calls because a photo folder, a burn folder, or an old email store has “disappeared.” You walk them through Control Panel, then Folder Options, then the View tab. They say, “Wait, I see it now!” and for one brief shining moment, you are the hero of the house. Not a superhero, exactly. More like a very underpaid wizard with decent mouse skills.
Power users often have a different experience. They already know hidden files exist, but they want proof before changing anything. That is where dir /a in Command Prompt becomes useful. It turns mystery into inventory. Instead of wondering whether a folder is actually gone, they can verify it in seconds. That is a big deal when troubleshooting software profiles, backup data, or strange storage usage on an old Windows 7 machine.
Then there are the moments when users reveal too much. They turn on hidden files, uncheck protected operating system files, and suddenly the system looks cluttered with strange names and pale icons. Files like desktop.ini show up and create immediate confusion. The first reaction is often, “What are these weird files, and did I break something?” Usually, no. Windows is simply showing the backstage props. The best response is not panic. It is restraint. See what you need, make note of it, and turn those advanced items back off when you are done.
Over time, most people realize that showing hidden files in Windows 7 is less about hacking and more about visibility. It is one of those small settings that gives you control when the computer feels unnecessarily secretive. Once you know the four methods, the whole task becomes routine. And that is the real experience most users end up with: what looked like a frustrating mystery at first turns into a two-minute fix they wish they had learned years earlier.
Final Thoughts
If you need to show hidden files in Windows 7, you have several solid options. The Explorer route is the easiest, Control Panel is the classic fallback, Start search and control folders are the shortcut methods, and Command Prompt is perfect when you want a more technical view.
The smartest approach is to reveal hidden files only when needed, avoid changing protected system items unless absolutely necessary, and switch the setting back afterward if you share the computer or want a cleaner view. Windows 7 may be old, but when it comes to hidden files, it still follows a simple rule: the files are usually there, even when the interface pretends otherwise.