If you are still rocking Windows 8 and want to play with a USB game controller, first of all: respect. Second of all: yes, it can still work surprisingly well. The trick is knowing whether your controller is the kind Windows recognizes instantly, the kind that wants a driver before it agrees to cooperate, or the kind that stares at you like a cat being asked to do taxes.
The good news is that Windows 8 can handle many USB gamepads, especially Xbox-style controllers and standard HID devices. The less-good news is that older generic pads, retro-style controllers, and some third-party models may need extra setup, calibration, or remapping before they behave inside actual games. That is where this guide comes in.
Below are three reliable ways to set up USB game controllers on Windows 8, plus troubleshooting tips, real-world examples, and hands-on experience so you can spend less time clicking around Control Panel and more time doing the important work of missing jumps by half an inch.
Before You Start: What to Check First
Before trying any setup method, do a quick sanity check. Plug the controller directly into a USB port on the computer instead of using a cheap hub. If your PC has both USB 2.0 and USB 3.0 ports, test both. Some older controllers are weirdly picky and behave better on a standard USB 2.0 port.
- Use the original USB cable if the controller has a detachable one.
- Disconnect extra controllers while setting up the first one.
- Close background utilities that may interfere with input mapping.
- Keep in mind that Windows 8 is old, so newer controller utilities may not support it perfectly.
One more important idea: not all controllers speak the same language. Modern PC games usually prefer XInput, which is the Xbox-style standard. Older or generic controllers often use DirectInput. If a controller works in Windows but not in your game, that difference is often the reason.
Way 1: Plug It In and Let Windows 8 Handle It
This is the easiest method, and honestly, it is the one everyone hopes for. You plug the controller in, Windows installs the driver automatically, and suddenly your evening improves.
Step 1: Connect the controller
Insert the USB connector into a working port and wait a moment. Windows 8 will usually try to install a basic driver on its own. For Xbox 360-style wired controllers and many standard USB pads, this is often enough.
Step 2: Check whether Windows sees it
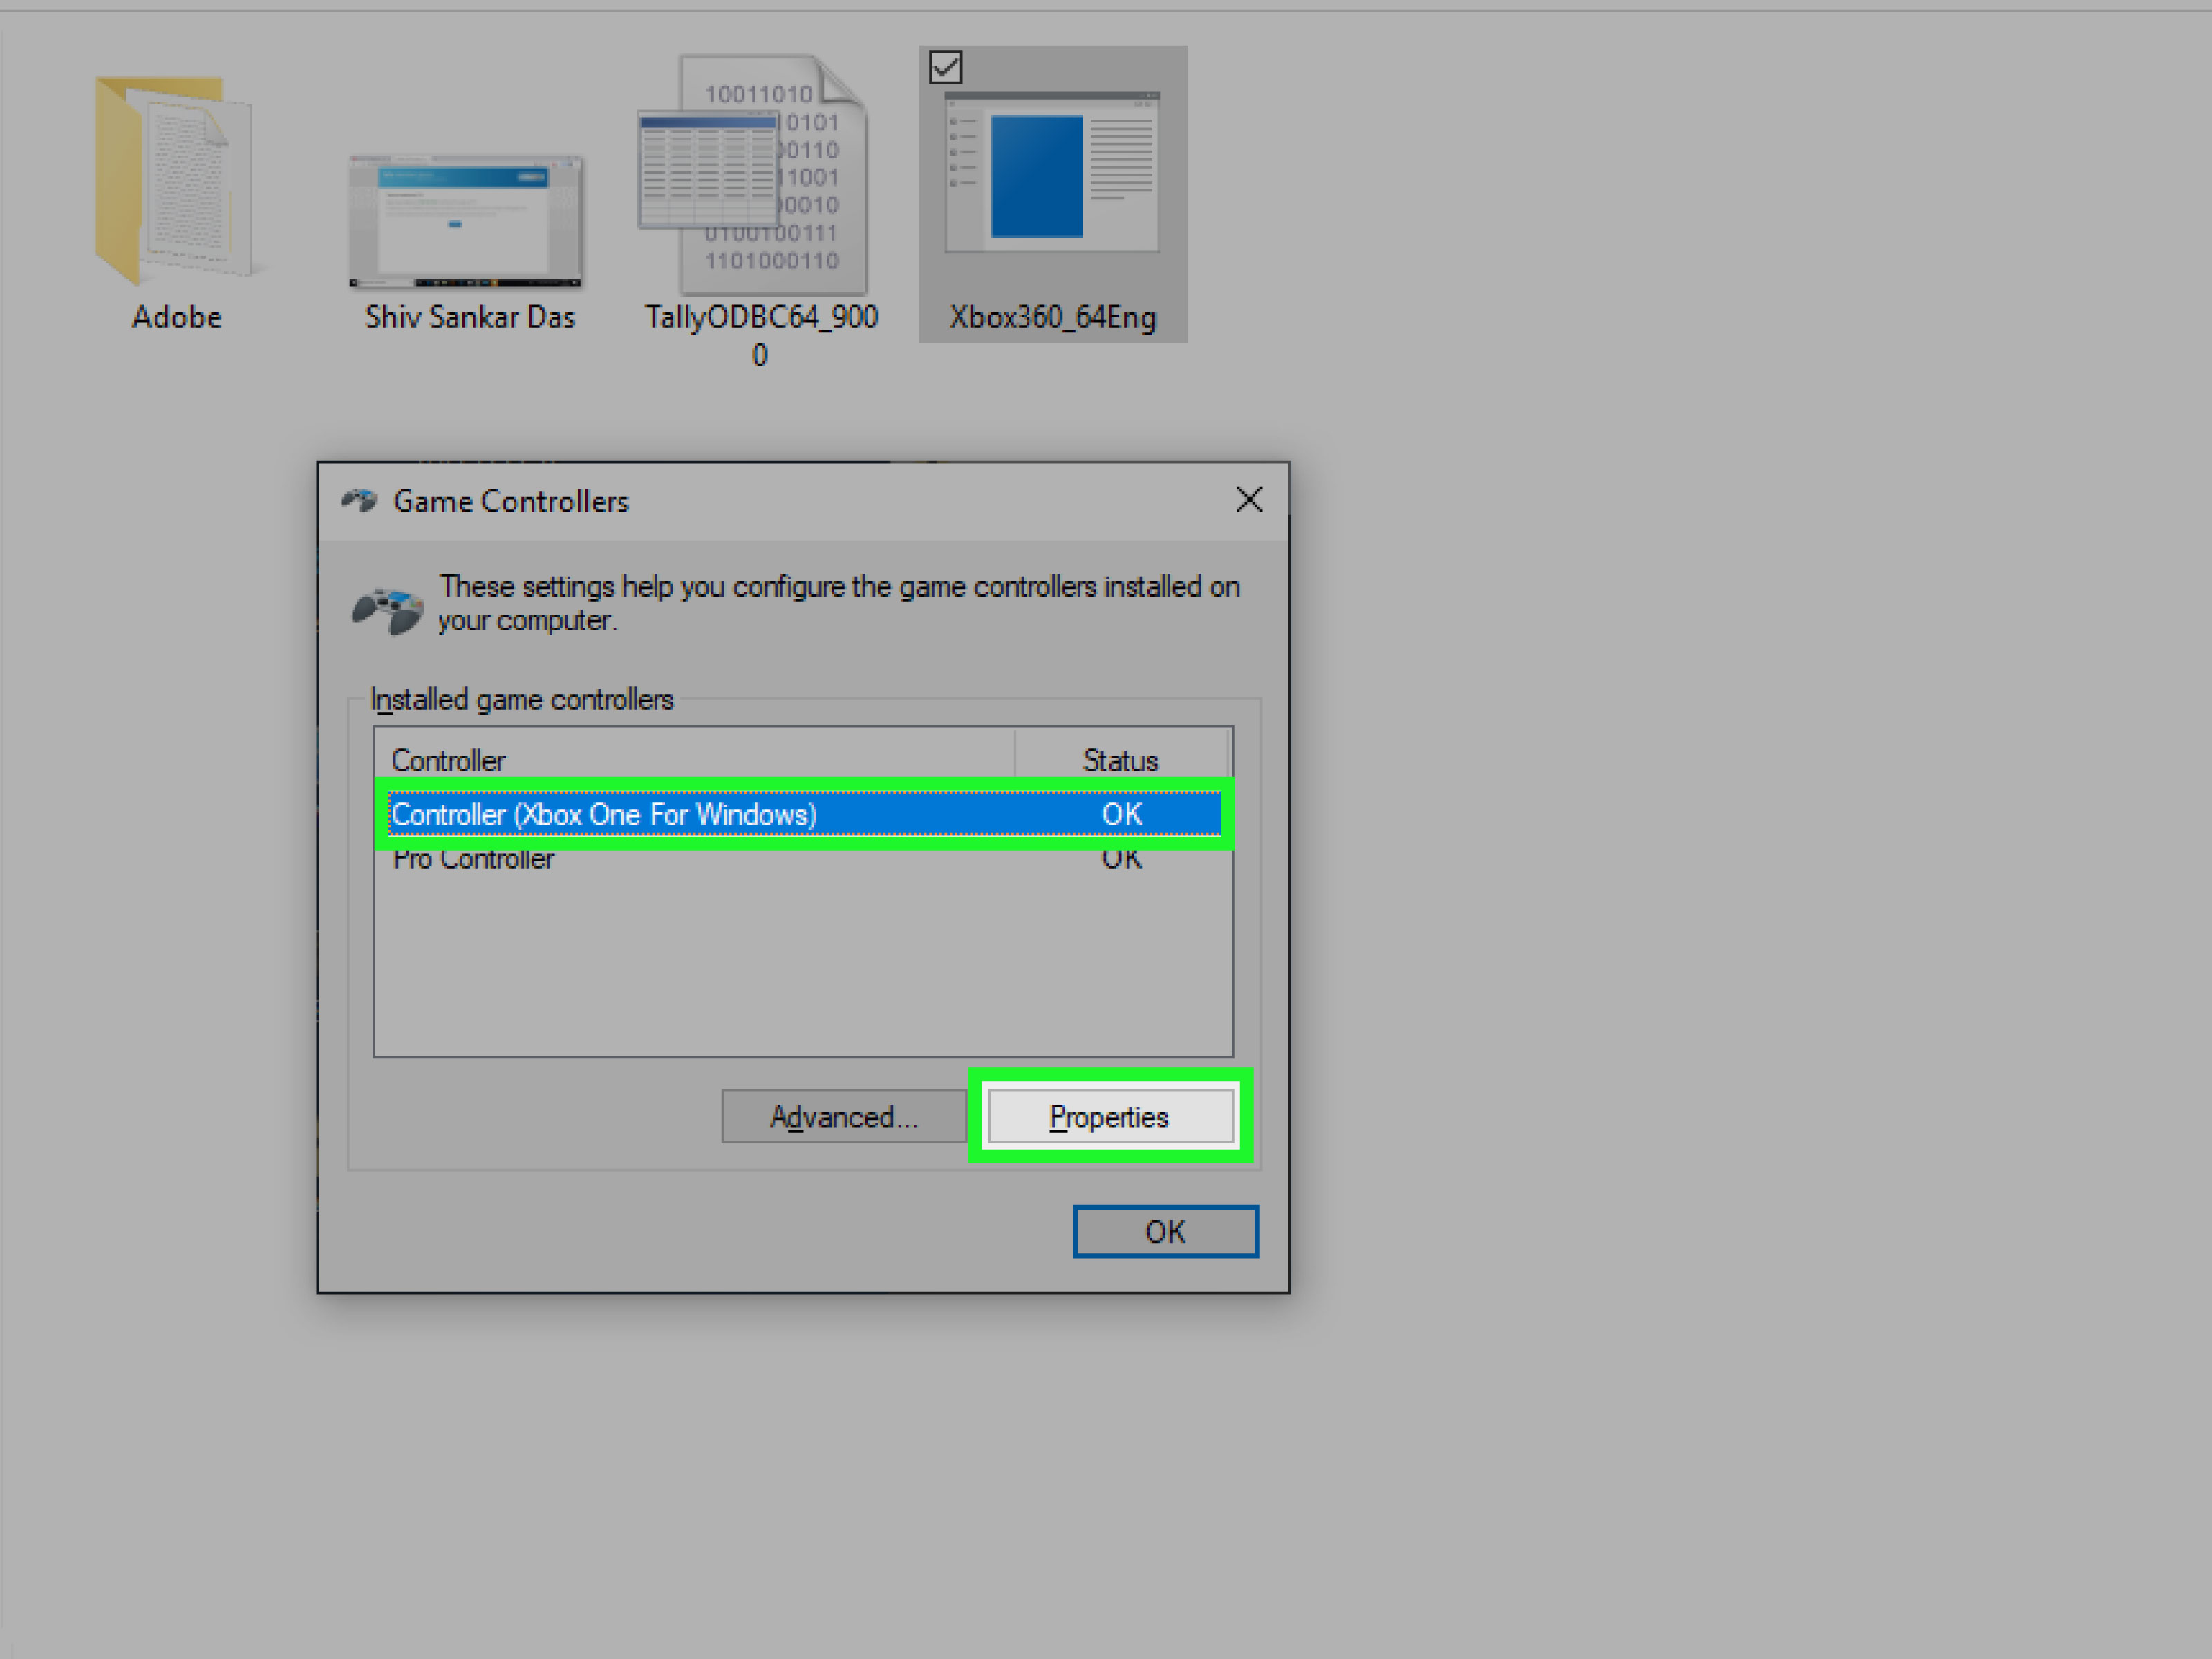
Open the desktop, press Windows + R, type joy.cpl, and press Enter. This opens the classic Game Controllers panel. If your controller appears in the list, that is a very good sign. You can also look in Control Panel > Devices and Printers to confirm Windows sees the device.
Step 3: Test the buttons and sticks
Select the controller and click Properties. Press buttons, move the analog sticks, and test the D-pad and triggers. If the indicators respond correctly, Windows 8 is recognizing the device at the system level. At that point, many games will work with no additional setup.
When this method works best
This setup path is best for:
- Xbox 360 wired controllers
- Xbox-compatible USB pads
- Many modern gamepads that identify as XInput devices
- Simple plug-and-play USB controllers with built-in Windows support
If your controller shows up, tests correctly, and works in games, congratulations. You have achieved the rare and magical state known as “Windows behaving.”
Way 2: Install or Update the Driver, Then Calibrate the Controller
If the controller does not appear in joy.cpl, appears with the wrong name, or shows broken inputs, move to the second method. This is the most useful fix for third-party controllers, older USB pads, and devices that came with a driver disc or download page.
Step 1: Install the manufacturer’s software or driver
If your controller came with a setup disc or has an official driver page, install that package first. Brands such as Logitech and Razer often provide their own utilities, drivers, or firmware tools. Some controllers also let you switch between XInput and DirectInput modes, and that switch can completely change how Windows and games detect the device.
For example, controllers in the Logitech F-series are known for offering both XInput and DirectInput support. That matters because the right mode depends on the game you want to play. Newer PC games usually prefer XInput. Older PC titles, emulators, and niche utilities may behave better with DirectInput.
Step 2: Update the driver through Device Manager
If you already installed the official software and the controller still acts clueless, open Device Manager. Look under Human Interface Devices, Sound, video and game controllers, and Universal Serial Bus controllers. If you see an unknown device, a warning icon, or a generic entry that looks suspicious, right-click it and choose Update Driver.
If Windows still refuses to cooperate, uninstall the problem device, unplug the controller, restart the PC, and reconnect it. In more stubborn cases, uninstalling the USB controllers and rebooting can force Windows 8 to reinstall the USB stack. That can fix cases where the port works for flash drives but refuses to behave with a controller.
Step 3: Calibrate the controller
Go back to joy.cpl, select your controller, and open Properties. Some devices provide a calibration option through the classic game controller panel or through the manufacturer’s utility. Calibration helps when sticks drift, triggers do not reach full range, or the D-pad behaves like it learned directions from a broken compass.
This step matters more than people expect. A controller can be “detected” by Windows and still feel terrible in games because the axes are off-center or the buttons are mapped strangely.
When to use compatibility mode
If the manufacturer only offers older software, right-click the installer, open Properties, choose the Compatibility tab, and try running it in Windows 7 compatibility mode. It is not a guaranteed fix, but it can help older controller utilities install on Windows 8 without drama.
Way 3: Use Steam or In-Game Mapping for Older and Generic Controllers
This is the method that saves many perfectly good controllers from being thrown into the “mystery cable drawer of doom.” If Windows sees the controller, but your game ignores it or maps it badly, software-based remapping is usually the answer.
Why this works
Many generic USB game controllers connect to Windows as DirectInput devices. That is fine for some games, but many newer PC titles are built around XInput. In plain English, the game expects an Xbox-style controller layout and does not know what to do with your random off-brand pad that looks like it was designed during a power outage.
Steam can help by detecting controllers, letting you configure layouts, and applying per-game mappings. It also offers calibration tools for supported controllers. This is especially helpful when the controller works in Windows, but the buttons are scrambled inside the game.
Basic Steam setup
Open Steam, enter the controller settings area, and look for your detected controller. From there, you can register, calibrate, or adjust the configuration depending on the device. For supported controllers, Steam Input can translate awkward layouts into something a game understands.
This setup method is especially useful for:
- Generic USB gamepads
- Retro-style USB controllers
- Controllers that work in emulators but not modern Steam games
- Pads with unusual button mapping or weak default support
Switching between XInput and DirectInput
If your controller has a physical X/D switch, test both modes. Use XInput for most modern action, racing, sports, and shooter games. Use DirectInput when you are dealing with older PC games, certain emulators, or a controller utility that only configures the pad in legacy mode.
A classic example is a controller that works perfectly in Windows and emulators in DirectInput mode, but suddenly becomes much easier to use in newer games after switching to XInput. The hardware did not change. The language did.
Common Problems and Fixes
The controller does not appear at all
Try a different USB port, try a different cable if possible, and test the controller on another PC. If it still does not appear, the controller itself may be faulty, or the required driver may be missing.
The controller appears, but buttons do nothing
Open joy.cpl and test it there. If nothing responds, reinstall the driver or manufacturer utility. If it responds in Windows but not in games, the issue is probably game compatibility or input type.
The D-pad or triggers are mapped incorrectly
This usually points to a DirectInput versus XInput mismatch or a controller profile issue. Switch input modes if the controller supports it, recalibrate, and check Steam or the game’s own controller settings.
The game detects the wrong controller
Disconnect extra controllers. In the Game Controllers panel, click Advanced and make your preferred device the default if the option is available. Some older games get confused when multiple controllers are connected.
Vibration or force feedback does not work
Some older controllers and drivers never fully supported rumble on Windows 8. In other cases, vibration only works when the controller is running in XInput mode or when the game itself supports that feature correctly.
Examples of Setup Scenarios
Example 1: Xbox 360 wired controller
You plug it in, Windows installs the built-in driver, the pad appears in joy.cpl, and it works in most games immediately. This is the cleanest and most boring setup path, which is exactly why people love it.
Example 2: Generic USB gamepad from an online marketplace
Windows sees it, but the buttons are labeled as numbers, the triggers act oddly, and one game ignores it. Installing the maker’s driver helps a little, but the real fix is using Steam Input or switching to a compatible profile in the game.
Example 3: Logitech-style controller with X/D switch
In DirectInput mode, the controller works in an emulator and a few older games. In XInput mode, it suddenly behaves much better in newer PC titles. Same controller. Different personality.
Hands-On Experience: What Using USB Game Controllers on Windows 8 Is Really Like
In real-world use, setting up a USB game controller on Windows 8 is less about one magic button and more about reading the mood of the device. Some controllers are total professionals. You plug them in, Windows nods politely, and five minutes later you are racing, fighting, or accidentally driving into a wall because you forgot which trigger is brake. Others act like they were dragged into the process against their will.
The most consistent success usually comes from Xbox-style wired controllers and well-supported PC pads. Those tend to work fast, especially if they identify as XInput devices. On an older Windows 8 machine, that kind of controller feels refreshingly modern. It appears in the controller panel, the test screen reacts properly, and most games recognize it without a fight. That is the dream.
The more interesting stories begin with generic controllers. These are the pads that technically connect, technically install, and technically function, yet somehow manage to make every game feel like a negotiation. One button becomes Start, another becomes Select, and the D-pad appears to believe in abstract art rather than cardinal directions. In those cases, the first instinct is usually panic, followed by furious clicking, followed by the discovery that the controller works perfectly fine once it is tested in joy.cpl and remapped through Steam or a game-specific menu.
Another common experience is the “it works in Windows but not in the game” problem. This is where many users assume the controller is broken, when the real issue is often that the game wants XInput and the controller is showing up as DirectInput. Once you understand that difference, the whole setup process feels less random. Suddenly the controller is not cursed. It is just speaking the wrong dialect.
Then there is the USB-port lottery. On some older Windows 8 systems, a controller behaves differently depending on which port you use. Move it from a front-panel USB slot to a rear motherboard port and it wakes up like it just had coffee. Try a USB 2.0 port instead of USB 3.0 and the same pad that seemed dead five minutes ago starts working normally. It is annoying, yes, but also strangely satisfying when the fix turns out to be that simple.
The biggest lesson from actual setup experience is this: test the controller in Windows first, then worry about the game. If it is visible in the Game Controllers panel and the buttons respond there, you are already halfway to victory. From that point on, the problem is usually mapping, calibration, or compatibility, not the controller itself. And once you solve it, even an older Windows 8 machine can still become a surprisingly capable little gaming setup.
Conclusion
If you want to set up a USB game controller on Windows 8, start with the simplest method and work your way up. First, try pure plug-and-play. If that fails, install or update the right driver and calibrate the pad. If the controller works in Windows but not inside a game, use Steam or the game’s own mapping tools to bridge the gap.
The smartest approach is not to assume every controller should work the same way. Some are XInput. Some are DirectInput. Some need manufacturer software. Some just need the right USB port and a little patience. Once you match the controller to the right setup method, Windows 8 can still deliver a solid gaming experience, even if it occasionally makes you earn it.