Note: This article uses standard U.S. knitting terms. In many patterns, bind off and cast off mean the same thing.
There comes a magical moment in every scarf project when you hold it up, squint a little, wrap it around your neck, and think, “Yep, this is officially scarf-shaped.” Then reality taps you on the shoulder and says, “Great. Now finish it properly.” That final step matters more than many beginners expect. A beautiful scarf can look polished, drapey, and gift-worthy with the right ending, or it can look like it escaped the needles in a panic.
If you are wondering how to end knitting a scarf, the good news is that you have options. The best finishing method depends on the stitch pattern, the yarn, and the look you want. A basic garter stitch scarf usually does well with a classic bind-off. A ribbed scarf often benefits from a stretchier finish so the edge does not look pinched. And if you want a scarf with extra flair, fringe can transform a simple rectangle into something that looks far more intentional than “I ran out of Netflix and kept knitting.”
In this guide, you will learn three practical ways to end knitting a scarf: a basic bind-off, a stretchier edge, and a decorative fringe finish. You will also learn when to use each method, what mistakes to avoid, and how to make the final edge look neat instead of suspicious. By the end, you will know exactly how to finish your scarf with confidence, even if this is your first project.
Before You End Your Scarf: Check These 4 Things First
Before you bind off even one stitch, pause for a quick scarf reality check. Finishing is easier when you know you are actually done. It sounds obvious, but many knitters have proudly bound off only to realize the scarf is still better suited for a hamster than a human.
1. Make sure the scarf is long enough
A simple everyday scarf is often long enough when it can wrap once around the neck with extra length hanging comfortably on both sides. Some people prefer a short neck scarf, while others want a long dramatic piece that says, “I am the lead character in a windy movie scene.” Length is personal, so try it on before finishing.
2. Look at the stitch pattern
Garter stitch, seed stitch, and moss stitch tend to lie flat and usually work well with a standard bind-off. Ribbing and some textured stitches often need a little more stretch at the edge. Stockinette scarves may curl, so a clean finish plus blocking can make a big difference.
3. Check your tension
If your stitches have been relaxed and even throughout the scarf, a super-tight bind-off will stand out immediately. The last row should match the body of the scarf as closely as possible. Think of it as the closing line of a good story. You do not want it to suddenly start shouting.
4. Plan for the yarn tail
Leave enough yarn to finish the edge and weave in the end securely. For most basic scarf bind-offs, a tail of about 6 to 8 inches is enough. If you are doing a sewn or decorative finish, you may need more.
Way 1: Use a Basic Bind-Off for a Clean, Classic Finish
The basic bind-off is the most common way to end knitting a scarf. It is beginner-friendly, tidy, and works especially well for simple scarves in garter stitch, stockinette with borders, seed stitch, or other easy textures. If you only learn one method today, make it this one.
When to use a basic bind-off
This method is ideal when you want a straightforward edge that looks neat and does not need much stretch. It is especially useful for scarves that are already fairly flexible and do not rely on a ribbed edge to expand.
How to do it
Start by knitting the first two stitches of the row as normal. Then use your left needle to lift the first stitch over the second stitch and off the right needle. You now have one stitch left on the right needle. Knit one more stitch so you have two stitches on the right needle again. Lift the first stitch over the second and off the needle. Repeat this process across the row until one stitch remains.
Cut the yarn, leaving a tail of several inches. Pull that tail through the final loop and tighten gently. Congratulations, your live stitches are no longer plotting their escape.
Why it works
A standard bind-off creates a firm, stable edge. It is simple to remember, quick to work, and easy to control once you get the rhythm. For many scarves, especially casual everyday pieces, this is all you need.
Common mistakes to avoid
The biggest problem with a basic bind-off is making it too tight. If the finished edge looks narrower than the rest of the scarf, you probably pulled the stitches too snugly. Try keeping your movements relaxed, or bind off with a needle one size larger. That small change can make the edge look much more balanced.
Best scarf examples for this method
A beginner garter stitch scarf in worsted-weight yarn is the classic example. A seed stitch scarf also looks crisp with a standard bind-off. If your scarf already lies flat and has a soft drape, this method is usually the safest bet.
Way 2: Use a Stretchy Bind-Off for Ribbed or Drapey Scarves
Not every scarf wants a firm edge. Some scarves, especially ribbed scarves, need a finish with more flexibility. If the body of the scarf stretches nicely but the last row feels tight and stiff, the edge can pull inward and make the scarf look slightly grumpy. That is where a stretchy bind-off helps.
When to use a stretchy bind-off
This method is a smart choice for scarves with ribbing, scarves made from soft drapey yarn, or scarves you want to wrap snugly around the neck without the edge feeling rigid. It is also helpful when your natural knitting tension tends to be tight.
A beginner-friendly way to make the bind-off stretchier
One simple approach is to switch to a larger needle for the bind-off row. Knit the first two stitches, lift the first stitch over the second, and continue as you would with a basic bind-off. The difference is that the larger needle creates extra room in the edge, making it more flexible and less likely to pinch.
You can also focus on leaving a bit more slack as you pass one stitch over the next. The goal is not a sloppy edge. The goal is a relaxed edge that matches the stretch of the scarf. Think “comfortable sweater weather,” not “yarn spaghetti.”
How to tell if the edge is stretchy enough
After binding off a few stitches, stop and gently tug the finished section. Compare it to the width and flexibility of the scarf below it. If the top edge already looks smaller or feels stiffer, loosen up before continuing. It is much easier to adjust early than to mutter dramatically while unraveling the entire row later.
Why this method works so well for ribbed scarves
Ribbing is naturally elastic because knit and purl columns pull in and expand. A tight basic bind-off can fight that elasticity and make the edge flare oddly or pull inward. A stretchier finish preserves the soft bounce of the rib pattern, which gives the scarf a more polished and professional look.
Best scarf examples for this method
A 1×1 rib scarf, a 2×2 rib scarf, or a long skinny scarf in a soft merino blend all benefit from a gentler, stretchier ending. This method is also useful for scarves with lace details where the edge should not flatten the pattern.
Way 3: Add Fringe for a Decorative Scarf Finish
If you want your scarf to end with a little personality, fringe is the classic decorative option. Technically, you still bind off the stitches first, but then you add fringe to the ends for style. So yes, fringe is the scarf equivalent of putting on earrings before leaving the house. Necessary? No. Fun? Absolutely.
When to use fringe
Fringe works beautifully on plain scarves, bulky winter scarves, and classic rectangular designs. It can add movement, texture, and extra length. It is especially useful when a scarf feels a tiny bit shorter than planned, because fringe adds visual length without requiring more knitting.
How to add fringe
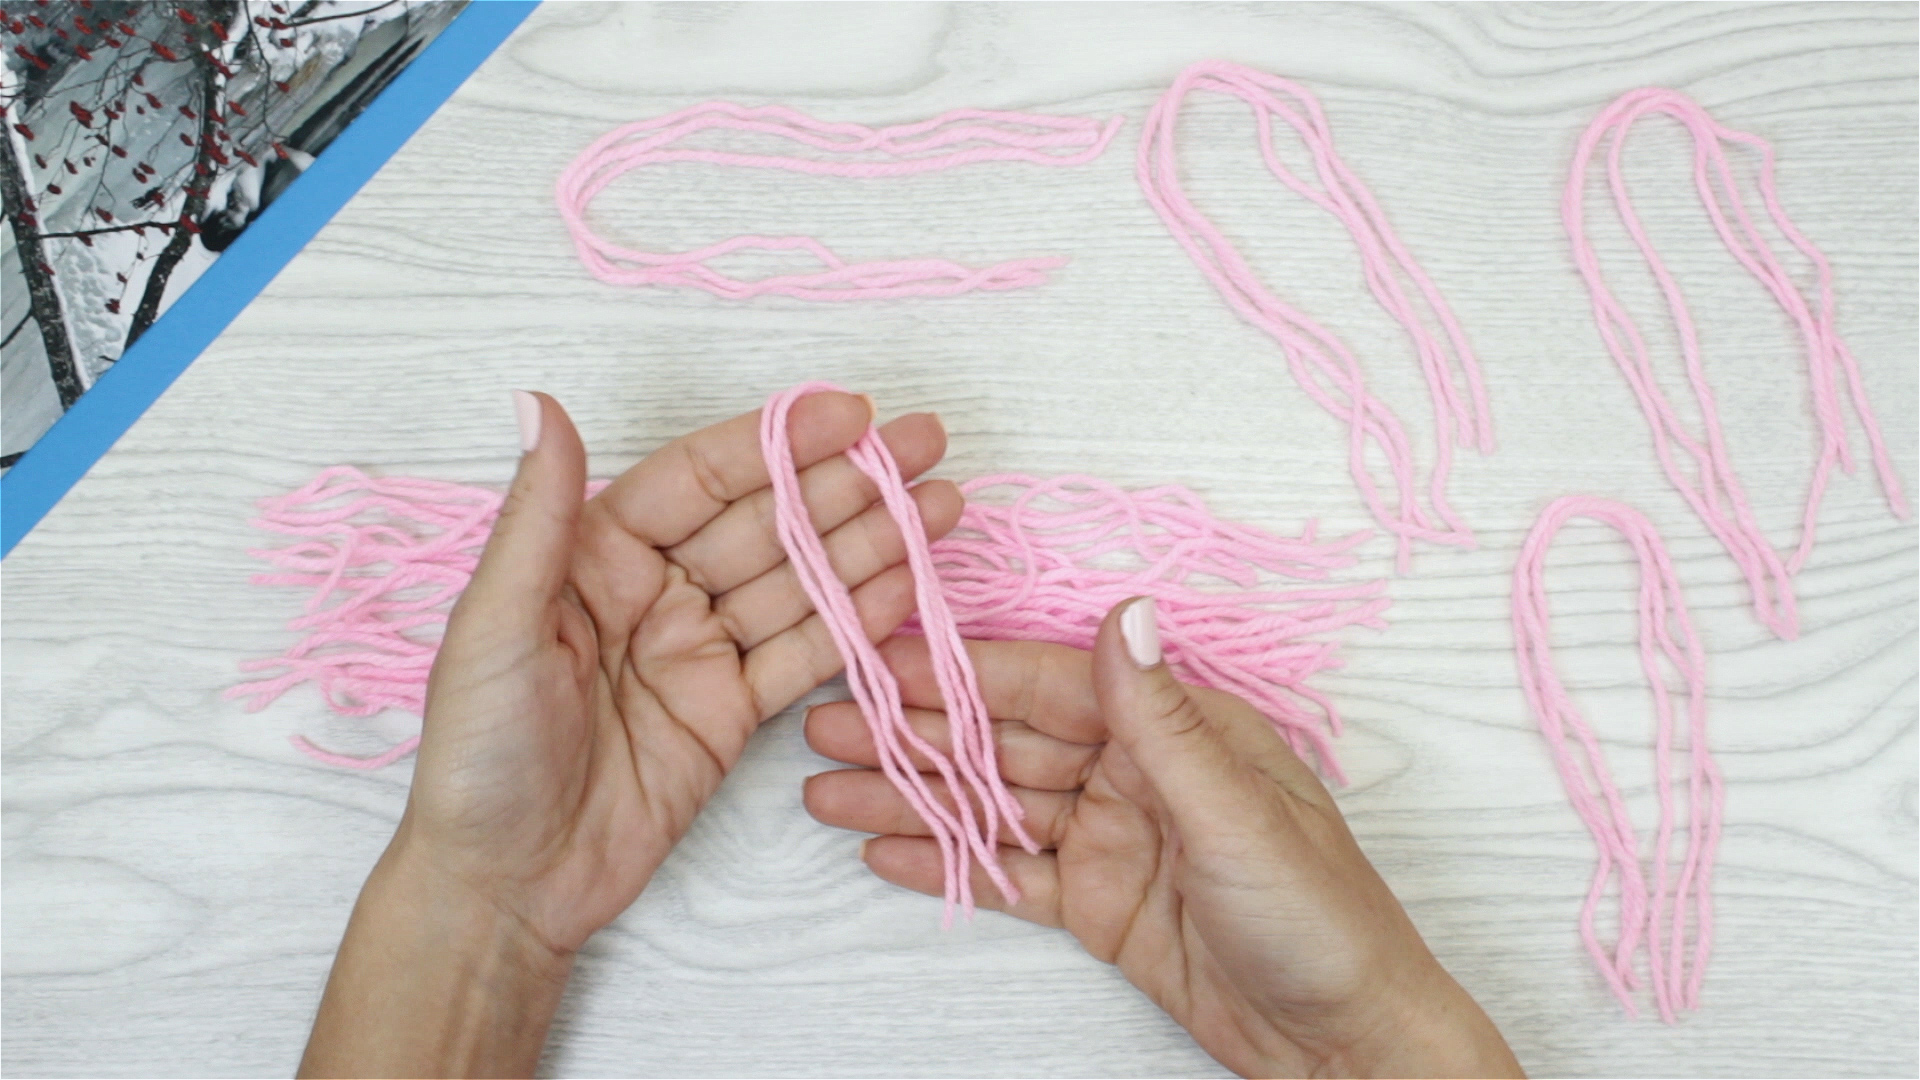
First, finish the scarf with a standard or stretchy bind-off. Then cut several strands of yarn to the same length. Fold a small group of strands in half. Using a crochet hook or your fingers, pull the folded loop through the edge of the scarf, then pull the loose ends through the loop and tighten. Repeat across the edge at even intervals.
You can make the fringe short and tidy, long and dramatic, or thick and chunky depending on the yarn and the look you want. After attaching all the fringe pieces, trim them evenly.
Why knitters love fringe
Fringe can hide a simple edge, add visual weight to a lightweight scarf, and give a handmade piece a more finished design. It is also beginner-friendly because it does not require complicated knitting skills. If you can cut yarn and make a loop, you are in business.
When to skip fringe
If the scarf has a very modern, minimal look, fringe may feel too busy. It is also less practical for scarves worn under fitted coats, since the fringe can bunch up or tangle. For children’s scarves or everyday commuter scarves, a clean edge may be more convenient.
Best scarf examples for this method
A garter stitch scarf in a rustic wool looks fantastic with fringe. A simple beginner scarf in a neutral shade can also look more stylish with tassel-like ends. If your scarf feels a bit plain, fringe is an easy upgrade.
How to Weave in the Ends So They Stay Put
No matter which finishing method you choose, you still need to deal with the yarn tails. This step is not glamorous, but it is what keeps your scarf from slowly unraveling and turning your hard work into a dramatic cautionary tale.
Thread the yarn tail onto a tapestry needle. Weave it through the back of the stitches in the same direction as the fabric for a few inches, then change direction slightly and weave through nearby stitches. This helps lock the tail in place. Avoid pulling too tightly, or the fabric may pucker. Trim the excess yarn once the tail feels secure.
If your scarf is reversible, be extra thoughtful about hiding the tail neatly so the wrong side does not announce itself. On textured stitches like seed stitch or garter stitch, tails are usually easy to disguise.
Should You Block the Scarf After Finishing?
In many cases, yes. Blocking can smooth uneven stitches, relax the bind-off edge, and help the scarf lie better. For wool and wool blends, wet blocking is often the most effective. For acrylic yarn, gentle steam blocking may work better, but always test carefully and follow the yarn label guidance.
Blocking is especially helpful if the scarf edges curl, the fabric looks slightly uneven, or the final shape needs a little encouragement. It is not magic, but it is pretty close in knitting terms.
Which Scarf Ending Method Is Best?
The best way to end knitting a scarf depends on the style of the scarf and how you want it to behave when worn.
Choose a basic bind-off if:
You want a clean edge, your scarf lies flat already, and the fabric does not need much stretch.
Choose a stretchy bind-off if:
Your scarf has ribbing, lace, or a soft drapey texture and you want the top edge to stay flexible.
Choose fringe if:
You want a decorative look, a little extra length, or a classic cozy style that feels intentionally finished.
There is no single universal answer. Good finishing is really about matching the edge to the scarf. The scarf should look like the ending belongs there, not like it was chosen in a panic five minutes before bedtime.
Extra Tips for a Better-Looking Scarf Finish
- Use the same rhythm and tension at the end that you used throughout the scarf.
- If your bind-off edge looks tight, try a larger needle before starting over completely.
- Match decorative finishes to the yarn style. Bulky wool and fringe are good friends. Sleek cotton and long wild tassels, not always.
- Measure before binding off so you do not finish too early.
- Take a photo before and after blocking. It is satisfying, and it helps you learn what finishing methods work best with your yarn.
Conclusion
Learning how to end knitting a scarf is one of those small skills that makes a big difference. The actual knitting may get most of the attention, but the finish is what turns a work in progress into a wearable scarf. A basic bind-off gives you a simple polished edge. A stretchy bind-off keeps ribbed or soft scarves comfortable and balanced. And a fringe finish adds style, texture, and a little extra drama in the best possible way.
If you are a beginner, start with the standard bind-off and practice keeping the tension relaxed. Once that feels comfortable, experiment with stretchier edges and decorative details. The more scarves you finish, the easier it becomes to look at a project and know exactly how it wants to end. And that is the real goal: not just finishing the scarf, but finishing it in a way that looks thoughtful, feels good, and makes you want to cast on the next one.
Knitting Experiences and Lessons Learned From Finishing Scarves
Anyone who has knit more than one scarf usually learns the same lesson sooner or later: the final edge can make a perfectly nice scarf look either handmade in a charming way or handmade in a “why is this top edge narrower than the rest of civilization?” way. Finishing teaches patience. A scarf often feels done long before it is actually done, especially when you have been knitting the same pattern for days or weeks. At that point, it is tempting to rush the bind-off, snip the yarn, and declare victory. That is exactly when many knitters create a tight edge, forget to leave a long enough tail, or weave in the ends with all the elegance of hiding receipts in a kitchen drawer.
One of the most common experiences with scarf finishing is discovering that the bind-off row behaves differently from the rest of the knitting. Even people with fairly even tension throughout the scarf can suddenly tighten up at the end. Sometimes that comes from excitement. Sometimes it comes from concentration. Sometimes it comes from the quiet fear that one wrong move will undo the whole project. Whatever the cause, many knitters eventually realize that the best-looking edge comes from slowing down, breathing normally, and treating the final row like just another row with slightly more responsibility.
Another common experience is learning that scarf style matters more than expected. A plain garter stitch scarf is wonderfully forgiving. You can use a classic bind-off, weave in the ends neatly, and it often looks great right away. Ribbed scarves are less forgiving. They practically demand a little flexibility at the edge. Many knitters do not notice this until they hold the finished scarf up and see the top edge pulling inward like it has a strong opinion. That moment can be frustrating, but it is also useful. It teaches the value of matching the finishing method to the fabric instead of assuming every project wants the same ending.
Fringe creates its own category of experience. It looks simple, and in many ways it is, but it can quickly become a tiny lesson in measuring, symmetry, and patience. Cut the strands too short and the scarf may look unfinished. Cut them unevenly and the ends may resemble a nervous haircut. But when fringe is done well, it can rescue a simple scarf and make it feel intentional, cozy, and stylish. Many knitters also discover that fringe is surprisingly fun because it gives a plain project an instant visual payoff after many rows of repetitive stitching.
Perhaps the most valuable finishing experience is realizing that mistakes at the end are not disasters. A tight bind-off can be redone. Uneven fringe can be trimmed. Loose tails can be rewoven. Blocking can smooth more imperfections than most beginners expect. Finishing a scarf teaches resilience as much as technique. By the time a knitter has completed a few scarves, they usually become much better at spotting what the fabric needs and much less likely to panic over a less-than-perfect edge. And that may be the best part of all: every scarf teaches you not only how to knit, but how to finish with more confidence the next time around.